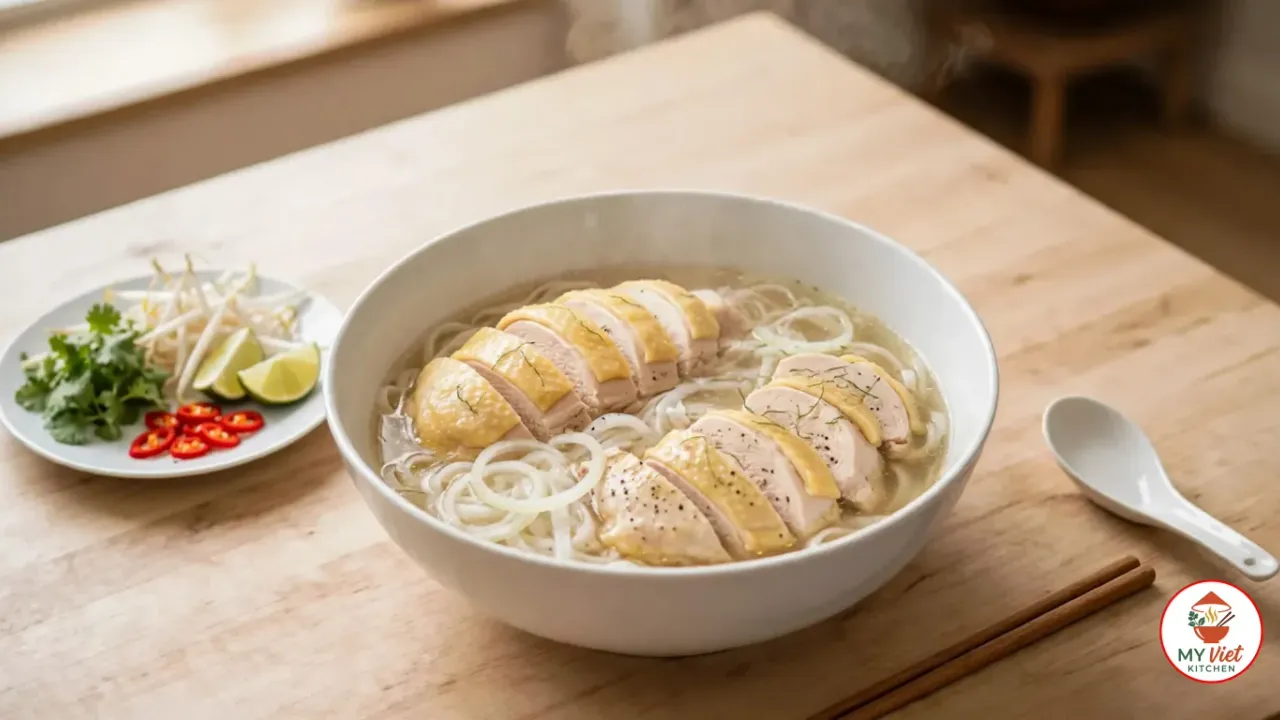
This Vietnamese Chicken Pho (Phở Gà) is the ultimate comfort bowl — a steaming, aromatic noodle soup with crystal-clear broth, tender poached chicken, and silky flat rice noodles. Known as phở gà Hà Nội, this Hanoi-style version keeps things pure and elegant: no star anise, no cinnamon, just the honest sweetness of slow-simmered chicken bones, charred ginger, and toasted coriander seeds. If you want to taste pho the way it was meant to be in northern Vietnam, this is the recipe.
Prep Time: 30 minutes | Cook Time: 2 hours 30 minutes | Servings: 6
Difficulty: Medium | Calories: ~400 per serving
What Makes Hanoi-Style Chicken Pho Special?
While most chicken pho recipes in the West load the broth with warm spices like star anise and cinnamon sticks, authentic Hanoi-style phở gà takes the opposite approach. The philosophy is simple: let the chicken do the talking. The broth should be clear, naturally sweet, and deeply savory — a golden liquid that reflects hours of patient simmering rather than a heavy spice blend.
This minimalist approach is what defines northern Vietnamese cuisine. In Hanoi, pho is almost meditative — the toppings are restrained, the broth is the star, and every element earns its place in the bowl. Scallions, a few slices of onion, torn lime leaves, and a sprinkle of black pepper are all you need. No basil jungle, no hoisin drizzle. Just pure, honest flavor that warms you from the inside out.
The secret weapon in Hanoi phở gà is the technique. Blanching the bones first for a clear broth, charring ginger and shallots for smoky depth, and using only toasted coriander seeds (hạt mùi) as the sole spice — these careful steps create a bowl that tastes complex yet clean. It’s the kind of pho that makes you close your eyes and sigh with the first spoonful.
Choosing the Right Chicken for Pho
The chicken you use will make or break your phở gà. In Vietnam, the standard choice is a young hen — gà mái tơ — and for good reason. Here’s what to look for:
- Free-range hen (gà mái tơ — best choice): Yellow skin, firm meat, naturally sweet flavor. The golden fat renders into the broth beautifully. If the hen has unlaid eggs inside, even better — they make a prized pho topping.
- Whole free-range chicken: A good alternative if you can’t find a hen specifically. Make sure it has skin on and is bone-in for maximum broth flavor.
- Chicken parts (thigh + drumstick): If you can’t find a whole bird, use bone-in, skin-on dark meat cuts. They contribute more flavor than breast meat, though the broth won’t be quite as rich.
Ingredients for Vietnamese Chicken Pho
For the Broth:
- 1 whole free-range hen — about 1.8 kg (4 lbs)
- 2 kg (4.4 lbs) chicken bones — backs, necks, and wings
- 100 g (3.5 oz) dried shallots — divided into two portions
- 2 large old ginger roots — divided into two portions
- 5 g (about 1 tbsp) coriander seeds
- A pinch of salt for blanching and poaching
For Seasoning the Broth:
- 40 g (about 2.5 tbsp) salt
- 70 g (2.5 oz) rock sugar (đường phèn)
- 1 tbsp fish sauce — optional, for added depth
- MSG — optional, to taste
For Serving:
- 1.5 kg (3.3 lbs) flat rice noodles (bánh phở)
- 1 yellow onion — peeled and thinly sliced
- 100 g (3.5 oz) scallions — chopped
- Kaffir lime leaves — finely shredded
- Ground black pepper
- 2 limes — cut into wedges
- Fresh chilies — sliced
- Fresh cilantro
- Bean sprouts
- Fresh herbs (optional: Thai basil, saw-tooth coriander)
Pro tip: Season the broth slightly saltier than you think it needs to be. When you ladle it over cold noodles and toppings, the flavor dilutes — so a broth that tastes just right in the pot will taste flat in the bowl.
Step-by-Step Instructions
Step 1: Blanch the Chicken Bones
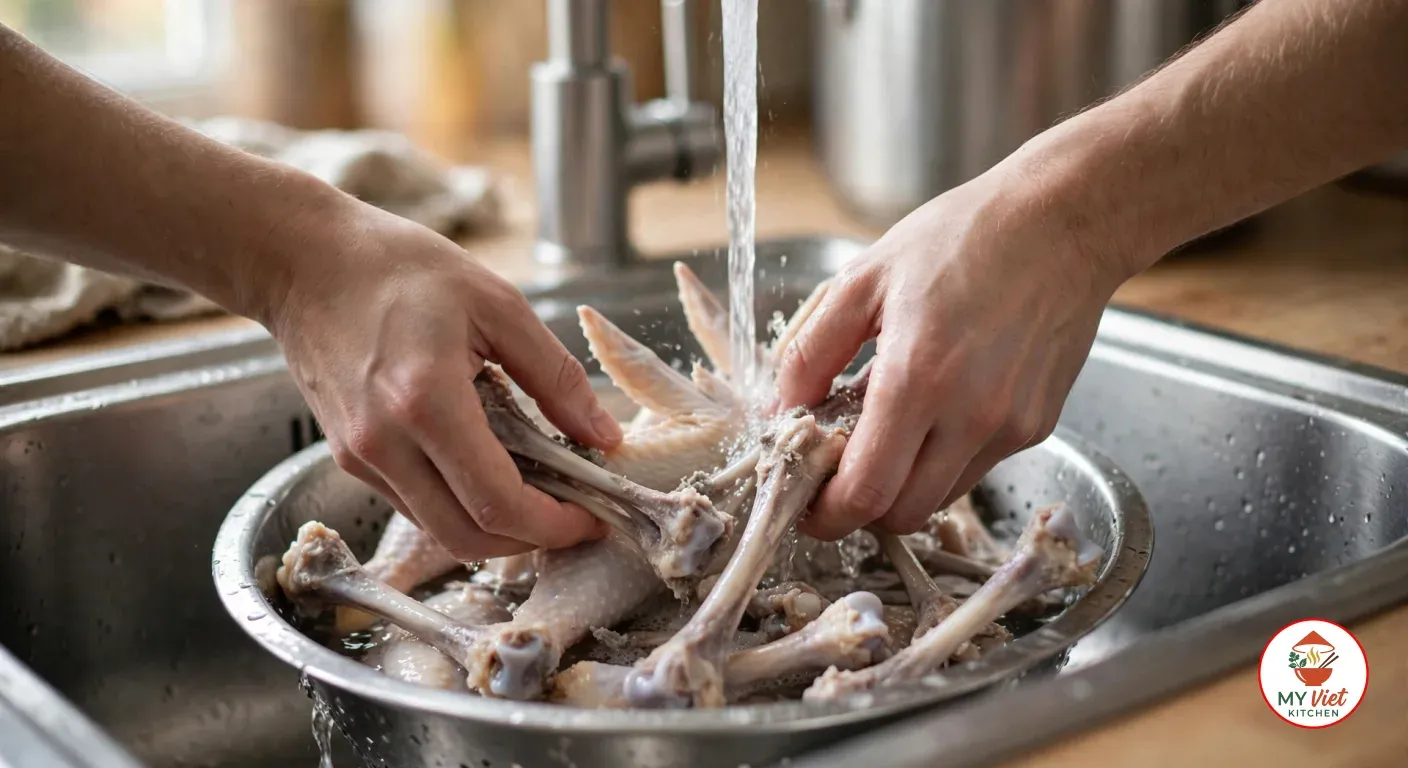
1Rinse the chicken bones under cold water. Place them in a large pot, cover with water, and bring to a rolling boil. Let them boil for 2 minutes — you’ll see a dramatic amount of gray foam and impurities rise to the surface. Drain the bones, rinse them thoroughly under running water, and clean the pot. This blanching step is non-negotiable if you want a crystal-clear broth. Skipping it means cloudy, murky soup.
Step 2: Clean the Whole Chicken
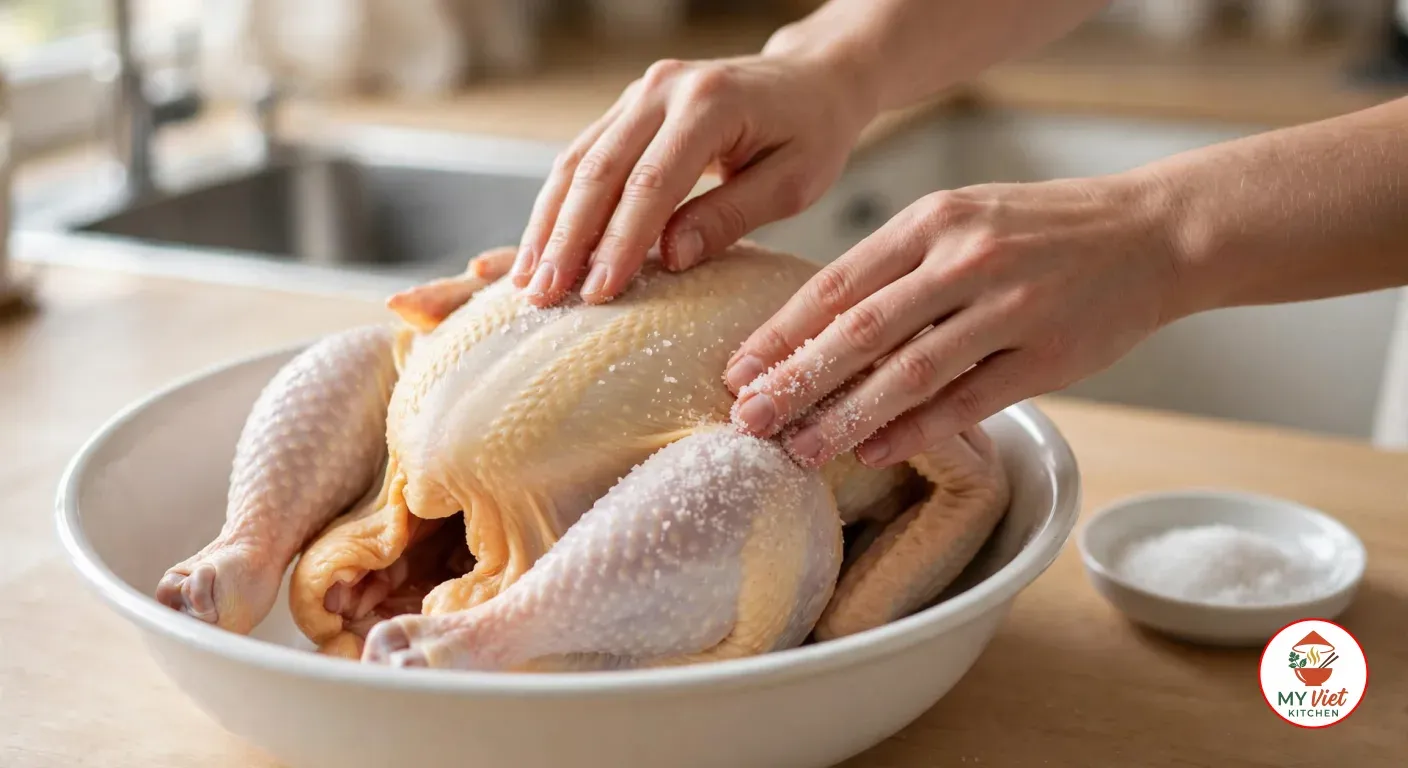
2Wash the chicken thoroughly, inside and out. Rub salt over the entire surface and into the cavity to remove any gamey odor. Rinse well under cold running water. A clean chicken means a clean-tasting broth — this small effort makes a real difference.
Step 3: Prepare the Aromatics
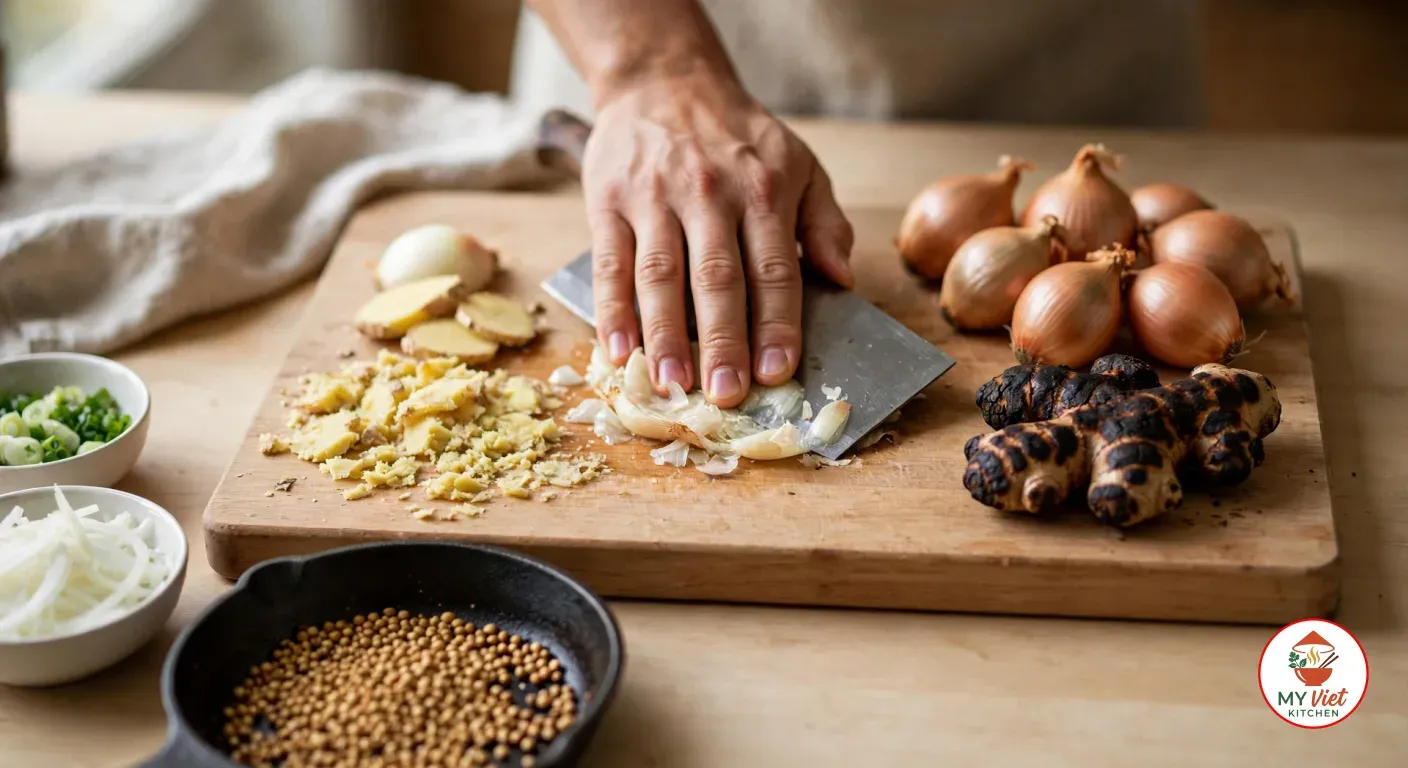
3Divide the shallots and ginger into two portions. The first portion: peel, wash, and crush with the flat side of a knife — these go into the poaching liquid. The second portion: char directly over a gas flame or under a broiler until the outside is blackened and fragrant, then rinse off the charred skin. This dual technique gives you both fresh aromatic sweetness and deep, smoky complexity.
Toast the coriander seeds in a dry pan over medium heat until they turn golden and release their warm, citrusy aroma (about 2 minutes). Peel and thinly slice the yellow onion. Wash and chop the scallions and lime leaves.
Step 4: Simmer the Bone Broth (2 Hours)
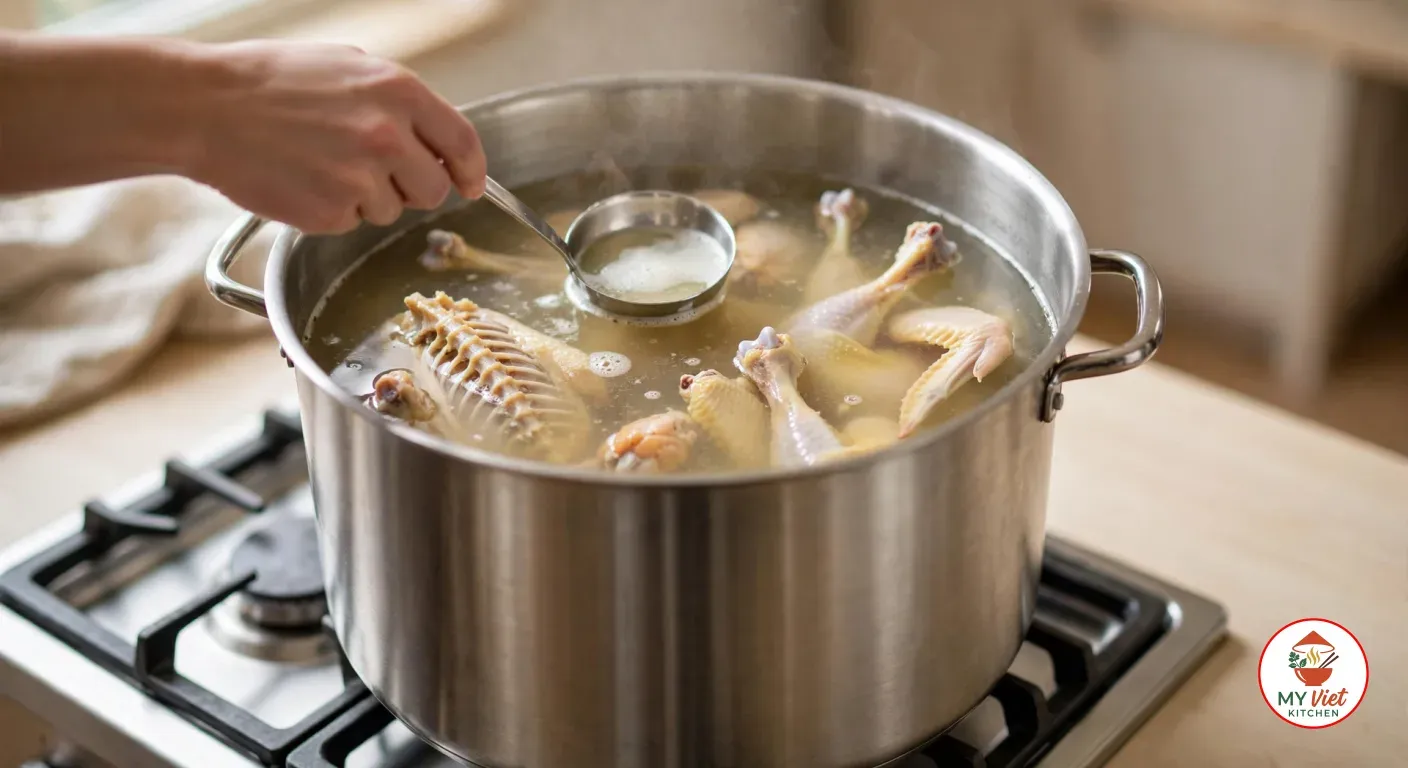
4Place the blanched chicken bones in a clean stockpot, cover with cold water, and bring to a boil over high heat. Starting from cold water is crucial — it draws out collagen and flavor gradually, resulting in a richer, clearer broth than if you dumped the bones into already-boiling water.
Once boiling, skim the surface thoroughly with a ladle, removing every bit of foam. Reduce to a very gentle simmer — you want tiny bubbles lazily rising, not a rolling boil. Simmer uncovered for 2 hours, skimming occasionally. Never cover the pot during simmering, as trapped steam drips back and makes the broth cloudy.
Step 5: Poach the Whole Chicken
5While the bone broth simmers, poach the whole chicken in a separate pot. Submerge the chicken in cold water, add a pinch of salt, the crushed shallots, and crushed ginger. Bring to a boil over medium-high heat. When the water reaches a full boil, skim any foam, then boil gently for 15 minutes.
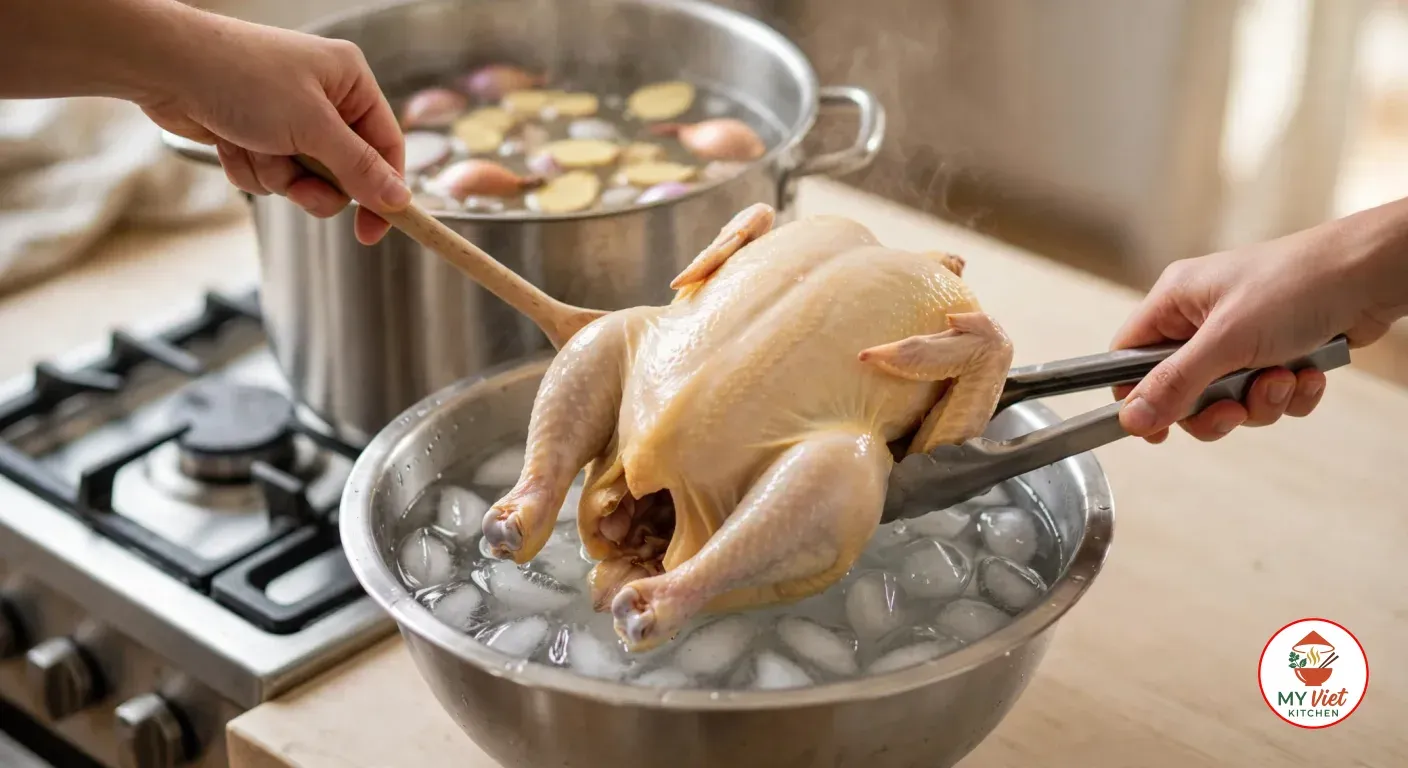
Turn off the heat, cover the pot tightly with a lid, and let the chicken steep for 5 more minutes. This residual-heat method cooks the chicken through gently, keeping the meat juicy and the skin uncracked. Transfer the chicken immediately to a large bowl of ice water to stop the cooking, then hang it up or place on a rack to drain all liquid from the cavity.
Step 6: Carve and Debone the Chicken
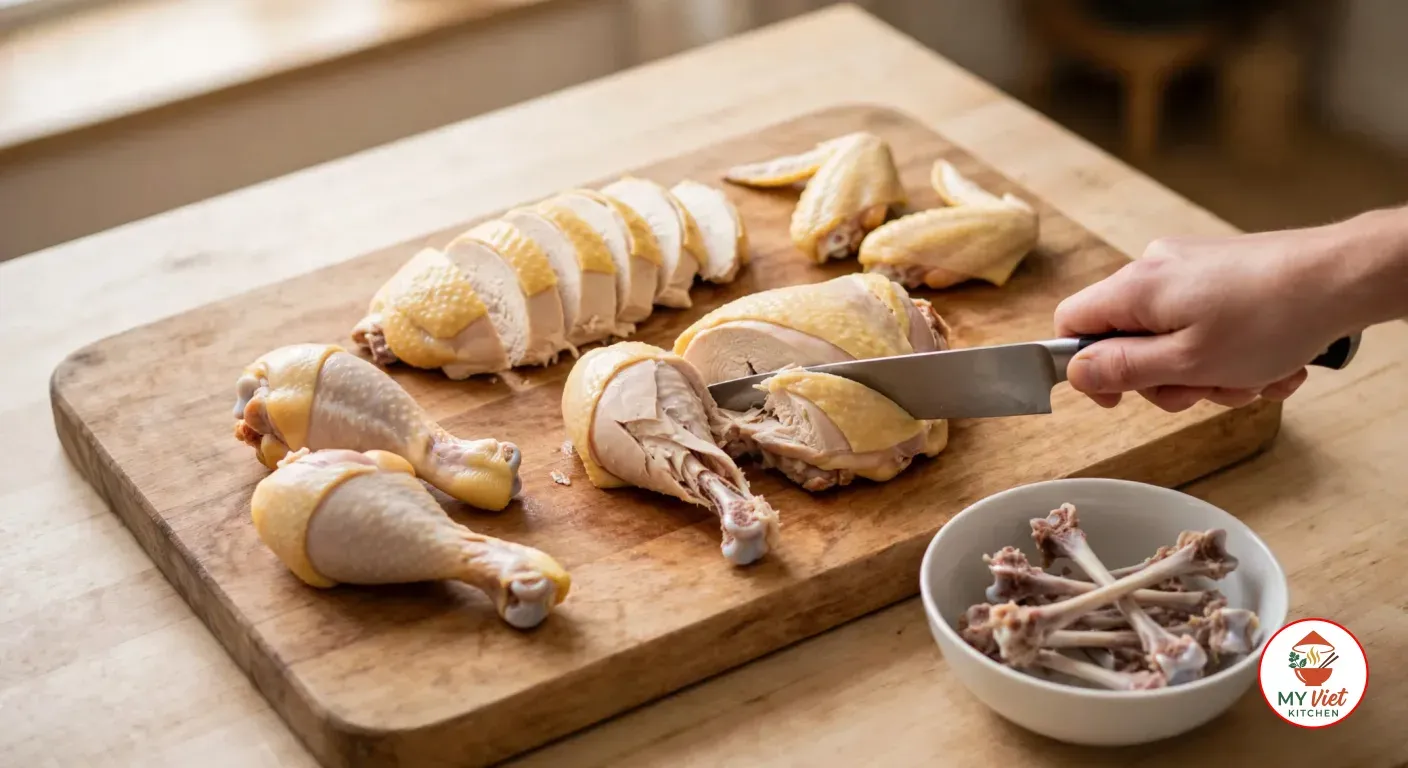
6Once the chicken has cooled, use a sharp knife to separate the joints: detach the legs, thighs, wings, breast, and back. Use the tip of the knife to carefully debone each piece, peeling the meat away from the bone. Slice the meat into clean pieces for serving — the best parts for pho are the thigh, drumstick, wing, and breast, as they hold their shape and have a satisfying texture.
Don’t waste those bones! Add every single bone back into the simmering broth pot. They’ll contribute extra sweetness and body to your final pho broth. If your hen has unlaid eggs, set them aside — they’re a traditional and cherished pho topping.
Step 7: Build the Final Broth
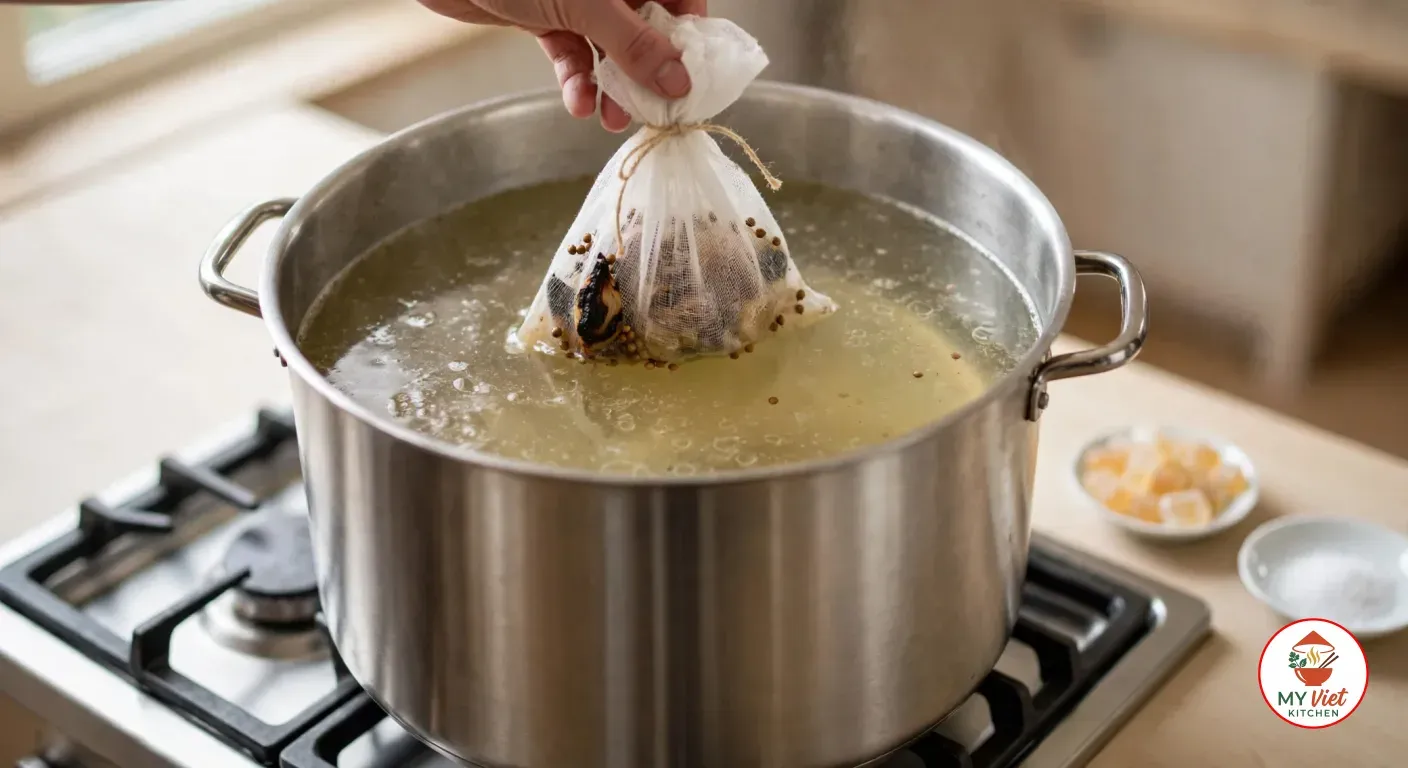
7Place the charred shallots, charred ginger, and toasted coriander seeds into a cheesecloth bag (or a tea infuser) and tie it shut. Strain the bone broth through a fine-mesh sieve, combine it with the chicken poaching liquid in a clean pot — you should have about 5 liters (1.3 gallons) total.
Drop in the spice bag, bring to a gentle simmer, and skim any remaining foam. Season with 40 g salt and 70 g rock sugar. Taste and adjust — the broth should taste slightly salty and sweet, well-balanced but leaning savory. If it needs more depth, stir in 1 tablespoon of fish sauce. Keep it at the lowest simmer until ready to serve. The broth should only “smile” — barely bubbling — never boil aggressively.
Step 8: Assemble and Serve
8Bring a large pot of water to a boil. Blanch the flat rice noodles (bánh phở) until just tender — this takes about 10–15 seconds for fresh noodles or 3–5 minutes for dried. Drain and divide among large soup bowls.
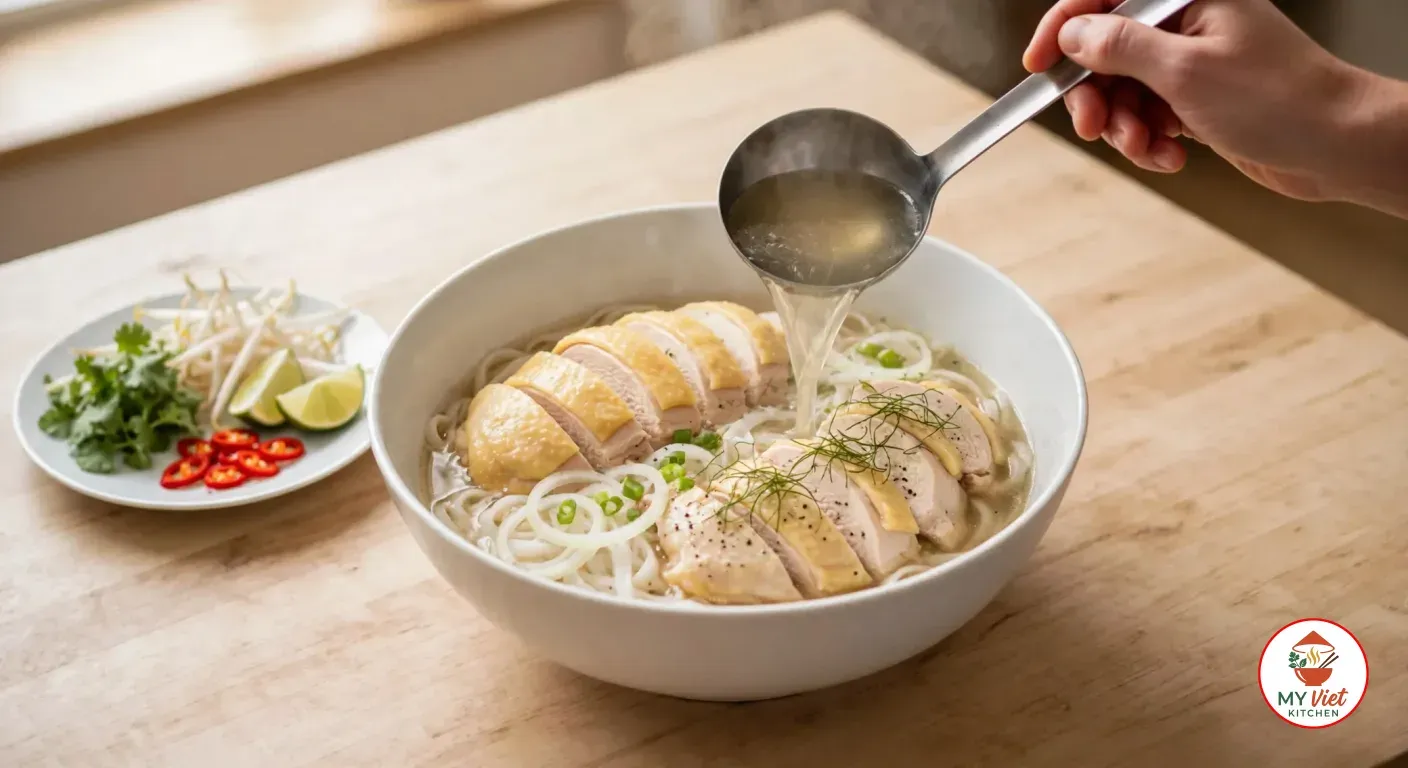
Top each bowl with sliced chicken, chopped scallions, shredded lime leaves, sliced yellow onion, and a pinch of ground black pepper. Ladle piping-hot broth generously over everything — the broth must be boiling when it hits the bowl. This final burst of heat wilts the aromatics and brings the whole bowl to life.
Serve immediately with a side plate of fresh cilantro, bean sprouts, lime wedges, and sliced chilies. For the authentic Hanoi experience, keep the extras minimal and let the broth shine.
Expert Tips for Perfect Chicken Pho
The “Cold Water Start” Rule
Always start your bone broth from cold water. Dropping bones into boiling water seals the surface and traps proteins inside, resulting in less flavor extraction and more cloudiness. Cold water draws out collagen, gelatin, and flavor gradually — the foundation of a truly great broth.
Season Boldly, Taste in Context
Your broth should taste slightly over-seasoned when you taste it from the pot. Once it hits the bowl with noodles, raw scallions, and cold toppings, the overall flavor dilutes. A broth that seems “just right” in the pot will taste flat in the bowl.
Prevent Noodle Sticking
After blanching your rice noodles, toss them with a tiny drizzle of cooking oil or rendered chicken fat. This keeps them from clumping together while you assemble the bowls. Chicken fat (mỡ gà) adds an extra layer of authentic flavor that oil alone can’t match.
The Ice Bath Is Essential
Shocking the poached chicken in ice water immediately after cooking serves two purposes: it stops the cooking process to prevent overcooking, and it tightens the skin, giving you that beautiful, slightly crisp texture that’s the hallmark of a well-made phở gà.
Hanoi Chicken Pho vs. Saigon Chicken Pho
The great pho debate in Vietnam isn’t really about which is “better” — it’s about two fundamentally different food philosophies. Here’s how they compare:
| Feature | Hanoi (Northern) Phở Gà | Saigon (Southern) Phở Gà |
|---|---|---|
| Broth character | Clear, savory, naturally sweet | Sweeter, richer, more complex |
| Spices used | Only coriander seeds | Star anise, cinnamon, cloves, coriander |
| Noodle style | Wide, flat rice noodles | Thinner rice noodles (multiple widths available) |
| Garnishes | Minimal: scallions, lime leaves, onion | Abundant: basil, bean sprouts, lime, hoisin, sriracha |
| Accompaniments | Quẩy (fried dough sticks), pickled garlic | Herb plate, hoisin sauce, chili sauce |
| Philosophy | Broth is the star — minimalist purity | Customization — build your own bowl |
Serving Suggestions
In Hanoi, phở gà is most often eaten for breakfast or as a late-night meal. It’s a complete dish in itself — no side dishes needed. That said, here are some traditional ways to elevate the experience:
The Perfect Accompaniments:
- Quẩy (fried dough sticks): The classic Hanoi pho companion. Tear off pieces and dunk them in the broth — they soak up that golden liquid like a sponge.
- Pickled garlic (tỏi ngâm giấm): A tangy, pungent condiment that cuts through the richness of the broth. A northern Vietnamese essential.
- Extra lime leaves: Shredding a few more lime leaves over your bowl adds a burst of citrusy freshness unique to Hanoi pho.
- Unlaid chicken eggs: If your hen contained them, these small, yolk-rich eggs are a prized addition that makes each bowl extra special.
Beverage Pairings:
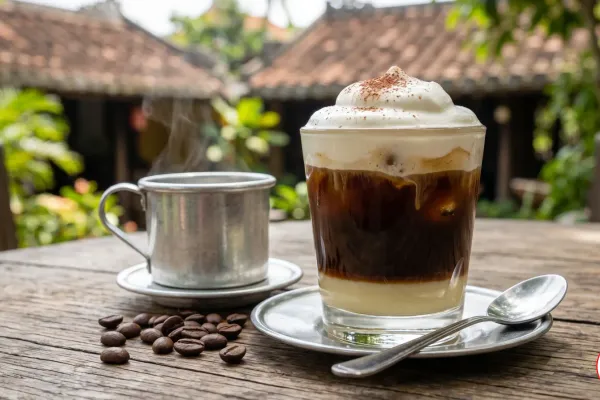
- Vietnamese iced coffee (cà phê sữa đá): The bold sweetness balances the savory broth.
- Hot jasmine tea (trà nhài): The traditional pairing — light, floral, and cleansing between bites.
- Bia hơi (fresh draft beer): For the full Hanoi street food experience, nothing beats a cold glass of bia hơi alongside your steaming bowl.
Storage and Reheating
Refrigerator: Store broth and cooked chicken separately for up to 5 days. The broth actually develops deeper flavor after a day in the fridge, making it ideal for meal prep.
Freezer: The broth freezes beautifully for up to 3 months. Pour into portions (about 500 ml each) for easy thawing. Cooked chicken can also be frozen for up to 2 months.
Reheating: Always bring the broth to a full, rolling boil before ladling. Never microwave the broth — it won’t be hot enough to properly wilt the toppings and warm the noodles. Cook fresh rice noodles per serving for the best texture; leftover cooked noodles become mushy and lose their chew.
Common Mistakes to Avoid
1. Adding Star Anise and Cinnamon
This is the most common mistake Western cooks make with chicken pho. Star anise and cinnamon belong in beef pho (phở bò), where their strong flavors complement the richness of beef. In authentic Hanoi-style chicken pho, these spices overpower the delicate chicken broth. Stick with toasted coriander seeds only — you’ll be amazed at how much flavor they add on their own.
2. Boiling the Broth Too Hard
A rolling boil emulsifies the fat and proteins in the broth, creating a murky, greasy soup. Always keep the broth at a gentle simmer — tiny bubbles lazily rising, barely disturbing the surface. Vietnamese cooks call this “sôi lăn tăn” (simmering with tiny ripples). Patience here is what separates restaurant-quality pho from a cloudy mess.
3. Using Beef or Pork Bones
Never mix beef or pork bones into your chicken pho broth. They have completely different flavor profiles and will muddy the clean, sweet character of the chicken broth. Use only chicken bones — backs, necks, and wings are ideal because they’re rich in collagen.
4. Serving with Lukewarm Broth
The broth must be at a full, rolling boil when you ladle it into the bowl. Anything less and the noodles won’t stay warm, the scallions won’t wilt, and the entire eating experience falls flat. This is perhaps the single most important rule for serving pho.
5. Skipping the Blanching Step
Blanching the bones removes blood, impurities, and excess fat before the long simmer begins. Without this step, you’ll spend the entire cooking time fighting foam and will still end up with a less-than-clear broth. Two minutes of blanching saves you hours of frustration.
Frequently Asked Questions
Should I add star anise and cinnamon to chicken pho?
For authentic Hanoi-style phở gà, no. These warm spices overwhelm the chicken’s delicate flavor. In northern Vietnam, only toasted coriander seeds are used. However, southern Vietnamese recipes do incorporate star anise and cinnamon for a more complex, sweeter broth. It comes down to which regional style you prefer.
What type of chicken is best for pho ga?
A free-range hen (gà mái tơ) with yellow skin is the gold standard. These birds have firmer, more flavorful meat and produce richer broth. Look for chickens with yellow feet and skin at Asian grocery stores. Avoid factory-farmed broiler chickens — their meat is bland and falls apart too easily.
How do I keep the broth clear?
Three techniques: blanch the bones first (removes impurities), never let the broth reach a rolling boil (gentle simmer only), and skim foam frequently during the cooking process. Also, never cover the pot while simmering — trapped condensation drips back into the broth and creates cloudiness.
Can I use a rotisserie chicken for quick pho?
For a weeknight shortcut, yes — a rotisserie chicken can work. Shred the meat for topping and simmer the carcass with the aromatics for about 45 minutes to create a quick broth. It won’t have the same depth as a from-scratch version, but it’s a perfectly respectable shortcut when time is limited.
How many calories are in a bowl of chicken pho?
A standard homemade bowl of phở gà contains approximately 350–450 calories, with around 25–30 grams of protein and 40–50 grams of carbohydrates. It’s a relatively lean, high-protein meal. Most of the calories come from the rice noodles and chicken, while the broth itself is quite low in calories.
Can I make pho broth ahead of time?
Absolutely — and it’s actually recommended. Pho broth develops deeper, more rounded flavors after a night in the refrigerator. Make the broth 1–2 days ahead, refrigerate it, then skim off any solidified fat from the surface before reheating. It also freezes beautifully for up to 3 months.
What’s the difference between phở and bún?
Phở uses flat rice noodles (bánh phở), while bún uses round rice vermicelli. The broths, toppings, and serving styles are also different. Phở is always a soup, while bún dishes can be served as dry noodle bowls (like bún chả or bún thịt nướng) or in broth (like bún bò Huế).
Variations and Adaptations
Southern-Style Chicken Pho (Phở Gà Sài Gòn):
Add 2 star anise pods and 1 cinnamon stick to the spice bag. Use thinner rice noodles. Serve with a generous herb plate including Thai basil, bean sprouts, lime wedges, and offer hoisin sauce and sriracha on the side. The broth will be slightly sweeter and more aromatic.
Chicken Pho with Fried Chicken Skin:
Remove the skin from the poached chicken before slicing. Cut the skin into strips and pan-fry until golden and crispy. Use these as a topping alongside the sliced meat for an incredible textural contrast — crispy, savory, and addictive.
Instant Pot / Pressure Cooker Version:
Combine the blanched bones, whole chicken, charred aromatics, and spice bag in a pressure cooker with 4 liters of water. Cook on high pressure for 45 minutes, then natural release for 15 minutes. The result is remarkably good for a fraction of the time, though purists may notice slightly less clarity in the broth.
The Cultural Significance of Phở Gà
Chicken pho holds a unique place in Vietnamese culinary history. While beef pho (phở bò) is believed to have originated in the early 20th century in northern Vietnam — influenced by both French and Chinese culinary traditions — chicken pho was born out of necessity. During the food rationing period under the communist government in the mid-20th century, beef became a luxury item that most families couldn’t access. Resourceful Vietnamese cooks adapted the beloved beef pho recipe to use chicken instead, creating an entirely new dish that would eventually earn its own devoted following.
In Hanoi today, phở gà is not just “the alternative to beef pho” — it’s a beloved dish in its own right, celebrated for its lighter, more refined character. Many Hanoians actually prefer chicken pho for its cleaner flavor and gentler nature, especially on warm days or when the body needs something nourishing but not heavy. The best pho gà stalls in Hanoi’s Old Quarter draw lines of locals every morning, with massive pots of golden broth steaming alongside trays of freshly poached chicken.
What makes phở truly special is how it reflects Vietnamese food philosophy: balance above all. The broth balances savory with sweet, the toppings balance soft with crunchy, and the overall experience balances simplicity with depth. Every Vietnamese family has their own “secret” for making pho — a little extra ginger, a longer simmer, a specific ratio of rock sugar to salt — and these small variations are passed down through generations like treasured heirlooms.
Conclusion
Making authentic Hanoi-style chicken pho at home is absolutely achievable, and the result is infinitely more satisfying than any restaurant version. Yes, it takes time — about 3 hours from start to finish — but most of that is hands-off simmering while your kitchen fills with the most incredible aroma. The key techniques to remember: blanch your bones, start from cold water, simmer gently (never boil), char your aromatics, and serve with boiling-hot broth.
Once you’ve mastered this recipe, you’ll have the confidence to explore the whole world of Vietnamese noodle soups. Try our other Vietnamese recipes to build a complete Vietnamese feast at home.