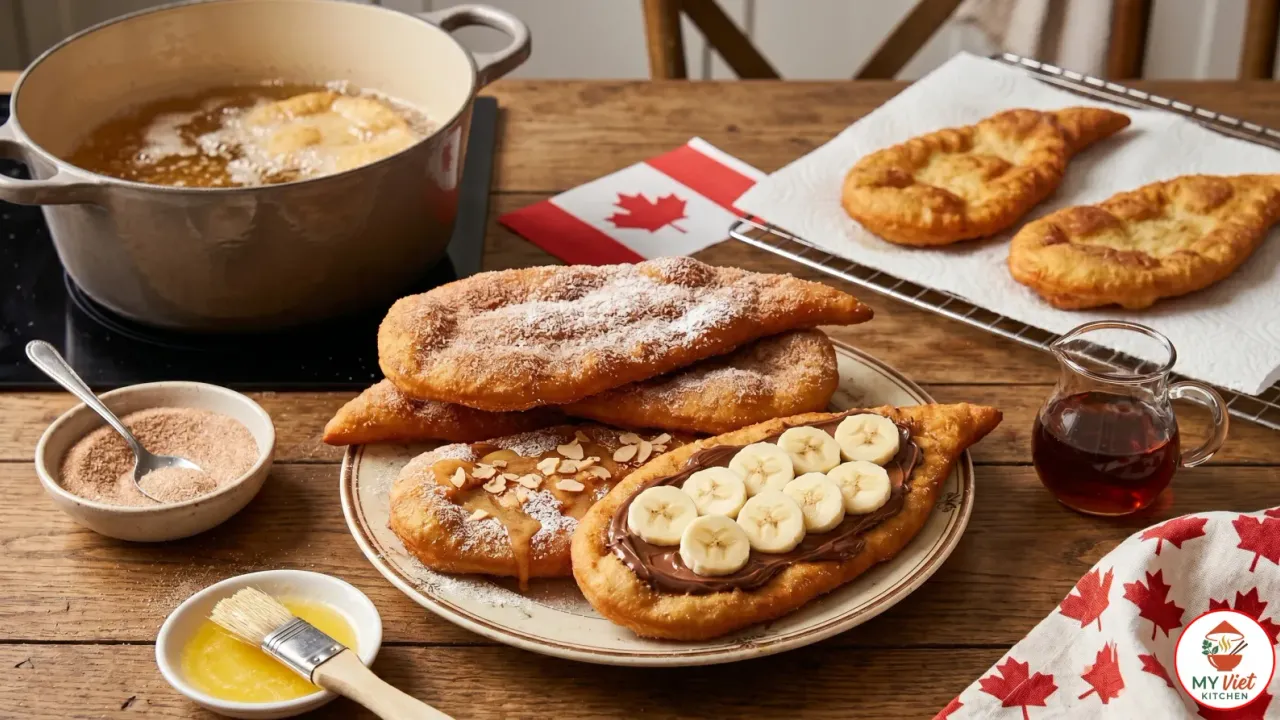
This BeaverTails recipe shows you how to make Canada’s most beloved street food dessert right in your own kitchen. These hand-stretched, golden fried dough pastries get their name from their signature flat, elongated shape that resembles a beaver’s tail. Originally created in Ontario in the late 1970s, BeaverTails have since become a Canadian icon. In this BeaverTails recipe, you will learn how to prepare the perfect yeasted dough, shape it properly, and fry it to crispy perfection. Whether you top them with classic cinnamon sugar or go bold with Nutella and bananas, this homemade BeaverTails recipe will transport you straight to the streets of Ottawa’s ByWard Market.
Prep Time: 30 minutes | Cook Time: 20 minutes | Servings: 8
Difficulty: Easy | Calories: ~320 per serving
What Makes BeaverTails Special?
BeaverTails stand apart from other fried pastries because of their unique preparation method. Unlike funnel cakes that use poured batter, BeaverTails start with a yeasted dough. This means the dough ferments and develops complex flavors before frying. As a result, you get a pastry that is crispy on the outside yet soft and slightly chewy on the inside.
The hand-stretching technique also sets BeaverTails apart. Each piece of dough is pulled and shaped by hand into a thin, flat oval. This creates an uneven surface with small bubbles that crisp up beautifully in the hot oil. Additionally, the thin profile ensures that every bite delivers the perfect ratio of crispy exterior to tender interior.
What truly makes this Canadian pastry iconic, however, is its cultural significance. BeaverTails have become synonymous with winter festivals, the Rideau Canal Skateway, and family outings across Canada. Indeed, no visit to Ottawa is complete without grabbing a warm BeaverTail on a cold winter day.

Choosing the Right Flour for BeaverTails
The type of flour you use directly affects the texture of your BeaverTails. Since the dough needs to stretch thin without tearing, you need a flour with moderate gluten content. Here are your best options:
- All-Purpose Flour (best choice): This provides the ideal balance of protein and starch. It creates a dough that stretches easily and fries up crispy.
- Bread Flour: This works well but produces a slightly chewier result. Use it if you prefer a more substantial texture.
- Whole Wheat Flour (partial substitute): You can replace up to one-third of the all-purpose flour with whole wheat for a nuttier flavor. However, the dough will be harder to stretch.
Ingredients for BeaverTails
Dough Ingredients:
- 3 cups all-purpose flour
- 1 packet (2 1/4 tsp) active dry yeast
- 1 cup warm water (110F/43C)
- 2 tablespoons granulated sugar
- 1 teaspoon salt
- 2 tablespoons unsalted butter, melted
- 1 large egg
- Vegetable oil for frying (about 4 cups)
For Classic Toppings:
- 1/2 cup granulated sugar mixed with 2 teaspoons ground cinnamon
- Nutella or chocolate hazelnut spread
- 1 sliced banana (for Nutella topping)
- Fresh lemon juice and powdered sugar
- Maple butter or pure maple syrup
- Melted butter for brushing
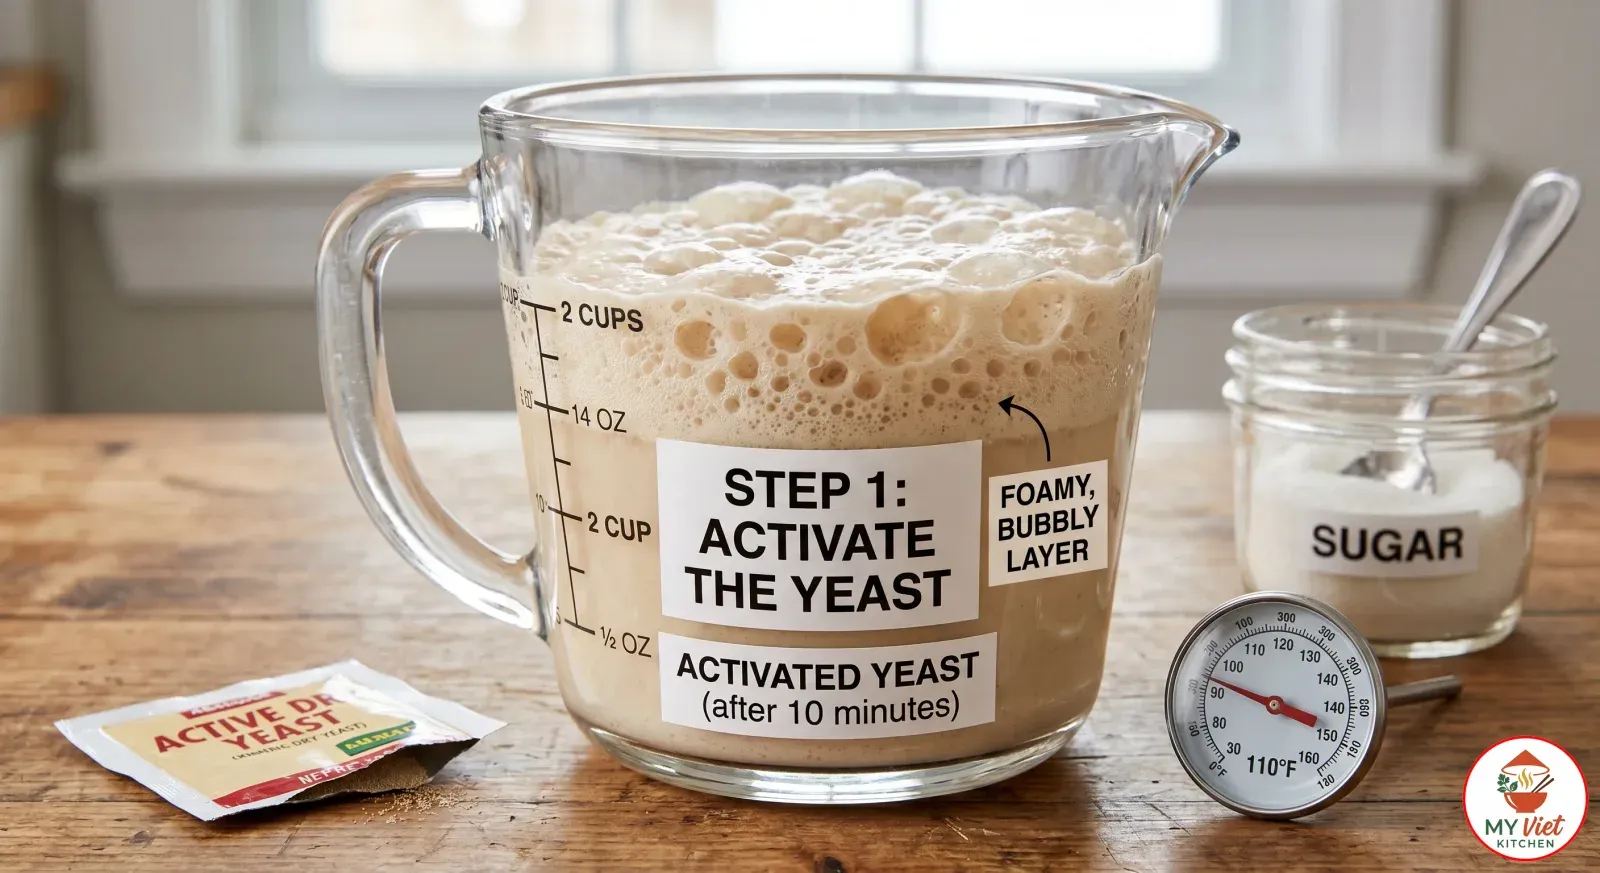
Pro tip: Make sure your water is warm but not hot. If the water is too hot, it will kill the yeast. Test it on your wrist first — it should feel comfortably warm, like bath water.
Step-by-Step Instructions
Step 1: Activate the Yeast
1First, combine the warm water and sugar in a large mixing bowl. Then sprinkle the yeast over the surface and gently stir. Let the mixture sit for 5 to 10 minutes. You will know the yeast is ready when it becomes foamy and bubbly on top. If nothing happens after 10 minutes, your yeast may be expired, so start over with fresh yeast.
Step 2: Mix and Knead the Dough
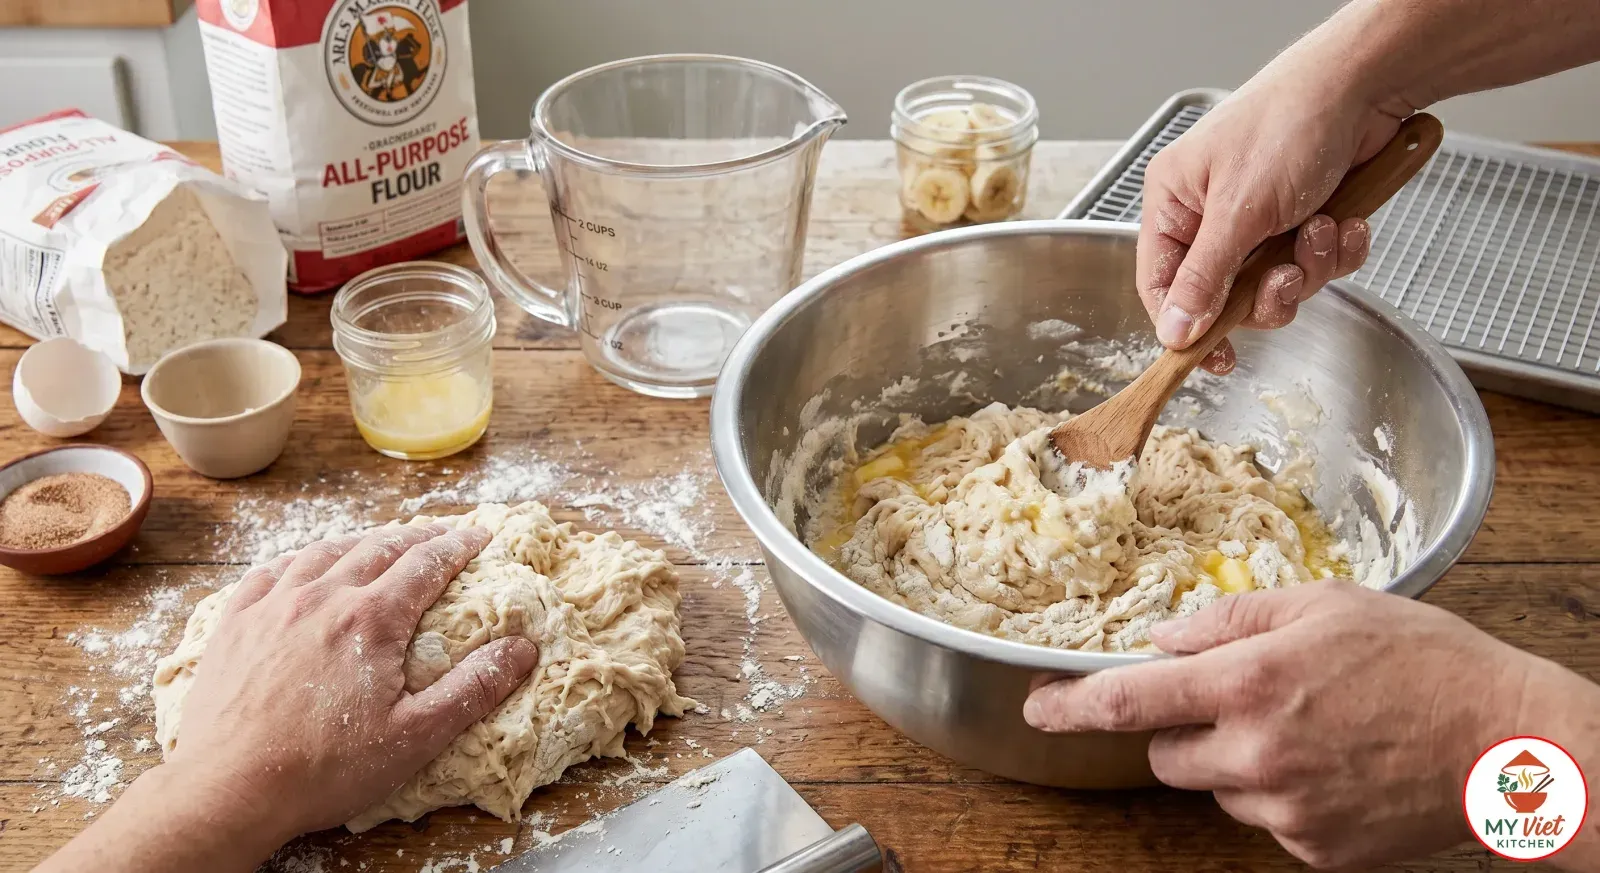
2Next, add the melted butter, egg, and salt to the yeast mixture. Stir to combine. Gradually add the flour, one cup at a time, mixing as you go. Once the dough pulls away from the sides of the bowl, transfer it to a lightly floured surface. Knead the dough for 8 to 10 minutes until it feels smooth, elastic, and slightly tacky. This kneading develops the gluten, which gives BeaverTails their characteristic chewiness.
Step 3: Let the Dough Rise
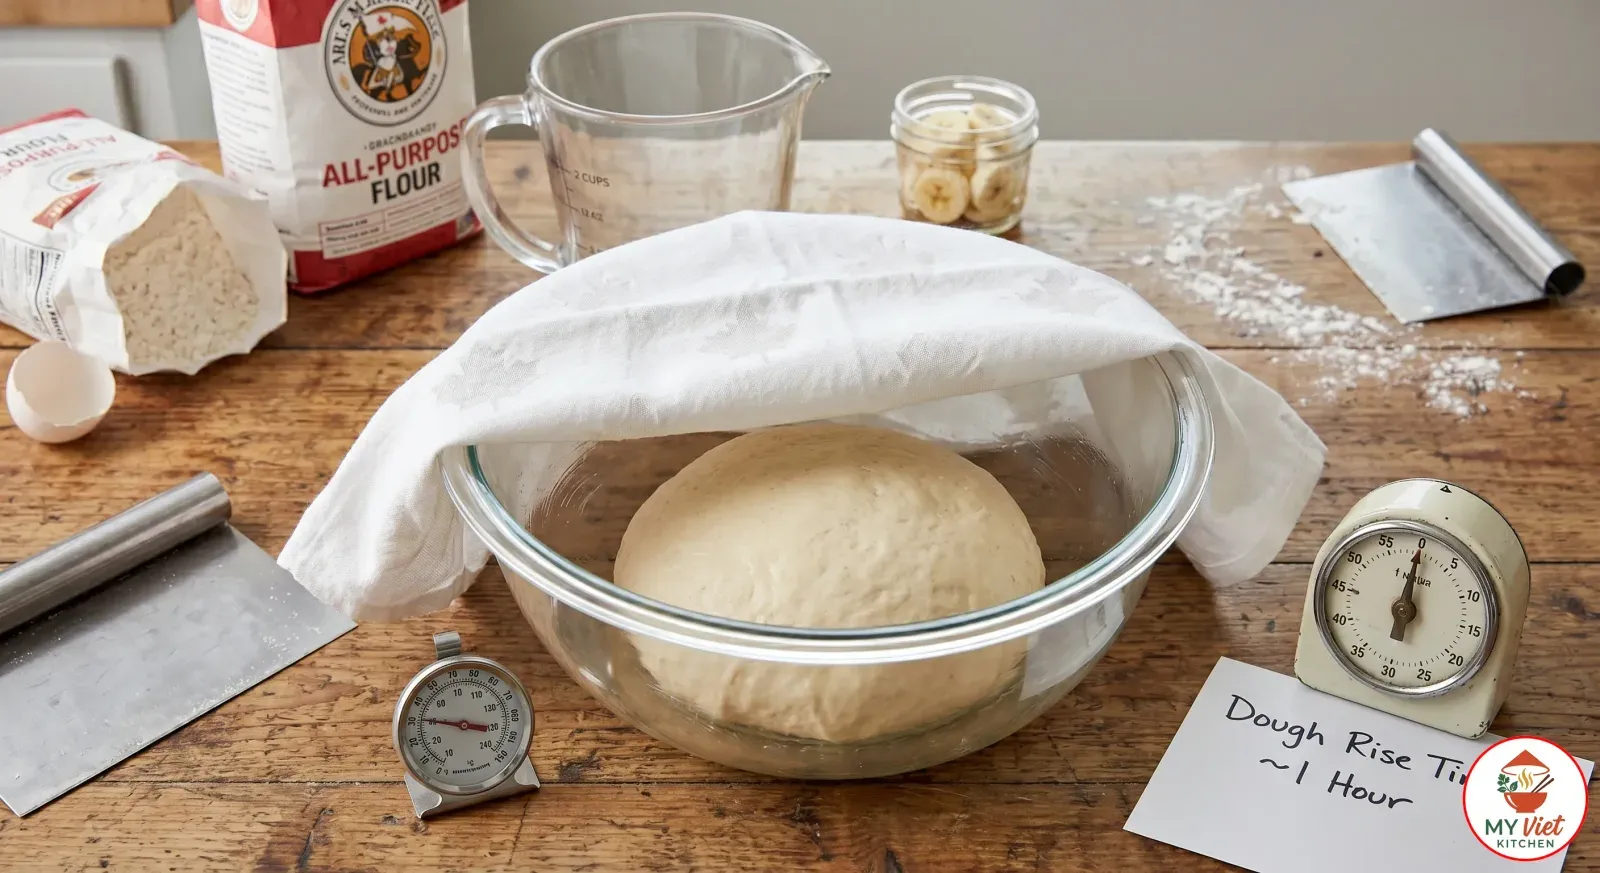
3Place the kneaded dough into a lightly oiled bowl. Turn it once so the top is coated with oil. Cover the bowl with a damp kitchen towel or plastic wrap. Then set it in a warm, draft-free spot. Allow the dough to rise for about 1 hour, or until it has doubled in size. The fermentation process is essential because it develops flavor and creates an airy texture.
Step 4: Shape the BeaverTails
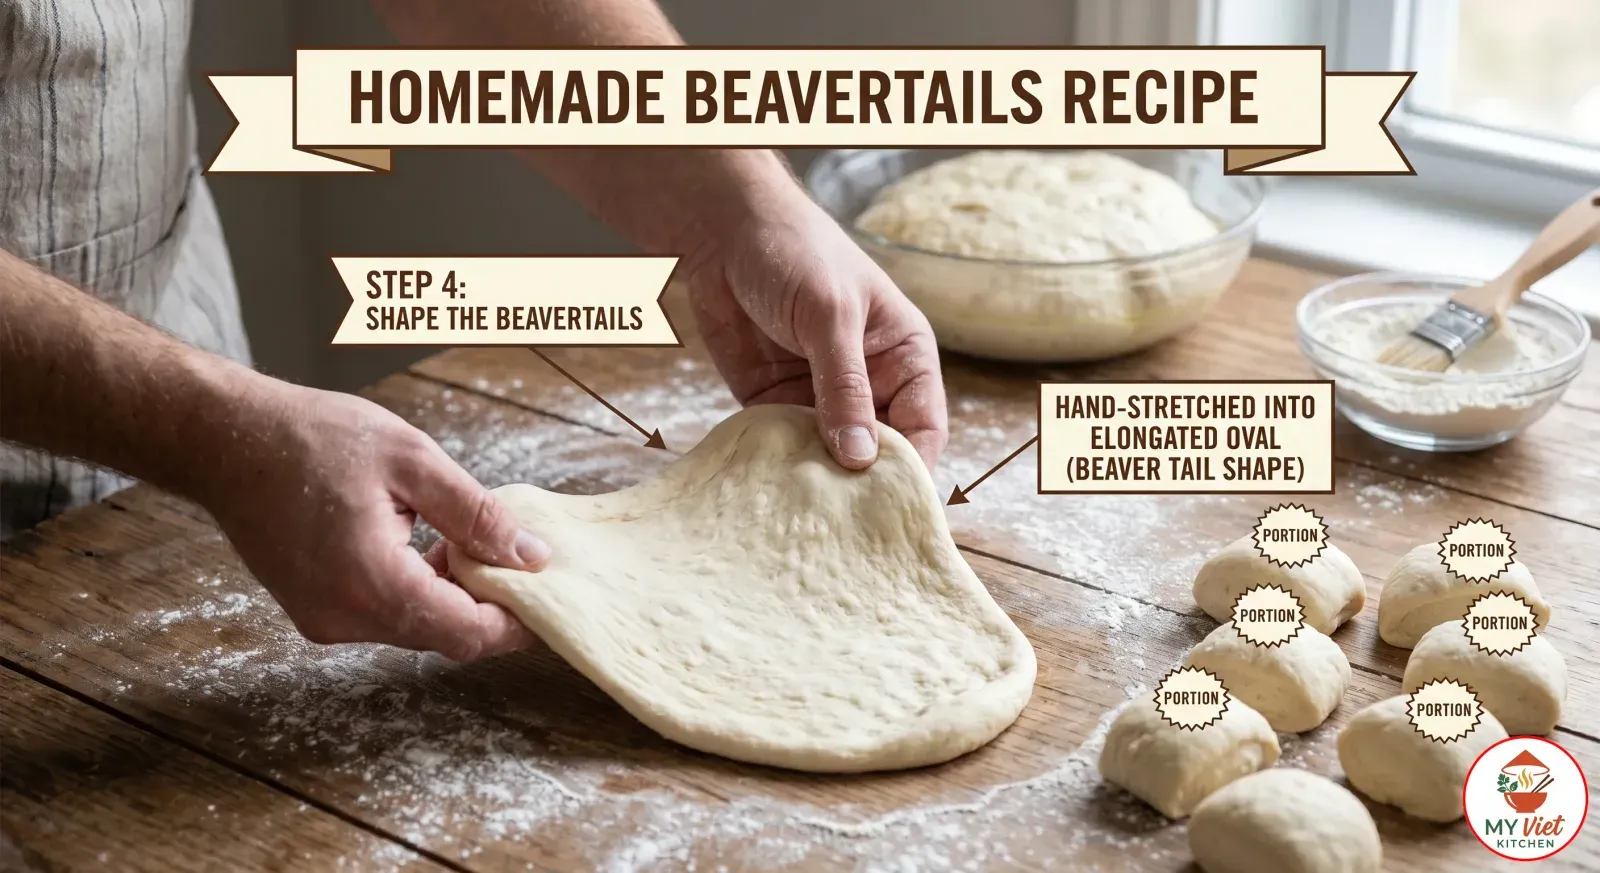
4After the dough has risen, punch it down gently to release the air. Divide it into 8 equal portions. Working with one piece at a time, roll and stretch the dough into a long, flat oval shape. Each piece should be roughly 10 inches long, 4 inches wide, and about 1/4 inch thick. The shape should look like a beaver’s flat tail. If the dough springs back, let it rest for 2 minutes before stretching again.
Step 5: Fry Until Golden
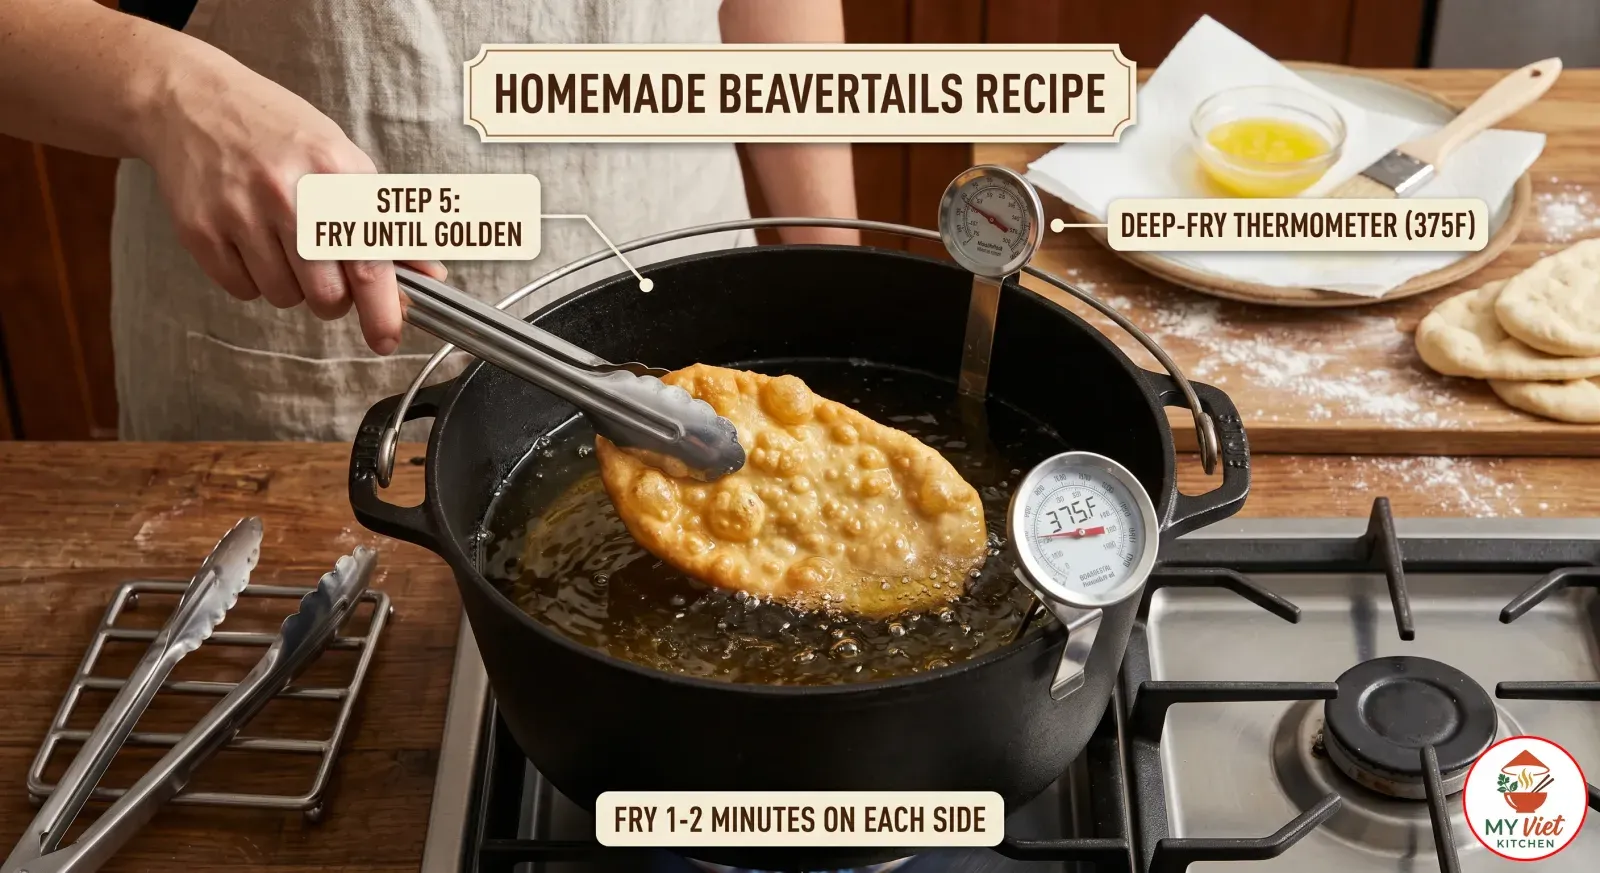
5Pour the vegetable oil into a deep, heavy-bottomed pot or Dutch oven. Heat the oil to 375F (190C) and use a thermometer to monitor the temperature closely. Carefully lower one shaped BeaverTail into the hot oil. Fry for 1 to 2 minutes on each side until the pastry turns golden brown. Then remove it with tongs or a slotted spoon and place it on a paper towel-lined plate to drain.
Step 6: Add Toppings and Serve
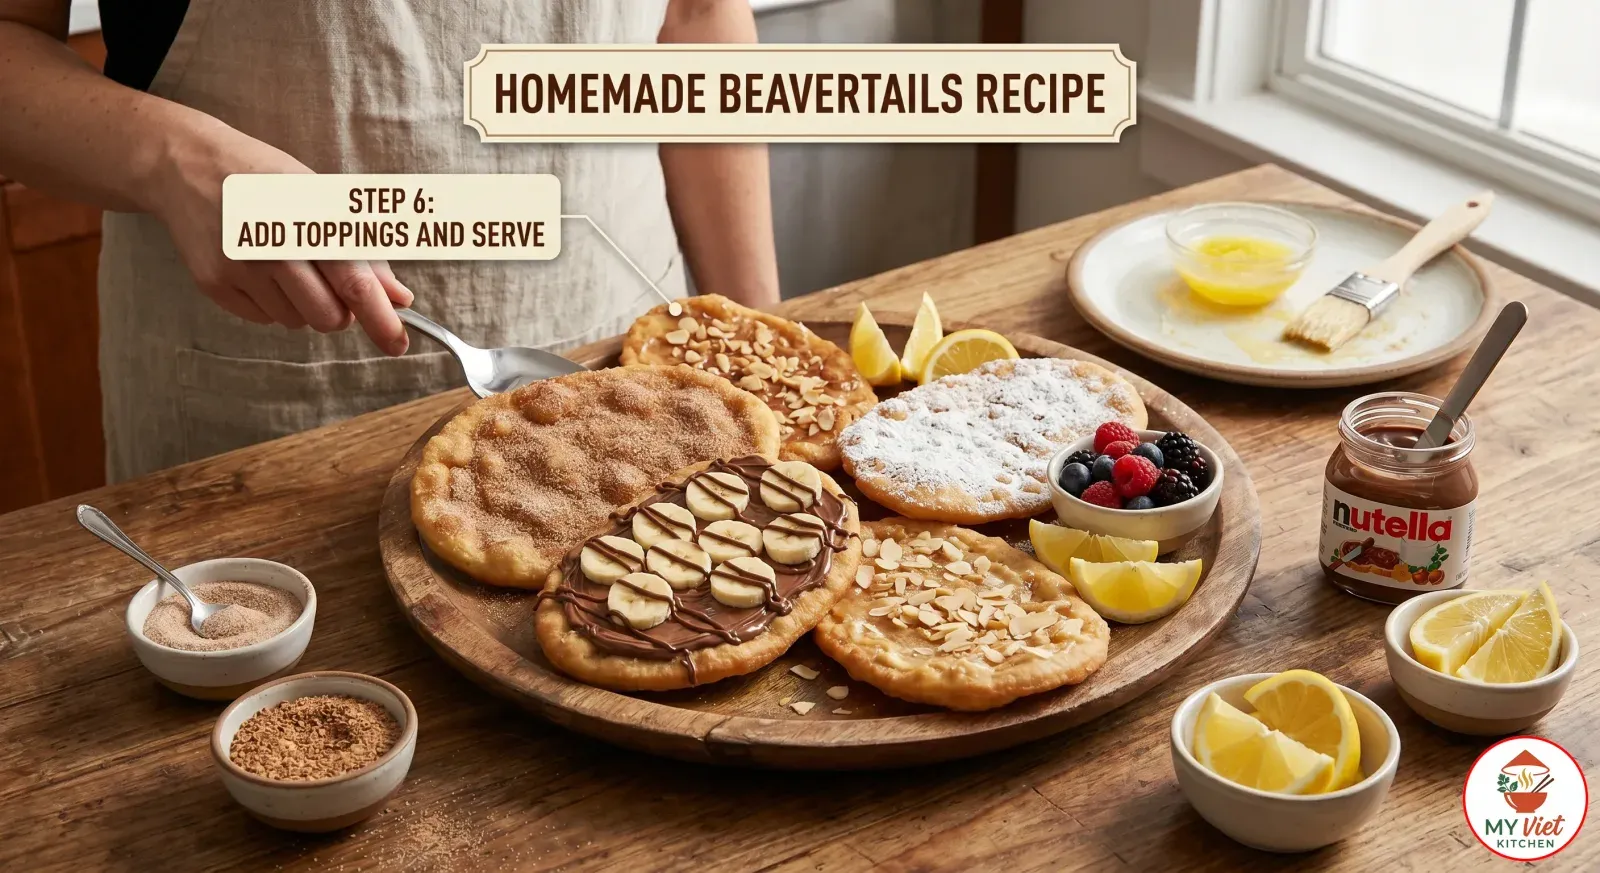
6While the BeaverTails are still warm, brush each one with melted butter. Then immediately add your chosen topping. For classic cinnamon sugar, press the buttered pastry into the cinnamon-sugar mixture. For the Nutella version, spread a generous layer and top with sliced bananas. Finally, for the lemon option, squeeze fresh lemon juice over the pastry and dust with powdered sugar. Serve right away for the crispiest texture.
Expert Tips for the Perfect BeaverTails Recipe
Oil Temperature Is Everything
Maintaining the right oil temperature is the single most important factor for great BeaverTails. If the oil is too cool, the dough absorbs excess grease and becomes heavy. If the oil is too hot, the outside burns before the inside cooks through. Therefore, always use a deep-fry thermometer and adjust the heat between batches to stay at 375F.
Stretch, Don’t Roll Too Thin
While you want the dough thin, avoid rolling it paper-thin. A thickness of about 1/4 inch is ideal. This ensures the BeaverTail puffs up slightly during frying, creating those signature bubbles and pockets. Moreover, slightly thicker dough gives you the soft, chewy center that balances the crispy exterior.
BeaverTails vs. Other Fried Pastries
Many people confuse BeaverTails with similar fried pastries from around the world. Although they share the concept of fried dough, each has its own distinct characteristics. Here is a quick comparison:
| Feature | BeaverTails | Funnel Cake | Elephant Ears |
|---|---|---|---|
| Dough Type | Yeasted, hand-stretched | Poured batter | Non-yeasted dough |
| Shape | Flat oval (beaver tail) | Spiraled, lacy | Large round disc |
| Texture | Crispy outside, chewy inside | Crispy and crunchy throughout | Flaky and crispy |
| Origin | Canada (Ontario, 1978) | United States | European-inspired |
| Common Toppings | Cinnamon sugar, Nutella, maple | Powdered sugar | Cinnamon sugar |
Serving Suggestions
Traditionally, BeaverTails are served fresh and hot as a stand-alone treat. However, you can also turn them into a more elaborate dessert experience. Here are some ideas to consider:
The Perfect Accompaniments:
- Ice cream: A scoop of vanilla ice cream on a warm BeaverTail creates an irresistible contrast of temperatures and textures.
- Fresh berries: Strawberries, blueberries, or raspberries add a bright, tangy note that cuts through the richness.
- Whipped cream: A dollop of fresh whipped cream takes any BeaverTail topping to the next level.
- Caramel sauce: Drizzle warm caramel sauce over a cinnamon sugar BeaverTail for pure indulgence.
Beverage Pairings:
- Hot chocolate: The classic Canadian pairing, especially during winter.
- Coffee or espresso: The bitterness of coffee complements the sweet toppings perfectly.
- Apple cider: Warm or cold apple cider pairs beautifully with cinnamon sugar BeaverTails.
- Milk: A simple glass of cold milk is always a crowd-pleaser alongside fried dough.
Storage and Reheating
Refrigerator: Store unfrosted BeaverTails in an airtight container for up to 2 days. Keep the toppings separate until you are ready to serve.
Freezer: You can freeze the uncooked, shaped dough pieces for up to 2 months. Place them on a parchment-lined baking sheet, freeze until solid, and then transfer to a freezer bag. Thaw in the refrigerator overnight before frying.
Reheating: Place leftover BeaverTails on a baking sheet and reheat in a preheated oven at 350F (175C) for 5 to 7 minutes. This method restores the crispness much better than a microwave. Avoid microwaving, as it makes the pastry soggy.
Common Mistakes to Avoid
1. Skipping the Dough Rise
Some people try to rush the process by skipping or shortening the rise time. This is a mistake because the yeast needs time to ferment the dough. Without proper rising, your BeaverTails will taste flat and lack the characteristic airy, chewy texture. Always allow the full hour for the dough to double in size.
2. Overcrowding the Frying Oil
Frying too many BeaverTails at once drops the oil temperature significantly. As a consequence, the pastries absorb more oil and turn out greasy rather than crispy. Fry only one or two BeaverTails at a time, and allow the oil to return to 375F between batches.
3. Adding Toppings Too Late
Toppings stick best to warm, freshly fried BeaverTails. If you wait too long, the butter glaze cools and the cinnamon sugar will not adhere properly. Therefore, always add your toppings within the first minute after frying.
Frequently Asked Questions
What are BeaverTails made of?
BeaverTails are made from a simple yeasted dough that includes flour, water, yeast, sugar, butter, egg, and salt. After the dough rises, it is hand-stretched into a flat oval and deep-fried. The result is a crispy, golden pastry that you then top with sweet toppings like cinnamon sugar or Nutella.
Can you make BeaverTails without a deep fryer?
Absolutely. You can use a heavy-bottomed pot or Dutch oven with at least 3 inches of vegetable oil. A deep-fry thermometer is essential for monitoring the temperature. This setup works just as well as a dedicated deep fryer. Most home cooks who try this BeaverTails recipe prefer it because of its simplicity.
What is the most popular BeaverTails topping?
Classic cinnamon sugar remains the all-time favorite topping for BeaverTails. It is the original flavor and the one most people try first. Nutella with banana is a close second, particularly among younger fans. Maple butter is another beloved choice that celebrates Canada’s most famous export.
Are BeaverTails the same as elephant ears or funnel cakes?
No, they are not the same. BeaverTails use a yeasted dough that is hand-stretched, while funnel cakes use poured batter and elephant ears often use a non-yeasted dough. Because of the yeast, BeaverTails have a chewier, bread-like interior. In contrast, funnel cakes are entirely crispy and elephant ears tend to be flaky.
How long do BeaverTails stay fresh?
BeaverTails taste best when served immediately after frying. At room temperature, they remain enjoyable for about 2 to 3 hours. After that, the texture softens and the crispness fades. For this reason, it is best to fry them just before serving whenever possible.
BeaverTails Recipe Variations and Adaptations
Savory BeaverTails:
Although BeaverTails are traditionally sweet, you can create savory versions by skipping the sugar toppings. Instead, brush the fried dough with garlic butter and sprinkle with grated Parmesan and herbs. This makes an excellent appetizer or snack for those who prefer something less sweet.
Baked BeaverTails (Healthier Option):
For a lighter version, you can bake the shaped dough instead of frying it. Preheat your oven to 425F (220C), place the shaped BeaverTails on a parchment-lined baking sheet, and bake for 10 to 12 minutes. Brush with butter immediately after baking. While the texture differs slightly from the fried version, baked BeaverTails still deliver great flavor with less oil.
Gluten-Free BeaverTails:
You can substitute the all-purpose flour with a 1:1 gluten-free flour blend. Also, add 1/2 teaspoon of xanthan gum if your blend does not already include it. The dough will be stickier and harder to stretch, so use wet hands when shaping. The result is slightly different in texture but still delicious.
The Cultural Significance of BeaverTails
Grant and Pam Hooker created the first BeaverTails in 1978, drawing from a family recipe that had been passed down through generations. They chose the beaver tail shape as a tribute to Canada’s national animal. The first BeaverTails stand opened at the Killaloe Craft and Community Fair in Ontario, and the response was immediate and enthusiastic.
Since then, BeaverTails have grown into a cultural phenomenon. They are now a staple at Winterlude, Canada’s famous winter festival in Ottawa. Furthermore, BeaverTails stands have appeared across Canada and even internationally, from Japan to the United States. The pastry has become so iconic that it was served to President Obama during his 2009 visit to Ottawa. For many Canadians, BeaverTails represent warm memories of skating on frozen canals, celebrating festivals, and sharing simple pleasures with family and friends. This BeaverTails recipe honors that tradition by staying true to the original method.
Conclusion
This BeaverTails recipe is surprisingly straightforward, and the results are absolutely worth the effort. With just a handful of pantry staples and some hot oil, you can recreate this iconic Canadian treat. Remember to let your dough rise fully, keep your oil at the right temperature, and add toppings while the pastry is still warm. These three steps alone will ensure your BeaverTails come out perfectly every time.
We hope this BeaverTails recipe inspires you to bring a taste of Canada into your home. Ready to explore more delicious recipes from around the world? Check out our homepage for a collection of international favorites. If you love Canadian cuisine, also try our classic poutine recipe or our butter tarts recipe for more Canadian comfort food.