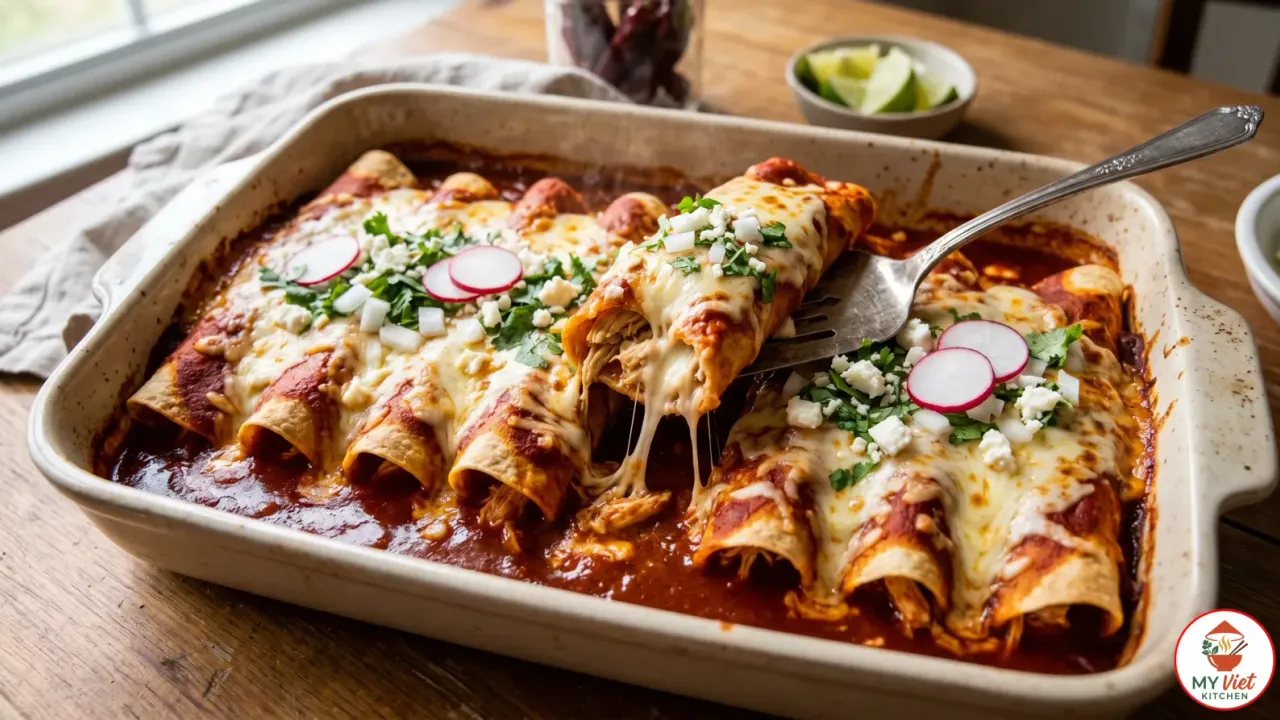
Enchiladas are one of the most beloved dishes in all of Mexican cuisine. Corn tortillas dipped in a deeply flavored red chile sauce, wrapped around a savory filling, and baked until the cheese melts into golden, bubbling pools. This is the kind of food that fills a kitchen with warm, earthy aromas and brings an entire family to the table. These are not the heavy, smothered plates of Tex-Mex chain restaurants. Authentic Mexican enchiladas are lighter, brighter, and built on a sauce made from real dried chiles that delivers complexity no canned product can match.
Prep Time: 30 minutes | Cook Time: 35 minutes | Servings: 6
Difficulty: Intermediate | Calories: ~420 per serving
What Makes Enchiladas Special?
The word enchilada comes from the Spanish verb “enchilar,” meaning to season or coat with chile. That etymology tells you everything about what this dish truly is. At its core, an enchilada is a tortilla bathed in chile sauce. The filling is important, but the sauce is the soul. A properly made enchilada sauce from dried guajillo and ancho chiles has a flavor profile that is simultaneously fruity, smoky, earthy, and gently spicy. No single bottled product can replicate this layered complexity because the flavor develops through toasting, rehydrating, charring, and blending fresh ingredients by hand.
Enchiladas have roots stretching back to pre-Columbian Mexico, where Aztec and Mayan civilizations rolled tortillas around small fish and other fillings, then doused them in chile sauces. The concept predates the arrival of Europeans by centuries. When Spanish colonizers introduced dairy cattle, cheese became part of the dish. Over time, regional Mexican cooks adapted enchiladas with local chiles, proteins, and techniques. Today, every state in Mexico has its own enchilada tradition. In Mexico City, enchiladas suizas feature a tomatillo-cream sauce. The potosinas variety from San Luis Potosi fold chile directly into the tortilla dough. Meanwhile, enchiladas mineras from Guanajuato are fried and served with potatoes and carrots. The dish is a living map of Mexican culinary diversity.

The Technique That Makes the Difference
What separates a great enchilada from a mediocre one is technique. The tortillas must be warmed so they become pliable without cracking. Each one gets a quick dip in the sauce, which accomplishes two things: it flavors the tortilla surface and creates a seal that prevents the corn from drying out in the oven. The filling should be generous but not overstuffed, allowing the tortilla to roll tightly without tearing. Finally, the baking time is brief. Enchiladas are not casseroles. They need just enough heat to melt the cheese and unify the flavors. Overbaking turns the tortillas into mush.
Choosing the Right Dried Chiles
Dried chiles are the foundation of authentic enchilada sauce. The specific varieties you choose determine the heat level, color, and flavor profile of the final dish. Mexican cooking treats dried chiles with the same respect that French cooking gives to wine. Each variety has a distinct personality. Here is what to look for at the Latin market or spice aisle.
- Guajillo chiles (essential): These are the backbone of most red enchilada sauces across Mexico. They have a smooth, burgundy skin and a mild to moderate heat level. The flavor is fruity with notes of cranberry and green tea, plus a subtle tanginess. Guajillos provide the bright red color that defines enchiladas rojas. Look for chiles that are still pliable rather than brittle, which indicates freshness.
- Ancho chiles (essential): These are dried poblano peppers. They are wide, wrinkled, and nearly black in color. Anchos add richness and a sweet, raisin-like depth that rounds out the brighter guajillo. They have mild heat and contribute a velvety body to the sauce. The combination of guajillo and ancho is the classic pairing for enchilada sauce throughout central Mexico.
- Chile de arbol (optional, for heat): If you want a spicier sauce, add one or two dried chiles de arbol to the blend. These slender, bright red chiles pack significant heat without altering the overall flavor balance. Toast them alongside the other chiles and blend them in. Start with one and taste before adding more.
- Pasilla chiles (optional, for complexity): Also called chile negro, pasillas have a dark, almost black skin and a complex flavor of dried fruit, cocoa, and herbs. Adding one pasilla to the guajillo-ancho base creates a more nuanced sauce with additional depth. This combination is popular in Oaxacan and Michoacan-style enchiladas.
Ingredients for Enchiladas
For the Red Chile Sauce:
- 6 dried guajillo chiles, stemmed and seeded
- 2 dried ancho chiles, stemmed and seeded
- 2 medium tomatoes, roughly chopped
- 1 medium white onion, quartered
- 4 cloves garlic, unpeeled
- 2 cups chicken broth
- 1 tablespoon vegetable oil
- 1 teaspoon ground cumin
- 1 teaspoon dried oregano (Mexican oregano preferred)
- 1 tablespoon apple cider vinegar
- 1 teaspoon salt, plus more to taste
- 1/2 teaspoon black pepper
For the Filling and Assembly:
- 12 corn tortillas
- 3 cups shredded cooked chicken (from poached or rotisserie chicken)
- 2 cups shredded Oaxaca cheese or Monterey Jack
- 1/2 cup Mexican crema or sour cream
For Garnish:
- Fresh cilantro, roughly chopped
- Diced white onion
- Sliced radishes
- Crumbled queso fresco or cotija cheese
Pro tip: When selecting dried chiles, bend them gently. Fresh dried chiles should flex without snapping. Brittle chiles have lost most of their essential oils and will produce a flat, papery sauce. Buy dried chiles from Mexican grocery stores or specialty spice shops with high turnover. Store unused chiles in an airtight bag in a cool, dark place for up to six months. Additionally, save the chile soaking water. A few tablespoons can be added to the blender if the sauce needs thinning. It carries subtle chile flavor that plain water does not.
Step-by-Step Instructions
Step 1: Toast and Rehydrate the Dried Chiles
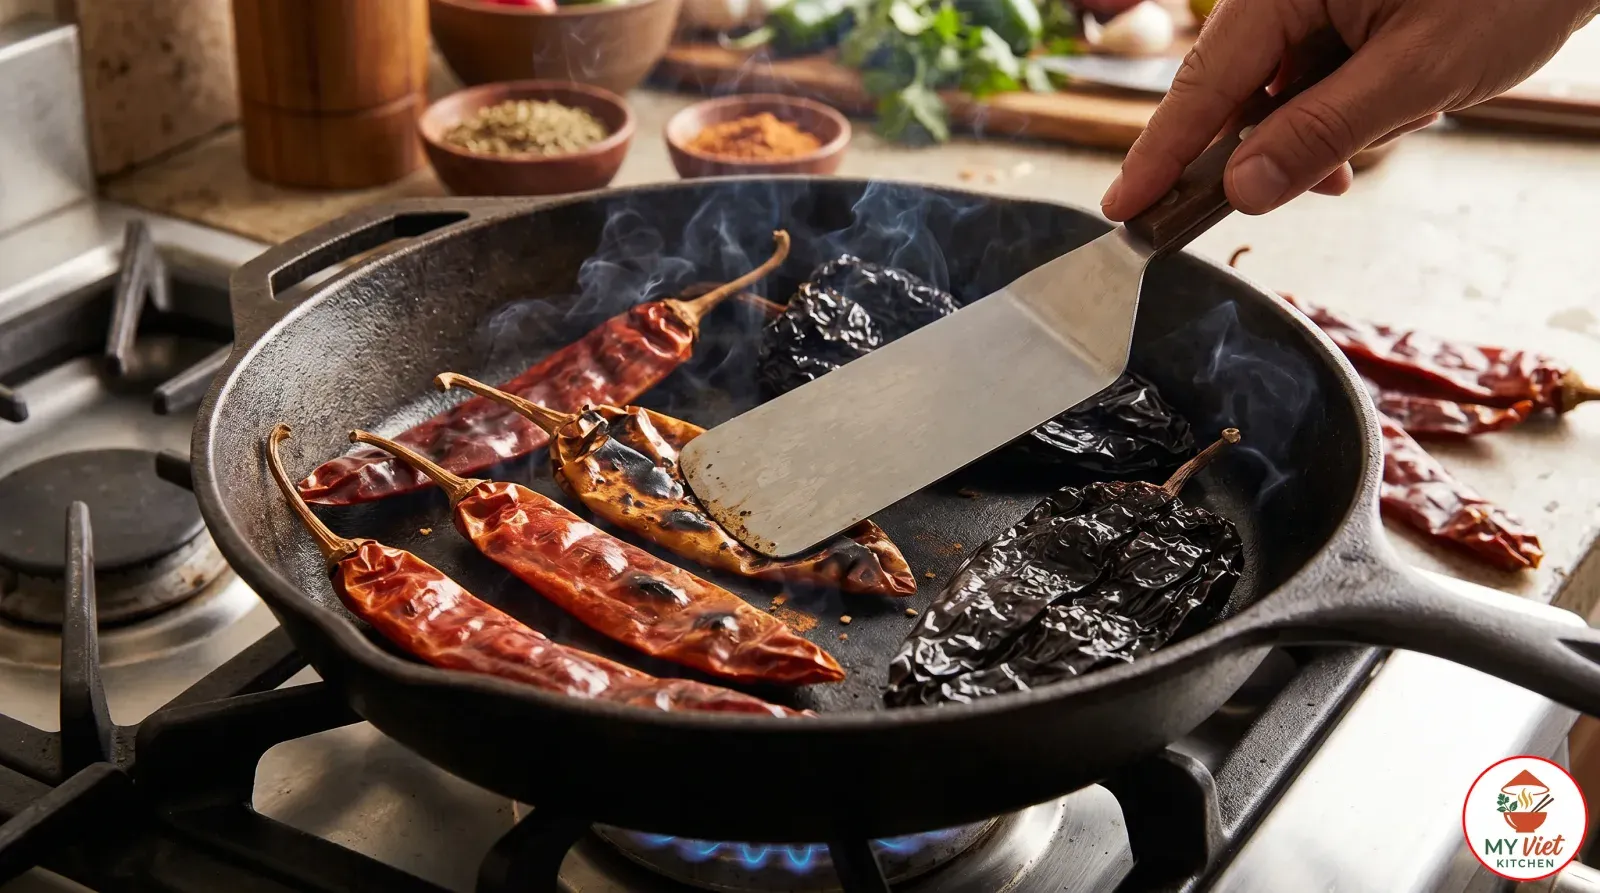
1 Heat a dry comal, cast-iron skillet, or heavy pan over medium heat. Open each dried guajillo and ancho chile flat and press it against the hot surface with a spatula. Toast for 15 to 20 seconds per side. The chile should become pliable, darken slightly, and release a warm, earthy aroma. Do not let the chiles blacken or blister. Burnt chiles turn irreversibly bitter and will ruin the entire sauce.
Transfer the toasted chiles to a heatproof bowl. Pour boiling water over them until fully submerged. Place a small plate on top to keep them under the surface. Soak for 20 minutes. During this time, the chiles rehydrate and soften completely. The soaking water will turn a deep red. Toasting before soaking is a step that many recipes skip, but it makes a significant difference. The dry heat triggers Maillard reactions on the chile surface, developing hundreds of new flavor compounds that dissolve into the sauce during blending. Raw, untoasted chiles produce a one-dimensional, flat-tasting sauce by comparison.
Step 2: Char the Vegetables
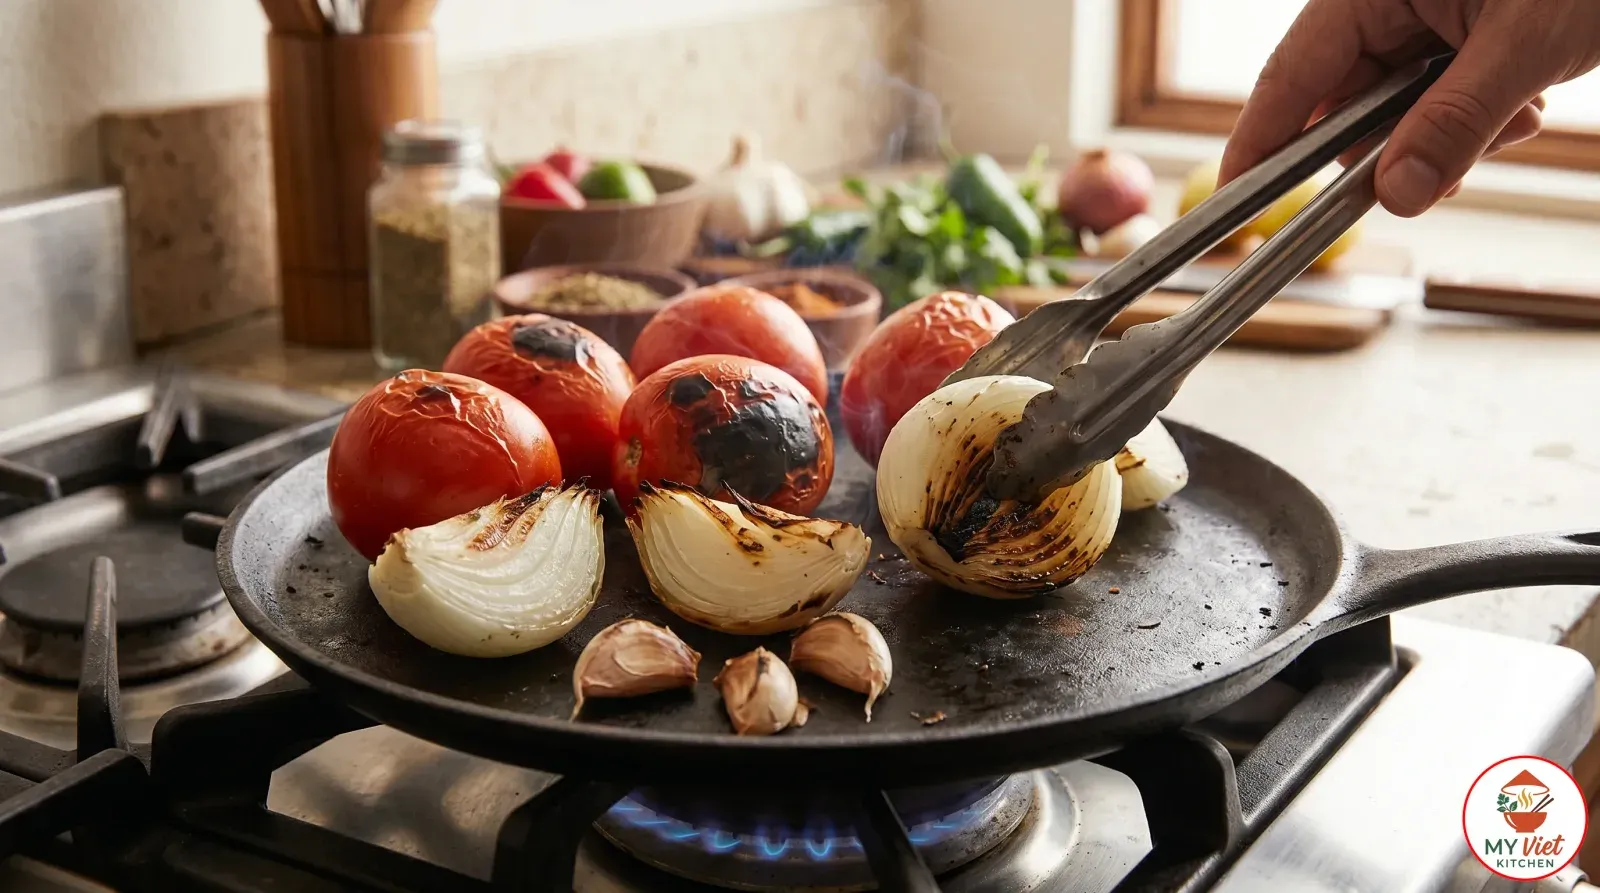
2 While the chiles soak, place the quartered white onion, whole tomatoes, and unpeeled garlic cloves directly on the dry comal or under a broiler set to high. Let each piece develop deep charring on all sides. Turn them with tongs every 2 to 3 minutes. The onion needs about 8 to 10 minutes total. Allow the tomatoes to soften and blister over roughly the same time. Garlic cloves char faster, requiring only about 5 minutes.
Charring the vegetables is a technique called “tatemar” in Mexican cooking. The high heat caramelizes the natural sugars in the onion and tomato, creating a smoky sweetness that balances the earthy chiles. The garlic becomes mellow and slightly nutty rather than sharp and raw. This roasting step is what gives traditional enchilada sauce its depth. Without it, the sauce tastes raw and acidic. Peel the garlic cloves once they are cool enough to handle. Everything else goes into the blender as-is, charred skin and all. Those blackened bits carry the smoky flavor.
Step 3: Blend the Enchilada Sauce
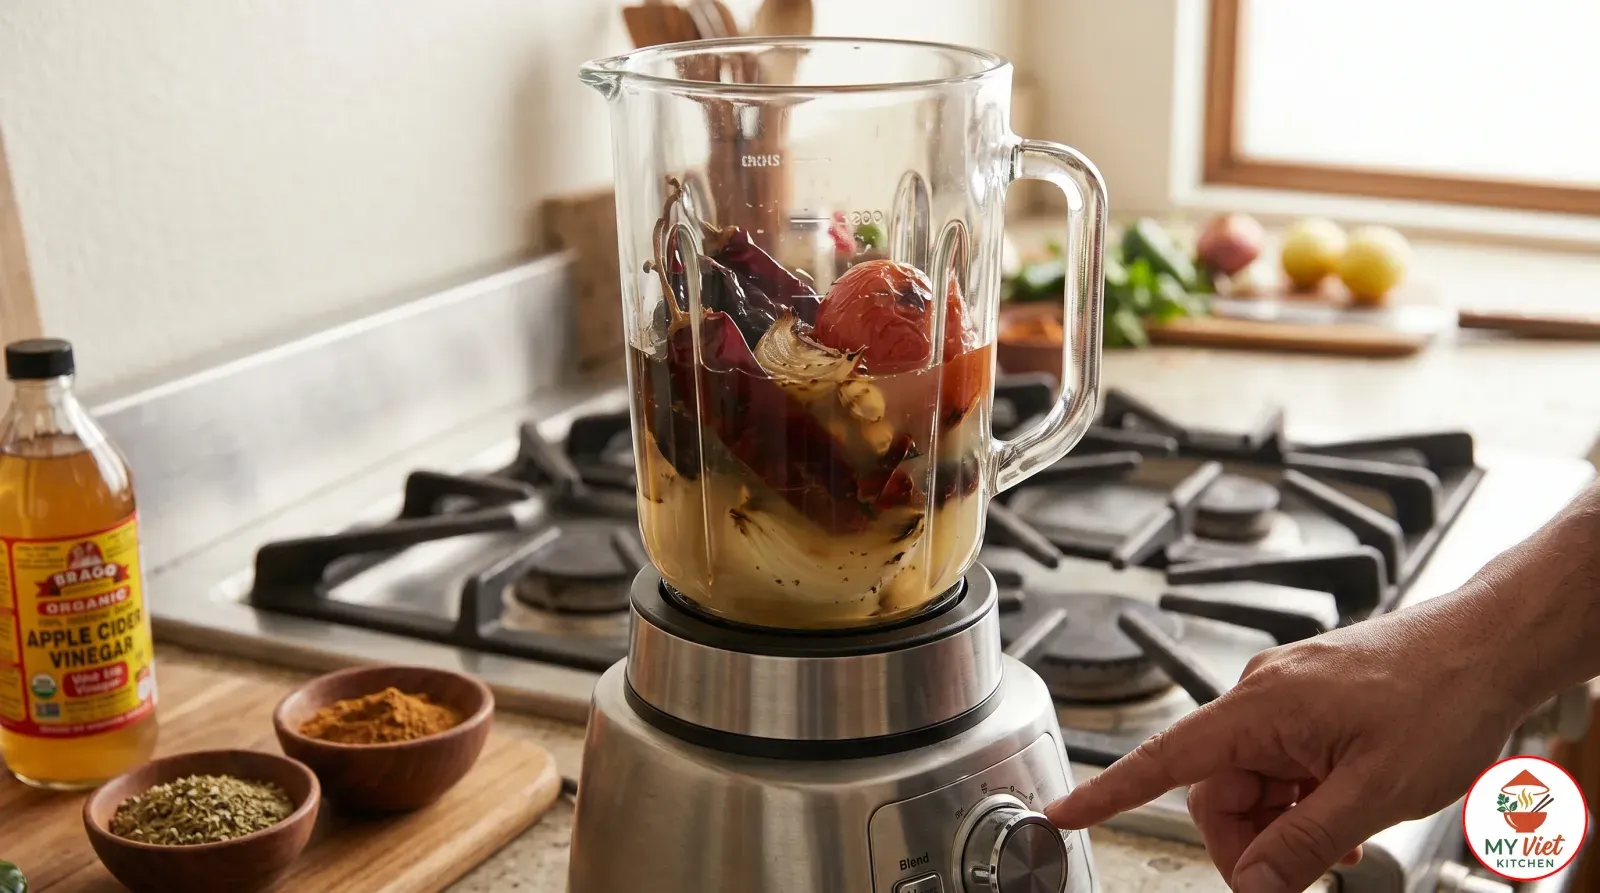
3 Drain the rehydrated chiles and place them in a blender. Add the charred tomatoes, charred onion quarters, peeled roasted garlic, chicken broth, ground cumin, dried oregano, apple cider vinegar, salt, and black pepper. Blend on high speed for a full 2 minutes until the sauce is completely smooth with no visible chunks or skin fragments remaining.
Set a fine-mesh strainer over a large bowl. Pour the blended sauce through the strainer, pressing firmly with the back of a spoon or spatula to extract every drop of liquid. Discard the fibrous pulp left in the strainer. This straining step is not optional. Dried chile skins contain tough cellulose fibers that never fully break down, even in a high-powered blender. Leaving them in creates a gritty, unpleasant texture. A properly strained enchilada sauce should be silky smooth and flow like heavy cream. You should have approximately 3 cups of sauce, which is exactly enough to coat the tortillas and cover the assembled dish.
Step 4: Cook the Sauce and Prepare the Tortillas
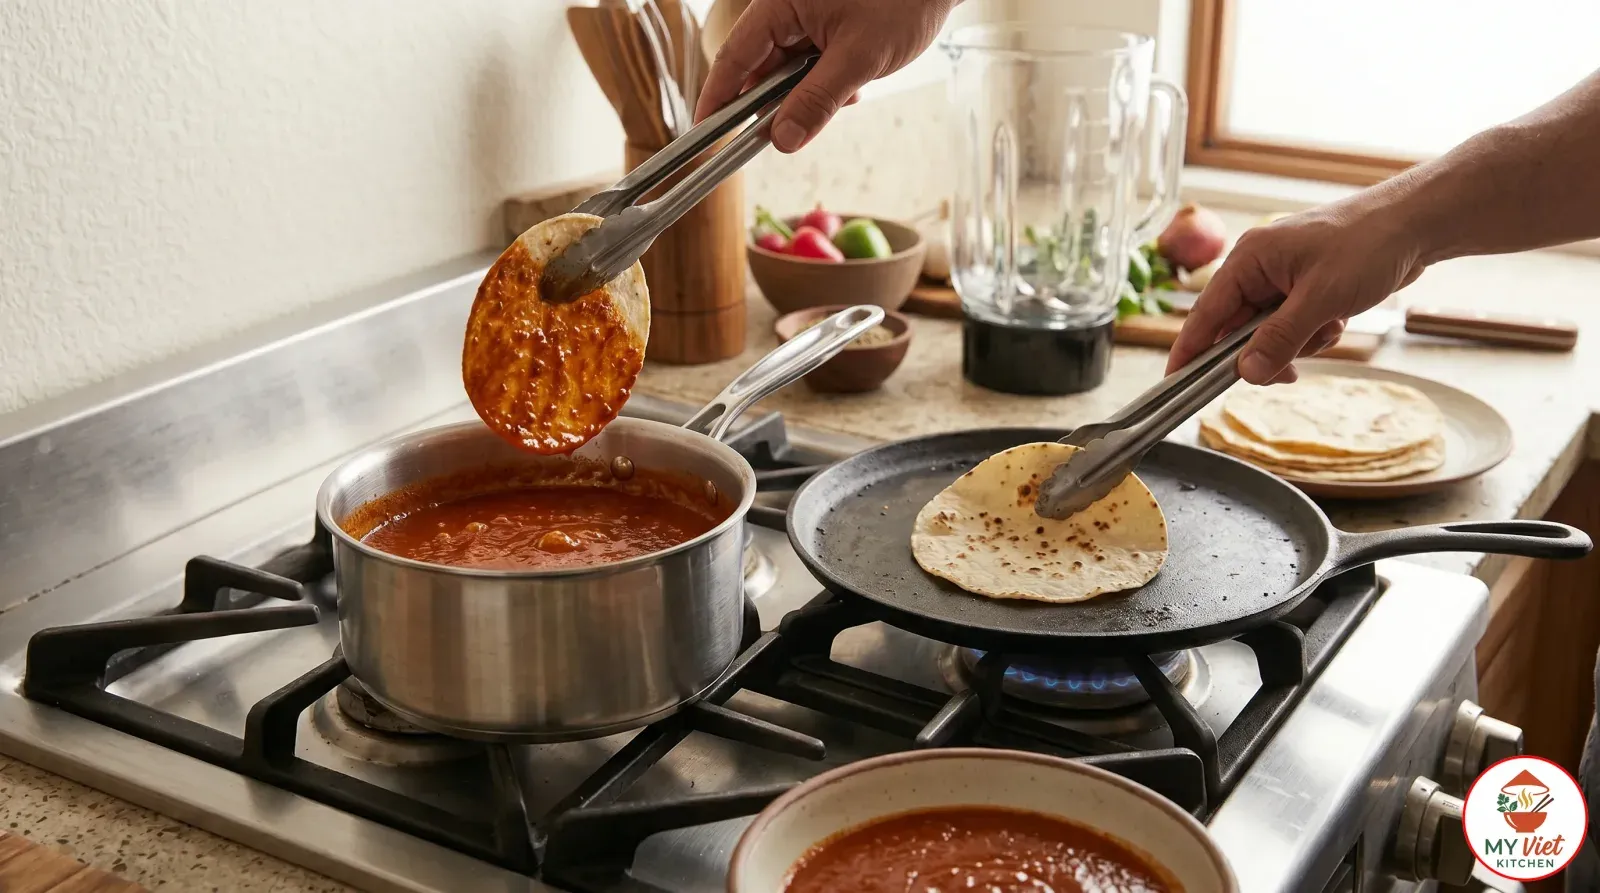
4 Heat one tablespoon of vegetable oil in a medium saucepan over medium heat. Once the oil shimmers, carefully pour in the strained sauce. It will sizzle and splatter on contact, so stand back. Bring the sauce to a gentle simmer and cook for 10 minutes, stirring occasionally. The sauce thickens slightly, darkens in color, and the raw edge of the chiles mellows into a rounded, deeper flavor. Taste and adjust the salt at this stage.
While the sauce simmers, warm the corn tortillas. Heat a dry skillet over medium-high heat. Place each tortilla on the skillet for about 15 seconds per side. The tortilla should become soft, pliable, and develop a few light brown spots. This step is critical. Cold tortillas crack when you try to roll them. Overheated tortillas become brittle. The goal is warm and flexible. Once each tortilla is warmed, use tongs to dip it briefly into the simmering sauce, coating both sides. The sauce coating flavors the tortilla and creates a protective layer that prevents drying during baking. Lay the sauce-coated tortilla on a clean surface and proceed to filling immediately.
Step 5: Fill, Roll, and Bake
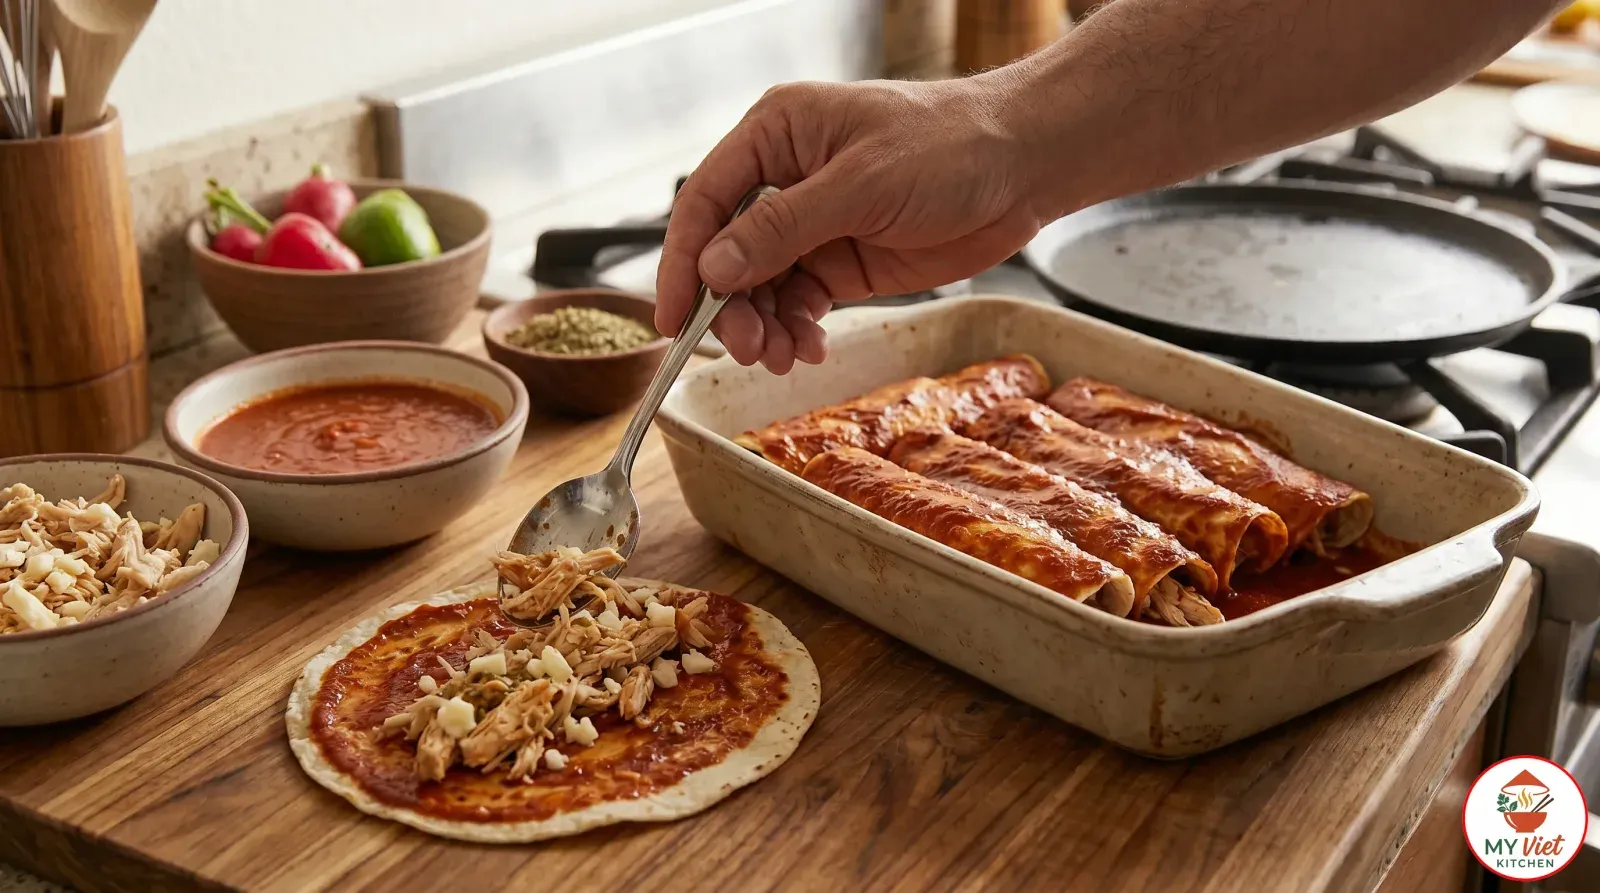
5 Preheat your oven to 375 degrees Fahrenheit (190 degrees Celsius). Spread a thin layer of enchilada sauce across the bottom of a 9x13-inch baking dish. This prevents the bottom tortillas from sticking and burning. Take a sauce-coated tortilla and place it flat on a work surface. Spoon approximately 3 tablespoons of shredded chicken down the center in a line. Add a small pinch of shredded cheese on top of the chicken. Roll the tortilla tightly around the filling and place it seam-side down in the prepared baking dish. Repeat with all 12 tortillas, nestling them snugly side by side.
Pour the remaining enchilada sauce evenly over the rolled tortillas, making sure every surface is coated. Scatter the remaining shredded Oaxaca cheese generously across the top. Place the dish in the preheated oven and bake for 15 to 20 minutes. The cheese should melt completely and turn golden in spots. The sauce should bubble gently around the edges. Remove from the oven and let the enchiladas rest for 5 minutes before serving. Drizzle Mexican crema over the top in thin lines. Garnish with chopped fresh cilantro, diced white onion, sliced radishes, and crumbled queso fresco. Serve immediately while the cheese is still molten and stretchy.
Expert Tips for Perfect Enchiladas
Fry the Tortillas Lightly for Extra Structure
Many traditional Mexican cooks briefly fry each corn tortilla in a thin layer of oil for 5 to 10 seconds per side before dipping it in sauce. This step creates a subtle barrier on the tortilla surface that prevents excessive sauce absorption. The result is enchiladas that hold their shape better and maintain a slight chew rather than becoming completely soft. Use just enough oil to coat the bottom of a skillet. The tortilla should not be crispy. It should be barely golden and still flexible. This technique is especially useful when you need to assemble the enchiladas ahead of time and bake them later.
Use the Right Amount of Filling
Overstuffing is the most common enchilada mistake. A corn tortilla is smaller and more delicate than a flour tortilla. It cannot hold the same volume of filling. Use approximately 3 tablespoons of filling per tortilla. The rolled enchilada should be snug but not bursting. If the seam does not stay closed, you have too much filling inside. A tightly rolled enchilada with moderate filling holds together during baking and is easier to eat. The sauce and cheese on top provide additional flavor, so the filling does not need to do all the work.
Make the Sauce Ahead for Deeper Flavor
Enchilada sauce improves with time. The chile flavors meld and mellow as the sauce rests. Making the sauce a day or even two days before assembling the enchiladas produces a noticeably more rounded, complex result. Store the finished sauce in a jar in the refrigerator. It keeps well for up to a week. Reheat gently before using. This also makes the assembly process faster on the day you cook, since the most time-consuming step is already complete.
Enchilada Styles Across Mexico
Mexico’s enchilada traditions vary dramatically from state to state. The red chile sauce version in this recipe is the most widely recognized, but it represents only one branch of a vast family tree. The following comparison highlights the remarkable diversity of enchilada styles found across the country.
| Style | Region | Key Characteristics |
|---|---|---|
| Enchiladas Rojas | Central Mexico | Red dried chile sauce (guajillo, ancho), chicken or cheese filling, baked with melted cheese |
| Enchiladas Verdes | Central Mexico | Tomatillo and green chile sauce, chicken filling, topped with crema and queso fresco |
| Enchiladas Suizas | Mexico City | Tomatillo-cream sauce, chicken filling, gratineed with Swiss-style cheese |
| Enchiladas Potosinas | San Luis Potosi | Chile ancho mixed into the tortilla dough, filled with cheese, folded and fried |
| Enchiladas Mineras | Guanajuato | Fried tortillas in guajillo sauce, served with potatoes, carrots, and crumbled cheese |
| Enchiladas de Mole | Oaxaca / Puebla | Mole negro or mole poblano sauce, chicken filling, sesame seed garnish |
Serving Suggestions
Enchiladas are a satisfying main course on their own, but the right accompaniments transform them into a complete Mexican meal. Traditional sides provide contrast in flavor, texture, and temperature against the warm, saucy enchiladas.
Classic Accompaniments:
- Mexican rice (arroz rojo): Tomato-flavored rice is the classic side for enchiladas throughout Mexico. The slightly dry, fluffy texture of well-made Mexican rice absorbs the enchilada sauce beautifully and adds a mild sweetness that complements the chile flavors.
- Refried beans (frijoles refritos): Creamy pinto or black refried beans provide a rich, earthy counterpoint. Spread them alongside the enchiladas or serve in a small bowl. A sprinkling of crumbled cotija cheese on top adds a salty finish.
- Simple green salad: A crisp salad of shredded lettuce, sliced radishes, and diced cucumber dressed with lime juice and salt provides a cool, refreshing contrast to the warm, rich enchiladas. The acidity of the lime brightens the entire plate.
- Guacamole: Fresh guacamole adds a creamy, cool element that pairs naturally with the chile sauce. The fat from the avocado tempers the heat, while the lime and cilantro echo the garnishes on the enchiladas themselves.
Beverage Pairings:
- Agua de Jamaica (hibiscus water): This tart, floral, deep-red Mexican drink is the classic non-alcoholic pairing with enchiladas. The acidity cuts through the richness of the cheese and sauce, while the slight sweetness refreshes the palate between bites.
- Mexican lager: A cold Modelo Especial, Pacifico, or Bohemia provides a clean, crisp counterpoint. The light carbonation and mild bitterness cleanse the palate effectively. Squeeze a lime wedge into the bottle for the full experience.
- Tempranillo or Garnacha wine: A medium-bodied Spanish red with ripe fruit and soft tannins complements the dried chile flavors without overwhelming them. These grapes share a historical connection with Mexican cuisine through the Spanish colonial period.
- Horchata: This creamy rice and cinnamon drink provides a cool, sweet contrast that soothes the palate after the gentle heat of the chile sauce. It is especially welcome alongside spicier enchilada variations.
Storage and Reheating
Refrigerator: Store leftover enchiladas in their baking dish covered tightly with aluminum foil, or transfer individual portions to airtight containers. They keep well for 3 to 4 days in the refrigerator. As they sit, the tortillas absorb more sauce, which actually deepens the flavor. Over time, the texture softens further, so reheated enchiladas have a more unified, melded character than freshly baked ones.
Freezer: Enchiladas freeze well for up to 2 months. For best results, assemble the enchiladas in a freezer-safe baking dish, cover with sauce and cheese, then wrap the entire dish tightly in plastic wrap followed by aluminum foil. Do not bake before freezing. When ready to cook, thaw overnight in the refrigerator and bake as directed, adding 5 to 10 extra minutes to account for the cold start. Alternatively, freeze individual baked portions in airtight containers for quick single-serving meals.
Reheating: The oven is the best method for reheating enchiladas. Preheat to 350 degrees Fahrenheit, cover the dish with foil to prevent the cheese from burning, and heat for 15 to 20 minutes until warmed through. Remove the foil for the last 3 minutes to re-crisp the cheese on top. The microwave works for individual portions in a pinch. Cover loosely and heat in 30-second intervals. Avoid reheating at high power, as it causes the tortillas to become rubbery and the cheese to separate.
Common Mistakes to Avoid
1. Using Canned Enchilada Sauce
Canned enchilada sauce contains thickeners, preservatives, and artificial flavors that produce a flat, tinny taste. Homemade sauce from real dried chiles takes only 30 minutes and delivers a flavor that is incomparably richer and more complex. Dried chiles are inexpensive and widely available at Latin grocery stores. Once you make the sauce from scratch, you will never go back to canned. In fact, the difference is as stark as fresh-squeezed orange juice versus powdered drink mix.
2. Using Flour Tortillas Instead of Corn
Flour tortillas are designed for burritos and quesadillas. They lack the earthy, slightly sweet corn flavor that is essential to a proper enchilada. Corn tortillas also have a more delicate texture that absorbs the chile sauce while maintaining structure. Flour tortillas become gummy and doughy when baked in sauce. Always use corn tortillas. If they crack when rolling, warm them more thoroughly on the skillet or dip them in sauce longer.
3. Skipping the Straining Step
Dried chile skins contain tough fibers that even powerful blenders cannot fully pulverize. Pouring the blended sauce directly over the enchiladas without straining results in a gritty, rough-textured coating. Always pass the sauce through a fine-mesh strainer. Press firmly to extract all the flavorful liquid while trapping the fibrous solids. This extra minute of effort produces a sauce with the velvety, restaurant-quality texture that makes enchiladas truly luxurious.
4. Overbaking the Enchiladas
Enchiladas need only 15 to 20 minutes in the oven. Your filling is already cooked. The sauce is already simmered. Baking serves only to melt the cheese and unify the dish. Leaving enchiladas in the oven for 30 or 40 minutes causes the tortillas to disintegrate into a mushy, indistinct mass. The sauce dries out and the cheese overbrowns. Watch the oven closely. When the cheese is fully melted and the edges bubble, remove the dish immediately.
Frequently Asked Questions
What is the difference between enchiladas and burritos?
Enchiladas use corn tortillas dipped in chile sauce, filled, rolled, and baked. Burritos use large flour tortillas wrapped around the filling without sauce, served as a handheld item. Enchiladas are always eaten with a fork and knife. The chile sauce coating is what defines an enchilada. Burritos are a much newer invention, originating in northern Mexico and the United States border region. The two dishes share some filling ideas but differ fundamentally in technique, texture, and eating experience.
Can I make enchiladas ahead of time?
Yes, enchiladas are excellent for meal prep. Assemble the filled and rolled enchiladas in the baking dish, cover with sauce and cheese, then wrap tightly and refrigerate for up to 24 hours. Add 5 to 10 extra minutes of baking time since the dish starts cold. You can also freeze the assembled, unbaked enchiladas for up to 2 months. Thaw overnight before baking. The tortillas actually absorb more sauce as they sit, which many cooks consider an improvement.
What can I use instead of guajillo chiles for enchilada sauce?
New Mexico dried red chiles are the closest substitute for guajillos. They share a similar mild heat and fruity, tangy flavor. California dried chiles work too, though they are milder. As a last resort, combine 3 tablespoons of ancho chile powder with 1 tablespoon of regular chili powder. Avoid generic “chili powder” blends that already contain cumin, garlic, and other seasonings. These pre-mixed blends throw off the carefully balanced flavor of the sauce.
Why do my enchiladas get soggy?
Soggy enchiladas come from three issues. First, using cold tortillas that crack and absorb too much sauce. Always warm tortillas on a hot skillet before dipping. Second, using too much sauce. A thin layer on the bottom and a moderate pour on top is sufficient. Third, letting the assembled dish sit too long before baking. Assemble and bake promptly. Lightly frying the tortillas in oil before dipping also creates a moisture barrier that keeps them intact.
What are the best cheeses for enchiladas?
Oaxaca cheese is the traditional melting cheese for enchiladas. It has a mild, buttery flavor and stretches beautifully like mozzarella. Chihuahua and asadero cheeses are also excellent choices. For finishing, crumble queso fresco or cotija on top after baking for a salty contrast. If Mexican cheeses are unavailable, Monterey Jack is the best American substitute for melting, and feta can stand in for queso fresco as a crumbled garnish.
Are enchiladas gluten-free?
Traditional enchiladas made with 100 percent corn tortillas are naturally gluten-free. Corn tortillas contain only masa harina, water, and salt. However, check store-bought tortilla labels, as some brands add wheat flour. The homemade chile sauce in this recipe is also gluten-free. Be cautious with commercial canned enchilada sauces, as many use wheat flour as a thickener. When in doubt, making everything from scratch gives you full control over the ingredients.
Variations and Adaptations
Enchiladas Verdes (Green Sauce):
Replace the dried red chiles entirely with a sauce made from roasted tomatillos, fresh serrano or jalapeno peppers, garlic, and cilantro. Boil or roast 1 pound of tomatillos until soft, then blend with 2 serranos, a handful of cilantro, and salt. The resulting green sauce is bright, tangy, and herbaceous. It pairs exceptionally well with chicken or cheese fillings. Top with crema and queso fresco rather than melted cheese for the most authentic presentation.
Beef Enchiladas:
Substitute the shredded chicken with slow-cooked, shredded beef chuck. Season 2 pounds of beef chuck with salt, cumin, and garlic powder. Braise in beef broth at 325 degrees Fahrenheit for 3 hours until fork-tender. Shred and use as the filling. The richer, more robust beef flavor stands up beautifully to the guajillo-ancho sauce. Add a tablespoon of chipotle in adobo to the sauce for a smoky heat that complements the beef.
Cheese Enchiladas (Vegetarian):
Fill the tortillas with a mixture of shredded Oaxaca cheese, queso fresco, and a small amount of diced white onion. For extra depth, add sauteed spinach or roasted poblano strips to the cheese filling. Use vegetable broth instead of chicken broth in the sauce. These simpler enchiladas are traditional in many parts of Mexico, where cheese-only fillings are considered the purest expression of the dish. The chile sauce truly becomes the star.
Enchiladas de Mole:
Replace the red chile sauce with mole poblano or mole negro for a richer, more complex experience. Mole sauces incorporate chocolate, nuts, seeds, dried fruits, and sometimes dozens of ingredients. Prepare the mole separately, thin it with broth to a pourable consistency, and use it exactly as you would the red sauce in this recipe. Finish with toasted sesame seeds. Mole enchiladas are a celebratory dish served at weddings, holidays, and special occasions across Oaxaca and Puebla.
The Cultural Significance of Enchiladas
Enchiladas carry the weight of Mexican culinary history in every bite. Archaeological evidence suggests that the practice of rolling tortillas around fillings and bathing them in chile sauce dates back to the Aztec empire. The Codex Florentino, a 16th-century ethnographic study of Mesoamerican culture, documents markets where women sold rolled tortillas with chile sauce to passing customers. This is not a dish that was invented. It evolved organically from the intersection of corn agriculture and chile cultivation, the two pillars of Mesoamerican civilization. To eat an enchilada is to participate in a food tradition that spans over five hundred years.
Enchiladas in Modern Mexico
In modern Mexico, enchiladas occupy a unique cultural space. They appear everywhere from street food stalls to high-end restaurants, from weeknight family dinners to elaborate celebration feasts. The dish is democratic in the truest sense. A grandmother making enchiladas with homemade tortillas and chiles from her garden commands the same respect as a chef plating an elegant version with mole negro and edible flowers. According to Taste Atlas, enchiladas consistently rank among the most beloved Mexican dishes worldwide. What keeps this dish alive across centuries is its adaptability. The fundamental technique of tortilla, sauce, and filling remains constant, while the specific ingredients change with the region, the season, and the cook. Every family has its own version, and every version tells a story about where it comes from.
Conclusion
Making enchiladas from scratch is more accessible than most people expect. Dried chiles need toasting and soaking. Vegetables need charring. And the sauce needs blending and straining. But none of these steps are difficult. They simply require attention and a willingness to let the ingredients speak for themselves. The reward is a dish with the kind of deep, layered flavor that no shortcut can replicate. Once you experience the difference between homemade enchilada sauce and the canned alternative, the extra effort becomes a non-negotiable part of your cooking.
Ready to explore more authentic Mexican recipes? Browse our full collection of Latin American dishes for classics like tacos al pastor, tamales, and pozole. If you try this enchilada recipe, leave a rating and share your experience in the comments below.