My Viet KitchenMy Viet Kitchen
HomeVietAsianEuropeanAfricanAmericanAustralianAboutContact
More
FAQPrivacy Policy
HomeVietAsianEuropeanAfricanAmericanAustralianAboutContactFAQPrivacy PolicySearch

Follow us

Home › Australian Dishes › Homemade Tim Tam Recipe: Copycat Malted Chocolate Biscuits

My Viet Kitchenmyvietkitchen.com/homemade-tim-tam-recipe/

Homemade Tim Tam Recipe: Copycat Malted Chocolate Biscuits

Australian DishesNovember 1, 202610 min read

Share
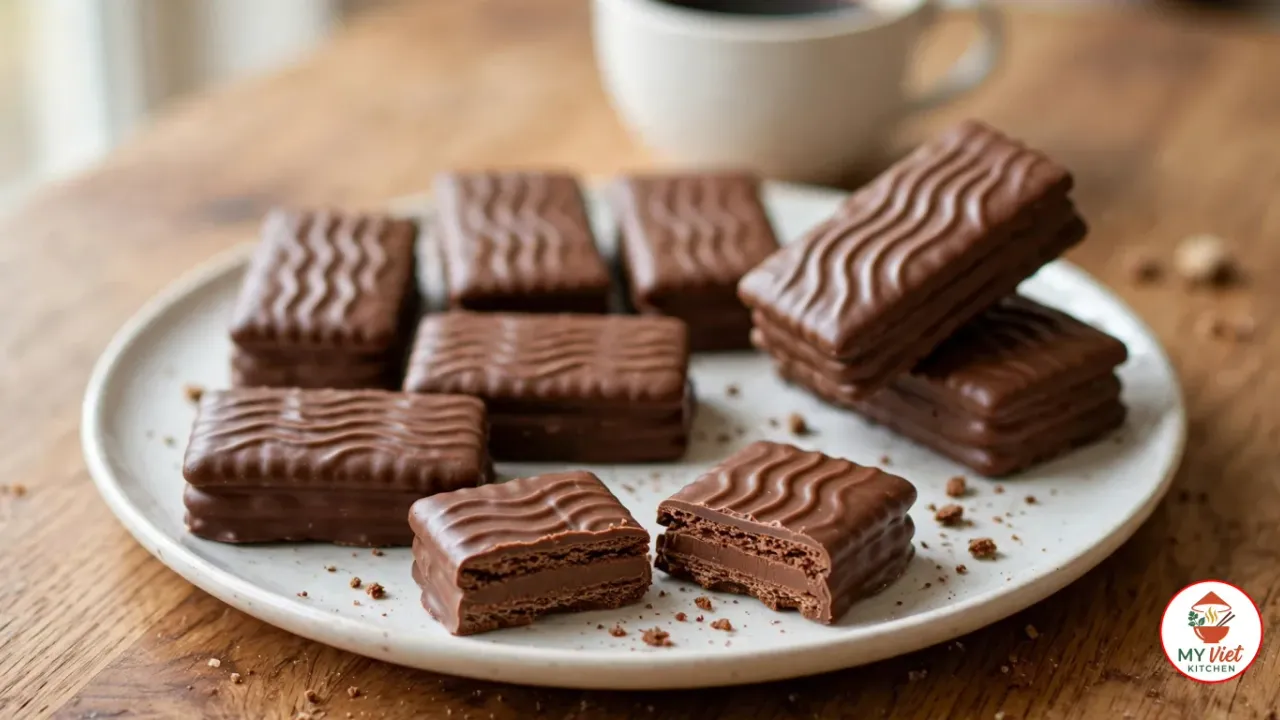
Homemade Tim Tam-style biscuits on a speckled white plate on a wooden table, rectangular sandwich biscuits coated in glossy milk chocolate with wavy ridges on top, one broken in half at the front to show two thin cocoa biscuits around a chocolate cream filling, with a cup of coffee behind

Prep 1 hour 10 minutesCook 12 minutesTotal 3 hours 27 minutesYield 20 biscuits

Ingredients

  • 1 cup (125 g) all-purpose flour
  • 1/3 cup (30 g) unsweetened cocoa powder
  • 1/2 cup (60 g) powdered sugar
  • 2 tablespoons (15 g) malted milk powder
  • 1/4 teaspoon fine salt
  • 1/2 cup (113 g) cold unsalted butter, cubed
  • 1 large egg yolk
  • 1 tablespoon (15 ml) cold water
  • 1/4 cup (55 g) unsalted butter, softened
  • 3/4 cup (90 g) powdered sugar
  • 1 tablespoon unsweetened cocoa powder
  • 1 tablespoon malted milk powder
  • 10 ounces (285 g) milk chocolate, chopped
  • 1 tablespoon (14 g) coconut oil

Method

  1. Make the Cocoa Biscuit Dough. Whisk the flour, cocoa powder, powdered sugar, malted milk powder and salt in a large bowl. Add the cold butter and rub it into the dry mix with your fingertips until it looks like coarse sand, with no butter lumps bigger than a lentil. Whisk the yolk and water together, tip them into the crumbs and toss with a fork until small clumps form, then press everything into a ball. Flatten it into a disc about 2 cm (3/4 inch) thick, wrap it and refrigerate for 30 minutes.
  2. Roll and Cut the Biscuits. Roll out the cold dough between two sheets of baking paper until it is 3 mm (1/8 inch) thick. Peel off the top sheet and cut the dough into 7 x 3 cm (2 3/4 x 1 1/4 inch) rectangles with a ruler and a sharp knife. Lift them onto two baking sheets lined with baking paper, 1 cm (1/2 inch) apart. Press the scraps together, re-roll and cut until all the dough is used; you should have about 40 rectangles, and you need an even number. Prick each rectangle twice with a fork. Chill the trays for 15 minutes while the oven heats to 350°F (180°C).
  3. Bake the Biscuits. Bake the trays on the middle and upper racks for 10 to 12 minutes, swapping them halfway, until the biscuits feel firm and dry on top when you press one lightly. Cocoa dough hides browning, so judge by touch rather than colour. Leave them on the trays for 5 minutes, then move them to a wire rack and let them cool completely, about 25 minutes more.
  4. Make the Malted Chocolate Filling. Beat the softened butter in a medium bowl with a wooden spoon or hand mixer until creamy. Sift in the powdered sugar, cocoa powder and malted milk powder, then beat for about 2 minutes, until the filling is smooth, fluffy and evenly brown. It should spread like soft butter.
  5. Sandwich the Biscuits. Pair the cooled biscuits by size. Turn one of each pair upside down and spread a heaped teaspoon of filling over its flat underside, stopping about 2 mm from the edges. Press the underside of its partner on top and set the sandwiches on a tray lined with baking paper. Chill the sandwiches for 20 minutes to firm the filling.
  6. Coat in Chocolate. Melt the milk chocolate with the coconut oil in a heatproof bowl set over a pan of barely simmering water, stirring until smooth, then take the bowl off the pan. Drop one cold sandwich into the chocolate, turn it over with two forks and lift it out on the forks. Tap the forks on the rim so the extra chocolate runs back into the bowl, then slide the biscuit onto a tray lined with baking paper. While the coating is still wet, touch the top lightly with the tines of a fork and lift away to leave ridges. Coat the rest the same way, then refrigerate for 30 minutes, until the chocolate has set.

Nutrition 185 calories per serving, protein 2g, fat 11g, carbohydrates 20g, fiber 1g, sugar 14g, sodium 40mg

In this recipe

  1. Where Did the Tim Tam Come From?
  2. What Gives a Tim Tam Its Malty Taste and Snap?
  3. How Thin Should You Roll the Biscuits?
  4. Ingredients for Homemade Tim Tam
  5. Step-by-Step Instructions
  6. Frequently Asked Questions
  7. Sources

A homemade Tim Tam is a copy of Arnott’s chocolate biscuit made in your own kitchen. Wikipedia describes the original as two malted biscuits separated by a light hard chocolate cream filling and coated in a thin layer of textured chocolate (Wikipedia). This is a copycat recipe, not Arnott’s own. You bake 40 thin cocoa-malt rectangles, sandwich them in pairs with malted chocolate buttercream and dip each one in milk chocolate.

Prep Time: 1 hour 10 minutes | Cook Time: 12 minutes | Total Time: 3 hours 27 minutes, including 2 hours 5 minutes of chilling, cooling and setting | Servings: 20 biscuits

Difficulty: Medium | Calories: ~185 per serving

Where Did the Tim Tam Come From?

Arnott’s says it created the Tim Tam in 1964 (Arnott’s). According to Wikipedia, Ian Norris came up with it after a world trip in 1958 looking for new product ideas. In Britain he found the Penguin biscuit and decided to try to “make a better one”. The biscuit went on sale on 10 September 1964. Ross Arnott named it after Tim Tam, the horse that won the 1958 Kentucky Derby, a race he had attended (Wikipedia).

This recipe is not Arnott’s formula, so like every home version it works from that description. Copycat recipes agree on the shape of the guess. A Beautiful Plate reprints one from Sarah’s cookbook The Sugar Hit! and sums the result up as two chocolate malt sandwich cookies with a malted chocolate filling, enrobed in milk chocolate (A Beautiful Plate).

What Gives a Tim Tam Its Malty Taste and Snap?

Malt is the flavour to get right in a homemade Tim Tam. This recipe puts malted milk powder in both layers. Claire Saffitz’s ingredient list for the video above does the same in her biscuit, with 2 tablespoons of malted milk powder to 1½ cups of flour (Claire Saffitz x Dessert Person). The Sugar Hit! filling beats 1 tablespoon of malted drink powder, such as Ovaltine, into butter, powdered sugar and cocoa (A Beautiful Plate). SugarHero’s adaptation names Ovaltine or Horlicks (SugarHero). Either works here.

The filling is a butter cream, as in The Sugar Hit! version, rather than a ganache of chocolate and cream. Butter sets firm in the fridge, which gets you closer to the “light hard” cream that Wikipedia describes in the original (Wikipedia), and it keeps the sandwiches square while you dip them. Spread it thin. A heaped teaspoon on a 7 x 3 cm biscuit gives a layer about as thick as the biscuit itself.

For the coating, use a bar of milk chocolate. A Beautiful Plate tells you to buy good-quality milk chocolate for dipping and not to substitute milk chocolate chips (A Beautiful Plate). Claire Saffitz’s list names dark chocolate for her coating, so dark is fine if you prefer it. The tablespoon of coconut oil loosens the melted chocolate so a thin layer clings and the rest drips back into the bowl.

The ridges come last. SugarHero suggests pressing the tines of a fork or dipping tool lightly onto the top while the chocolate is still wet to make a wavy pattern (SugarHero). That stands in for the textured coating Wikipedia describes. Untempered chocolate with coconut oil softens in a warm room, so store the finished biscuits in the fridge in hot weather.

How Thin Should You Roll the Biscuits?

Aim for 3 mm (1/8 inch). The factory goes much thinner: on Arnott’s line, Wikipedia says, the dough is cut to 1 mm thick and 11 holes are punched in each biscuit before baking (Wikipedia). A 1 mm rectangle of buttery dough is too fragile to lift by hand, while 3 mm still bakes crisp. Two fork pricks per biscuit are a small nod to those holes.

The Sugar Hit! method works the other way. It rolls a very soft creamed dough about 1/4 inch thick, freezes the sheet for 30 minutes, then cuts 28 rectangles of 1¼ x 2½ inches and bakes them for 10 minutes at 350°F (A Beautiful Plate). That gives biscuits about twice as thick as these. The chapter list for Claire Saffitz’s video includes a “Use pasta roller” step after the dough, one way to get an even sheet (Claire Saffitz x Dessert Person).

Here the dough is rubbed together like shortbread, so it is firm after its 30 minutes in the fridge and rolls cleanly between sheets of baking paper. Check the thickness at the edges as well as the middle; a sheet that tapers bakes unevenly. The 375 g of dough covers about 40 rectangles once you re-roll the scraps. If you end up with an odd one, bake it anyway and eat it as the cook’s test.

Ingredients for Homemade Tim Tam

For the Biscuits:

  • 1 cup (125 g) all-purpose flour
  • 1/3 cup (30 g) unsweetened cocoa powder
  • 1/2 cup (60 g) powdered sugar
  • 2 tablespoons (15 g) malted milk powder
  • 1/4 teaspoon fine salt
  • 1/2 cup (113 g) cold unsalted butter, cubed
  • 1 large egg yolk
  • 1 tablespoon (15 ml) cold water

For the Filling:

  • 1/4 cup (55 g) unsalted butter, softened
  • 3/4 cup (90 g) powdered sugar
  • 1 tablespoon unsweetened cocoa powder
  • 1 tablespoon malted milk powder

For the Coating:

  • 10 ounces (285 g) milk chocolate, chopped
  • 1 tablespoon (14 g) coconut oil

Step-by-Step Instructions


Step 1: Make the Cocoa Biscuit Dough

1Whisk the flour, cocoa powder, powdered sugar, malted milk powder and salt in a large bowl. Add the cold butter and rub it into the dry mix with your fingertips until it looks like coarse sand, with no butter lumps bigger than a lentil. Whisk the yolk and water together, tip them into the crumbs and toss with a fork until small clumps form, then press everything into a ball. Flatten it into a disc about 2 cm (3/4 inch) thick, wrap it and refrigerate for 30 minutes.
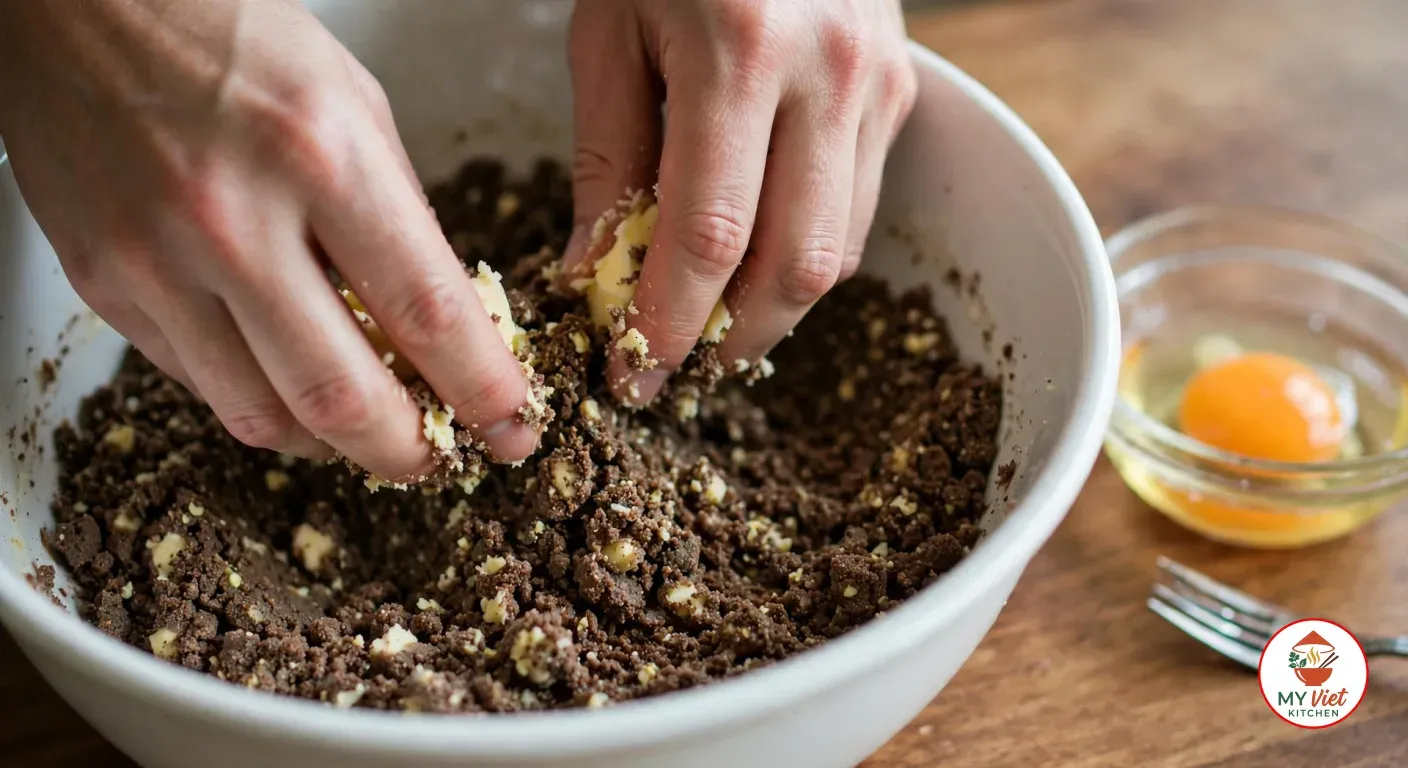
Two hands rubbing cubes of cold butter into a dark cocoa and flour mix in a white ceramic bowl until it looks like coarse sand, beside a small glass bowl holding an egg yolk and a fork on a wooden bench
Step 1- Make the Cocoa Biscuit Dough

Step 2: Roll and Cut the Biscuits

2Roll out the cold dough between two sheets of baking paper until it is 3 mm (1/8 inch) thick. Peel off the top sheet and cut the dough into 7 x 3 cm (2 3/4 x 1 1/4 inch) rectangles with a ruler and a sharp knife. Lift them onto two baking sheets lined with baking paper, 1 cm (1/2 inch) apart. Press the scraps together, re-roll and cut until all the dough is used; you should have about 40 rectangles, and you need an even number. Prick each rectangle twice with a fork. Chill the trays for 15 minutes while the oven heats to 350°F (180°C).
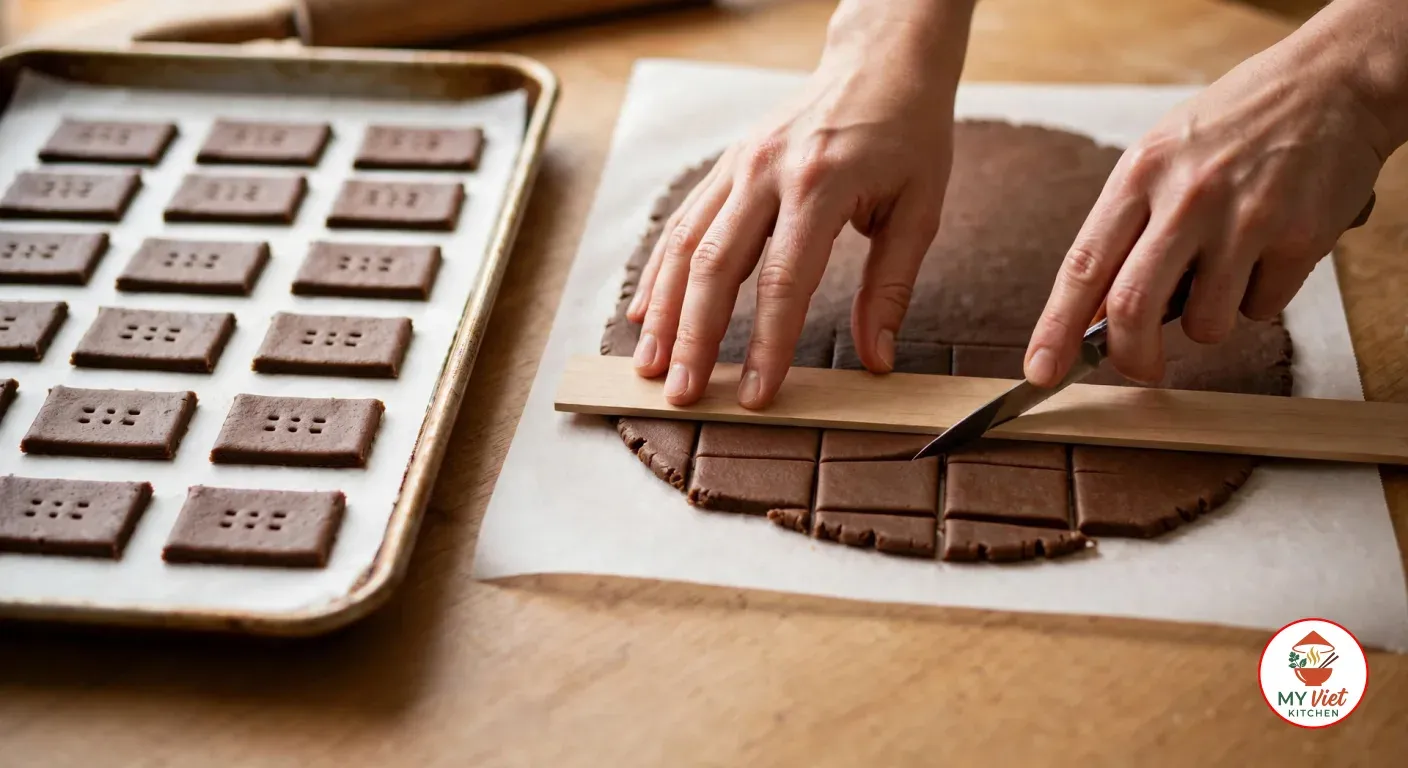
Hands cutting a thin round sheet of cocoa dough on baking paper into small rectangles with a knife along a wooden ruler, beside a lined baking sheet of raw rectangles pricked with fork holes
Step 2- Roll and Cut the Biscuits

Step 3: Bake the Biscuits

3Bake the trays on the middle and upper racks for 10 to 12 minutes, swapping them halfway, until the biscuits feel firm and dry on top when you press one lightly. Cocoa dough hides browning, so judge by touch rather than colour. Leave them on the trays for 5 minutes, then move them to a wire rack and let them cool completely, about 25 minutes more.
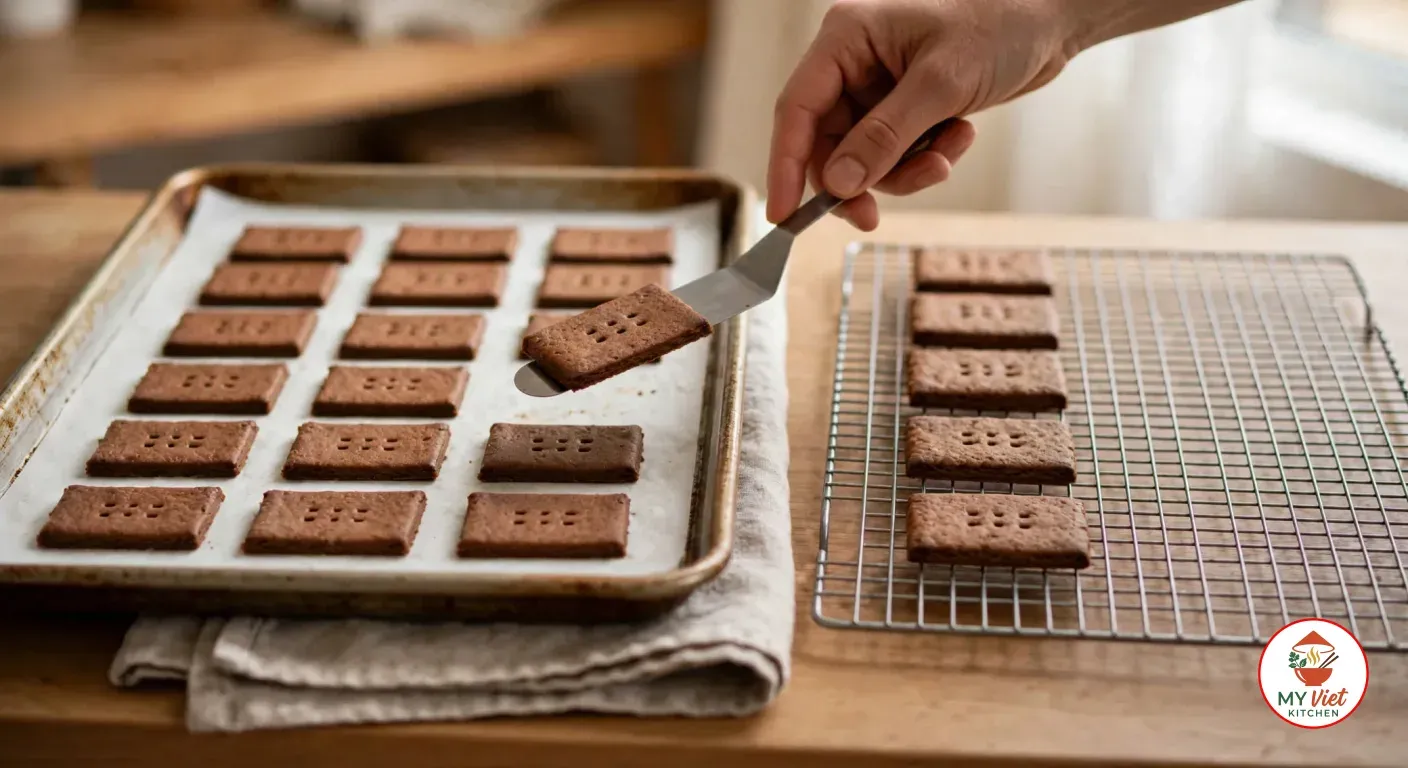
A hand lifting a baked cocoa biscuit rectangle with an offset spatula from a paper-lined baking sheet onto a wire rack where five more are cooling
Step 3- Bake the Biscuits

Step 4: Make the Malted Chocolate Filling

4Beat the softened butter in a medium bowl with a wooden spoon or hand mixer until creamy. Sift in the powdered sugar, cocoa powder and malted milk powder, then beat for about 2 minutes, until the filling is smooth, fluffy and evenly brown. It should spread like soft butter.
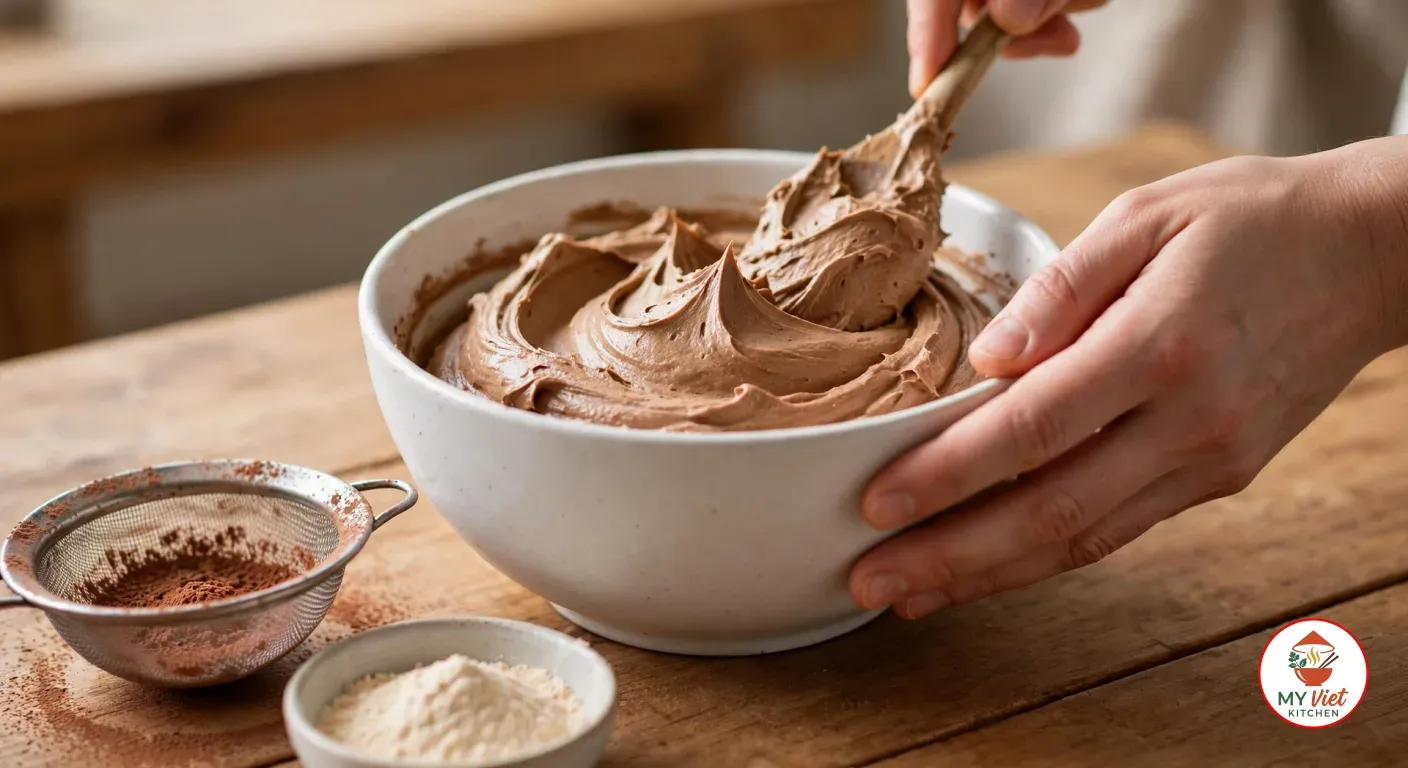
One hand steadying a white ceramic bowl of fluffy light-brown malted chocolate buttercream while the other beats it with a wooden spoon, next to a sieve dusted with cocoa and a small bowl of pale malted milk powder
Step 4- Make the Malted Chocolate Filling

Step 5: Sandwich the Biscuits

5Pair the cooled biscuits by size. Turn one of each pair upside down and spread a heaped teaspoon of filling over its flat underside, stopping about 2 mm from the edges. Press the underside of its partner on top and set the sandwiches on a tray lined with baking paper. Chill the sandwiches for 20 minutes to firm the filling.
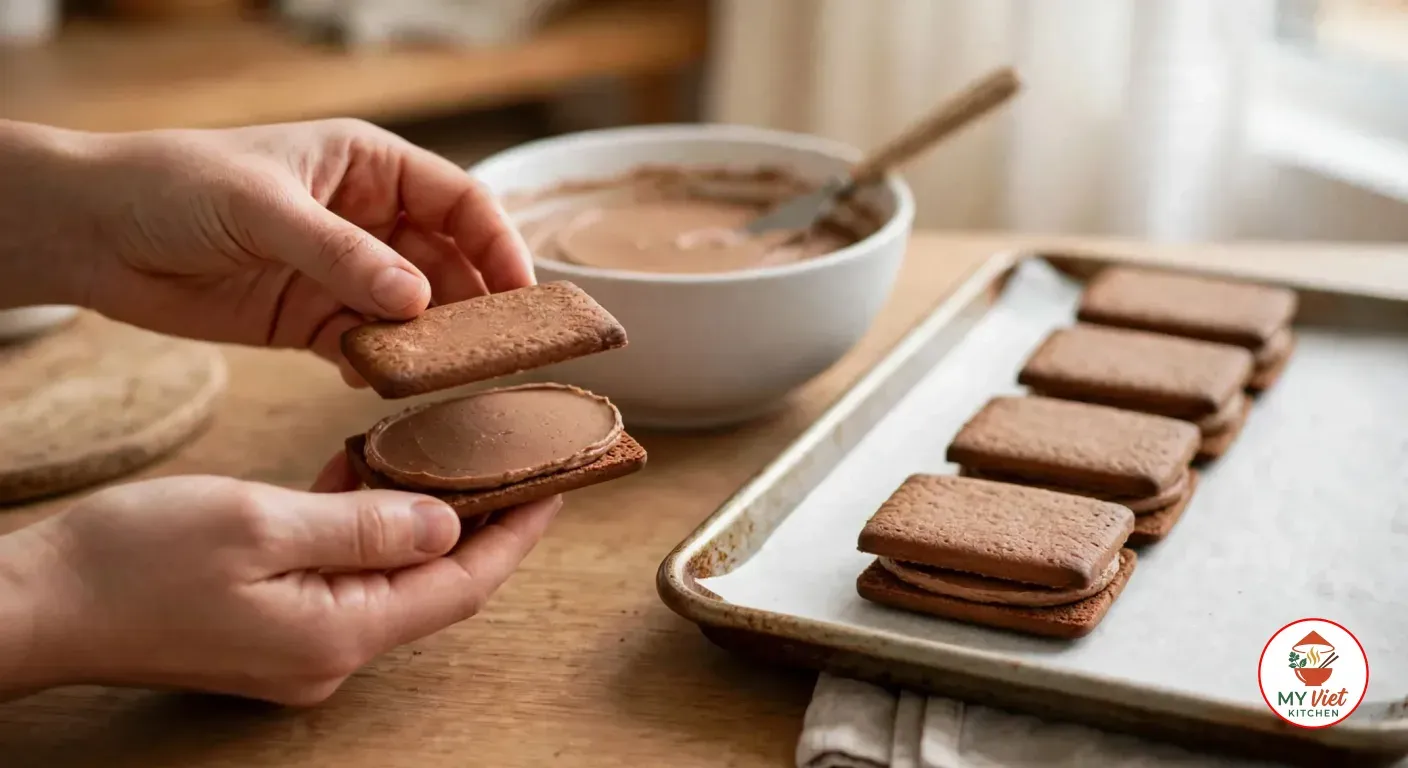
Hands lowering a cocoa biscuit onto another spread with a flat layer of chocolate buttercream, beside a lined baking tray of four sandwiched biscuits and a white bowl of filling
Step 5- Sandwich the Biscuits

Step 6: Coat in Chocolate

6Melt the milk chocolate with the coconut oil in a heatproof bowl set over a pan of barely simmering water, stirring until smooth, then take the bowl off the pan. Drop one cold sandwich into the chocolate, turn it over with two forks and lift it out on the forks. Tap the forks on the rim so the extra chocolate runs back into the bowl, then slide the biscuit onto a tray lined with baking paper. While the coating is still wet, touch the top lightly with the tines of a fork and lift away to leave ridges. Coat the rest the same way, then refrigerate for 30 minutes, until the chocolate has set.
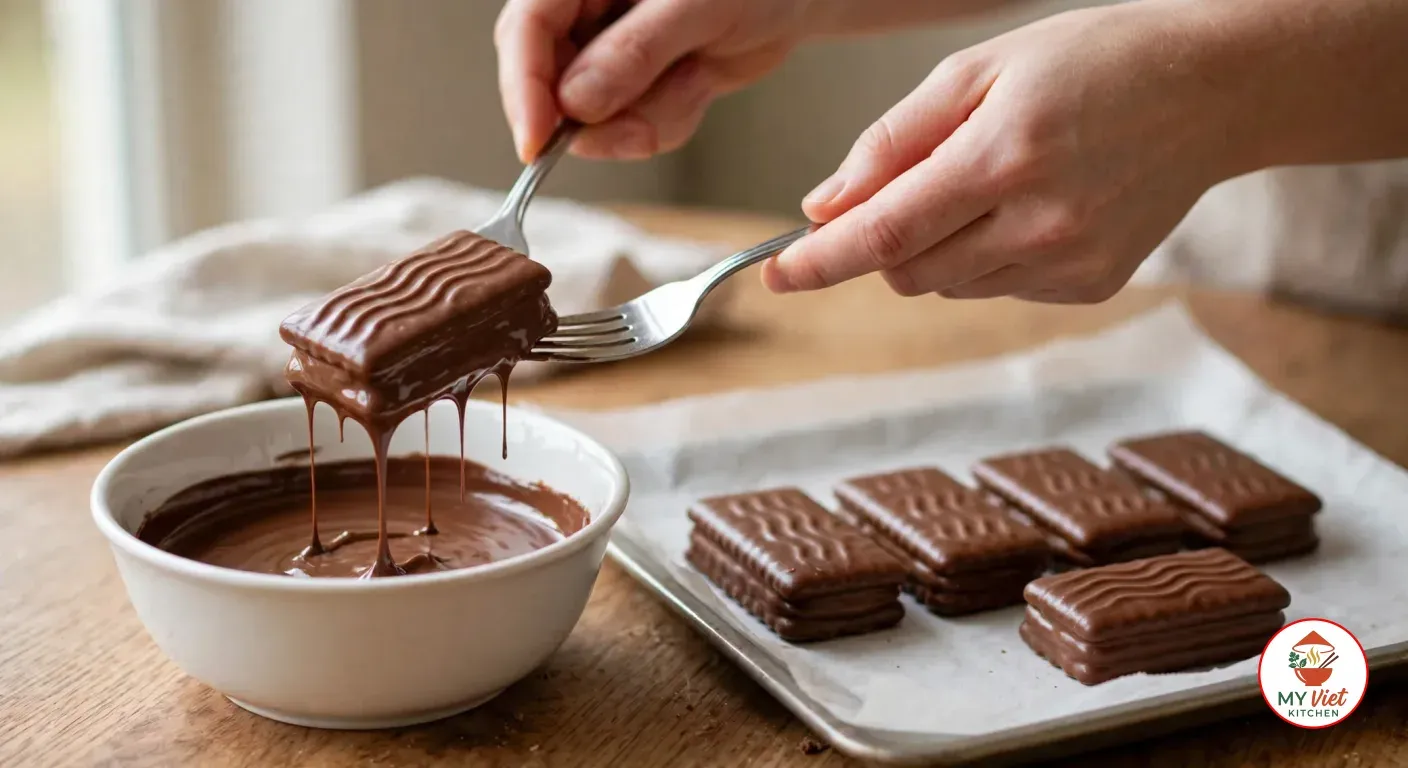
Two forks lifting a sandwich biscuit dripping with melted milk chocolate out of a white bowl, beside a paper-lined tray of five coated biscuits with wavy ridges on top
Step 6- Coat in Chocolate

Frequently Asked Questions

What is the Tim Tam Slam?

It means drinking a hot drink through a Tim Tam as if the biscuit were a straw. You bite off opposite corners, put one end in the drink and suck the drink up through the biscuit. When the crisp inside softens and the coating starts to melt, you eat it. Arnott’s used the name “Tim Tam Suck” in a 2002 advertising campaign (Wikipedia). Claire Saffitz’s video description says she explores the mechanics of the perfect Slam (Claire Saffitz x Dessert Person).

Can you fill them with ganache instead of buttercream?

Yes. Claire Saffitz’s video uses a chocolate cream filling, and her ingredient list gives 150 g of chopped milk chocolate, 150 g of heavy cream and salt (Claire Saffitz x Dessert Person). With equal weights of chocolate and cream it stays softer than this butter filling, so give the sandwiches longer in the fridge before you dip them, and keep the finished biscuits cold.

Why are my homemade Tim Tams soft instead of crisp?

Usually the biscuits were rolled too thick or came out of the oven too soon. Keep the dough at 3 mm and bake until the tops feel firm and dry when you press one, even if they look no different. They firm up further on the rack. A thick layer of filling also softens the bite, so keep it to a heaped teaspoon per biscuit.

Do you need the malted milk powder?

No, but without it you get a plain chocolate biscuit. Eight Forest Lane makes the same point about its own recipe, which uses malt extract syrup in the filling. You can leave it out, the recipe says, but the biscuits will then taste of chocolate rather than choc malt (Eight Forest Lane). Wikipedia describes the original’s biscuits as malted, which is why this recipe puts malt in both the dough and the filling (Wikipedia).

Sources

  • Tim Tam, Wikipedia
  • Tim Tam | Australia’s Favourite Chocolate Biscuit, Arnott’s
  • Tim Tams Recipe (How to Make Homemade Tim Tams), Laura, A Beautiful Plate (recipe reprinted from The Sugar Hit!, Hardie Grant 2015), September 2015
  • Homemade Tim Tams, Elizabeth LaBau, SugarHero, updated July 2023
  • Homemade Tim Tams (Vegan), Eight Forest Lane, updated 2025
  • I Tried Making Homemade Australian Tim Tams | Claire Recreates, Claire Saffitz x Dessert Person, YouTube, May 2025

Love This Recipe?

Click on a star to rate it!

☆☆☆☆☆No votes so far! Be the first to rate this recipe.

Share

Tags: homemade tim tamtim tam recipecopycat tim tamtim tam slamAustralian biscuitAustralian dessertchocolate sandwich biscuit

An egg hopper with a set white and a glossy orange yolk in its centre and a plain hopper behind it on a white plate, both thin golden bowls with lacy, holey edges, beside small bowls of orange-red pol sambol with a lime wedge and dark red lunu miris on a wooden table← PreviousHoppers (Appa): Sri Lankan Bowl Pancakes from an Overnight Batter

More Australian Dishes

Nine white squares of haupia with clean, straight edges set out in three rows on a glossy green ti leaf over a wooden board, with an empty half coconut shell and a linen napkin behind
Australian Dishes

Haupia: Hawaiian Coconut Pudding Firm Enough to Cut

October 31, 2026

Three scoops of pale vanilla ice cream in a shallow white bowl, flecked with golden-amber honeycomb toffee nuggets and thin amber toffee streaks, beside four bubbly chunks of hokey pokey and a steel ice cream scoop on crumpled baking paper on a wooden table
Australian Dishes

Hokey Pokey Ice Cream with Homemade Honeycomb Toffee

October 31, 2026

A wire basket lined with softened cabbage leaves, just lifted from a hāngī and opened on a wooden table outdoors, holding pale steam-cooked chicken drumsticks, lamb chops, pork pieces, potato halves, rounds of red-skinned kūmara, pumpkin wedges and cabbage halves, with crumpled foil peeled back behind it and a folded hessian sack beside it
Australian Dishes

Hangi: How to Put Down a Māori Hāngī for 10

October 30, 2026

Recent recipes

  • An egg hopper with a set white and a glossy orange yolk in its centre and a plain hopper behind it on a white plate, both thin golden bowls with lacy, holey edges, beside small bowls of orange-red pol sambol with a lime wedge and dark red lunu miris on a wooden tableHoppers (Appa): Sri Lankan Bowl Pancakes from an Overnight BatterNovember 1, 2026
  • Nine white squares of haupia with clean, straight edges set out in three rows on a glossy green ti leaf over a wooden board, with an empty half coconut shell and a linen napkin behindHaupia: Hawaiian Coconut Pudding Firm Enough to CutOctober 31, 2026
  • Three scoops of pale vanilla ice cream in a shallow white bowl, flecked with golden-amber honeycomb toffee nuggets and thin amber toffee streaks, beside four bubbly chunks of hokey pokey and a steel ice cream scoop on crumpled baking paper on a wooden tableHokey Pokey Ice Cream with Homemade Honeycomb ToffeeOctober 31, 2026
  • A white plate of Hainanese chicken rice, a dome of pale golden rice beside slices of poached chicken with smooth, glossy, pale yellow skin, cucumber slices and cilantro, with small dishes of red chilli-garlic sauce, ginger and green onion sauce and dark soy sauce and a bowl of clear broth on a wooden tableHainanese Chicken Rice with Poached Chicken and Three SaucesOctober 30, 2026

Follow us

Where shall we eat today?

  • Vietnamese
  • Asian
  • European
  • African
  • Americas
  • Australia
  • Drinks
  • Surprise me

Recently updated

  • Homemade Tim Tam Recipe: Copycat Malted Chocolate Biscuits
  • Hoppers (Appa): Sri Lankan Bowl Pancakes from an Overnight Batter
  • Haupia: Hawaiian Coconut Pudding Firm Enough to Cut
  • Hokey Pokey Ice Cream with Homemade Honeycomb Toffee
  • Hainanese Chicken Rice with Poached Chicken and Three Sauces

Categories

  • Vietnamese Dishes
  • Asian Dishes
  • European Dishes
  • African Dishes
  • American Dishes
  • Australian Dishes
  • Beverages

Pages

  • About Us
  • Contact Us
  • FAQ
  • Privacy Policy
  • RSS

Tags

European dishescomfort foodAfrican recipesLatin American foodWest African recipesAsian recipesAustralian cuisineEast African foodSouth American foodCaribbean cuisineAfrican dishesEastern European foodMexican foodSouth African foodvietnamese cuisineFrench cuisineBalkan foodCaribbean foodeasy dinner recipeItalian cookingMexican cuisinePeruvian foodBalkan cuisinefamily dinnerisland foodLatin American recipesNigerian cuisineNorth African recipessummer grillingAuthentic Vietnamese

All tags

Follow us
© 2026 My Viet KitchenAuthentic Vietnamese flavors, made simple