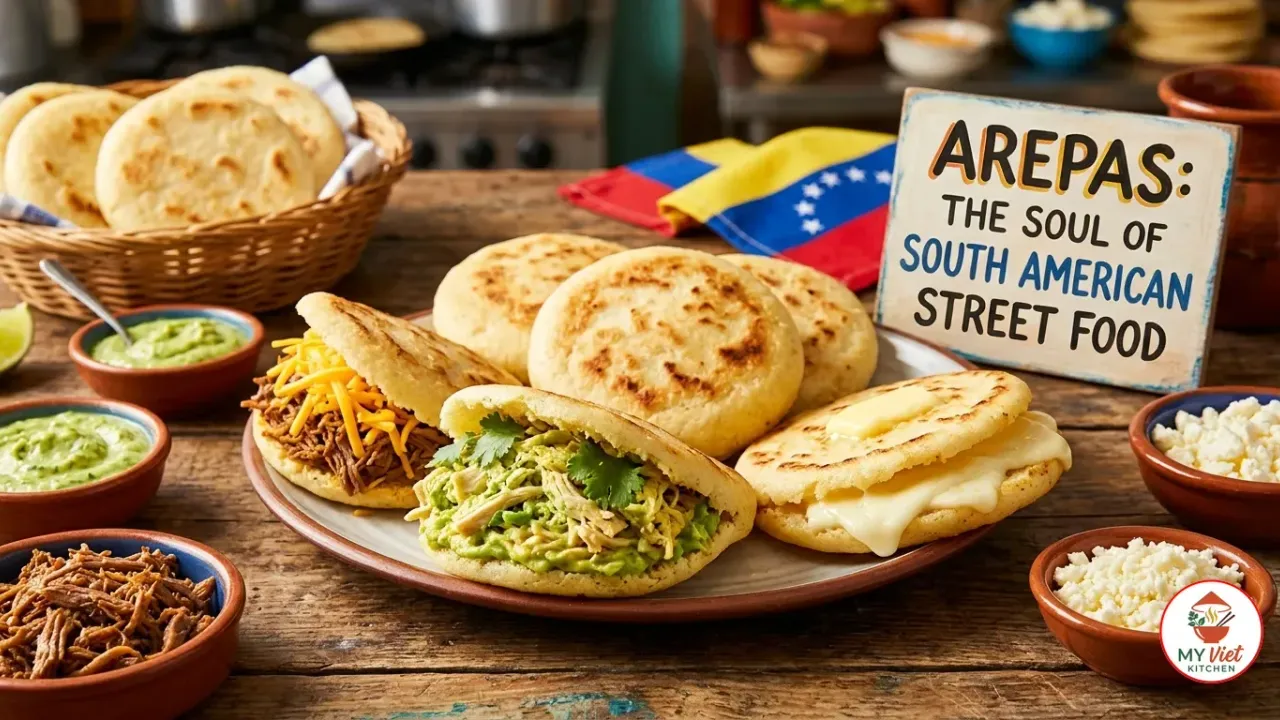
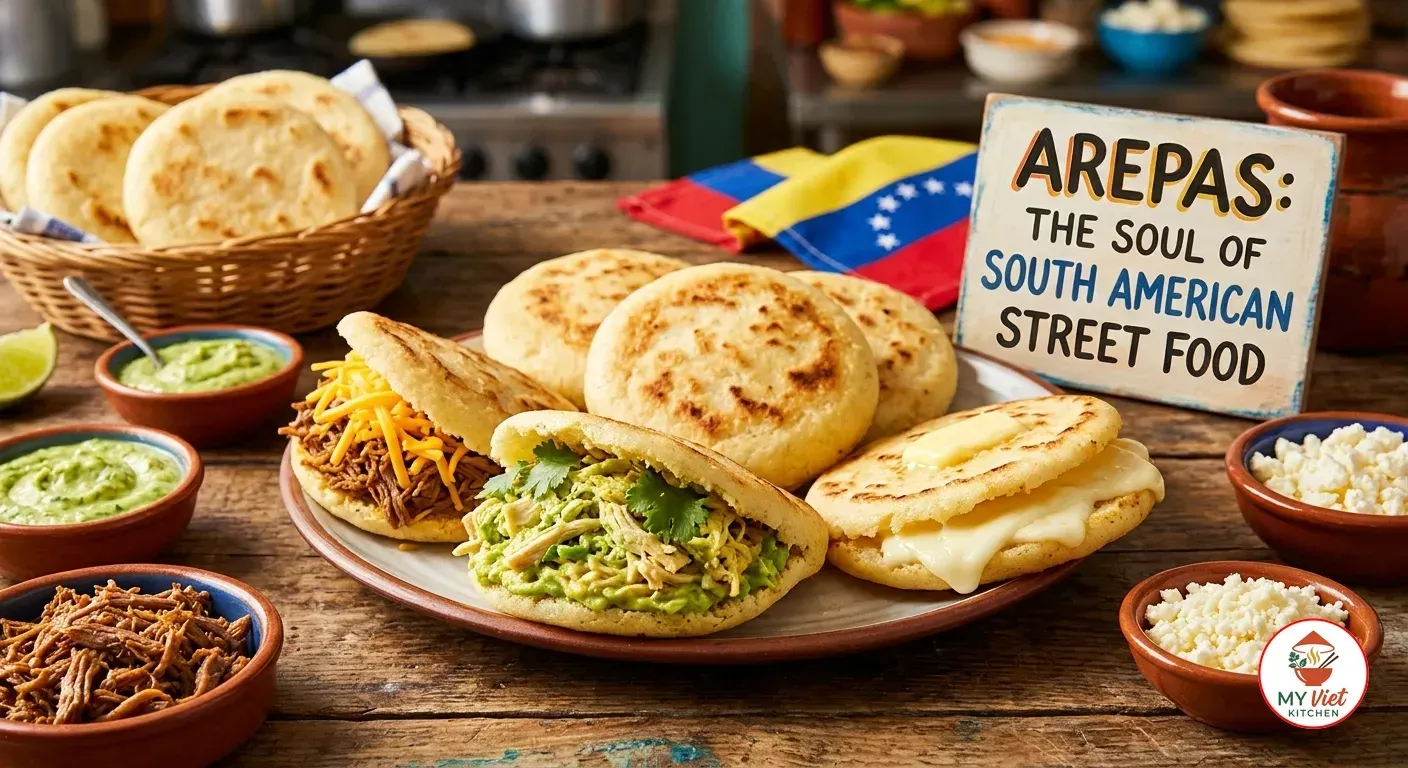
Arepas are the soul of Venezuelan and Colombian cooking, a golden cornmeal flatbread with a crispy shell and a soft, pillowy interior that serves as the perfect vessel for bold, savory fillings. Whether stuffed with creamy Reina Pepiada, loaded with shredded beef, or simply brushed with butter and topped with salty white cheese, this arepas recipe delivers an authentic taste of South American street food that you can master in your own kitchen. Few dishes in the world offer this combination of simplicity, versatility, and deep cultural meaning.
Prep Time: 15 minutes | Cook Time: 25 minutes | Servings: 8
Difficulty: Easy | Calories: ~180 per serving
What Makes This Arepas Recipe Special?
Arepas hold a unique position among the world’s flatbreads. Unlike wheat breads that need gluten for structure, arepas get their texture from pre-cooked cornmeal alone. The result is a gluten-free bread with a crispy shell and a soft, chewy center. The dough has only three items in it, so the quality of your cornmeal matters most.
What truly elevates arepas beyond a simple flatbread is their role as a carrier for fillings. In Venezuela, arepas function the way sandwiches do in Western cuisine. Every arepera (arepa shop) offers dozens of named fillings, each with its own identity and loyal following. The arepa itself is the blank canvas. Consequently, mastering the dough is the single most important skill in any arepas recipe.
The dish also carries enormous cultural weight. Arepas go back long before European contact. Native peoples across the region ground dried corn into meal and cooked flat cakes on clay griddles for centuries. Today, they remain a daily staple across Venezuela and Colombia. For Venezuelan families, making arepas together is a morning ritual as natural as brewing coffee.
Choosing the Right Cornmeal for Arepas
The cornmeal you choose will make or break your arepas. Not all corn products are interchangeable, and using the wrong one is the most common mistake newcomers make. Here is what you need to know about each option for this arepas recipe.
- Harina P.A.N. (best choice): This Venezuelan brand of pre-cooked white cornmeal is the undisputed standard for arepas. The corn has been cooked, dried, and ground into a fine flour that hydrates instantly and produces a smooth, crack-free dough. You can find it at most Latin grocery stores or order it online. If you can find it, use it.
- Other pre-cooked cornmeal brands: Brands like Goya Masarepa or Areparina work well and are available in many Latin grocery stores. They produce similar results to Harina P.A.N. and are reliable substitutes.
- Masa harina (not recommended): Masa harina is also made from corn, but it goes through a lime soak called nixtamalization. This gives it a very different taste and feel, best for tortillas and tamales. Your dough will taste off and act in odd ways if you use it.
Ingredients for Arepas
Arepa Dough:
- 2 cups pre-cooked white cornmeal (Harina P.A.N.)
- 2 1/2 cups warm water
- 1 teaspoon salt
- 1 tablespoon vegetable oil or butter (optional, for softer dough)
For Cooking:
- 2 tablespoons vegetable oil or butter for the griddle
Classic Filling - Reina Pepiada:
- 2 cups shredded cooked chicken breast
- 1 large ripe avocado, mashed
- 3 tablespoons mayonnaise
- 1 tablespoon lime juice
- 2 tablespoons finely chopped cilantro
- Salt and pepper to taste
Pro tip: Always use warm water, not cold, when mixing your arepa dough. Warm water allows the pre-cooked cornmeal to hydrate faster and more evenly, producing a smoother dough with fewer cracks. Cold water creates a grainy, stiff dough that falls apart during cooking.
Step-by-Step Instructions
Step 1: Mix the Dough
1Pour 2 1/2 cups of warm water into a large mixing bowl and dissolve the salt. Then gradually add the pre-cooked cornmeal in a steady stream while stirring constantly with your other hand. Keep mixing until all the flour is incorporated and no dry spots remain. The dough should feel like wet sand at first. Knead it gently for 2 to 3 minutes until it becomes smooth and pliable. If the dough feels too dry and cracks when pressed, add water one tablespoon at a time. If it sticks to your palms, sprinkle in a bit more cornmeal. Let the dough rest for 5 minutes so the cornmeal finishes absorbing the water completely.
Step 2: Shape the Arepas
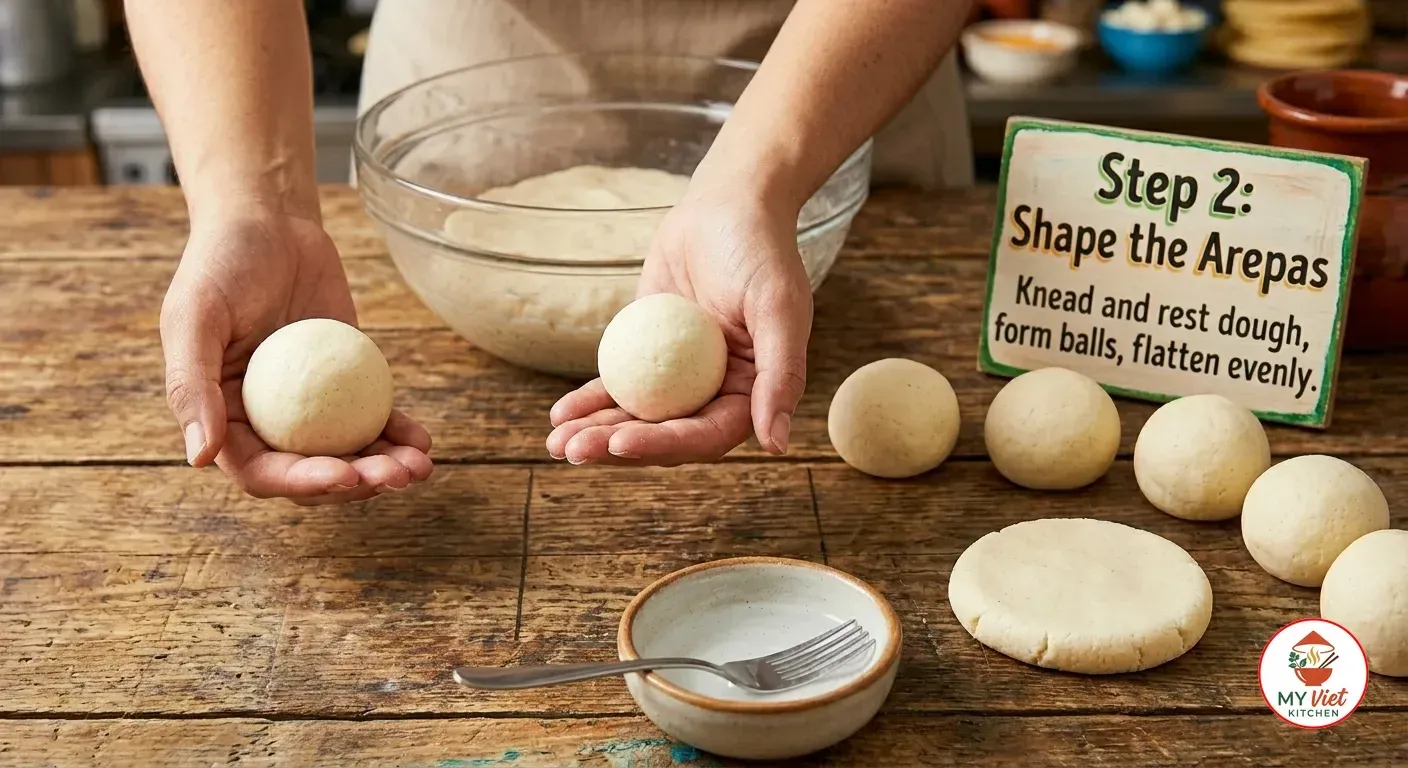
2Divide the dough into 8 equal portions. Roll each one into a smooth ball between your palms. Then gently flatten each ball into a disc about half an inch thick and roughly four inches in diameter. The key here is even thickness. If one side is thinner than the other, the arepa will cook unevenly and possibly split. Smooth any cracks along the edges with a wet fingertip, because those cracks will widen during cooking and let moisture escape. Your finished discs should look clean and uniform.
Step 3: Sear on the Griddle
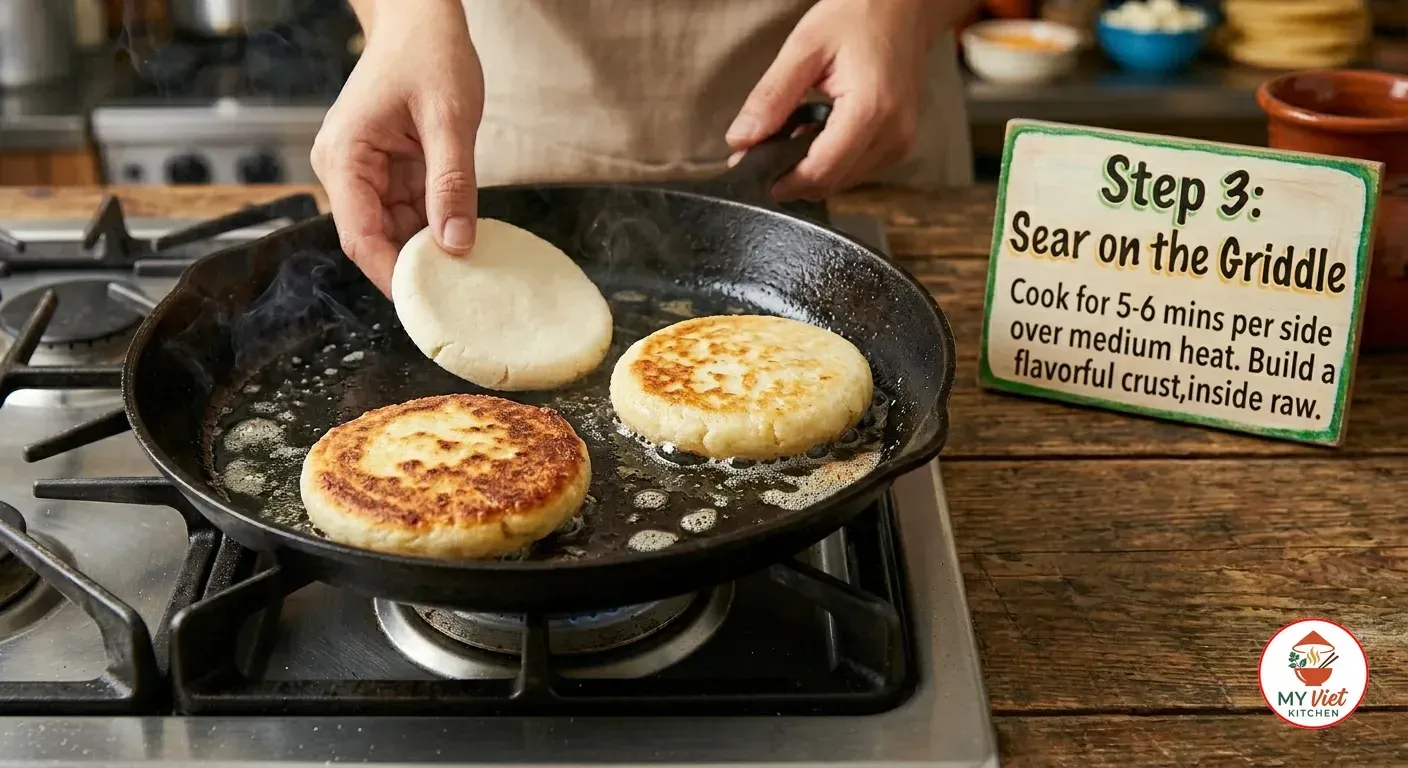
3Heat a flat griddle, cast-iron skillet, or non-stick pan over medium heat. Add a thin layer of oil or butter. Once the surface shimmers, place the arepas on the griddle without crowding them. Cook for 5 to 6 minutes per side until a golden-brown crust forms. You will know they are ready to flip when the bottom releases easily and you see a dark golden color. Do not press down on the arepas with a spatula, because this squeezes out moisture and makes them dense. The goal of this step is to build a flavorful, crunchy exterior while the inside stays moist.
Step 4: Finish in the Oven
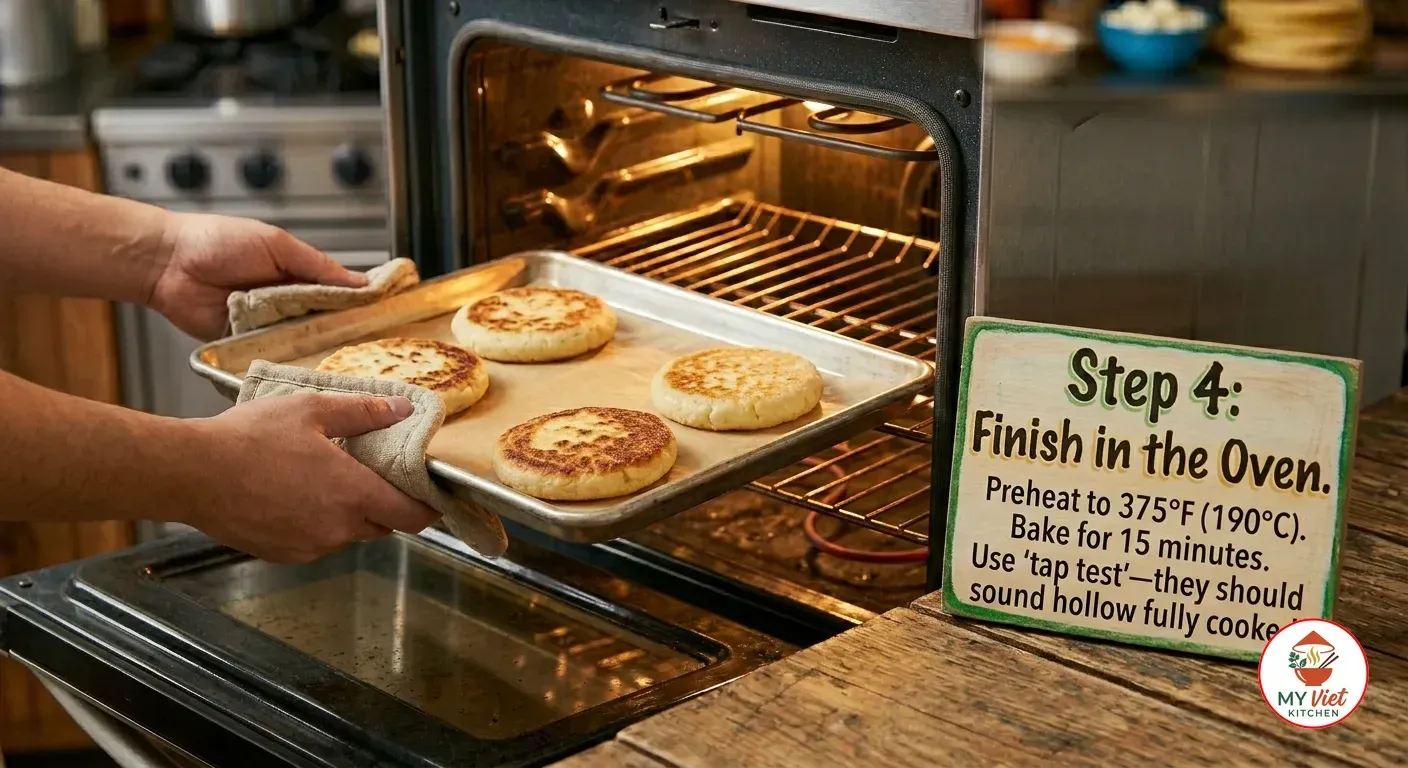
4Preheat your oven to 375 degrees Fahrenheit. Transfer the seared arepas to a baking sheet lined with parchment paper. Bake for 15 minutes until they puff slightly and feel lighter when picked up. The oven step is essential because it cooks the interior through without burning the crust. You can test doneness by tapping the bottom of an arepa. If it sounds hollow, the inside is fully cooked. If you do not have an oven, cover the skillet with a tight lid, reduce heat to low, and cook for 10 to 12 minutes, flipping once halfway.
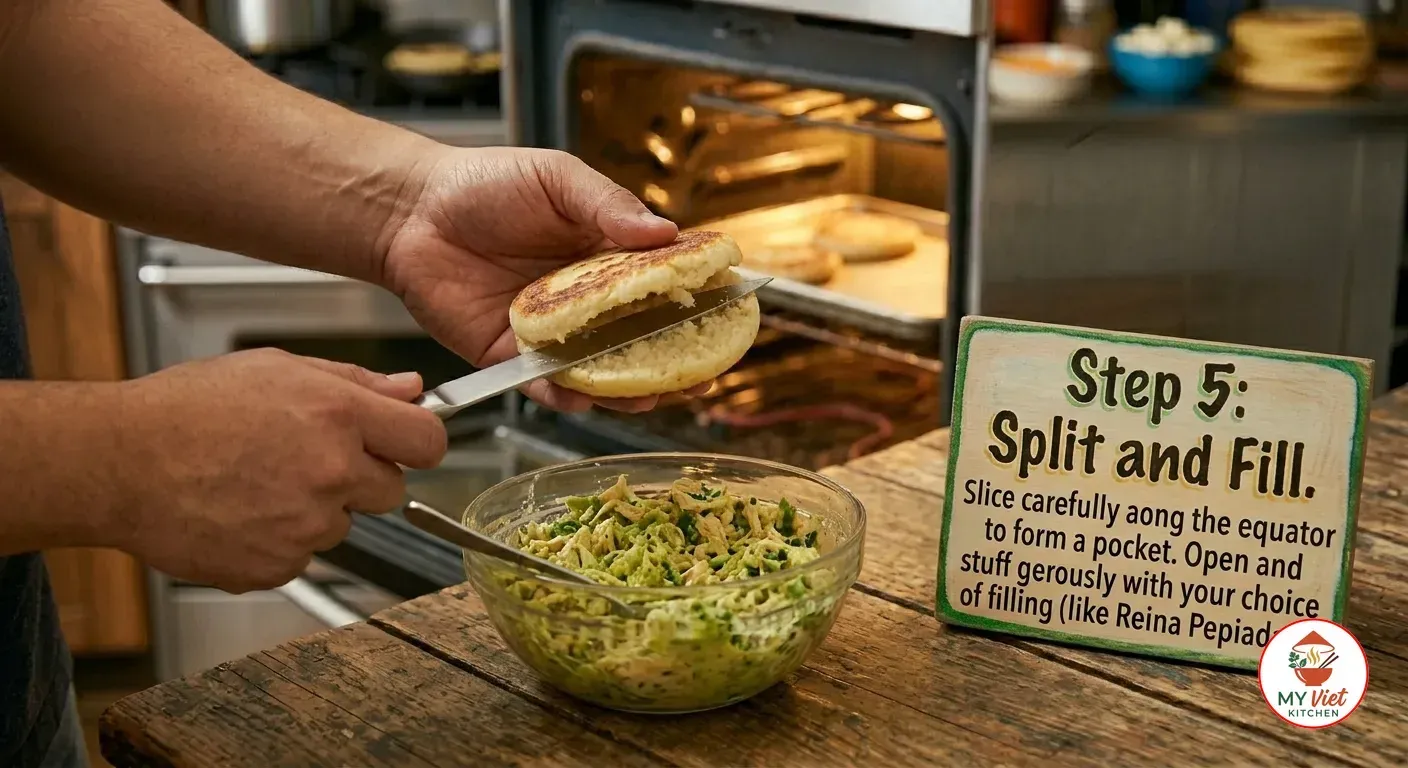
Step 5: Split and Fill
5Let the arepas cool for about 2 minutes so you can handle them comfortably. Then use a sharp knife to slice each arepa open along the equator, like cutting open a pita pocket. Leave a hinge on one side so the arepa stays in one piece. Gently pull the halves apart and use a fork to scoop out a small amount of the soft interior if you want more room for filling. Stuff generously with your choice of filling. For the classic Reina Pepiada, fold together shredded chicken, mashed avocado, mayonnaise, lime juice, and cilantro, then pile it inside the arepa.
Expert Tips for Perfect Arepas
Get the Dough Consistency Right
The dough should feel like soft Play-Doh. If it cracks when you shape a disc, it is too dry. Add water one spoon at a time and knead again. If it sticks to your hands, add a bit more cornmeal. The rest step matters, too. The cornmeal keeps soaking up water for a few minutes after mixing. So check the feel after the rest, not before.
Control Your Heat
Medium heat is key for arepas. Too hot, and the outside burns while the inside stays raw. Too low, and they dry out before a crust can form. A cast-iron pan holds heat best and gives the best sear. Let the pan heat up for at least 3 minutes before you start.
Use the Tap Test
After baking, pick up an arepa and tap the bottom. A done arepa sounds hollow, like tapping a ripe melon. If the sound is dull and heavy, put it back in the oven for 5 more minutes. This tap test is the best way to check, and it stops both raw middles and dry, overdone results.
Venezuelan vs. Colombian Arepas
Both countries claim arepas as their own. However, the two versions differ in thickness, prep, and how they show up on the plate. Here is a side-by-side look at the key differences.
| Feature | Venezuelan Arepas | Colombian Arepas |
|---|---|---|
| Thickness | About 1/2 inch, thick and puffy | Thinner, about 1/4 inch |
| Primary role | Stuffed with fillings like a sandwich | Served as a side dish or topped |
| Common toppings | Reina Pepiada, shredded beef, beans | Butter, cheese, hogao sauce |
| Cornmeal | White pre-cooked cornmeal | White or yellow pre-cooked cornmeal |
| Extras in dough | Usually plain | Sometimes cheese or egg mixed in |
| Meal role | Breakfast, lunch, dinner, or snack | Primarily breakfast or side dish |
Serving Suggestions
Arepas are remarkably versatile. In Venezuela, they appear at every meal from a quick breakfast to a late-night street food snack. The filling determines the occasion, so here are some classic combinations and pairings to try with this arepas recipe.
Classic Venezuelan Arepa Fillings:
- Reina Pepiada: Shredded chicken mixed with avocado, mayonnaise, and lime. This is the most iconic arepa filling in Venezuela.
- Pabellon: Shredded beef, black beans, fried sweet plantains, and white cheese stuffed together. This mirrors the Venezuelan national dish.
- Domino: Black beans and crumbled white cheese. Simple, satisfying, and beloved for breakfast.
- La Pelua: Shredded beef mixed with melted yellow cheese. Rich and indulgent.
Beverage Pairings:
- Papaya or guava juice: Fresh tropical fruit juice is the classic Venezuelan accompaniment.
- Coffee with milk (cafe con leche): A strong morning coffee pairs perfectly with a breakfast arepa.
- Chicha: A thick, creamy Venezuelan rice drink flavored with cinnamon and condensed milk.
- Light beer or lager: For dinner arepas, a cold Polar or similar lager cuts through the richness of the filling.
Storage and Reheating
Refrigerator: Store cooked, unfilled arepas in an airtight container for up to 3 days. They actually firm up nicely in the fridge, which makes them easier to slice and fill later.
Freezer: Freeze uncooked shaped discs or fully cooked arepas for up to 3 months. Place parchment paper between each one to prevent sticking. Freeze them flat on a baking sheet first, then transfer to a freezer bag once solid.
Reheating: Reheat refrigerated arepas in a 375 degree oven for 8 to 10 minutes or on a dry skillet over medium heat for 3 to 4 minutes per side. For frozen arepas, bake directly from frozen at 375 degrees for 15 to 18 minutes. Avoid the microwave, because it makes the exterior soft and rubbery instead of crispy.
Common Mistakes to Avoid
1. Using the Wrong Cornmeal
Regular cornmeal, polenta, and masa harina do not work here. Each one has a different grind and soaks up water at a different rate. The wrong product gives you a dough that falls apart, tastes sour, or stays raw inside. Always look for “pre-cooked” on the label.
2. Skipping the Rest Period
The cornmeal keeps soaking up water for a few minutes after you first mix it. If you shape the arepas right away, the dough may seem fine but then crack as it dries out. A 5-minute rest fixes this problem entirely. After the rest, knead briefly and check the texture again before shaping.
3. Making Them Too Thin or Too Thick
Arepas thinner than a quarter inch will crack open during cooking and have no room for filling. Arepas thicker than three-quarters of an inch will be raw in the center even after baking. Half an inch is the sweet spot for this arepas recipe, giving you a crispy crust, a cooked interior, and enough space to stuff generously.
Frequently Asked Questions
What is the best flour for making arepas?
Pre-cooked white cornmeal is the only flour you should use. Harina P.A.N. is the most popular brand and is available in Latin grocery stores and online. Goya Masarepa is another solid option. Do not use regular cornmeal, polenta, or masa harina, because these products behave completely differently in the dough.
What is the difference between Venezuelan and Colombian arepas?
Venezuelan arepas are thicker and designed to be split open and stuffed with hearty fillings like shredded meat and avocado. Colombian arepas are thinner, often have cheese mixed into the dough, and are typically served as a side dish topped with butter or hogao sauce. Both are delicious but serve different purposes at the table.
Can I make arepas without an oven?
Absolutely. After searing both sides on the griddle, reduce the heat to low and cover the pan with a tight-fitting lid. Cook for 10 to 12 minutes, flipping once at the halfway mark. The trapped steam will cook the interior through. You can also deep-fry shaped arepas at 350 degrees Fahrenheit for a crispy, puffed result.
Why do my arepas crack when I shape them?
Cracking means the dough is too dry. Add warm water one tablespoon at a time and knead again until smooth. Also make sure you let the dough rest for 5 minutes after mixing so the cornmeal fully hydrates. Wet your fingertips and smooth any edge cracks before cooking, because small cracks will widen under heat.
Are arepas gluten-free?
Yes, arepas are naturally gluten-free since they contain only cornmeal, water, and salt. This makes them an excellent bread alternative for anyone avoiding gluten. However, fillings may contain gluten, so check your ingredients carefully if this is a dietary concern.
What are the most popular arepa fillings?
The most beloved Venezuelan fillings include Reina Pepiada (avocado chicken salad), Pabellon (shredded beef with black beans, plantains, and cheese), Domino (black beans and white cheese), La Pelua (shredded beef with yellow cheese), and Catira (shredded chicken with yellow cheese). Each has a distinct identity and flavor profile.
Variations and Adaptations
Arepa de Queso (Cheese Arepas):
Mix 1 cup of shredded white cheese (queso fresco, mozzarella, or queso de mano) directly into the dough before shaping. The cheese melts during cooking and creates pockets of gooey, salty goodness throughout the arepa. This Colombian-inspired variation is popular for breakfast.
Arepa de Choclo (Sweet Corn Arepas):
Blend fresh sweet corn with a bit of cornmeal, sugar, and salt. Shape and cook as usual. These sweet arepas are thinner and often topped with fresh white cheese. They turn a golden yellow and taste like pure corn.
Arepas Fritas (Fried Arepas):
Shape the dough into smaller, thinner discs and deep-fry at 350 degrees until puffed and golden on both sides. Fried arepas are crispier than the baked kind and make a great snack or starter. Serve them with guasacaca, a Venezuelan avocado sauce similar to guacamole.
Vegan and Plant-Based Fillings:
The arepa dough itself is already vegan. For plant-based fillings, try black beans with sauteed peppers and onions, roasted sweet plantains with avocado, or a hearty mushroom and corn stew. These combinations deliver the same satisfying richness without any animal products, and they work perfectly with this arepas recipe.
The Cultural Significance of Arepas
Arepas go back thousands of years to the native peoples of what is now Venezuela and Colombia. They grew corn and found ways to grind it into meal. The word “arepa” likely comes from erepa, a native term for corn. When the Spanish arrived, they found arepas already woven into daily meals. Unlike many native foods that faded after contact, the arepa survived and grew stronger.
Today, arepas are far more than food in Venezuela. They are a symbol of national identity, a daily ritual, and a thread connecting families across generations. Every home has its own way of making them. The debate over the right thickness, the best sear, and the top filling can spark lively talks at any table. Also, Venezuelans abroad have brought arepas to cities all over the world, from Miami to Madrid to Melbourne. As a result, arepa shops now pop up on nearly every continent, bringing new fans to this amazing flatbread.
In Colombia, arepas play a similar but distinct role. In Antioquia, the arepa shows up at every meal as a side, topped with butter and cheese. On the coast, arepa de huevo (egg-stuffed fried arepa) is loved street food. The arepa adapts to its region and its cook. That is what has kept it alive for so long.
Conclusion
Making arepas at home is one of the most rewarding cooking projects you can take on. With just cornmeal, water, and salt, you create a versatile flatbread that carries bold, vibrant fillings. This arepas recipe keeps the technique simple. Mix a smooth dough, shape even discs, sear until golden, and bake until hollow-sounding. Once you master the basic arepa, a world of fillings opens up, from the iconic Reina Pepiada to creative plant-based combinations.
If you enjoy exploring Latin American flavors, check out our Latin American recipe collection for more authentic dishes from across the region. For another gluten-free bread option with a completely different flavor profile, try our homemade focaccia guide.