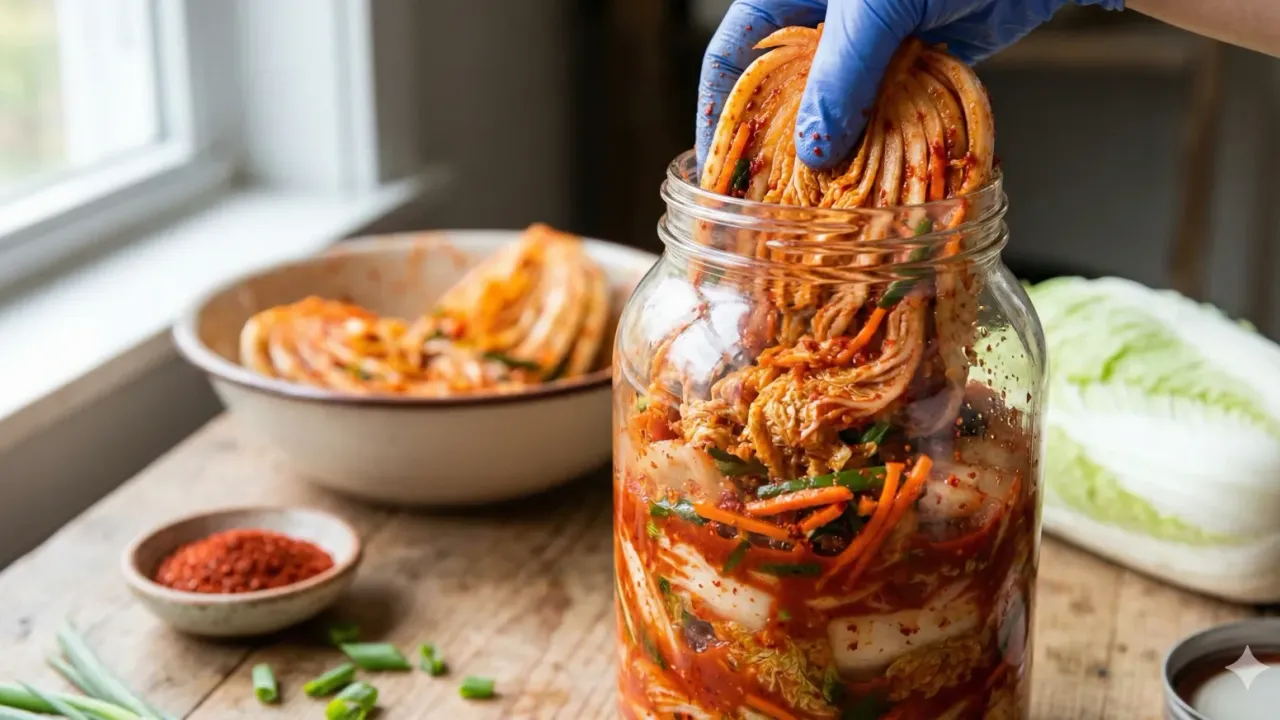
Korean Napa Cabbage Kimchi — known in Vietnamese as kim chi cải thảo — is one of the world’s most beloved fermented foods, and making it at home is much easier than most people think. This recipe delivers that iconic combination of crunch, heat, tanginess, and umami depth, using traditional ingredients like Korean gochugaru, salted shrimp, and a glutinous rice paste base to create a batch that ferments beautifully and tastes authentic from the very first bite.
Prep Time: 60 minutes | Fermentation Time: 16–18 hours | Servings: 20
Difficulty: Medium | Calories: ~25 per serving
What Makes Napa Cabbage Kimchi Special?
Kimchi is not just a side dish — it is a living food. The fermentation process transforms simple vegetables into a probiotic powerhouse packed with beneficial bacteria, vitamins, and complex flavors that evolve the longer it sits. While there are hundreds of kimchi varieties in Korean cuisine, baechu-kimchi (napa cabbage kimchi) is the undisputed classic, appearing on virtually every Korean table at every meal.
What sets a great kimchi apart is the paste — yangnyeom — a fragrant, fiery mixture of gochugaru, garlic, ginger, fermented seafood, and fresh fruit that coats every leaf and slowly works its magic during fermentation. The glutinous rice paste acts as a binder that helps the seasoning cling to the cabbage and provides the natural sugars that feed the fermentation process.
Kimchi has become hugely popular across Vietnam and around the world, and many Vietnamese home cooks now make their own batches at home. This recipe balances authentic Korean technique with practical, easy-to-follow steps so you can succeed on your very first try — no special equipment needed.

Choosing the Right Napa Cabbage
The quality of your napa cabbage directly determines the texture and flavor of your finished kimchi. Here’s what to look for at the market:
- Size and weight: Choose large, heavy, tightly packed heads — the more compact, the better the crunch after brining.
- Leaf color (best choice): Look for pale green outer leaves that are thin and slightly translucent. These absorb seasoning more evenly than thick, dark outer leaves.
- Seasonality: Napa cabbage is at its best from September through April — sweeter, crunchier, and with just the right moisture content for kimchi.
- Avoid: Heads with black spots, wilted leaves, or a yellowing core. These indicate age or poor storage and will result in mushy kimchi.
For the carrots, choose firm, bright orange ones with a still-green top. Smaller carrots tend to be sweeter and crunchier than large ones, which can be pithy and fibrous.
Ingredients for Korean Napa Cabbage Kimchi
Main Ingredients:
- 3 kg napa cabbage (about 1 large head)
- 180g coarse sea salt (non-iodized)
- 1 liter water
- 300g carrots, julienned
- 130g green onions, cut into 1-inch pieces
- 120g garlic chives (buchu), cut into 1-inch pieces
For the Kimchi Paste:
- 80g garlic (about 20 cloves), roughly chopped
- 20g fresh ginger, peeled and roughly chopped
- 100g yellow onion
- 300g apple or Asian pear, peeled, cored, and diced
- 50g dried shrimp (haesaljeot)
- 3 tablespoons fish sauce
- 120g Korean red pepper flakes (gochugaru)
- 2 tablespoons honey
For the Rice Paste:
- 60g glutinous rice flour
- 500ml water
- 1 tablespoon sugar
Pro tip: Use only non-iodized sea salt or kosher salt for brining — iodized table salt can inhibit the natural fermentation process and leave your kimchi tasting flat.
Step-by-Step Instructions
Step 1: Salt and Brine the Cabbage
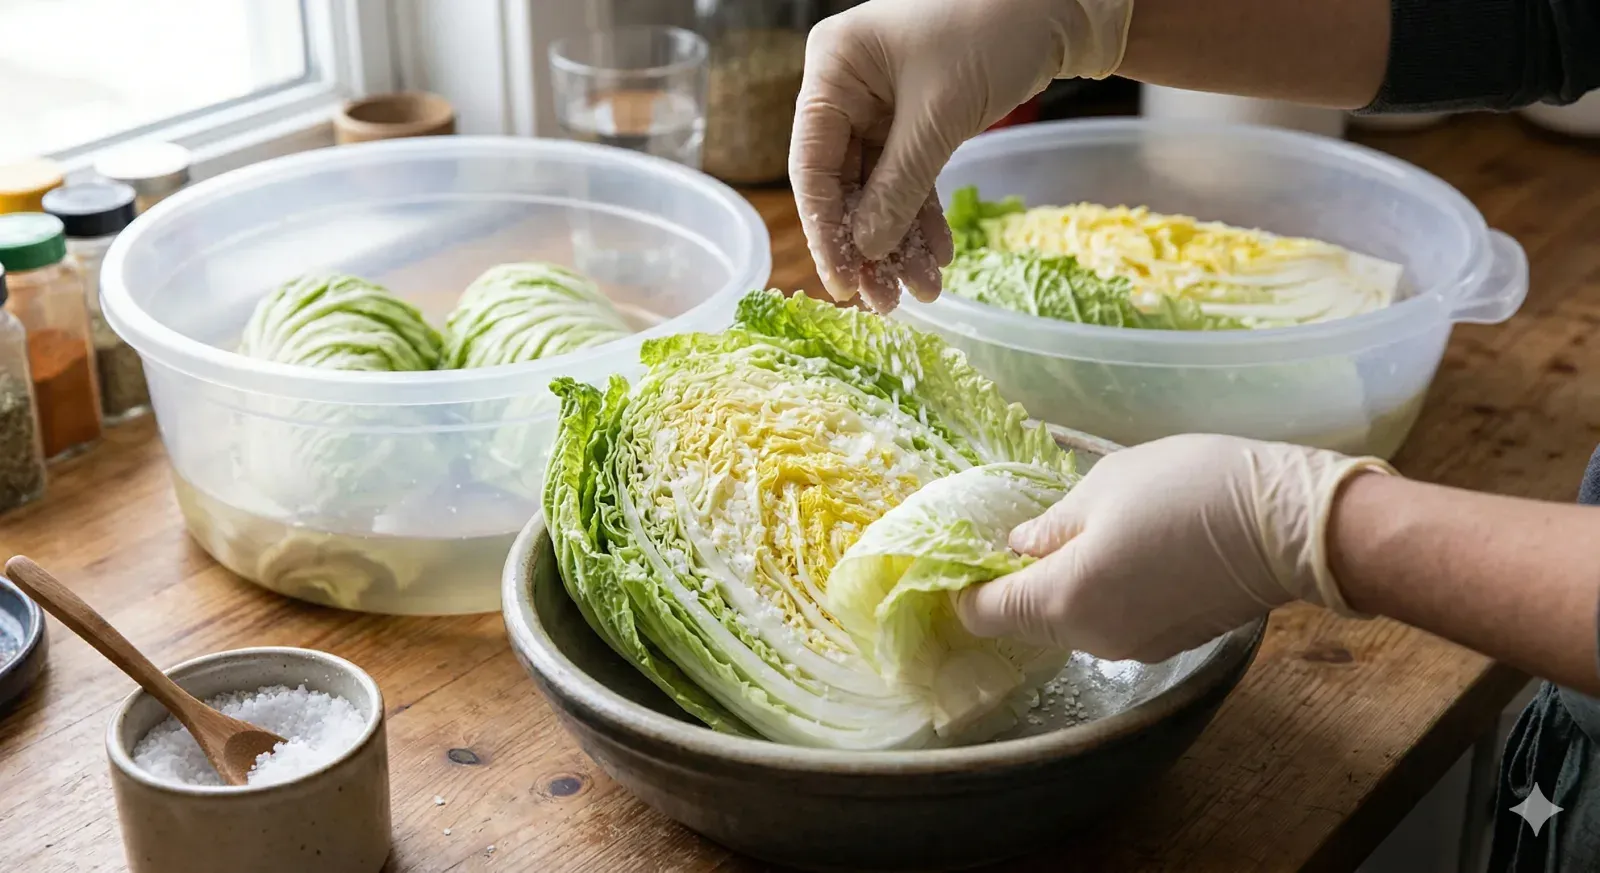
1Quarter the napa cabbage by cutting lengthwise from the base through the core. In a large bowl, dissolve 180g of coarse salt in 1 liter of water. Dip each cabbage quarter into the brine, then peel back the leaves one by one and sprinkle additional salt directly between each layer — this double-salting ensures the entire head is evenly seasoned. Roll up each salted quarter and nestle tightly into a large bowl or basin. Pour the remaining brine over everything and set aside to brine for 4–6 hours, turning the cabbage every hour or so. The cabbage is ready when you can bend a thick outer leaf in half without it snapping — pliable but not limp.
Step 2: Rinse and Drain
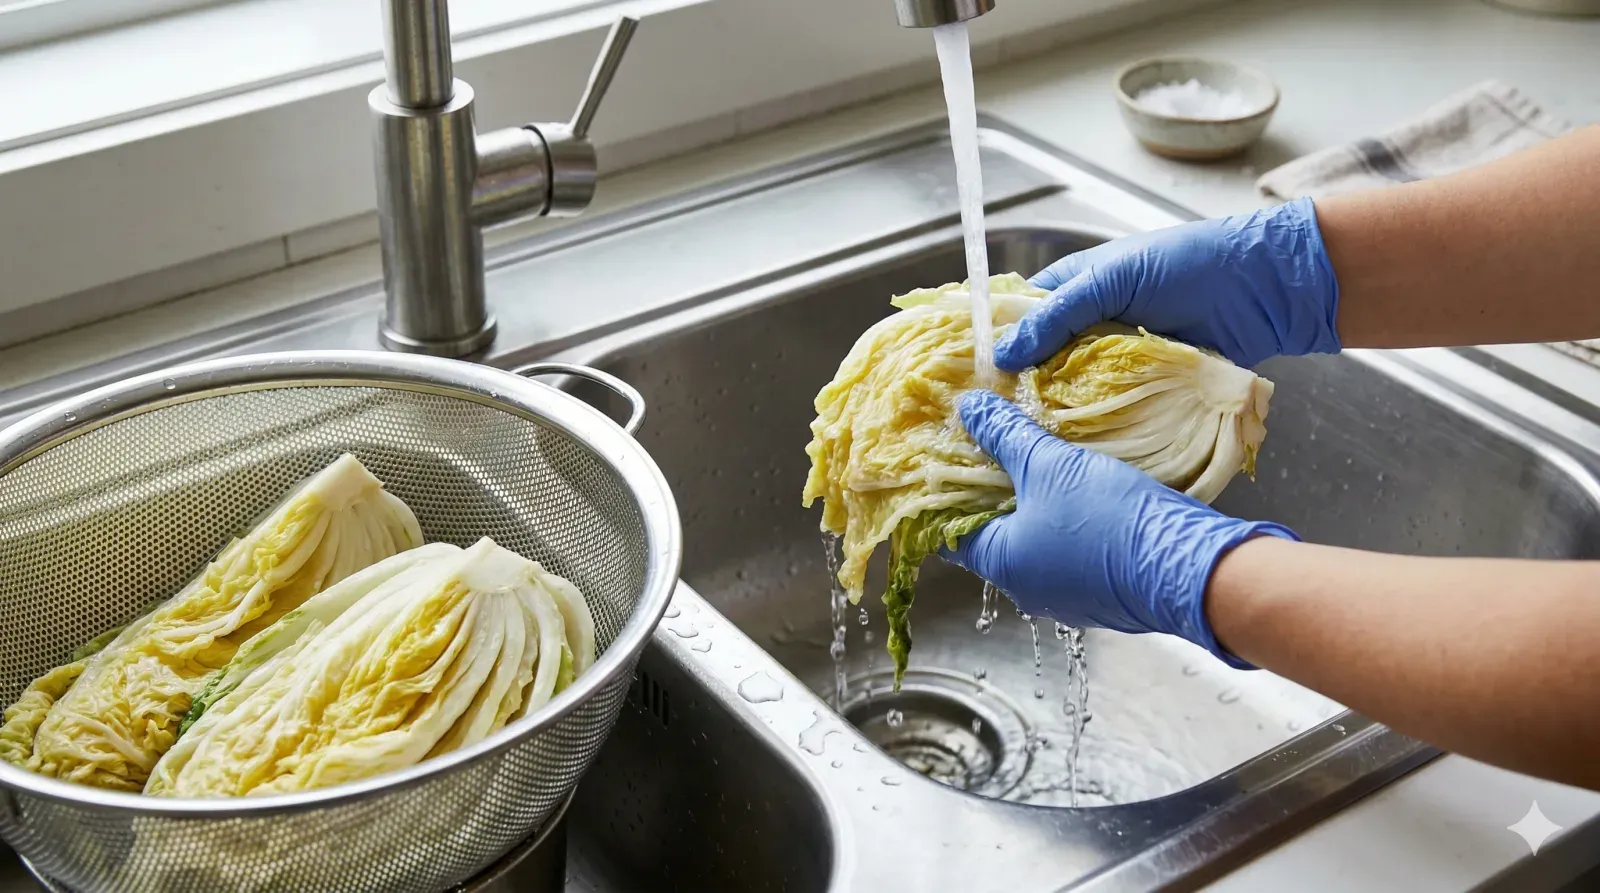
2After brining, rinse each cabbage quarter under cold running water 2–3 times, gently squeezing between rinses to flush out excess salt. Taste a piece — it should be pleasantly salty but not overwhelmingly so. If it’s too salty, submerge the quarters in fresh water for 30 minutes and rinse again. Once rinsed, squeeze out as much water as possible without crushing the leaves, then lay the quarters on a rack or hang them in a cool, ventilated spot for 30–60 minutes to drain. Drier cabbage means the paste adheres better and fermentation is more controlled.
Step 3: Cook the Glutinous Rice Paste
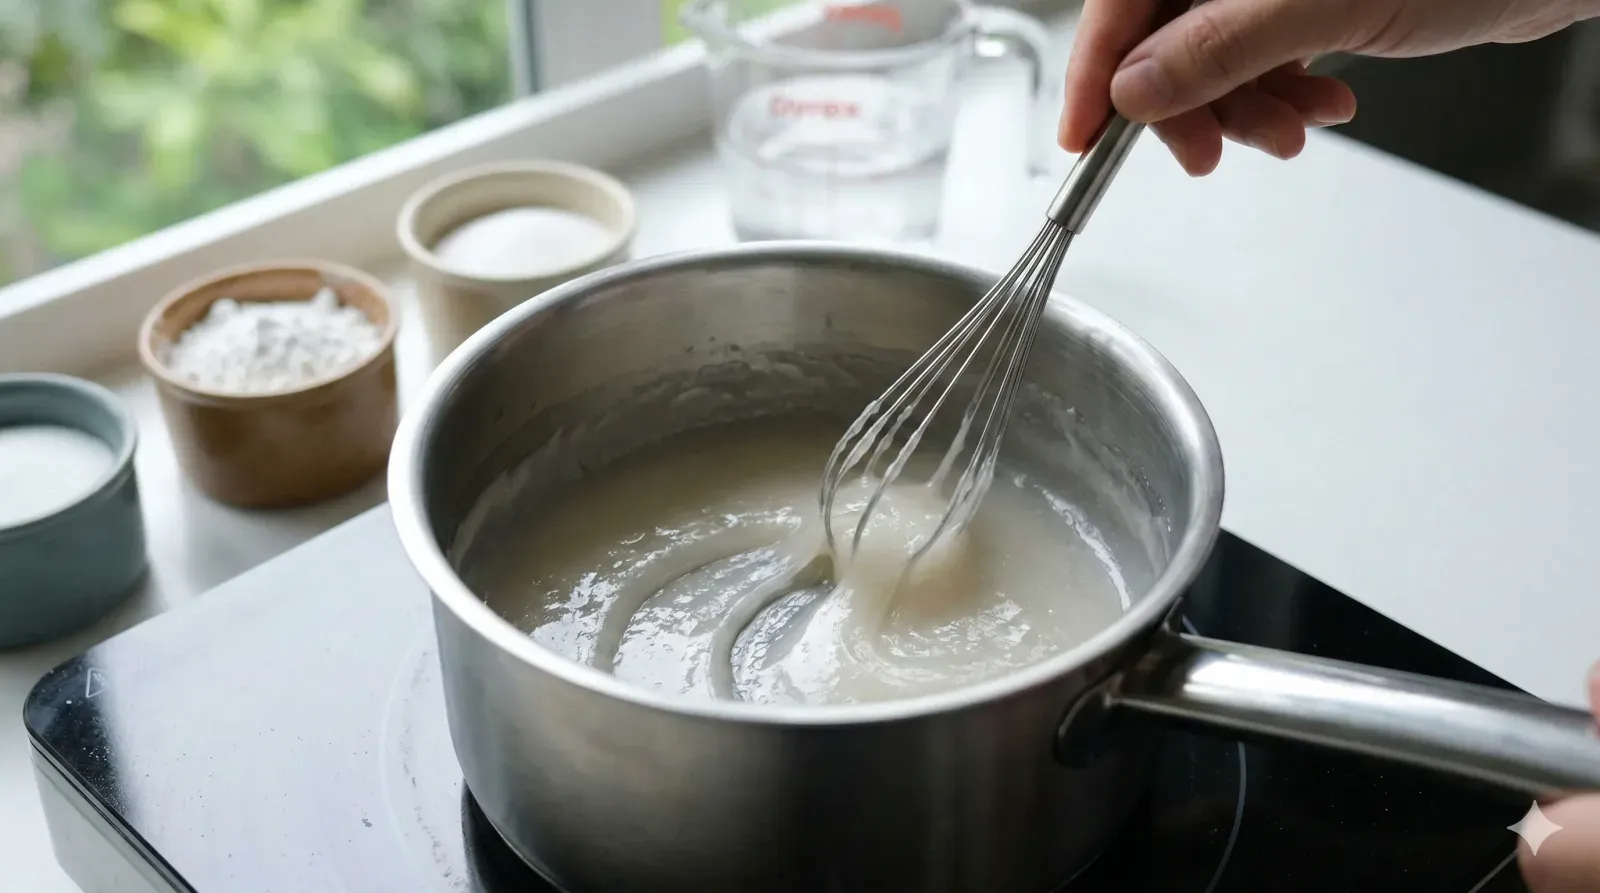
3In a small saucepan, whisk together 60g glutinous rice flour, 500ml of water, and 1 tablespoon of sugar until the flour is completely dissolved and no lumps remain — it’s easiest to mix while the water is still cold. Place the saucepan over medium heat and stir constantly until the mixture thickens into a smooth, glossy, translucent paste, about 5–7 minutes. Remove from heat immediately and let it cool to room temperature before using. This paste binds the seasoning to the cabbage leaves and provides natural sugars that kick-start fermentation.
Step 4: Blend the Aromatic Paste
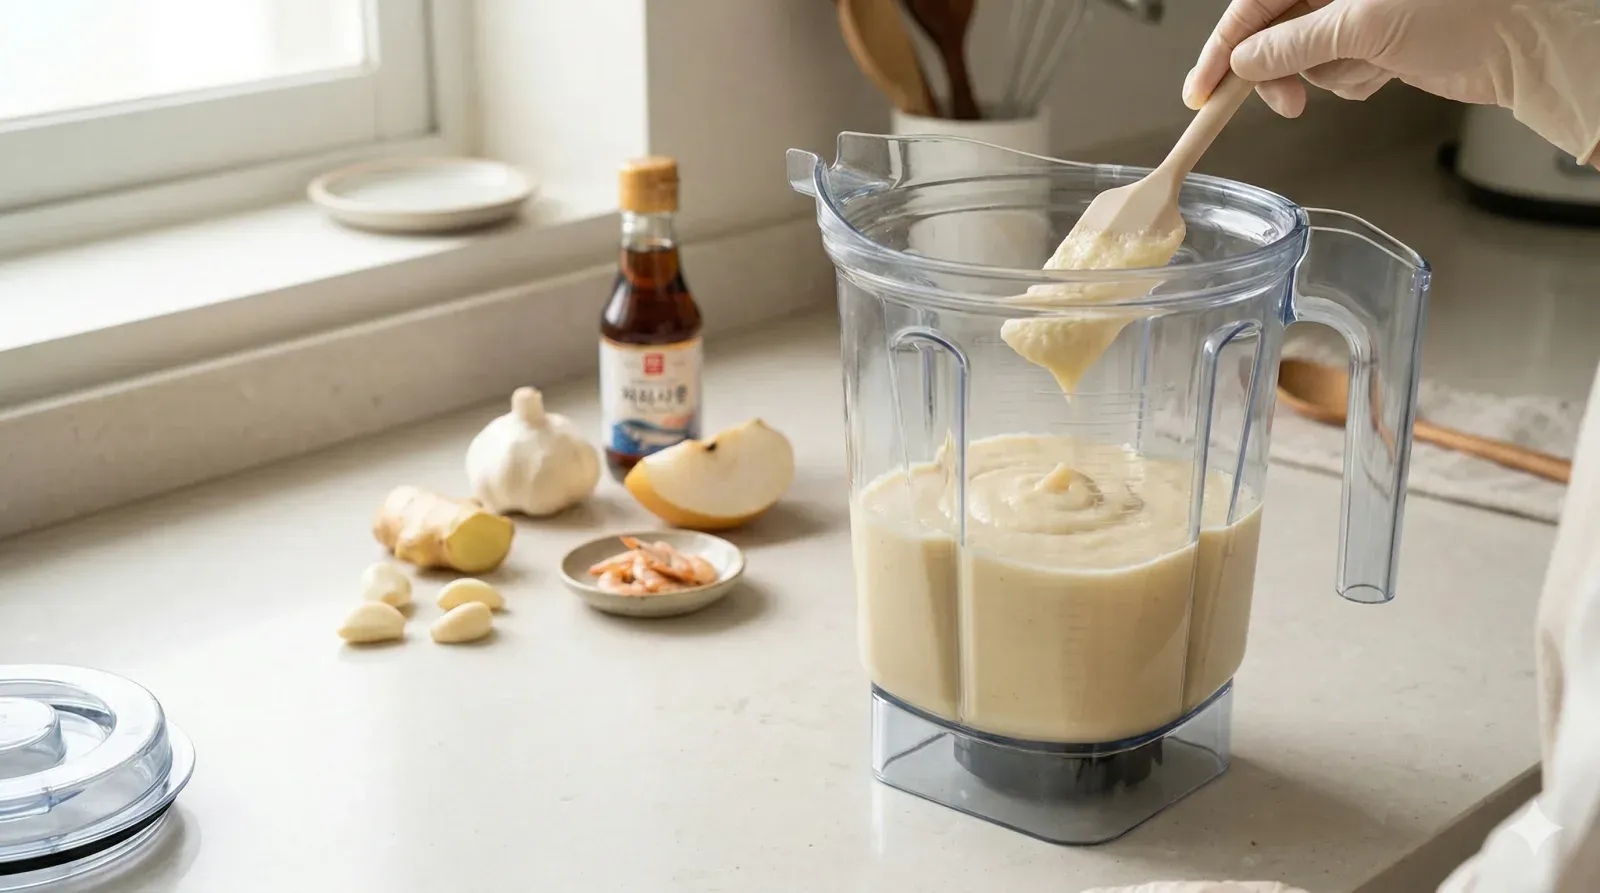
4In a blender or food processor, combine the garlic, ginger, onion, apple (or pear), dried shrimp, and fish sauce. Blend until completely smooth — if the mixture is too thick to blend, add a splash of water. Transfer to a large mixing bowl and stir in the cooled rice paste, gochugaru, and honey. Mix until everything is fully incorporated into a uniform, vivid red paste. Taste it — it should be boldly spicy, savory, slightly sweet, and fragrant. Adjust seasoning if needed.
Step 5: Mix in the Vegetables
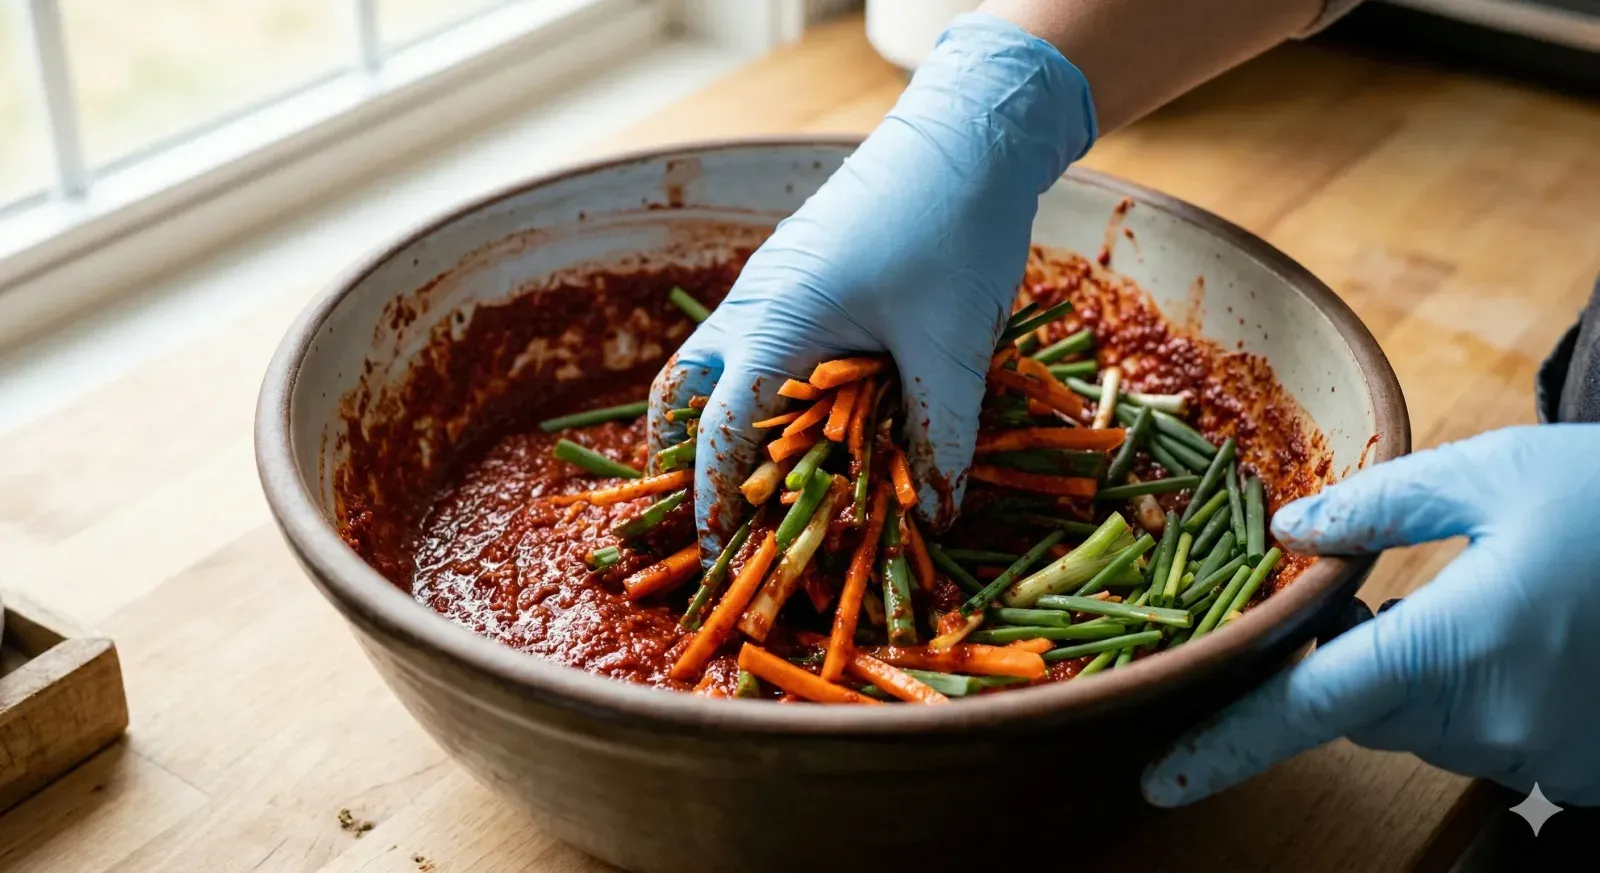
5Add the julienned carrots, sliced green onions, and garlic chives to the bowl of paste. Toss everything together with clean hands (wear gloves!) until the vegetables are evenly coated. The paste should cling to every piece — this is your complete kimchi seasoning mix, known as sobagi in Korean.
Step 6: Coat the Cabbage
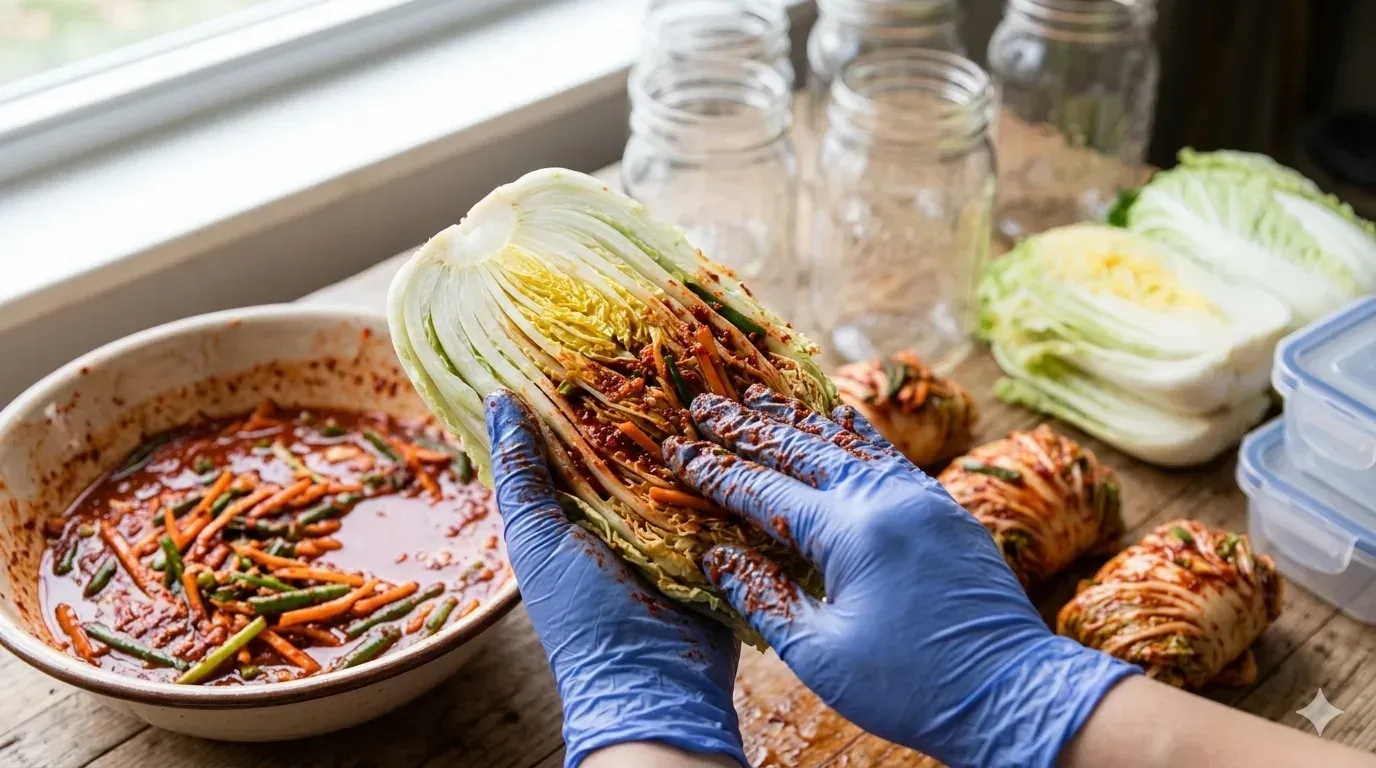
6Wearing gloves, take one drained cabbage quarter and peel back the layers. Using your hand like a brush, spread a generous, even coating of paste onto each leaf from the core outward — don’t skimp near the root end, as that’s the thickest part and needs the most seasoning. Once fully coated, fold the outer leaf around the quarter to form a compact bundle. Repeat for all remaining quarters. Pack the bundles tightly (cut side up) into clean glass jars or airtight food-safe containers, pressing down firmly so the pieces sit snugly with no air gaps. Spoon any remaining paste on top.
Step 7: Ferment and Refrigerate
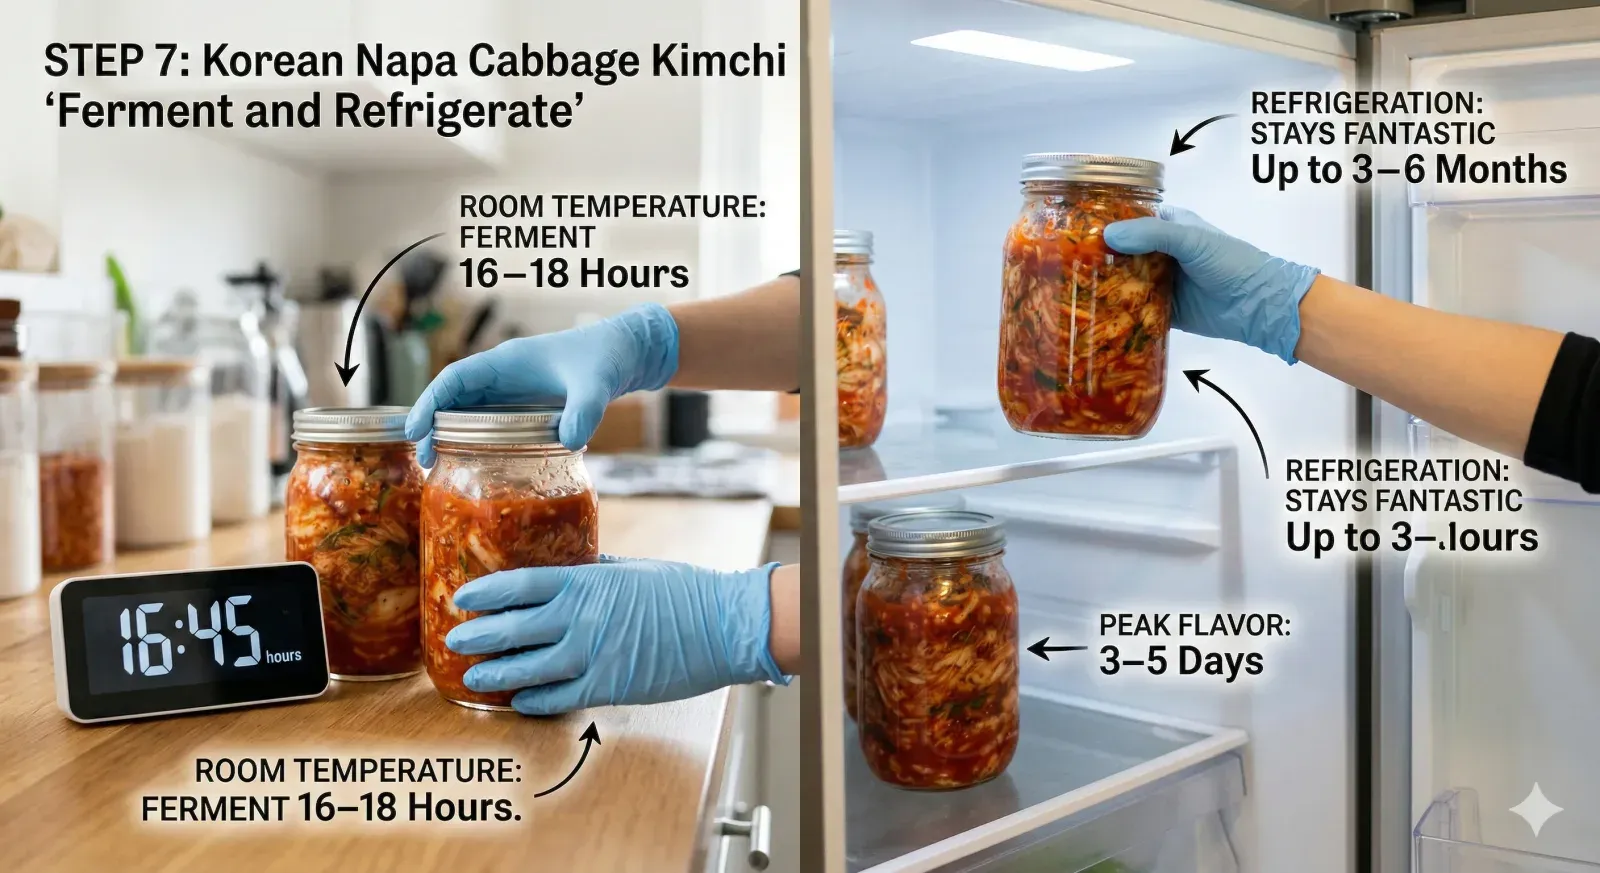
7Seal the containers and leave them at room temperature for 16–18 hours to begin fermentation. You’ll start to see small bubbles forming and the liquid rising — that’s a sign the good bacteria are at work. After this initial room-temperature period, transfer the kimchi to the refrigerator. The cold environment slows fermentation and allows the flavor to develop slowly over days and weeks. Your kimchi is technically ready to eat right away, but it peaks in flavor after 3–5 days and is fantastic for up to 3–6 months.
Expert Tips for Perfect Kimchi Every Time
Don’t Rush the Brine
The brining step is the most important one — underbrined cabbage will be too crunchy and won’t ferment properly, while overbrined cabbage becomes limp and flavorless. The 4–6 hour window is your sweet spot. Check by gently bending a thick outer leaf; it should fold without snapping. If you’re short on time, you can extend the brining period up to 8–10 hours in the refrigerator overnight.
Use Gochugaru, Not Regular Chili Flakes
Korean gochugaru is essential and cannot be swapped for generic chili flakes. It has a coarser grind, a brilliant red color, and a uniquely fruity, slightly smoky heat that defines kimchi’s flavor. Using regular chili flakes will make your kimchi bitter and overly sharp. Gochugaru is widely available at Asian grocery stores and online.
Always Use Glass Containers
Store kimchi in glass jars or high-quality BPA-free food containers — never stainless steel, as the acidic kimchi can react with the metal and develop off-flavors. Glass is odor-neutral, easy to clean, and allows you to see exactly how your kimchi is progressing. Leave about 2–3 cm of headspace in each jar to allow for expansion during fermentation.
Press Down After Each Use
Each time you take kimchi from the jar, press the remaining kimchi back down so it stays submerged in its brine. Kimchi exposed to air accelerates fermentation and oxidizes faster, turning sour more quickly than expected. Keep contact with air to a minimum.
Fresh Kimchi vs. Aged Kimchi: What’s the Difference?
Kimchi’s flavor transforms dramatically as it ferments. Here’s a quick comparison to help you decide when to eat it based on your taste preferences:
| Stage | Time | Flavor Profile | Best Used For |
|---|---|---|---|
| Freshly made (geotjeori) | 0–1 day | Spicy, garlicky, slightly raw | Salad-style side dish |
| Young kimchi | 3–5 days | Tangy, crunchy, balanced heat | All-purpose side dish |
| Ripe kimchi | 2–4 weeks | Deeply sour, complex, very savory | Kimchi jjigae (stew), fried rice |
| Aged kimchi (mukeunji) | 3–6 months | Intensely sour, funky, umami-rich | Braised pork, kimchi pancakes |
Serving Suggestions
In Korean cuisine, kimchi is served at every single meal — breakfast, lunch, and dinner — as a banchan (side dish). Slice it into bite-sized pieces and serve cold or at room temperature. Beyond eating it straight, kimchi is one of the most versatile ingredients in any kitchen.
The Perfect Accompaniments:
- Steamed white rice: The classic pairing — the mild, starchy rice perfectly balances the bold, spicy kimchi.
- Korean BBQ (grilled meats): Kimchi is the essential accompaniment to samgyeopsal (pork belly) and bulgogi, cutting through the richness of the meat.
- Instant noodles (ramyeon): Add sliced kimchi directly to your noodle bowl for a huge flavor boost.
- Fried rice: Stir-fry older, sourer kimchi with rice and egg for a quick and incredibly satisfying meal.
- Kimchi soup (kimchi jjigae): Simmer well-fermented kimchi with pork, tofu, and broth for one of Korea’s most comforting dishes.
Beverage Pairings:
- Barley tea (bori cha) — mild and nutty, perfect for calming the heat
- Soju or makgeolli (Korean rice wine) — traditional pairings for Korean BBQ nights
- Cold beer — the bubbles cut through kimchi’s richness beautifully
- Jasmine or green tea — a soothing, cleansing pairing
Storage and Reheating
Room temperature (initial fermentation): Leave sealed jars at room temperature for 16–18 hours to begin fermentation, then move to the refrigerator. Do not leave at room temperature beyond this point unless you are intentionally making very sour, aged kimchi.
Refrigerator: Up to 3–6 months in a sealed glass jar. Kimchi continues to ferment slowly in the fridge, getting more sour and complex over time. Most people find it best between 3 days and 4 weeks.
Freezer: Kimchi can be frozen for up to 3 months. Freeze in small portions since refreezing is not recommended. Note that freezing stops fermentation permanently and slightly changes the texture — best used for cooking rather than fresh eating after thawing.
Serving from cold: Kimchi is served cold or at room temperature — no reheating needed when eating it as a side dish. When cooking with kimchi (e.g., in stews or fried rice), add it directly to the hot pan from the jar.
Common Mistakes to Avoid
1. Using Iodized Salt
Iodine in regular table salt can inhibit the natural bacteria responsible for lacto-fermentation, resulting in kimchi that doesn’t ferment properly or develops off-flavors. Always use non-iodized coarse sea salt or kosher salt for both brining and seasoning.
2. Skipping the Rice Paste
The glutinous rice paste isn’t just a binder — it provides the fermentable sugars that lactic acid bacteria need to thrive. Skipping it results in a paste that slides off the cabbage and kimchi that ferments unevenly. Don’t skip this step.
3. Packing Jars Too Loosely
Air pockets inside the jar allow mold to develop before fermentation can acidify the kimchi. Pack your kimchi as tightly as possible, pressing it down firmly so there are no gaps. The natural brine should rise to cover the cabbage within the first day of fermentation.
4. Fermenting Too Long at Room Temperature
After the initial 16–18 hour room-temperature fermentation window, kimchi should be refrigerated. Leaving it out longer, especially in a warm kitchen (above 24°C/75°F), causes the kimchi to become overly sour very quickly and can make it mushy. When in doubt, refrigerate early — you can always let it sit in the fridge longer to develop flavor.
5. Not Wearing Gloves
The gochugaru paste will stain your hands, nails, and anything it touches a vivid orange-red for days. Always wear disposable gloves when mixing the paste and coating the cabbage. Your future self will thank you.
Frequently Asked Questions
How long does homemade kimchi last?
Properly stored in a sealed glass container in the refrigerator, homemade kimchi lasts 3–6 months. The flavor deepens and becomes more sour over time. At room temperature after the initial fermentation period, it stays fresh for about 1 week.
Can I make vegan kimchi without fish sauce or shrimp?
Absolutely. Substitute the fish sauce with soy sauce or light miso paste, and simply omit the dried shrimp or replace with a spoonful of fermented soybean paste (doenjang). Your kimchi will still ferment beautifully — the flavor profile will be slightly earthier and less oceanic, but still deeply delicious.
Why is my kimchi not fermenting?
Fermentation needs warmth and time. If your kitchen is cooler than 18°C (65°F), the process will be very slow — try placing the jars in a warmer area of your home. Also double-check that you used non-iodized salt, as iodine can inhibit the lactobacillus bacteria that drive fermentation.
What is gochugaru and can I substitute it?
Gochugaru is Korean coarse red pepper flakes — mildly hot, slightly smoky, and beautifully red. It is available at most Asian grocery stores and online. There is no perfect substitute, but in a pinch you can mix regular mild chili powder with a small amount of smoked paprika to approximate the color and flavor. The result won’t be identical to traditional kimchi, but it will still be very tasty.
How do I know when kimchi has gone bad?
Sour kimchi is normal and expected — it does not mean the kimchi has spoiled. Kimchi has gone bad when you see actual mold growth on the surface (fuzzy white, blue, or green growth, as opposed to the harmless white sediment of active fermentation), or when it develops a rotten, putrid smell rather than a pleasantly sour, garlicky one. Properly packed and refrigerated kimchi very rarely spoils.
Variations and Adaptations
Quick Kimchi (Baechu-geotjeori):
Skip the fermentation entirely and serve the freshly dressed kimchi as a crunchy salad-style side dish. Reduce the salt slightly and use crunchy, thinly sliced napa cabbage. It pairs wonderfully with Korean BBQ and is ready to eat in under an hour from start to finish.
Mild Kimchi for Kids or Low-Heat Preference:
Reduce the gochugaru to 50–60g and replace part of it with sweet paprika to maintain the red color without as much heat. You can also increase the apple or pear to naturally sweeten and cool the paste. This version is popular in households with children or those new to fermented foods.
Using Instant Kimchi Seasoning Packets:
If you’re short on time or can’t find all the individual ingredients, pre-made kimchi seasoning packets are available at Korean and Asian grocery stores. They simplify the process significantly while still producing excellent results — just follow the brine and fermentation steps as normal, and use the packet in place of the homemade paste.
The Cultural Significance of Kimchi
Kimchi is more than food — it is the living soul of Korean cuisine and a UNESCO Intangible Cultural Heritage. The traditional practice of making kimchi in large community batches every autumn, known as kimjang, is a centuries-old ritual of collective effort, generosity, and preparation for the cold winter months. Families would gather to salt, season, and pack hundreds of heads of cabbage together, sharing the labor and the harvest.
In Vietnamese households, kimchi has found a warm welcome as a beloved accompaniment to grilled meats, rice dishes, and even instant noodles. Its tangy, spicy kick complements the bold flavors of Vietnamese cooking in a way that feels both foreign and perfectly at home. Making your own kimchi at home — understanding the process, tasting it at each stage, adjusting it to your palate — is a way of participating in that same tradition of care and craft, adapted for your own kitchen and your own family’s taste.
Conclusion
Making homemade napa cabbage kimchi is one of the most rewarding kitchen projects you can undertake. It requires patience more than skill — the brining, the careful coating of each leaf, the waiting during fermentation — but the payoff is a jar full of something truly alive and delicious that gets better with every passing day. The key techniques to remember: use non-iodized salt, don’t skip the rice paste, pack the jars tightly, and trust the fermentation process. Once you’ve made your first batch and tasted the difference from store-bought, you’ll never want to go back.
Enjoyed this recipe? Explore more Korean-inspired dishes and Vietnamese favorites on My Viet Kitchen — from fresh spring rolls and pho to savory stir-fries and traditional fermented condiments. Happy fermenting!