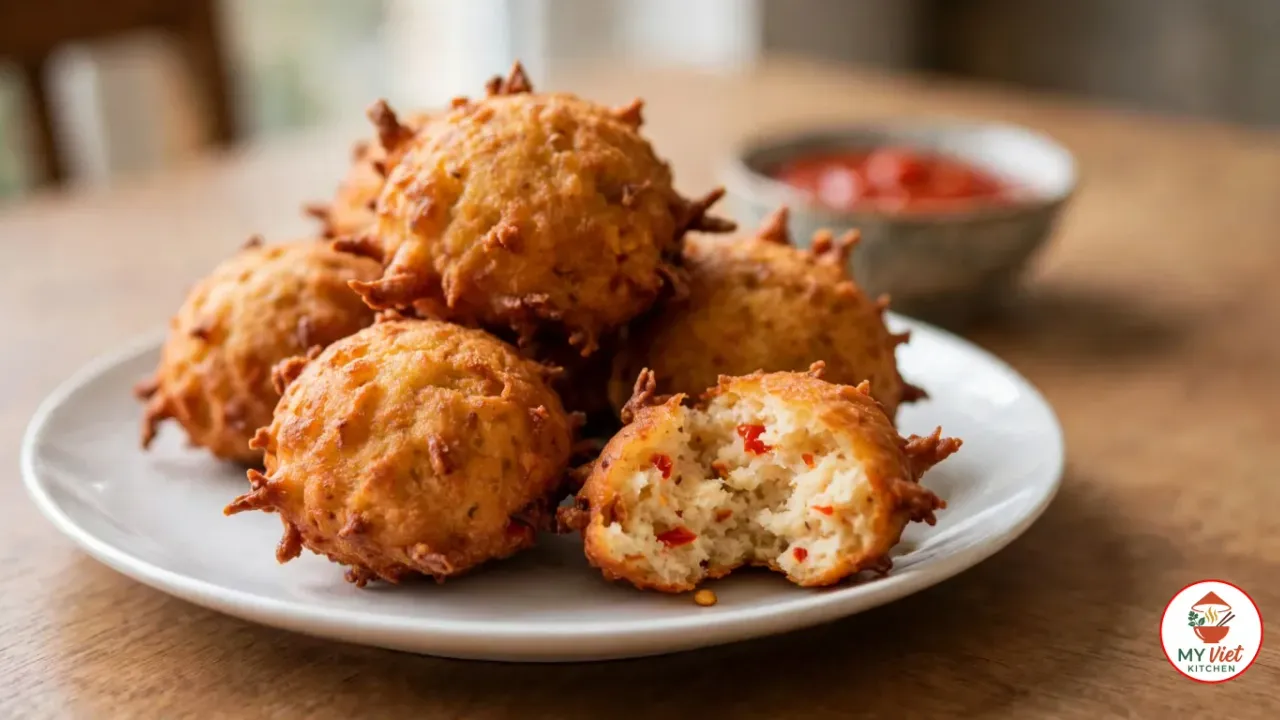
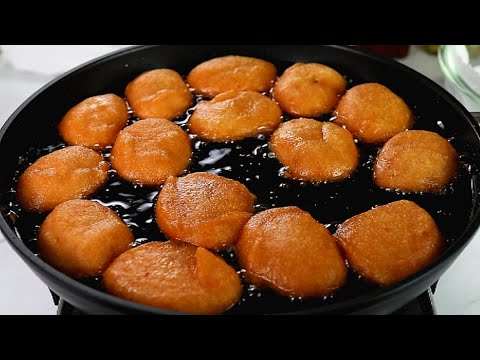
Akara is Nigeria’s most beloved bean fritter, and these crispy golden cakes have been a breakfast staple across West Africa for generations. Made from dried black-eyed peas that are soaked, peeled, blended with onions and hot peppers, and then deep-fried until perfectly golden, akara delivers a satisfying crunch on the outside and a soft, pillowy interior that melts on your tongue. Whether you serve akara as a morning meal with pap, a midday snack with bread, or a party appetizer, this akara recipe teaches you every step to achieve the crispiest, most flavorful bean cakes at home.
Prep Time: 30 minutes | Cook Time: 20 minutes | Servings: 4
Difficulty: Medium | Calories: ~280 per serving
What Makes Akara Special?
Akara occupies a unique place in Nigerian cuisine because it transforms one of the humblest pantry staples into something extraordinary. Black-eyed peas on their own are mild and starchy, but the process of peeling, blending, seasoning, and whipping them into an airy batter unlocks a completely different character. When that batter hits hot oil, the exterior sets into a thin, crispy shell while the inside stays light and almost fluffy. This contrast between the crunchy golden crust and the tender bean interior is what makes akara so addictive.
Across Nigeria, akara appears at roadside stalls, market corners, and family kitchens from the earliest hours of the morning. In Lagos, akara vendors wake before dawn to prepare fresh batches that sell out by mid-morning. In the north, where it goes by the Hausa name kosai, the fritters are often spiced differently and served with kunu, a fermented millet drink. According to food historians, akara likely originated with the Yoruba people of southwestern Nigeria and spread throughout West Africa along trade routes. Today it exists in various forms from Ghana to Brazil, where a nearly identical version called acaraje arrived with enslaved Yoruba people centuries ago.
Beyond its rich history, akara also appeals to modern dietary needs. Because the batter contains only beans, vegetables, and seasonings, akara is naturally gluten-free, dairy-free, and vegan. Black-eyed peas provide plant-based protein, dietary fiber, iron, and folate, which makes akara a nourishing choice for breakfast or a snack. For these reasons, akara has gained popularity among health-conscious eaters worldwide who appreciate its wholesome ingredients and satisfying crunch.
Choosing the Right Black-Eyed Peas for Akara
The quality and type of black-eyed peas you use directly affect the taste and texture of your akara. Since the beans are the foundation of the entire recipe, selecting the right ones matters more than any other decision. Here are your options when shopping for beans.
- Dried black-eyed peas (best choice): Dried beans produce the lightest, crispiest akara because they absorb water evenly during soaking and blend into a smooth, airy batter. Look for beans that appear uniform in color without cracks or insect damage. African grocery stores often carry varieties specifically suited for akara that have thinner skins.
- Honey beans (ewa oloyin): These smaller, sweeter Nigerian beans create a slightly different akara with a richer, earthier flavor. They take longer to peel but produce a batter with a beautiful golden color. Use honey beans when you want a more traditional Yoruba-style akara.
- Canned black-eyed peas (avoid for best results): Canned beans are already cooked, which means they produce a heavier, denser batter that does not puff up properly during frying. The akara turns out flat and oily rather than round and crispy. Use canned beans only as a last resort when time is extremely limited.
Ingredients for Akara
Main Ingredients:
- 2 cups dried black-eyed peas
- 1 large onion, roughly chopped
- 2 habanero or Scotch bonnet peppers, seeded
- 1 red bell pepper, roughly chopped
- 1 teaspoon salt
- 1/2 teaspoon ground crayfish (optional, for authentic flavor)
- 1 seasoning cube (Maggi or Knorr), crushed
For Frying:
- 2 cups vegetable oil or peanut oil for deep frying
Optional Additions:
- 1/4 cup finely chopped spring onions (scallions)
- 1/2 teaspoon ground white pepper
- 1 tablespoon palm oil for extra color and flavor
- Diced smoked fish or dried shrimp for protein
Pro tip: The secret to the crispiest akara is whipping the batter until it becomes light and full of air bubbles. After blending, beat the batter vigorously with a wooden spoon for at least 3 to 5 minutes. You can test the batter by dropping a small amount into a bowl of water. If it floats, the batter has enough air and your akara will be perfectly crispy.
Step-by-Step Instructions
Step 1: Soak and Peel the Black-Eyed Peas
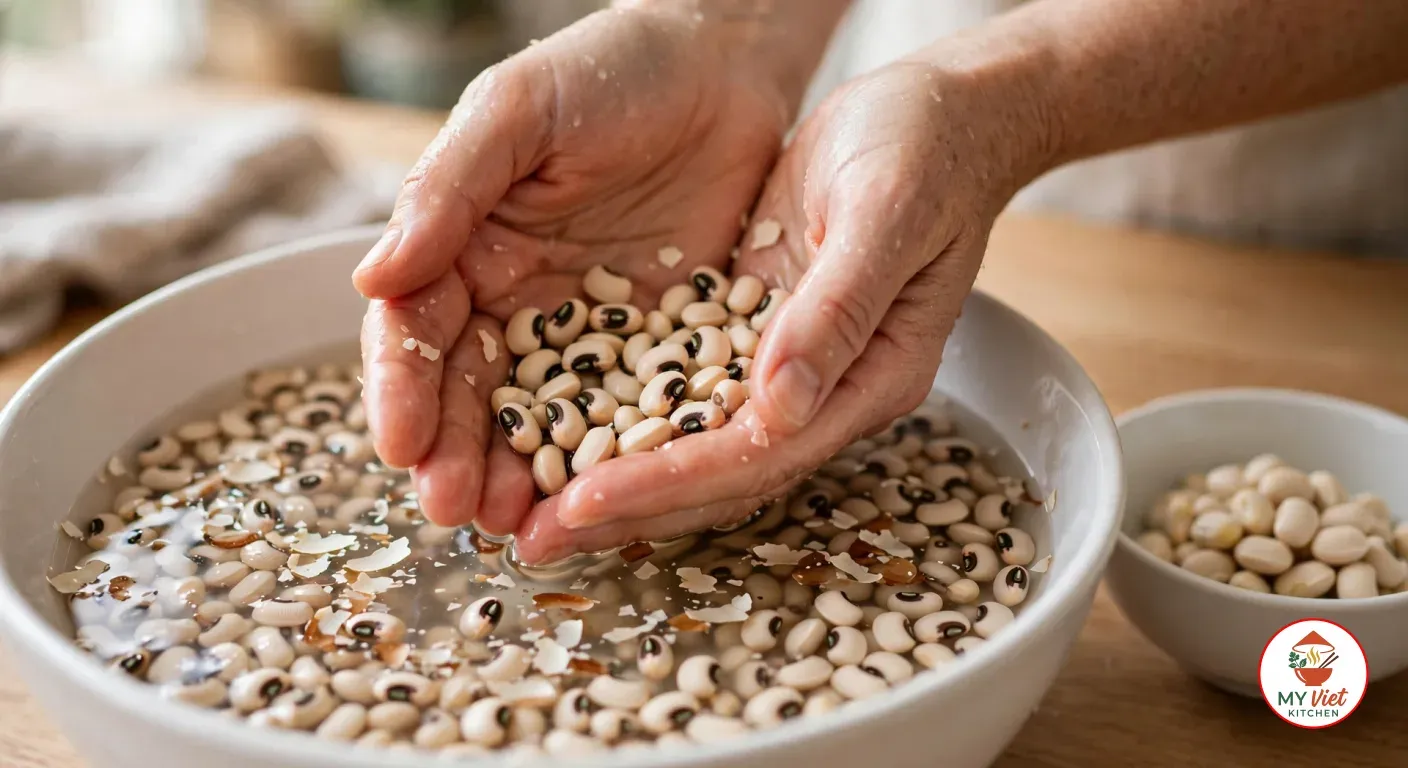
1Place the dried black-eyed peas in a large bowl and cover them with at least 3 inches of water. Allow the beans to soak for 4 to 6 hours, or leave them overnight for the easiest peeling. After soaking, rub handfuls of beans between your palms vigorously. This friction loosens the skins, which then float to the surface of the water. Skim off the floating skins and rinse the beans. Repeat this rubbing and rinsing process 4 to 5 times until the majority of the skins have been removed. Some cooks prefer to pulse the soaked beans briefly in a blender first, then transfer them to water to separate the skins. Either method works well, so choose whichever feels most comfortable.
Step 2: Blend the Bean Batter
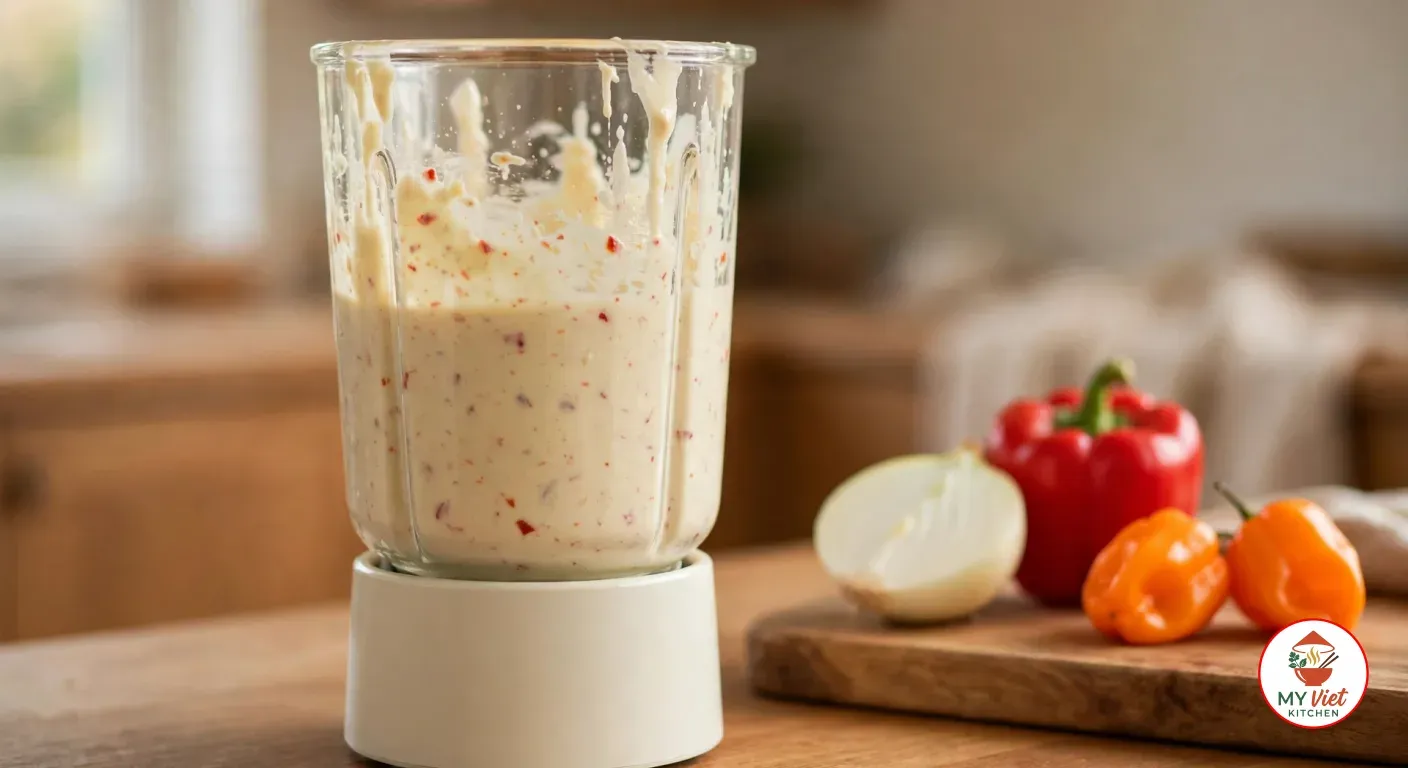
2Add the peeled beans to a high-powered blender along with the chopped onion, habanero peppers, and red bell pepper. Blend on high speed until you achieve a thick, smooth paste. Add water one tablespoon at a time only if the blender struggles to process the mixture. The batter should be thick enough to hold its shape when scooped with a spoon. Avoid adding too much water because a thin batter produces flat, greasy akara instead of round, puffy fritters. If your blender is small, process the beans in two batches and combine them in a large mixing bowl afterward.
Step 3: Season and Whip the Batter
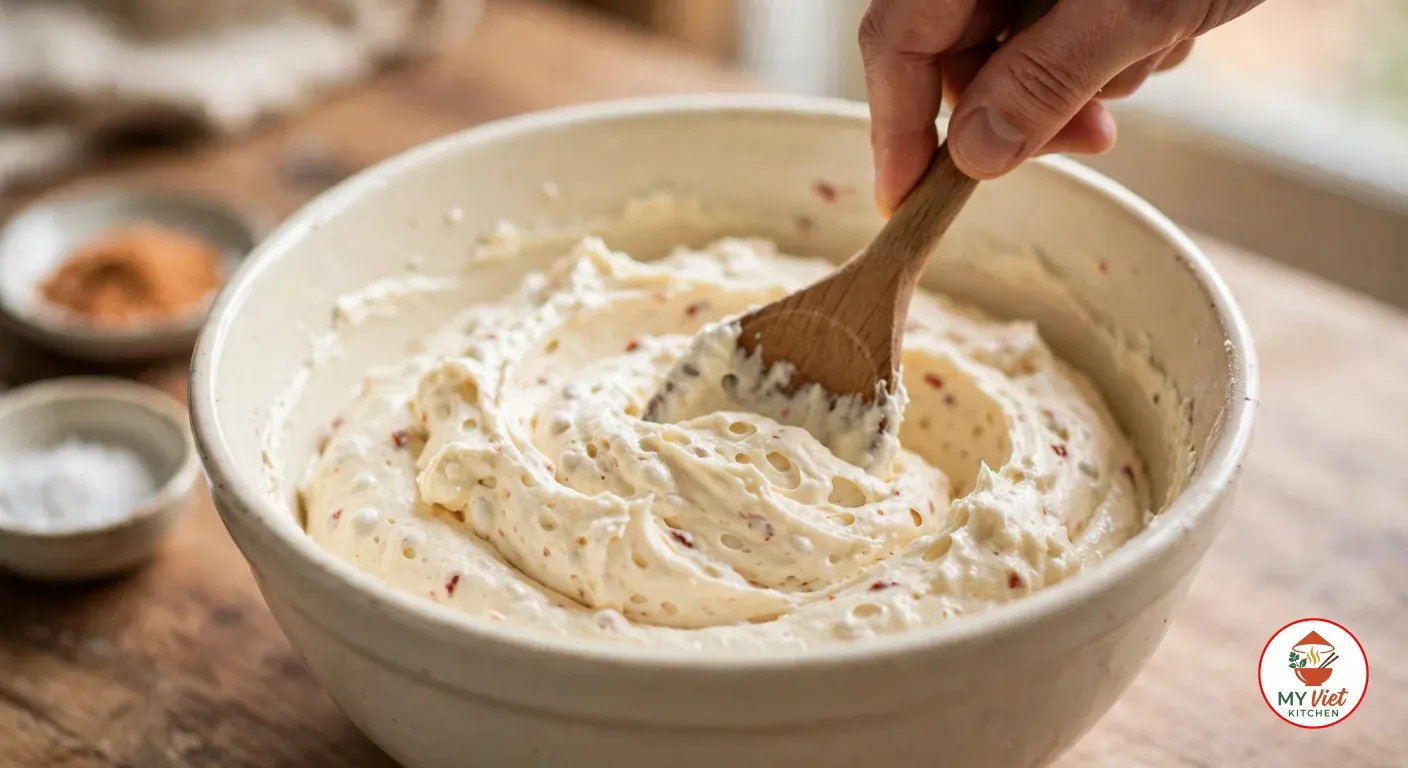
3Transfer the blended batter to a large bowl. Add the salt, ground crayfish, and crushed seasoning cube. Now comes the most important step for crispy akara: beat the batter vigorously with a wooden spoon or sturdy whisk for 3 to 5 minutes. This whipping action incorporates air into the batter, and those tiny air pockets expand during frying to create a light, puffy interior. You will notice the batter becoming lighter in color and increasing slightly in volume as you whip. Test the batter by dropping a small ball into a cup of water. If it floats, the batter is ready for frying.
Step 4: Heat the Oil and Fry the Akara
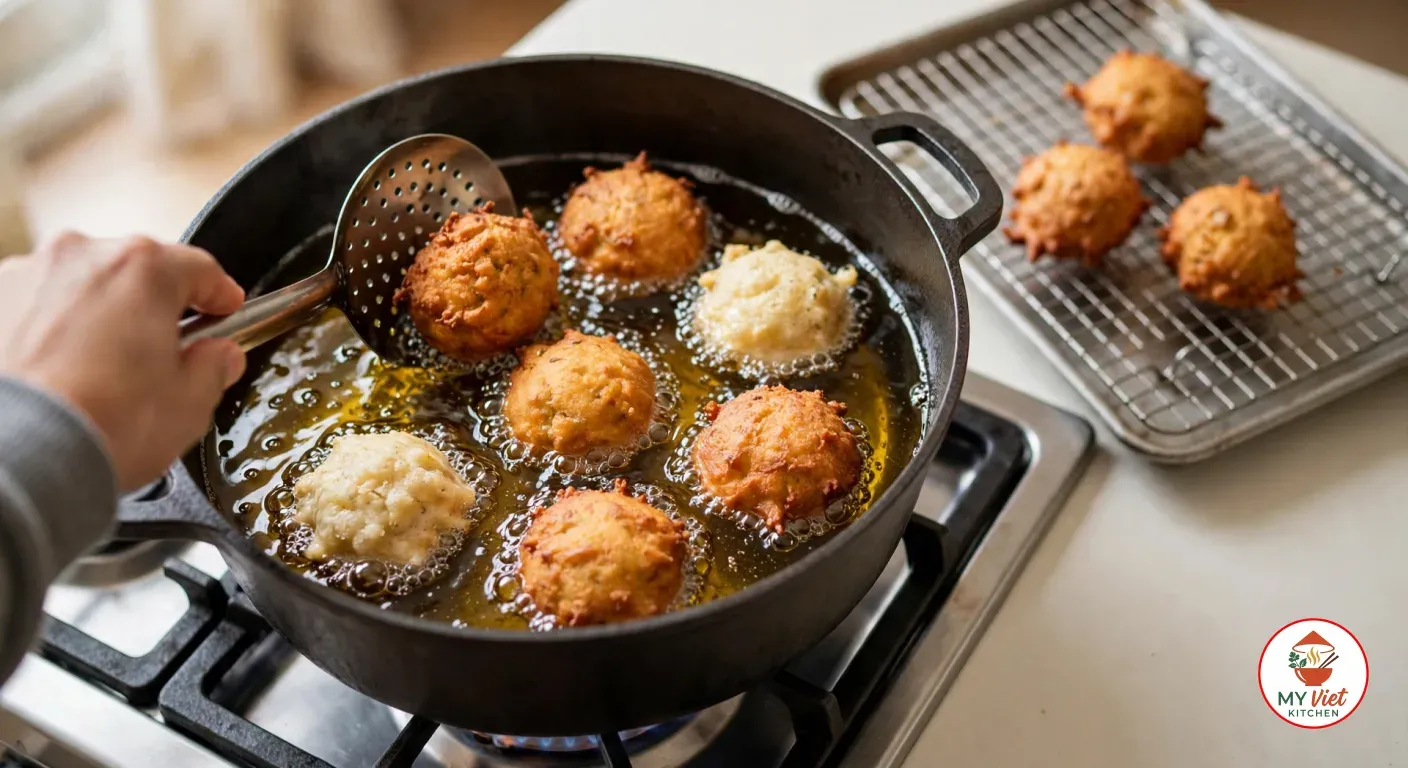
4Pour the vegetable oil into a deep, heavy-bottomed pot or Dutch oven. Heat the oil over medium-high heat until it reaches 350 degrees Fahrenheit (175 degrees Celsius). Test the temperature by dropping a tiny bit of batter into the oil. If it sizzles immediately and floats to the surface, the oil is ready. Using a tablespoon or your hand, scoop a portion of batter and carefully drop it into the hot oil. Fry 5 to 6 pieces at a time, turning them with a slotted spoon every 2 minutes until all sides turn golden brown. Each batch takes about 4 to 5 minutes total. Remove the finished akara and drain on paper towels or a wire rack.
Step 5: Serve the Akara
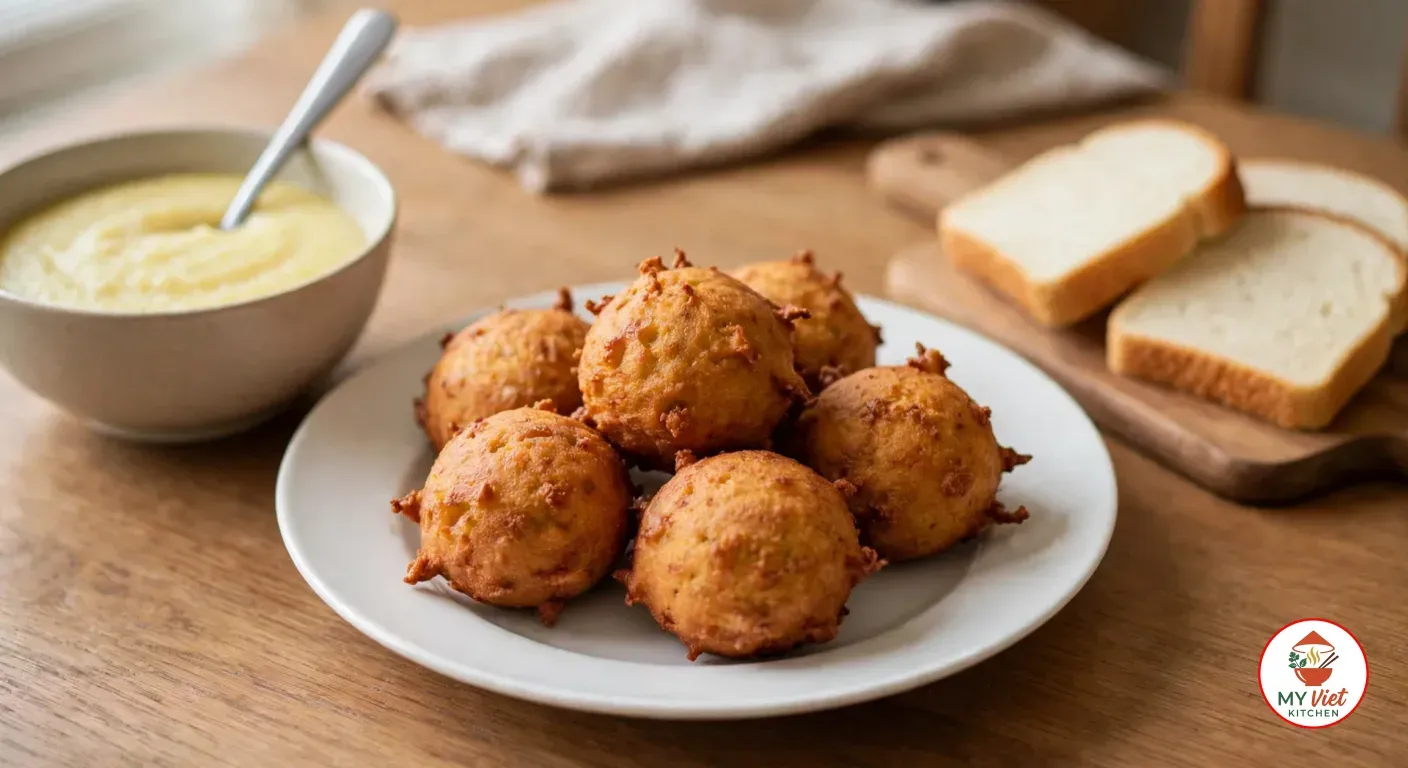
5Arrange the freshly fried akara on a serving plate. Serve immediately while still hot and crispy for the best eating experience. In Nigeria, akara is traditionally enjoyed with soft white bread, pap (ogi), or custard for breakfast. You can also serve akara as a snack alongside a spicy pepper sauce or use it as an appetizer at gatherings. The fritters taste best within 30 minutes of frying, so bring them to the table straight from the kitchen.
Expert Tips for Perfect Akara
Whip the Batter Thoroughly
The single most important factor for crispy, puffy akara is a well-whipped batter. Beating the batter incorporates air bubbles that expand when the fritters hit hot oil. This creates the characteristic light, airy interior that distinguishes great akara from dense, heavy versions. Use a sturdy wooden spoon and beat in one direction for consistent results. If your arm gets tired, you can use a hand mixer on low speed for 2 minutes to achieve similar results.
Maintain Oil Temperature
Keeping the oil at a steady 350 degrees Fahrenheit throughout the frying process ensures every batch comes out golden and crispy. When you add batter to the oil, the temperature drops temporarily. So allow the oil to recover between batches by waiting 30 seconds before adding the next round. If the oil is too cool, the akara absorbs excess oil and turns greasy. If the oil is too hot, the outside burns before the inside cooks through. A deep-fry thermometer takes the guesswork out of this step entirely.
Remove All Bean Skins
Taking the time to remove the bean skins properly makes a noticeable difference in the final texture. Skins create a gritty, grainy batter that produces akara with a rough, uneven surface. Thoroughly peeled beans blend into a silky paste that fries evenly and produces a smooth, golden exterior. While the peeling step requires patience, it is not something you can skip if you want authentic results.
Akara vs. Other Bean Fritters Around the World
Bean fritters appear in many cuisines worldwide, but each culture brings different techniques and seasonings to the concept. Here is how Nigerian akara compares to other popular bean fritter dishes from different regions.
| Feature | Akara (Nigeria) | Acaraje (Brazil) | Falafel (Middle East) |
|---|---|---|---|
| Base Ingredient | Black-eyed peas | Black-eyed peas | Chickpeas or fava beans |
| Seasoning | Onions, peppers, crayfish | Onions, dried shrimp, palm oil | Herbs, garlic, cumin |
| Shape | Round balls or patties | Split open and stuffed | Small round patties |
| Texture | Crispy shell, fluffy inside | Crispy shell, fluffy inside | Crispy shell, dense and herby |
| Serving Style | With pap, bread, or sauce | Stuffed with vatapa and salad | In pita with tahini and vegetables |
| Cultural Origin | Yoruba, West Africa | Afro-Brazilian (Yoruba roots) | Levantine and Egyptian |
Serving Suggestions
In Nigeria, akara appears at breakfast tables, street stalls, and celebration feasts throughout the year. The versatility of these bean fritters means you can enjoy them at any meal and with a wide range of accompaniments. Here are the most traditional and popular ways to serve your homemade akara.
The Perfect Accompaniments:
- Pap (ogi/akamu): This fermented corn porridge is the most classic pairing for akara in Nigeria. The smooth, warm pap contrasts beautifully with the crispy bean fritters, and together they form the most popular Nigerian breakfast combination.
- Soft white bread: Many Nigerians enjoy akara tucked inside sliced bread as a handheld breakfast sandwich. The soft bread soaks up the warmth of the fritters and creates a satisfying texture contrast.
- Jollof rice: Serve akara alongside jollof rice for a more substantial meal. The tomato-based rice and the bean fritters complement each other with contrasting textures and shared West African flavors.
- Garri (soaked or fried): In many Nigerian households, leftover akara gets paired with garri soaked in cold water and sugar. This simple combination makes a quick, filling afternoon snack that millions of Nigerians enjoy daily.
Beverage Pairings:
- Pap (corn porridge): Beyond being a food accompaniment, warm pap also functions as a breakfast drink in Nigeria. Its mild, slightly tangy flavor pairs naturally with the savory, spiced akara.
- Kunu (fermented millet drink): This creamy, spiced beverage from northern Nigeria offers a refreshing counterpoint to the richness of fried akara. The ginger and clove notes in kunu cut through the oil and refresh the palate.
- Zobo (hibiscus tea): The tart, cranberry-like flavor of zobo cleanses the palate between bites of akara and aids digestion after a hearty breakfast.
Storage and Reheating
Refrigerator: Store leftover akara in an airtight container for up to 3 days. The fritters lose their crispiness in the refrigerator, but proper reheating restores much of the texture. Keep any dipping sauce in a separate container to prevent the akara from becoming soggy.
Freezer: Freeze cooked akara in a single layer on a baking sheet first, then transfer to freezer bags for up to 2 months. This method prevents the pieces from sticking together. You can reheat them directly from frozen without thawing first.
Reheating: The best way to reheat akara is in a hot oven at 375 degrees Fahrenheit for 8 to 10 minutes. Place them on a wire rack so hot air circulates around each piece and restores the crispy exterior. You can also re-fry them briefly in hot oil for 1 to 2 minutes per side. Avoid the microwave because it turns the crispy shell soft and rubbery.
Common Mistakes to Avoid
1. Skipping the Bean Peeling Step
Leaving the skins on the black-eyed peas is the fastest way to ruin a batch of akara. The skins prevent the batter from blending smoothly and create a rough, grainy texture that does not fry evenly. Unpeeled beans also make the batter heavier, which means the akara will not puff up during frying. Always take the time to peel your beans thoroughly, even though the process requires patience and multiple rounds of rinsing.
2. Adding Too Much Water to the Batter
A watery batter is the second most common mistake when making akara. If you add too much water during blending, the batter becomes thin and runny. Thin batter spreads flat in the oil instead of forming round, puffy balls. The result is oily, dense fritters that lack the characteristic crispy exterior. Add water only one tablespoon at a time, and stop as soon as the blender can process the beans smoothly. The batter should be thick enough to hold a peak when you lift the spoon.
3. Overcrowding the Frying Pot
Dropping too many batter portions into the oil at once causes the temperature to plunge. When the oil cools down, the akara absorbs oil instead of crisping up on the surface. The result is greasy, heavy fritters that taste oily rather than light and crunchy. Fry only 5 to 6 pieces at a time and give each piece enough room to float freely. This patience pays off with evenly golden, perfectly crispy akara every time.
Frequently Asked Questions
Can I make akara without a blender?
Traditionally, Nigerian cooks made akara by grinding the soaked beans on a stone mortar and pestle. While this method works, it requires significant effort and time. A food processor is the best modern alternative to a blender. If you have neither, you can use a potato masher to crush the beans after soaking, though the texture will be coarser. For the smoothest batter, a high-powered blender remains the most effective tool.
How spicy is akara?
The heat level depends entirely on how many habanero or Scotch bonnet peppers you include and whether you remove the seeds. Two seeded peppers produce a moderate heat that most adults handle comfortably. For a milder version, use only one pepper or substitute a less fiery variety like a jalapeño. For extra heat, leave the seeds in or add an additional pepper. Children in Nigeria often eat akara made with only bell peppers and no hot peppers at all.
Can I make akara ahead of time for a party?
You can prepare the batter up to 12 hours in advance and store it in the refrigerator. When you are ready to serve, give the batter a quick whip to re-incorporate air before frying. However, akara tastes best when freshly fried, so plan your timing to fry the last batch just before serving. If you must fry in advance, keep the finished akara warm in an oven set to 200 degrees Fahrenheit on a wire rack until your guests arrive.
What oil is best for frying akara?
Vegetable oil and peanut oil both work excellently for frying akara. Peanut oil has a high smoke point and adds a subtle nutty undertone that complements the bean flavor beautifully. Some traditional recipes call for palm oil, which gives the akara a distinctive reddish color and earthy depth. Avoid olive oil because its low smoke point makes it unsuitable for the high temperatures needed for deep frying. Canola oil serves as another neutral option that produces consistent results.
Variations and Adaptations
Akara with Eggs:
For a richer version, crack one or two eggs into the batter before whipping. The eggs add extra protein and help bind the batter, resulting in a slightly denser but more golden fritter. This variation is popular in some parts of Lagos, where vendors add eggs to differentiate their akara from competitors. The egg version holds together better and stays crispy slightly longer after frying.
Stuffed Akara (Brazilian Acaraje Style):
Take inspiration from Brazilian acaraje by splitting fried akara open and stuffing them with spiced shrimp, tomato salsa, or cooked vegetables. This presentation transforms simple bean fritters into an impressive appetizer or party food. The crispy akara shell serves as an edible cup that holds fillings beautifully.
Baked Akara (Healthier Version):
For a lower-fat alternative, spoon the batter into a greased muffin tin and bake at 375 degrees Fahrenheit for 25 to 30 minutes until golden on top. Baked akara will not have the same crispy shell as the fried version, but it delivers the same bean flavor with significantly less oil. This method works well for meal prep because baked akara reheats better than fried versions.
The Cultural Significance of Akara
Akara holds deep cultural meaning that extends far beyond its role as a breakfast food in Nigeria. Among the Yoruba people, akara plays a part in naming ceremonies, weddings, and other celebrations. When a baby is born, the mother traditionally receives gifts of akara along with other symbolic foods. At wedding celebrations, large quantities of akara appear alongside other traditional dishes as a sign of abundance and hospitality. The ability to make excellent akara is considered an important culinary skill for Yoruba women, and many families pass down their specific recipes through generations.
The economic significance of akara also deserves recognition. Thousands of women across Nigeria earn their livelihoods by selling akara at roadside stalls and markets. Starting an akara business requires minimal capital: beans, oil, peppers, and a frying pot are the only necessities. This low barrier to entry has made akara selling one of the most accessible forms of self-employment for Nigerian women. In Lagos alone, akara vendors serve millions of people every morning, forming a vital part of the informal food economy that feeds the city.
Furthermore, akara connects Nigeria to the broader African diaspora. When enslaved Yoruba people arrived in Brazil, they brought their bean fritter recipe with them. Over centuries, that recipe evolved into acaraje, which is now a protected cultural heritage food in the Brazilian state of Bahia. The fact that akara survived the Middle Passage and thrives today on two continents speaks to its importance as a carrier of cultural identity and culinary knowledge. Every batch of akara fried in a Nigerian kitchen or a Brazilian street stall carries forward a tradition that spans hundreds of years.
Conclusion
Akara is one of Nigeria’s greatest culinary gifts to the world, and making it at home brings the vibrant flavors of West African street food into your kitchen. The recipe requires patience during the bean peeling stage, but the reward is a crispy, golden fritter with a fluffy interior that no other cooking method can replicate. By peeling your beans thoroughly, blending the batter to the right consistency, whipping air into the mixture, and maintaining proper oil temperature, you can achieve akara that rivals what you would find at the best stalls in Lagos.
If you enjoyed this recipe, explore more of our African food collection for dishes from across the continent. Try our egusi soup recipe for another beloved Nigerian dish, or discover suya for the smoky grilled meat skewers that are Nigeria’s other legendary street food.