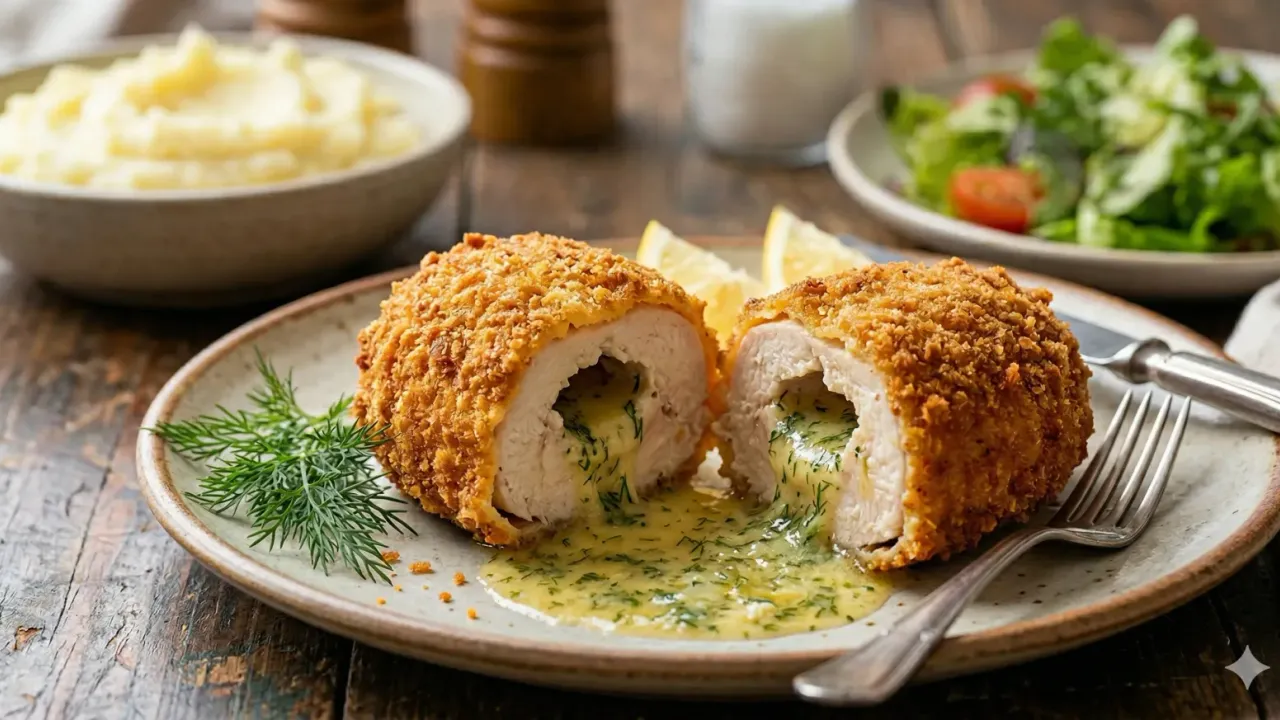
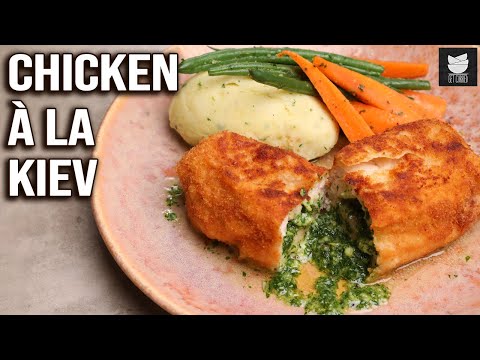
Chicken Kyiv is one of the most celebrated dishes in Ukrainian cuisine. A tender chicken breast wraps around a core of fragrant garlic herb butter, then gets coated in golden breadcrumbs and fried to perfection. Cutting into that crispy shell releases a rush of melted butter that pools on the plate. This chicken kyiv recipe guides you through every technique for achieving restaurant-quality results at home. Expect a crackling crust, juicy meat, and that signature buttery burst in every bite.
Prep Time: 30 minutes | Cook Time: 25 minutes | Servings: 4
Difficulty: Intermediate | Calories: ~520 per serving
What Makes Chicken Kyiv Special?
Chicken Kyiv stands apart from other stuffed chicken dishes because of its dramatic reveal. The moment your knife pierces the crispy shell, a stream of garlic-scented butter flows out. That visual spectacle turns a simple dinner into an event. No other chicken preparation delivers this combination of textures and flavors in a single cut. The exterior shatters like glass. The chicken stays remarkably moist. And the herb butter acts as a built-in sauce that eliminates the need for anything extra on the plate.
The genius of this dish lies in its construction. By freezing the butter first, the cook creates a time-delayed melting effect. During frying and baking, the butter softens gradually inside the sealed chicken pocket. It bastes the meat from within while the breadcrumb armor holds everything together. This technique represents a masterful understanding of how heat, fat, and protein interact. Ukrainian cooks perfected this balance over generations, and it remains one of the most impressive feats in home cooking.
Beyond technique, Chicken Kyiv carries deep cultural significance. The dish became an international symbol of Ukrainian culinary skill during the Soviet era. Hotels in Kyiv served it to visiting diplomats and journalists. Word spread across Europe and North America. Today, the dish has regained its proper Ukrainian spelling and identity. Making Chicken Kyiv at home is both a celebration of Ukrainian heritage and a rewarding kitchen challenge that builds real cooking confidence.
Choosing the Right Chicken
The chicken breast is the foundation of this dish. Your choice of meat directly affects the texture, flavor, and success of the final result. Here is what to look for when shopping.
- Fresh boneless, skinless breasts (best choice): Look for plump breasts that weigh about 6 ounces each. Fresh chicken pounds more evenly and holds together better during rolling. Avoid breasts that look waterlogged, because injected solutions make the meat spongy and difficult to seal around the butter.
- Organic or free-range chicken (premium option): These breasts tend to have better flavor and a firmer texture. The meat has more natural structure from the bird’s active lifestyle. That firmness helps the chicken hold its shape during pounding and rolling. The flavor difference is noticeable in a dish this simple.
- Airline-cut breasts (traditional method): Some classic recipes use a breast with the drumette bone still attached. The bone acts as a handle and gives the finished dish an elegant presentation. Ask your butcher for this cut. It requires more careful pounding, but the visual impact is worth the effort.
- Thawed frozen breasts (budget-friendly): Frozen chicken works if thawed slowly in the fridge overnight. However, previously frozen meat releases more moisture during cooking. Pat it completely dry before pounding. Extra moisture weakens the breading and increases the risk of butter leaks during frying.
Ingredients for Chicken Kyiv
Garlic Herb Butter:
- 1/2 cup (1 stick) unsalted butter, softened
- 4 cloves garlic, finely minced
- 2 tablespoons fresh dill, finely chopped
- 2 tablespoons fresh parsley, finely chopped
- 1 tablespoon fresh chives, finely chopped
- 1 teaspoon lemon zest
- 1 teaspoon lemon juice
- 1/2 teaspoon salt
- 1/4 teaspoon black pepper
Chicken:
- 4 boneless, skinless chicken breasts (about 6 ounces each)
- Salt and black pepper to taste
Breading Station:
- 1 cup all-purpose flour
- 3 large eggs, beaten
- 2 cups panko breadcrumbs
- 1/2 cup fine dry breadcrumbs
For Cooking and Serving:
- Vegetable oil for frying (about 2 inches deep)
- Lemon wedges for serving
- Fresh dill sprigs for garnish
Pro tip: The compound butter must be completely frozen before you roll it inside the chicken. Soft butter melts through the meat during assembly and creates gaps in the seal. Shape the butter into tight logs, wrap in plastic, and freeze for at least 30 minutes. Even better, freeze for a full hour. A rock-solid butter log gives you more time during the rolling and breading process. It also ensures the butter melts slowly and evenly during cooking instead of erupting through a weak spot in the crust.
Step-by-Step Instructions
Step 1: Prepare the Garlic Herb Butter
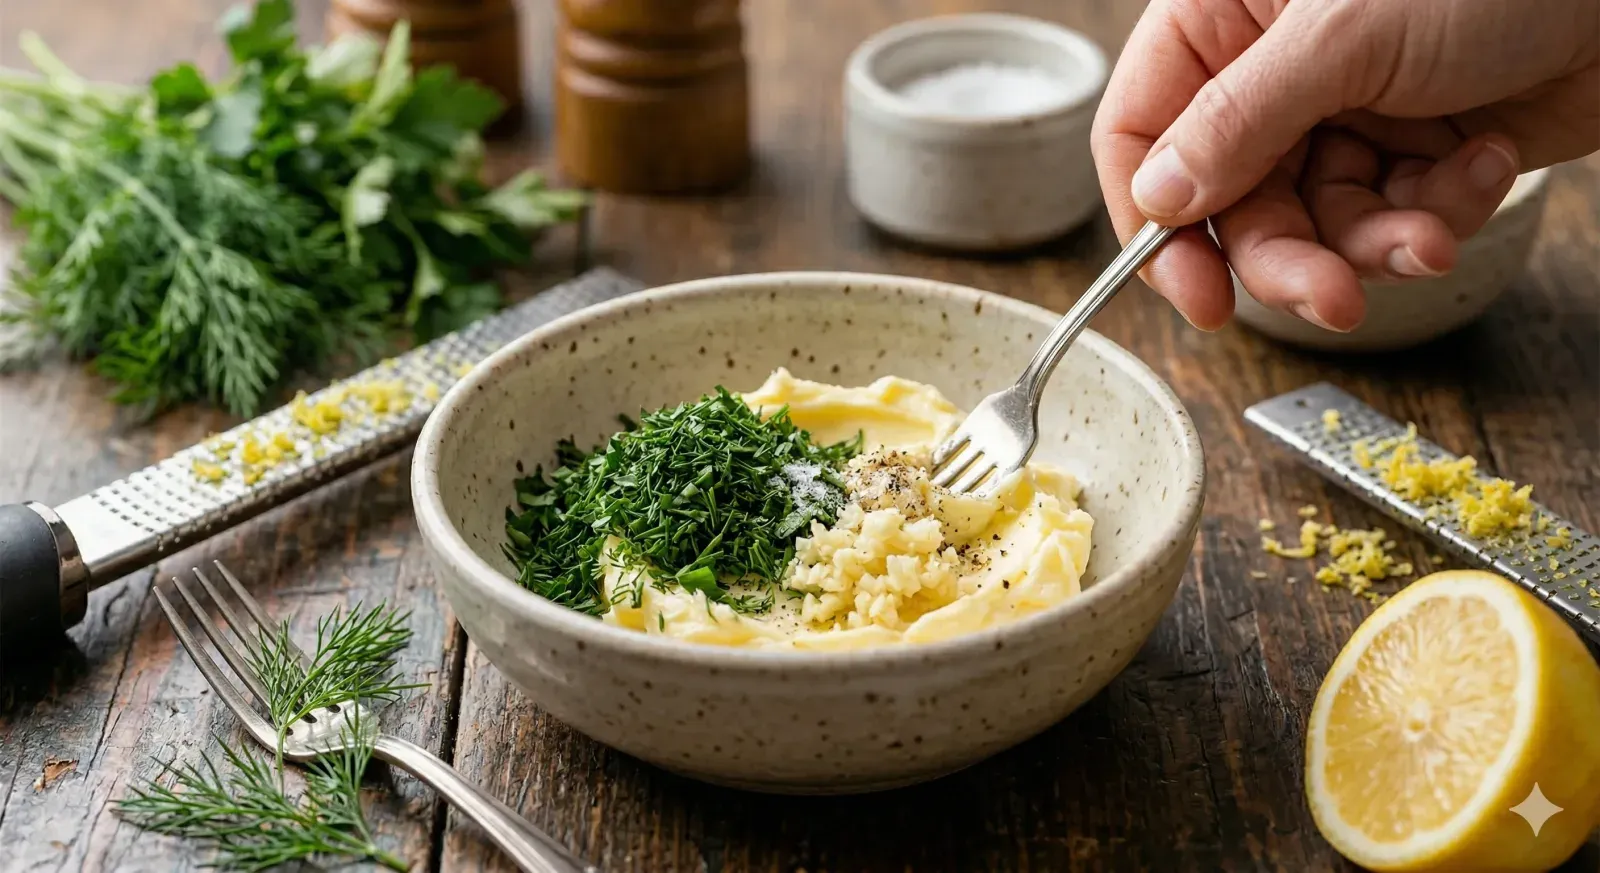
1 Place the softened butter in a bowl. Add the minced garlic, chopped dill, parsley, chives, lemon zest, and lemon juice. Season with salt and pepper. Mix everything together with a fork until the herbs distribute evenly throughout the butter. You should see green flecks scattered uniformly in every direction.
Divide the butter into four equal portions. Roll each portion into a tight log about three inches long and one inch thick. Wrap each log snugly in plastic wrap, twisting the ends to compress the butter. Place them in the freezer for at least 30 minutes. Meanwhile, you can prepare the chicken. The butter needs to be completely firm before it goes inside the meat. Otherwise, it will melt prematurely and leak during cooking.
Step 2: Butterfly and Pound the Chicken
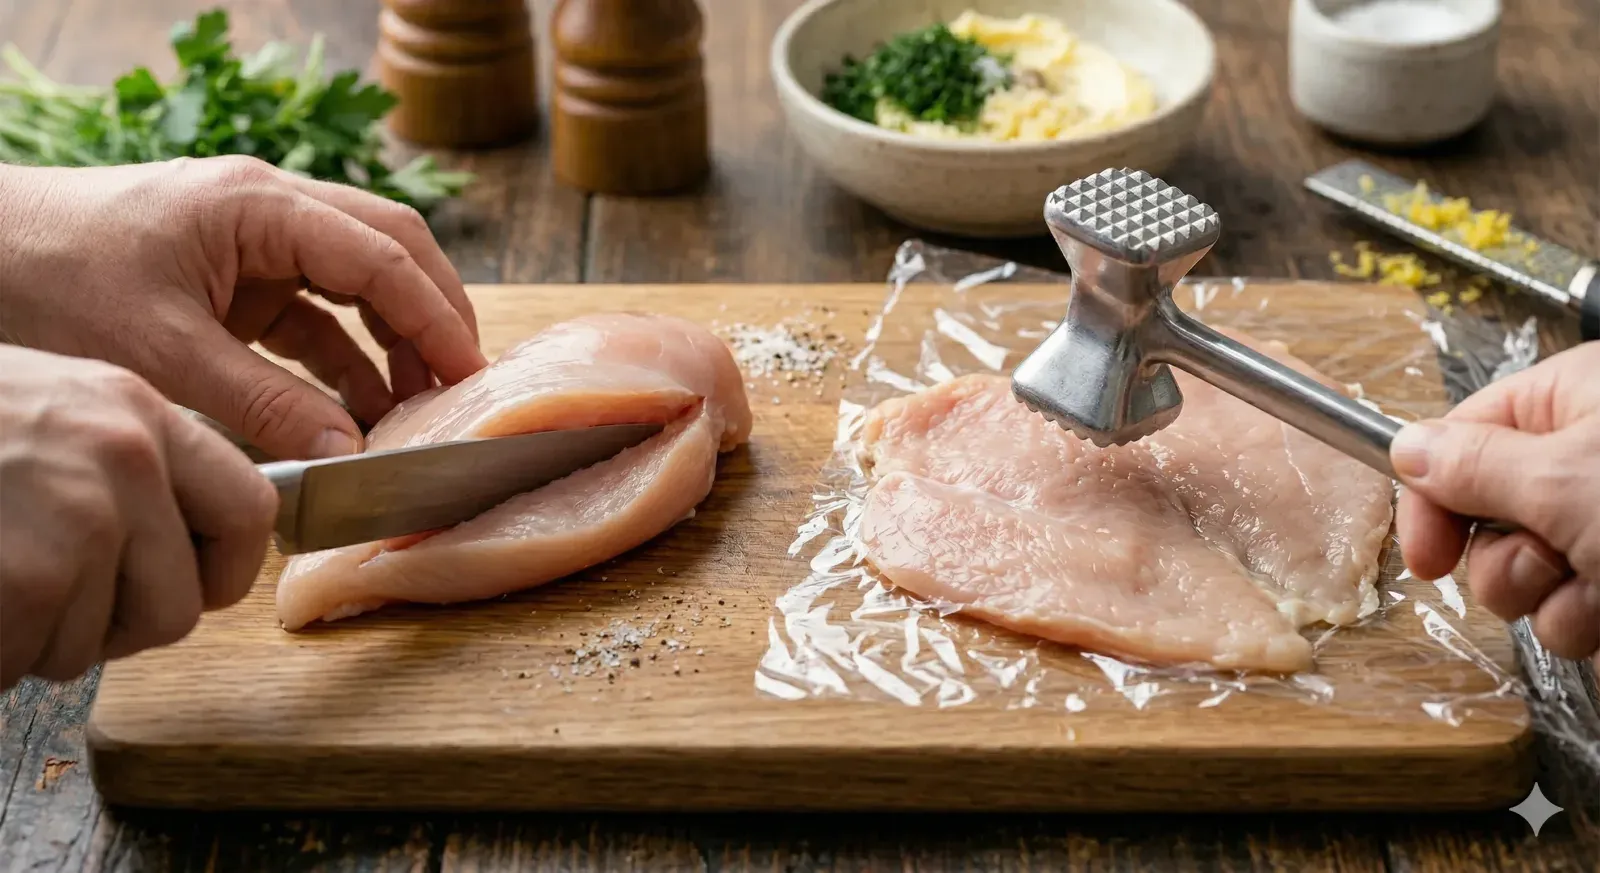
2 Lay one chicken breast flat on a cutting board. Hold your knife parallel to the board and slice horizontally through the thickest part. Stop about half an inch from the edge so the breast opens like a book. This technique is called butterflying. It doubles the surface area while keeping the meat in one piece.
Open the butterflied breast and place it between two sheets of plastic wrap. Use a meat mallet or rolling pin to pound it to an even quarter-inch thickness. Work from the center outward with gentle, controlled strikes. Aggressive pounding tears the meat, which creates holes where butter escapes. You want a uniform sheet of chicken with no thin spots or rips. Repeat with the remaining three breasts. Season both sides of each piece with salt and pepper.
Step 3: Roll the Chicken Around the Butter
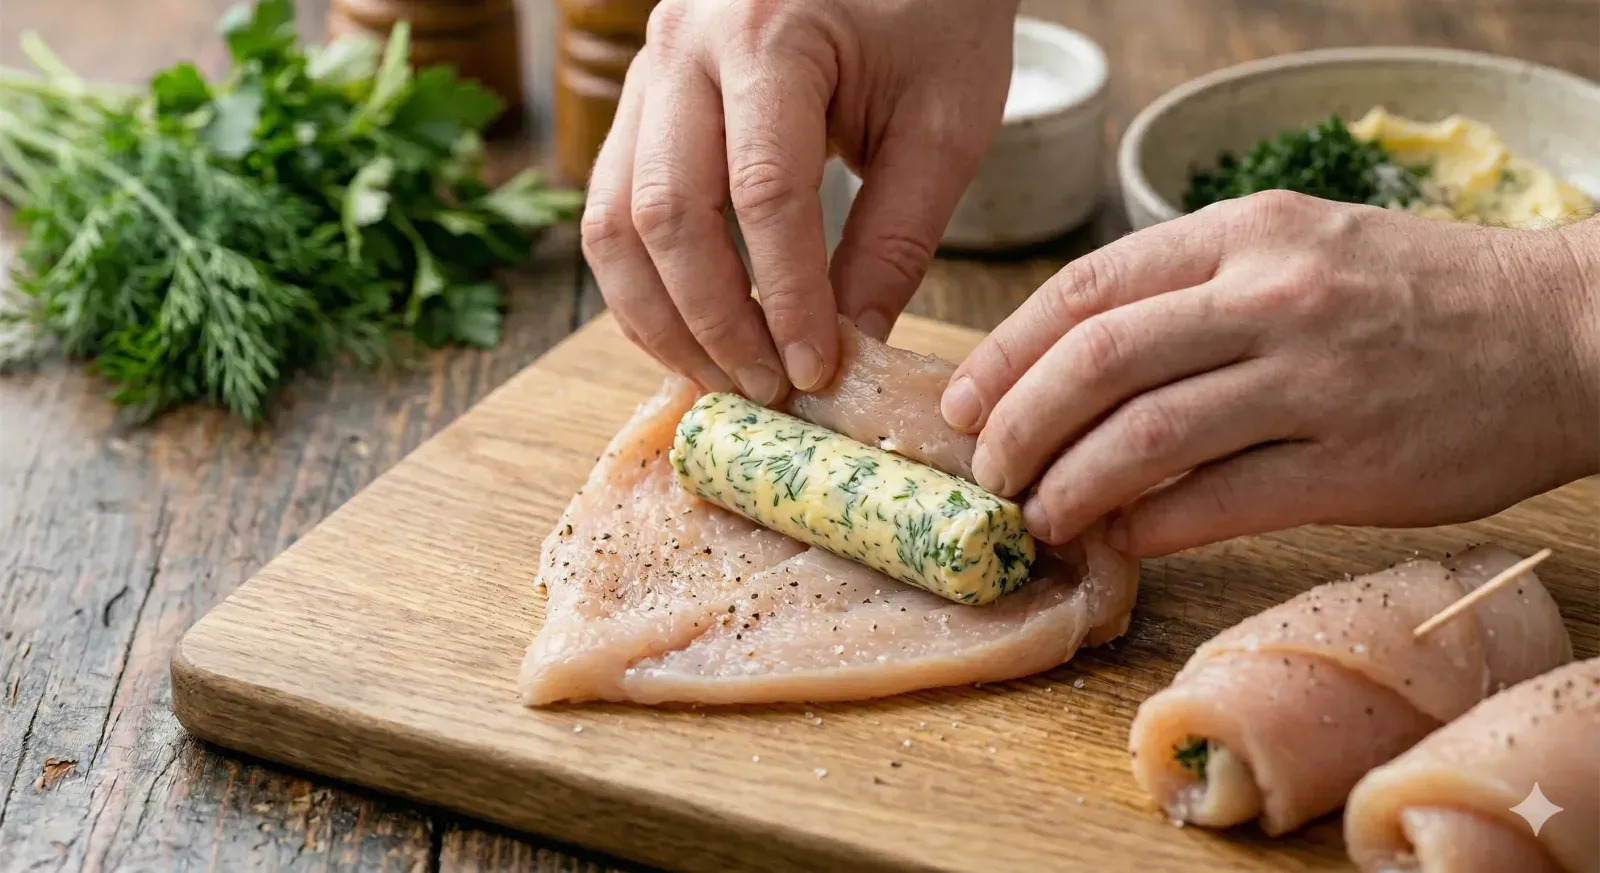
3 Remove the butter logs from the freezer. Unwrap one log and place it at the wider end of a pounded chicken breast. Fold the sides of the chicken inward over the butter. Then roll the breast tightly from the wide end toward the narrow tip. The goal is a compact cylinder with no exposed butter visible.
Tuck the seam side down and press gently to seal. If any part feels loose, secure it with a toothpick. However, a properly pounded and rolled breast should hold together without one. Repeat with the remaining three pieces. The tighter your roll, the less likely the butter will escape during frying. Think of it as wrapping a gift. Every edge needs to overlap and every seam needs to face downward.
Step 4: Bread the Chicken Rolls
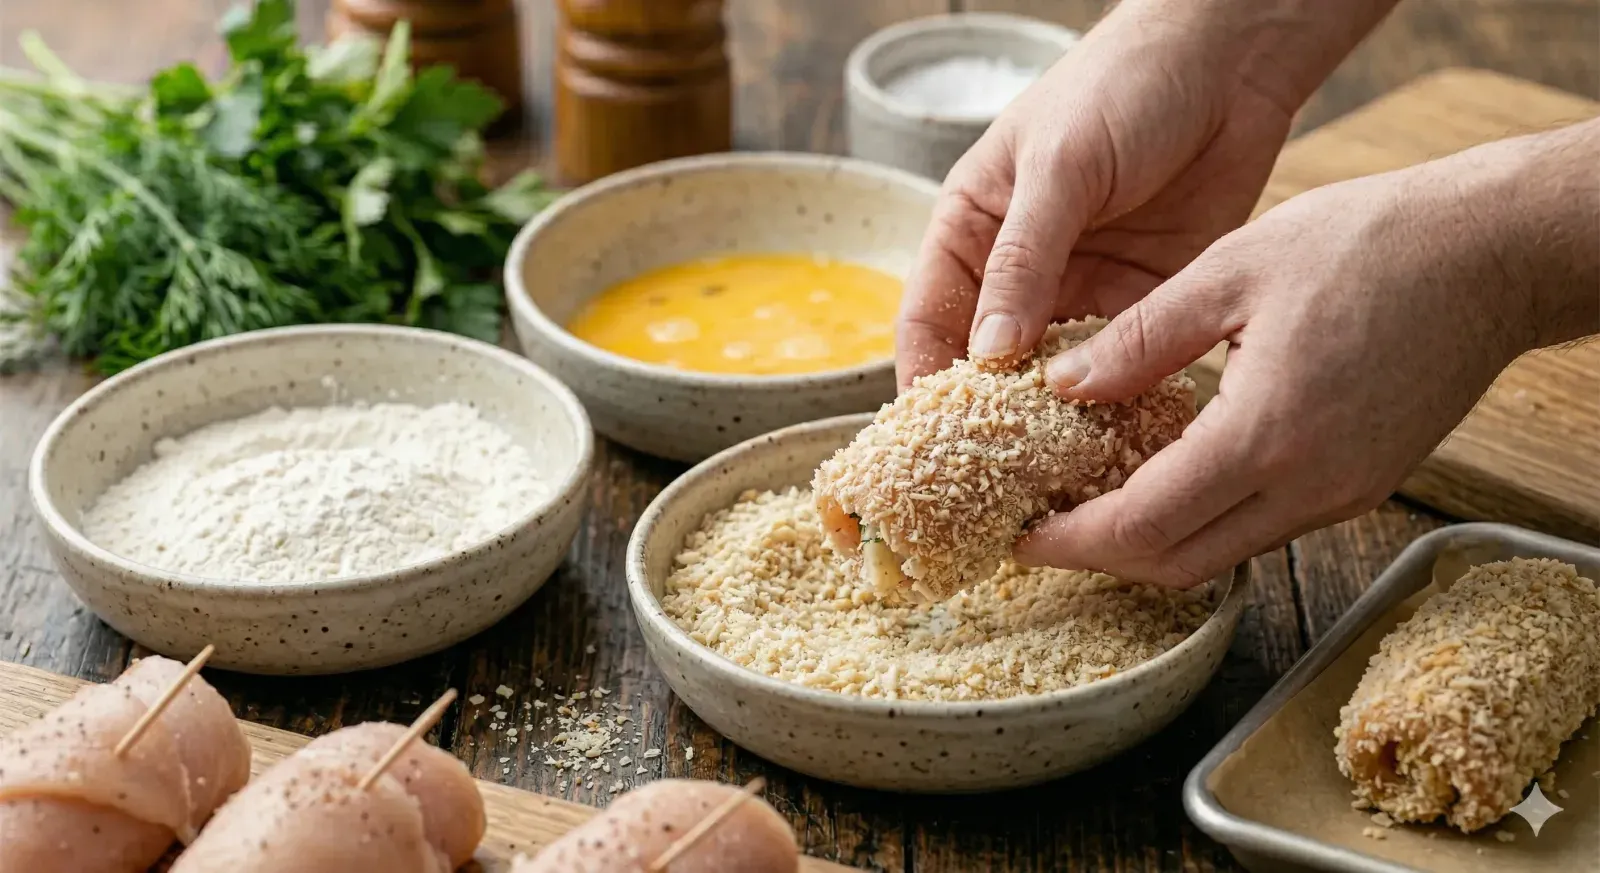
4 Set up your breading station with three shallow dishes. Place flour in the first, beaten eggs in the second, and the combined panko and fine breadcrumbs in the third. The mixture of panko and fine crumbs gives you the best of both worlds. Panko provides crunch, while fine crumbs fill the gaps for a sealed coating.
Roll each chicken piece in flour first, shaking off the excess. Next, dip it in the beaten egg, letting any extra drip away. Then press it firmly into the breadcrumb mixture, coating every surface evenly. Now repeat the egg and breadcrumb steps for a second coat. This double breading creates a thick, sturdy armor that prevents butter leaks. Place the breaded rolls on a baking sheet and refrigerate for 15 minutes. Chilling sets the coating and helps it adhere during frying.
Step 5: Fry and Bake the Chicken Kyiv
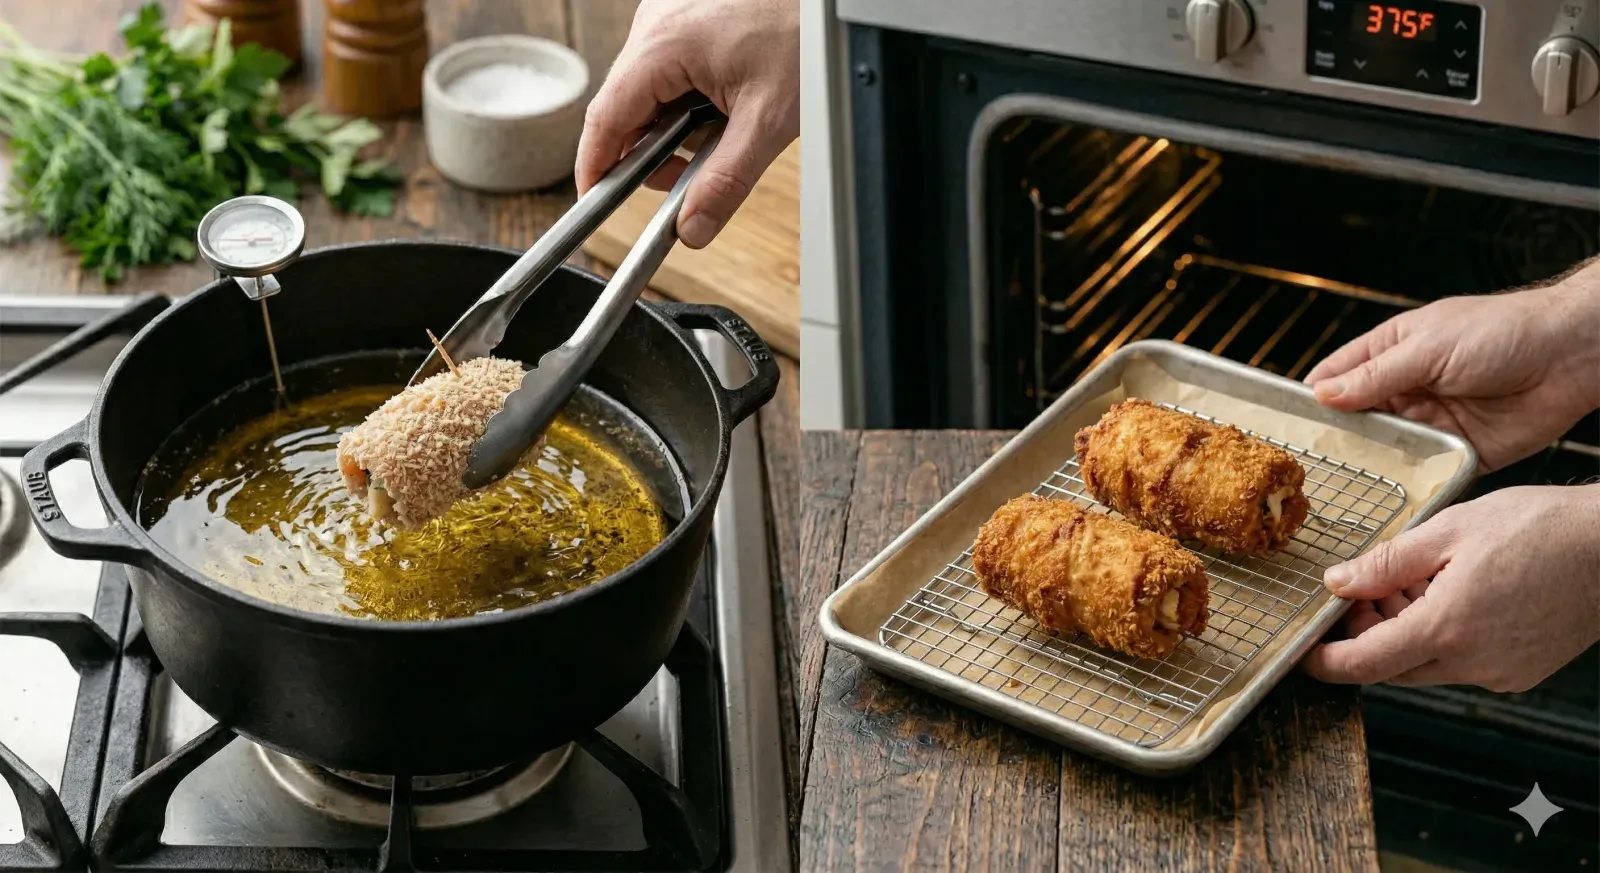
5 Pour vegetable oil into a deep skillet or Dutch oven to a depth of about two inches. Heat the oil to 340 degrees Fahrenheit. Use a thermometer to monitor the temperature accurately. Oil that is too hot burns the coating before the chicken cooks through. Oil that is too cool makes the breading greasy and soggy.
Carefully lower two chicken rolls into the oil using tongs. Fry for 3 to 4 minutes, turning gently, until the coating turns golden brown on all sides. Transfer to a wire rack set over a baking sheet. Repeat with the remaining two rolls. Then place the baking sheet in a preheated 375-degree Fahrenheit oven. Bake for 15 to 18 minutes until the internal temperature reaches 165 degrees Fahrenheit. This two-stage cooking method gives you a perfect crust and fully cooked, juicy meat inside.
Step 6: Rest and Serve
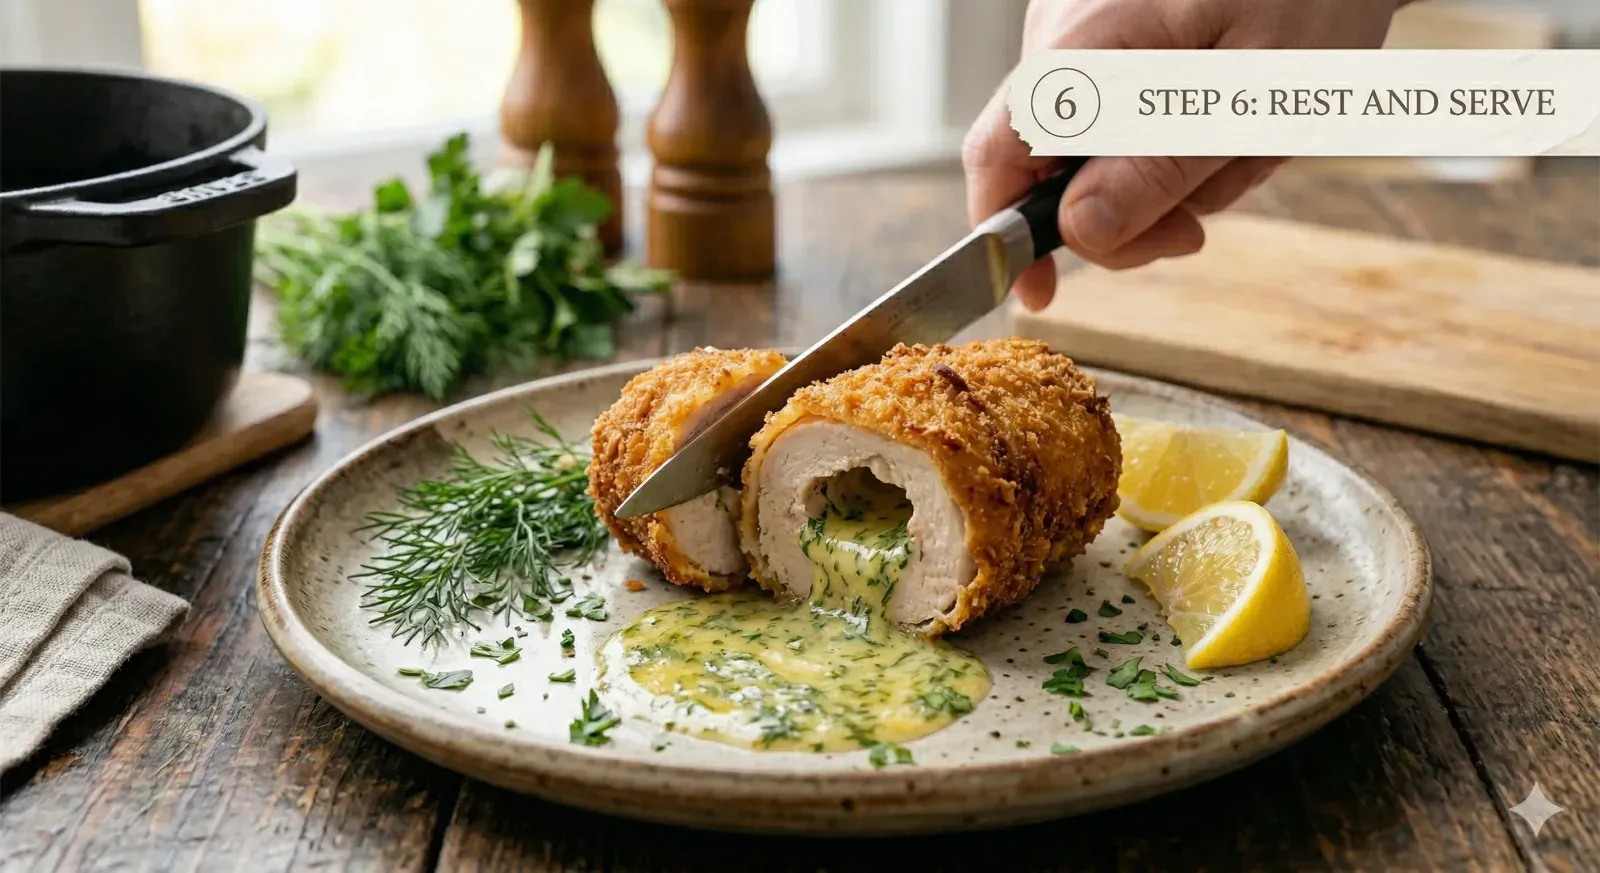
6 Remove the Chicken Kyiv from the oven and let it rest on a wire rack for 5 minutes. Resting is essential for this dish. It allows the internal butter to cool just enough to thicken slightly. Without resting, the butter erupts the moment you cut into the chicken. A brief pause keeps the butter pooled inside until you slice deliberately at the table.
Place each Chicken Kyiv on a warmed plate. Add a lemon wedge and a sprig of fresh dill alongside it. Bring the plates to the table before cutting. The reveal is half the experience. Slice the chicken on a slight angle and watch the golden garlic butter flow out onto the plate. Spoon the pooled butter over each bite as you eat. That combination of shattering crust, tender chicken, and aromatic melted butter is what makes this dish unforgettable.
Expert Tips for Perfect Chicken Kyiv
Master the Double Breading Technique
A single coat of breadcrumbs is never enough for Chicken Kyiv. The butter inside generates steam as it melts, and that pressure will push through a thin coating. Double breading creates two distinct layers of protection. After the first round of egg and crumbs, the second coat fills any gaps and reinforces weak spots. As a result, the crust stays intact while the butter melts safely inside. Professional kitchens never skip this step, and neither should you.
Pound Evenly and Gently
Uneven pounding is the leading cause of butter leaks. Thin spots in the chicken tear open during rolling or frying. Thick spots prevent the meat from sealing properly around the butter. Instead, use controlled taps and work outward from the center. The plastic wrap protects the meat from sticking to the mallet. Aim for a consistent quarter-inch thickness across the entire breast. Take your time with this step, because it determines the success of everything that follows.
Control Your Oil Temperature
Frying at the correct temperature is critical. At 340 degrees Fahrenheit, the breading sets quickly without burning. This temperature also gives you enough time to brown all sides evenly. If the oil drops below 320 degrees, the coating absorbs excess oil and turns heavy. Above 360 degrees, the exterior darkens before the chicken cooks through. Use a clip-on thermometer and adjust the burner as needed. Fry only two pieces at a time to maintain steady heat.
Regional Comparison of Stuffed Chicken Dishes
Chicken Kyiv belongs to a family of stuffed and rolled chicken preparations found across Europe. Each country puts its own spin on the concept. Here is how the most famous versions compare.
| Country | Dish Name | Filling | Cooking Method and Notes |
|---|---|---|---|
| Ukraine | Chicken Kyiv | Garlic herb butter with dill and parsley | Fried then baked, double-breaded, butter melts inside |
| France | Chicken Cordon Bleu | Ham and Swiss cheese | Breaded and fried or baked, cheese melts into the ham |
| Italy | Chicken Involtini | Prosciutto, mozzarella, basil | Pan-seared and braised in sauce, often with tomato |
| Georgia | Tabaka Chicken | No filling, spiced and pressed flat | Pan-fried under a weight, crispy skin, garlic sauce on the side |
| Poland | Kotlet de Volaille | Butter with herbs (similar to Kyiv) | Breaded and fried, served in many Polish restaurants |
Serving Suggestions
Chicken Kyiv is rich and buttery, so the best sides provide contrast. Choose accompaniments that offer freshness, acidity, or starchy comfort to balance the dish.
Classic Accompaniments:
- Mashed potatoes: Creamy mashed potatoes are the most traditional side for Chicken Kyiv. They catch the melted butter beautifully. Keep them simple with just butter and milk so they do not compete with the garlic herbs.
- Steamed rice or buckwheat: Buckwheat porridge called kasha is a staple Ukrainian side. Its earthy, nutty flavor complements the garlic butter perfectly. Steamed jasmine rice works as a lighter alternative.
- Green salad with lemon vinaigrette: A bright, acidic salad cuts through the richness of the fried chicken. Use butter lettuce, cucumber, and radish tossed in lemon juice and olive oil.
- Borscht as a first course: For a full Ukrainian meal, start with a bowl of beet borscht before the Chicken Kyiv. The tangy, earthy soup prepares the palate for the rich main course.
Beverage Pairings:
- Chardonnay (best match): A lightly oaked Chardonnay mirrors the buttery character of the dish. Its acidity balances the richness. Look for a Burgundy or a cooler-climate bottle for the best pairing.
- Dry Riesling: The crisp acidity and citrus notes in a dry Riesling slice through the fried coating. German or Alsatian Rieslings work especially well with garlic herb flavors.
- Ukrainian horilka or chilled vodka: A small glass of chilled vodka or Ukrainian horilka is the traditional pairing. The clean spirit refreshes the palate between bites of rich, buttery chicken.
- Sparkling water with lemon: For a non-alcoholic choice, sparkling water with a squeeze of lemon keeps the palate clean. The bubbles and citrus contrast nicely with the crispy fried coating.
Storage and Reheating
Refrigerator: Store leftover Chicken Kyiv in an airtight container for up to 2 days. The butter will solidify in the fridge, so reheating is essential. Place the container on a shelf rather than in the door, where temperature fluctuates.
Freezer: Uncooked breaded Chicken Kyiv freezes beautifully for up to 1 month. Place the rolls on a parchment-lined tray and freeze until solid. Then transfer them to a freezer bag. Cook from frozen by adding 2 extra minutes to the frying time and 5 extra minutes to the baking time. Do not thaw before cooking, because the butter will leak as the chicken defrosts.
Reheating: Reheat cooked Chicken Kyiv in a 350-degree Fahrenheit oven for 12 to 15 minutes. Place it on a wire rack over a baking sheet so the air circulates around the entire piece. This restores the crispy coating. Avoid the microwave at all costs. Microwaving turns the crispy breadcrumb shell into a soft, soggy wrapper. The oven is the only method that preserves the texture.
Common Mistakes to Avoid
1. Using Soft Butter for the Filling
Room-temperature butter is perfect for mixing, but it must be frozen before rolling. Soft butter squeezes out of the chicken during assembly. It also melts too quickly during frying, which causes leaks before the coating has time to seal. Always shape and freeze the butter logs until they are rock solid. This single step prevents the most common failure.
2. Tearing the Chicken While Pounding
Aggressive pounding rips holes in the meat. Those holes become escape routes for the melted butter. Use a flat meat mallet rather than a spiked tenderizer. Cover the chicken in plastic wrap to reduce friction. Then use steady, moderate force. If a small tear does appear, overlap an extra piece of chicken over the hole before rolling. Prevention is easier than patching.
3. Skipping the Double Breading
A single layer of breadcrumbs cannot withstand the pressure of melting butter. The steam pushes through thin spots and the butter leaks into the oil. Double breading adds a second barrier that reinforces the entire surface. It takes only two extra minutes but makes the difference between a successful Chicken Kyiv and a dry, butterless disappointment.
4. Frying at the Wrong Temperature
Temperature control is non-negotiable. Oil below 320 degrees Fahrenheit produces a greasy, pale coating. Oil above 360 degrees chars the breadcrumbs before the chicken cooks. Invest in a clip-on thermometer and keep the oil at a steady 340 degrees. Fry in small batches so each piece has room. Crowding the pan drops the temperature rapidly.
Frequently Asked Questions
What is the difference between Chicken Kyiv and Chicken Kiev?
The two names refer to the same dish. Chicken Kiev uses the older Russian-based transliteration of the Ukrainian capital city. Chicken Kyiv follows the modern Ukrainian spelling. Since the dish originates in Ukraine, the spelling Kyiv is now preferred internationally. The recipe, technique, and flavors remain identical regardless of how you spell the name.
Can I bake Chicken Kyiv without frying first?
Yes, a fully baked version works well. Spray the breaded rolls generously with cooking oil and place them on a wire rack over a baking sheet. Bake at 400 degrees Fahrenheit for 25 to 30 minutes. The result will not be as deeply golden as the fried method. However, brushing melted butter over the surface before baking improves the color significantly. This approach is lighter and less messy.
How do I keep the butter from leaking out?
Three techniques work together to seal the butter inside. First, freeze the butter until it is completely solid. Second, pound the chicken evenly so there are no tears or thin spots. Third, apply a double layer of breading for maximum protection. If you follow all three steps carefully, the butter will stay trapped inside the chicken throughout the entire cooking process. Resting after baking also helps by letting the butter cool slightly before you cut.
What should I serve with Chicken Kyiv?
Mashed potatoes are the most traditional accompaniment. They absorb the melted garlic butter and create a rich, comforting combination. Buckwheat kasha is another classic Ukrainian pairing. A fresh green salad with lemon dressing provides contrast to the fried coating. For a full Ukrainian dinner, serve borscht as a starter before the Chicken Kyiv main course.
Can I make Chicken Kyiv ahead of time?
Absolutely. Assemble and bread the rolls up to 24 hours before cooking. Store them covered in the refrigerator. The extra resting time actually helps the breading bond more securely. For longer storage, freeze the uncooked breaded rolls for up to one month. Cook them directly from frozen without thawing. Add a couple of extra minutes to the frying and baking times to account for the frozen center.
Why is my Chicken Kyiv not crispy?
Low oil temperature is the most likely culprit. Oil below 320 degrees Fahrenheit causes the breading to absorb oil rather than crisp up. Use a thermometer and maintain 340 degrees throughout frying. Another common cause is skipping the double breading. A single coat is too thin and turns soft during baking. Finally, make sure you bake on a wire rack rather than directly on a sheet pan. Air circulation underneath keeps the bottom crust from getting soggy.
Variations and Adaptations
Blue Cheese and Walnut Filling:
Replace the herb butter with a blend of softened butter, crumbled blue cheese, and crushed walnuts. The tangy cheese melts into a pungent, creamy center. Walnuts add a surprising crunch inside the chicken. This version pairs especially well with a pear and arugula salad on the side. It is a bold twist for adventurous eaters.
Sun-Dried Tomato and Basil:
Mix softened butter with finely chopped sun-dried tomatoes, fresh basil, and a pinch of red pepper flakes. The tomatoes add a sweet, concentrated flavor and a striking red color to the melted center. This Mediterranean-inspired variation goes beautifully with roasted vegetables or pasta tossed in olive oil.
Mushroom Duxelles Filling:
Finely chop mushrooms and cook them with shallots and thyme until all the moisture evaporates. Mix this duxelles with softened butter and a splash of cream. The concentrated mushroom flavor creates an earthy, savory center. This version draws on classic French technique while keeping the Ukrainian format of the dish.
Air Fryer Chicken Kyiv:
For a lighter version, skip the deep frying entirely. Spray the breaded rolls with cooking oil and arrange them in a single layer in the air fryer basket. Cook at 370 degrees Fahrenheit for 18 to 20 minutes, turning halfway through. The air fryer produces a crispy exterior with significantly less oil. It also simplifies cleanup and reduces cooking time.
The Cultural Significance of Chicken Kyiv
Chicken Kyiv holds a fascinating and debated place in culinary history. The dish’s exact origins remain contested. Some food historians trace it to 18th-century French kitchens, where chefs first developed the technique of stuffing poultry with compound butter. Others credit the hotels of early 20th-century Kyiv, where chefs adapted French techniques using local Ukrainian ingredients like dill and garlic. What is certain is that the dish became a symbol of Ukrainian hospitality and culinary sophistication.
During the Soviet era, Chicken Kyiv appeared on menus in government hotels and Intourist restaurants across the USSR. It became one of the few Ukrainian dishes to achieve genuine international recognition. Western travelers who tasted it brought the recipe home. By the 1970s and 1980s, Chicken Kiev had become a popular dinner party dish in Britain, America, and Australia. Supermarkets began selling pre-made frozen versions, which introduced the dish to millions who had never visited Eastern Europe.
Today, the dish carries renewed significance. The adoption of the Ukrainian spelling Kyiv instead of the Russian Kiev reflects a broader cultural reclamation. For Ukrainians, the name matters. It is a small but meaningful assertion of identity through food. Cooking Chicken Kyiv at home connects you to a rich tradition that spans centuries. Every golden, butter-filled cutlet carries the story of Ukrainian ingenuity, French technique, and the universal human desire to turn humble ingredients into something extraordinary.
Conclusion
Chicken Kyiv rewards patience and precision with one of the most satisfying bites in all of European cooking. A shattering golden crust gives way to tender, juicy chicken. Then the garlic herb butter flows out, creating its own instant sauce on the plate. This recipe covers every detail from shaping the butter to nailing the double breading to achieving the perfect fry. Follow these steps faithfully, and you will produce a Chicken Kyiv that rivals any restaurant version.
Ready to explore more classic European dishes? Browse our full collection of European dishes, including Ukrainian borscht, Polish pierogi, and Hungarian goulash. Discover recipes from across the continent, each crafted with the same attention to authentic technique and flavor.