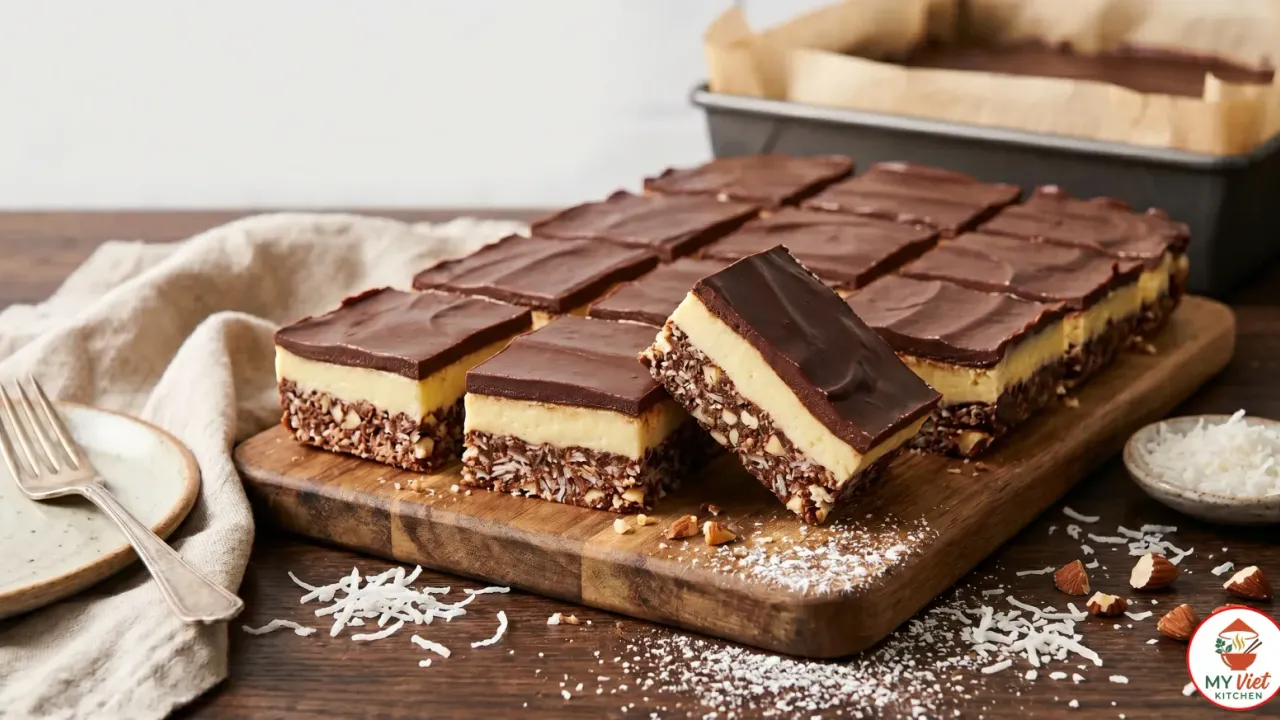
Nanaimo bars are Canada’s most iconic no-bake dessert, and they deliver three layers of pure indulgence in every bite. This beloved treat features a crunchy chocolate coconut base, a smooth vanilla custard filling, and a glossy chocolate ganache topping. If you have never tried Nanaimo bars before, then you are about to discover one of the greatest desserts in the world. Best of all, this recipe requires absolutely no baking. Whether you need a showstopping holiday treat or a simple weekend project, these bars always impress. For more global dessert recipes, explore our full collection of sweet treats from around the world.
Prep Time: 30 minutes | Cook Time: 0 minutes (no bake) | Servings: 16 bars
Difficulty: Easy | Calories: ~295 per serving
What Makes Nanaimo Bars Special?
Nanaimo bars stand apart from every other layered dessert because of their remarkable contrast in textures. The bottom layer combines graham cracker crumbs, shredded coconut, and chopped almonds into a firm, crunchy foundation. Meanwhile, the middle layer offers a buttery custard cream that melts on your tongue. Finally, the chocolate topping provides a satisfying snap when you bite through it. Together, these three layers create a dessert experience that is truly greater than the sum of its parts.
Unlike brownies or chocolate cake, Nanaimo bars require no oven time at all. You simply melt, mix, layer, and chill. This makes them an excellent choice for hot summer days when you want to avoid heating up the kitchen. Furthermore, because they set in the refrigerator, these bars develop a dense, fudge-like quality that holds up well at picnics and potlucks.
The flavor profile combines bittersweet chocolate, toasted coconut, and vanilla custard into something deeply satisfying. Each layer brings its own character, yet they work together harmoniously. In addition, the slight nuttiness from the almonds adds complexity without overpowering the other flavors. This balance is what makes Nanaimo bars so universally loved across Canada and beyond.

Choosing the Right Chocolate
Since chocolate plays a starring role in both the base and topping layers, selecting the right type directly affects your results. Here are your best options for making outstanding Nanaimo bars at home.
- Semi-sweet chocolate (best choice): This provides the ideal balance of sweetness and cocoa intensity. It pairs perfectly with the sweet custard layer without tasting too bitter or too sugary.
- Dark chocolate (70% cocoa): Use this if you prefer a more intense, bittersweet flavor. However, the higher cocoa content can make the topping slightly harder when chilled.
- Milk chocolate: This creates a sweeter, milder topping. It works well for children or anyone who finds dark chocolate too strong. Keep in mind that it softens faster at room temperature.
Ingredients for Nanaimo Bars
Bottom Layer (Chocolate Coconut Base):
- 1/2 cup unsalted butter
- 1/4 cup granulated sugar
- 5 tablespoons cocoa powder (unsweetened)
- 1 large egg, beaten
- 1 3/4 cups graham cracker crumbs
- 1/2 cup finely chopped almonds
- 1 cup shredded sweetened coconut
Middle Layer (Custard Filling):
- 1/2 cup unsalted butter, softened to room temperature
- 2 tablespoons custard powder (such as Bird’s Custard Powder)
- 3 tablespoons heavy cream
- 2 cups powdered sugar, sifted
Top Layer (Chocolate Ganache):
- 4 ounces semi-sweet chocolate, chopped
- 2 tablespoons unsalted butter
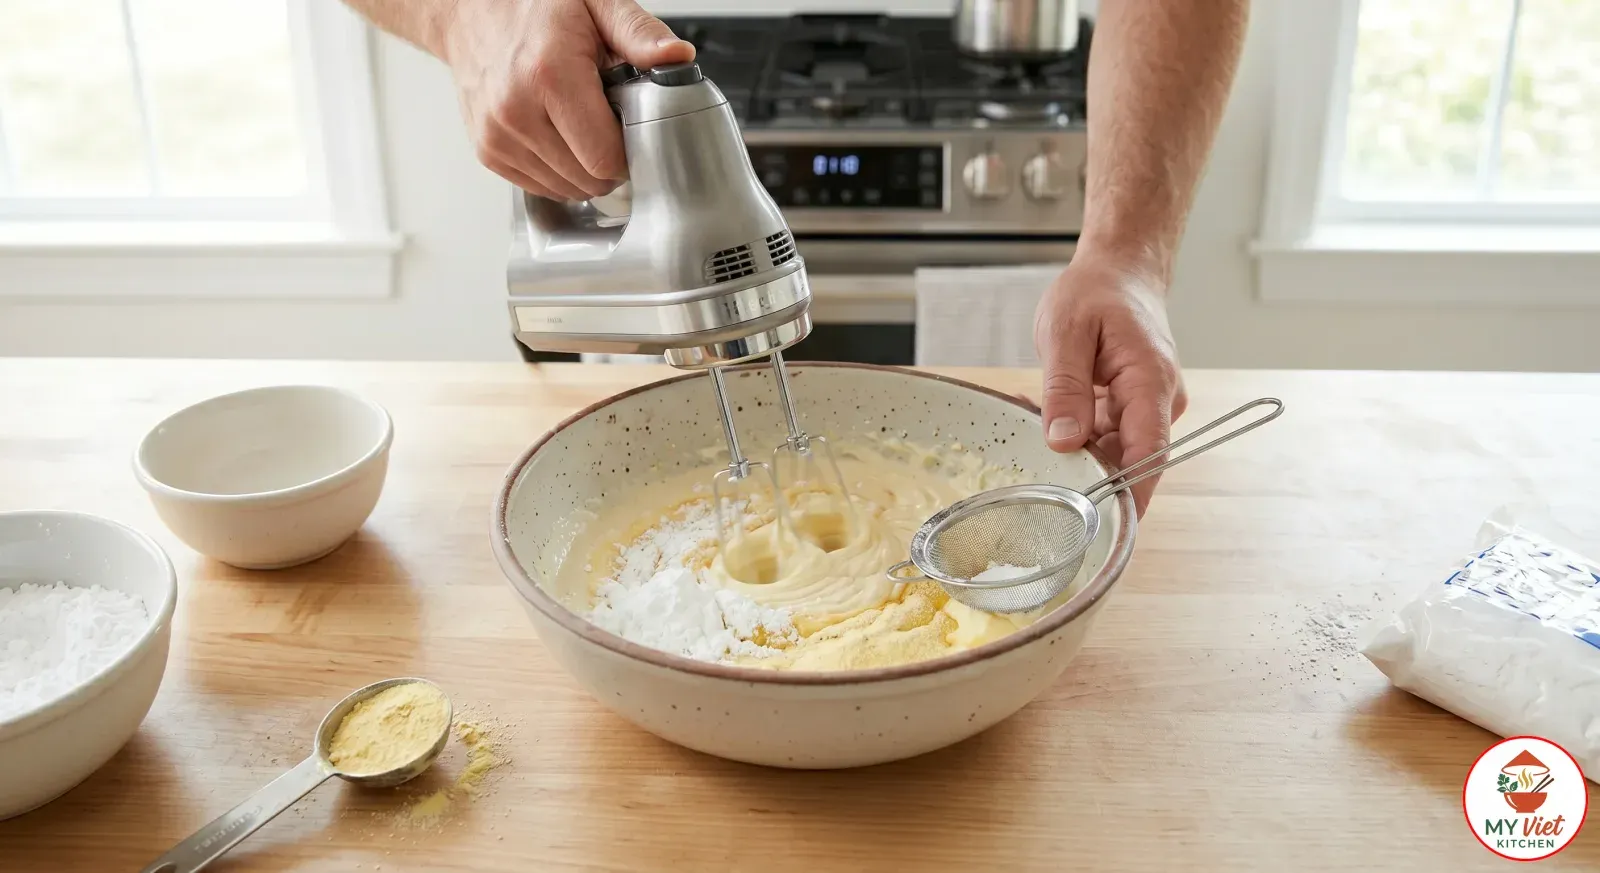
Pro tip: Sift your powdered sugar before adding it to the custard layer. Lumps in the sugar create an uneven texture that no amount of mixing can fix. Also, make sure your butter is truly softened for the filling, because cold butter will not cream properly with the custard powder.
Step-by-Step Instructions
Step 1: Make the Base Layer
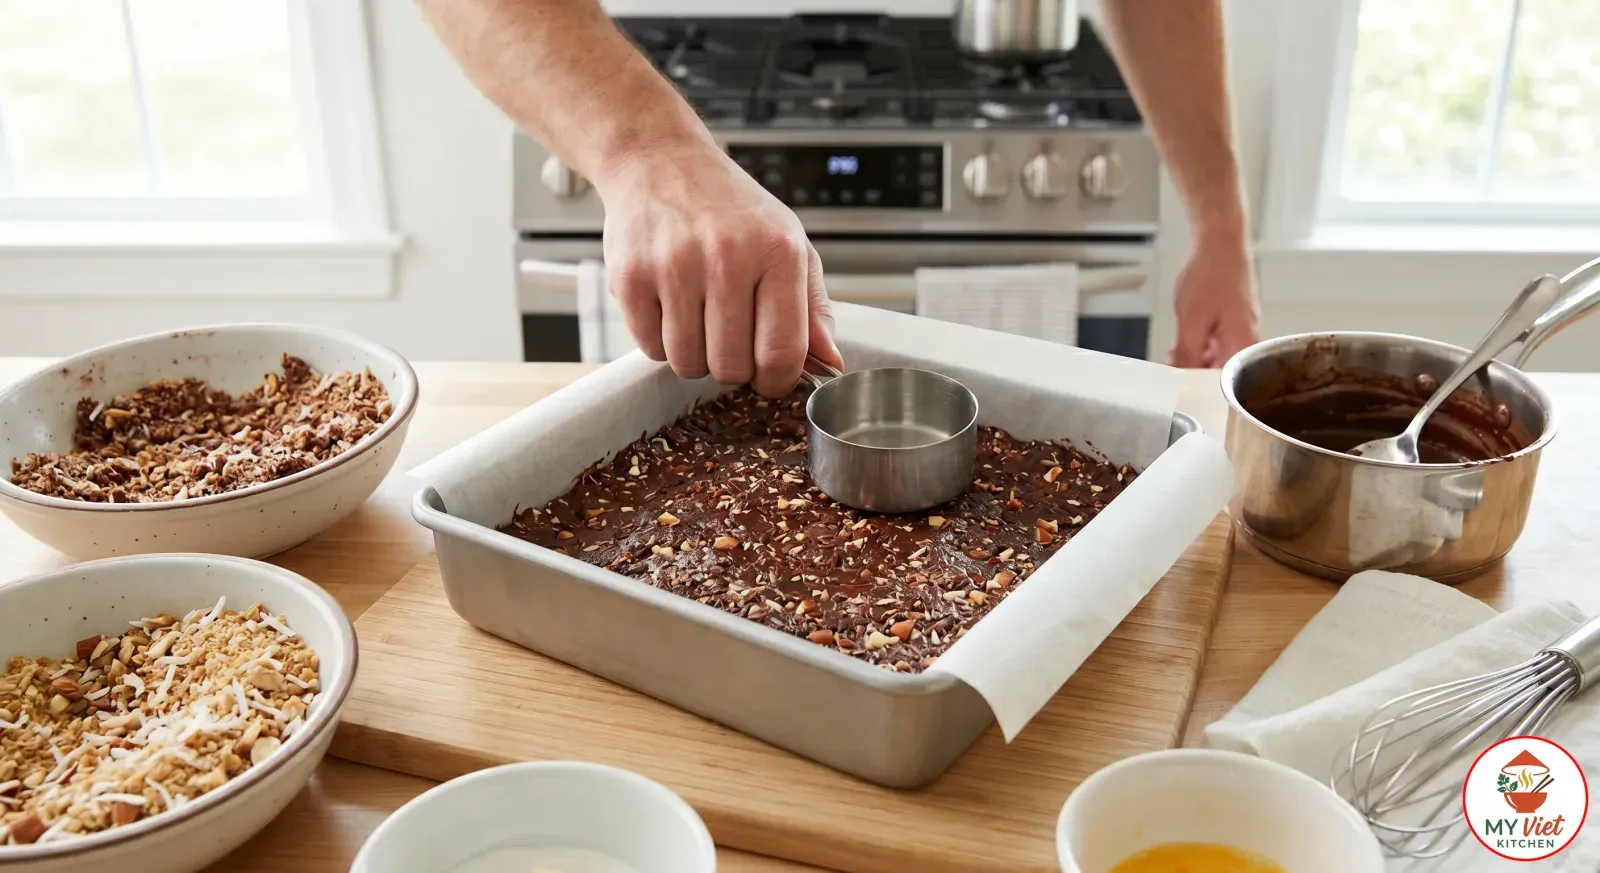
1Start by lining an 8x8 inch baking pan with parchment paper, leaving an overhang on two sides for easy removal. Then set up a double boiler by placing a heatproof bowl over a pot of simmering water. Add the butter, sugar, and cocoa powder to the bowl. Stir constantly until the butter melts and everything combines into a smooth mixture. Next, add the beaten egg and stir vigorously for about 2 minutes. The mixture will thicken noticeably as the egg cooks. Remove the bowl from the heat immediately. Fold in the graham cracker crumbs, chopped almonds, and shredded coconut until everything is evenly coated. Press this mixture firmly and evenly into the prepared pan. Use the bottom of a measuring cup to pack it down tightly. Place the pan in the refrigerator for at least 30 minutes to set.
Step 2: Prepare the Custard Filling
2While the base chills, prepare the custard layer. Place the softened butter in a medium bowl. Beat it with an electric mixer on medium speed until smooth and creamy. Then add the custard powder, heavy cream, and sifted powdered sugar. Continue beating until the mixture becomes light and fluffy. This usually takes about 3 minutes. The filling should look pale yellow and hold its shape when you lift the beaters. Once ready, spread the custard evenly over the chilled base layer. Use an offset spatula for the smoothest finish. Return the pan to the refrigerator for another 30 minutes to firm up.
Step 3: Add the Chocolate Topping
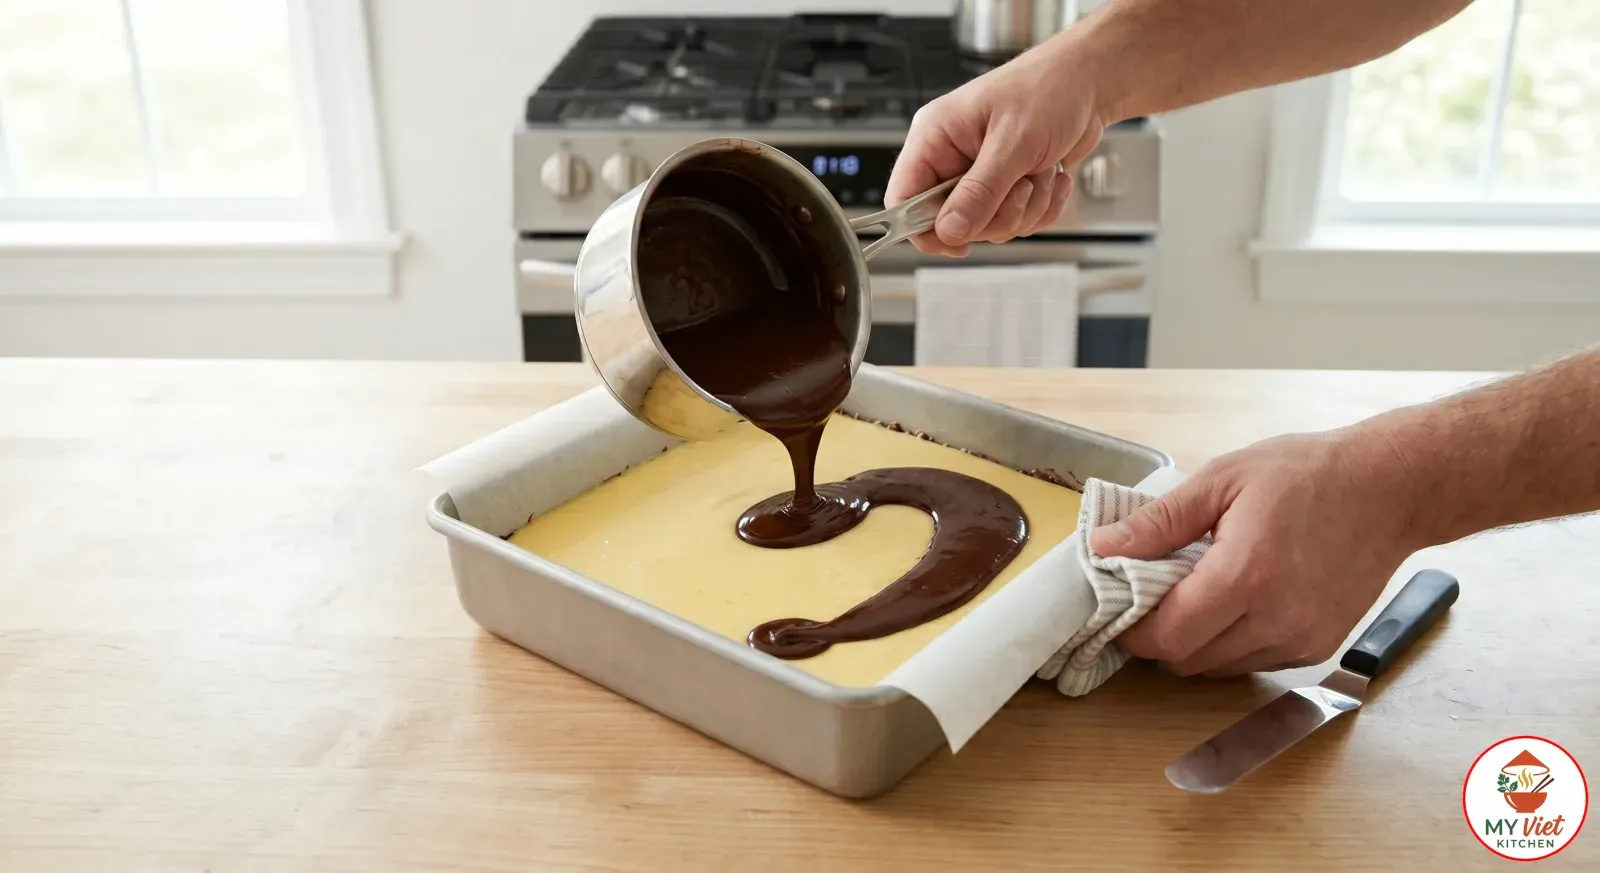
3For the final layer, melt the chopped chocolate and butter together using a double boiler. Stir frequently until the mixture is completely smooth and glossy. Alternatively, you can melt them in the microwave in 30-second intervals, stirring between each round. Let the chocolate cool for about 2 minutes so it does not melt the custard layer beneath. Then pour the chocolate over the custard and tilt the pan gently to spread it evenly. Work quickly, because the chocolate begins to set as it touches the cold custard. Refrigerate the entire pan for at least 2 hours, or until the chocolate topping is completely firm.
Step 4: Slice and Serve
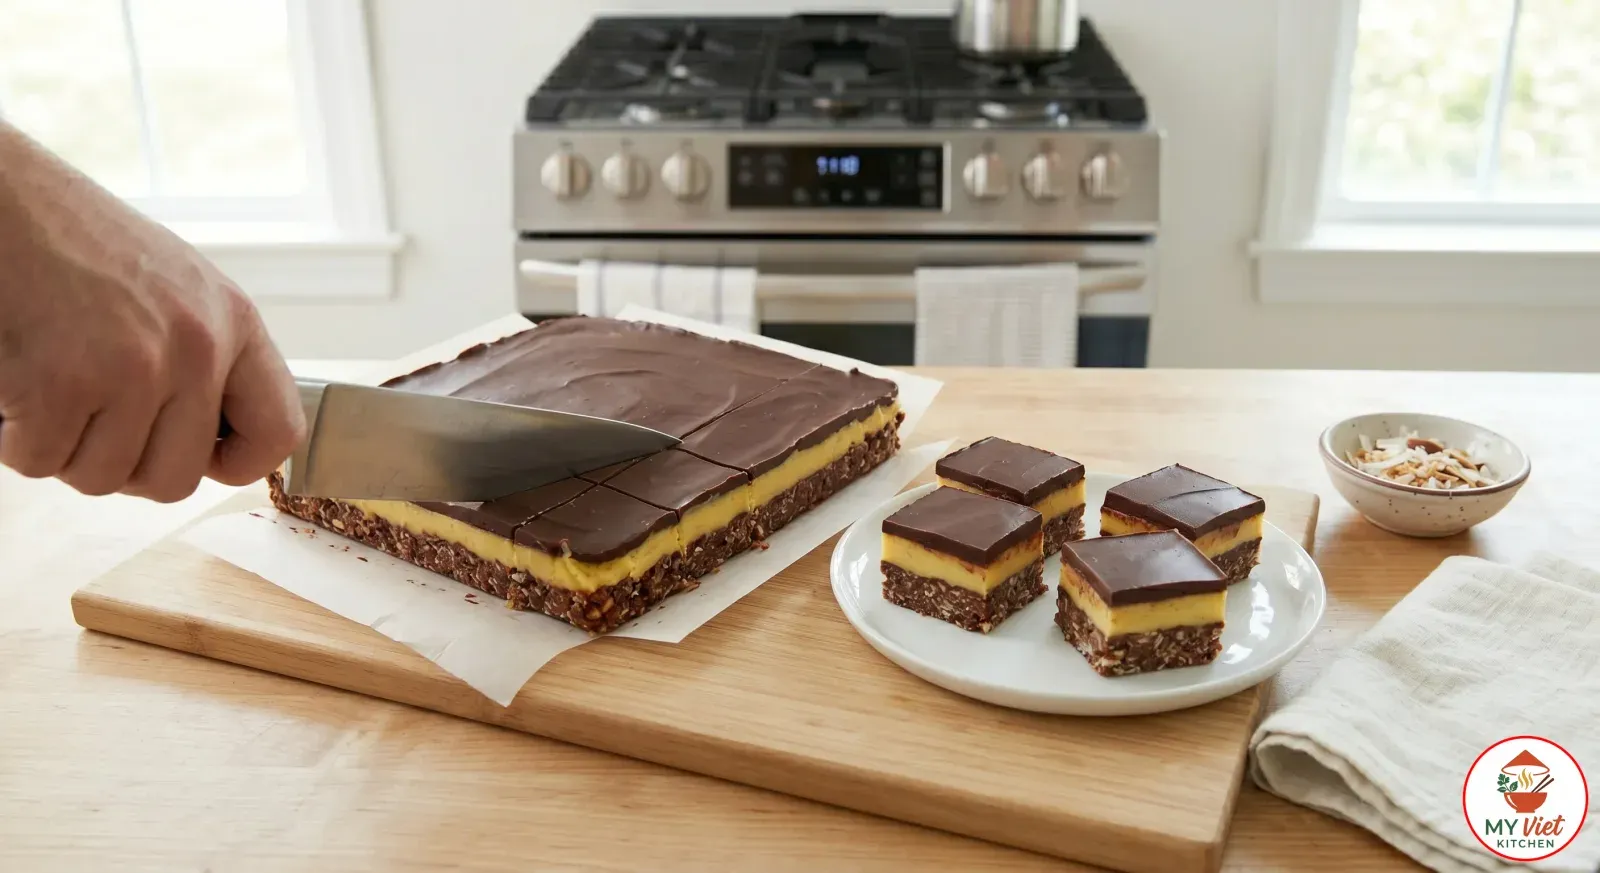
4Remove the pan from the refrigerator and let it sit at room temperature for 5 minutes. This brief rest prevents the chocolate from cracking when you cut through it. Lift the bars out of the pan using the parchment overhang. Place them on a cutting board and use a sharp chef’s knife to cut into 16 even squares. For the cleanest cuts, dip the knife in hot water and wipe it dry between each slice. Serve the bars chilled for the best texture and flavor.
Expert Tips for Perfect Nanaimo Bars
Press the Base Firmly
A loosely packed base will crumble when you try to slice the bars. Therefore, use the flat bottom of a measuring cup or glass to press the mixture down as tightly as possible. Every inch of the pan should feel compact and even. This firm foundation supports the upper layers and creates clean slices.
Cool the Chocolate Before Pouring
If you pour the melted chocolate directly onto the custard while it is still very hot, it will melt through the custard layer. As a result, your bars will lose their distinct three-layer appearance. Instead, let the chocolate cool for 2 minutes after melting. It should still flow easily but feel warm rather than hot to the touch.
Use a Hot Knife for Clean Cuts
Nanaimo bars are dense and layered, so a cold knife will drag through the chocolate and create messy edges. Dip your knife in hot water, then wipe it with a clean towel before each cut. This simple trick gives you bakery-quality slices every time.
Nanaimo Bars vs. Other Layered Desserts
Many layered desserts share similarities with Nanaimo bars, but each one has distinct characteristics. Here is how they compare to help you understand what makes this Canadian classic unique.
| Feature | Nanaimo Bars | Millionaire Shortbread | Seven Layer Bars |
|---|---|---|---|
| Origin | Canada (British Columbia) | Scotland | United States |
| Base | Graham cracker, coconut, almonds | Buttery shortbread | Graham cracker |
| Middle layer | Custard cream | Caramel | Mixed chips and coconut |
| Topping | Chocolate ganache | Chocolate | Sweetened condensed milk |
| Baking required | No | Yes | Yes |
Serving Suggestions
Nanaimo bars taste incredible on their own, but the right pairing can elevate them even further. Here are some ideas for serving these bars at your next gathering or as an everyday treat.
The Perfect Accompaniments:
- Fresh raspberries: The tartness of the berries cuts through the rich chocolate and custard beautifully.
- Vanilla ice cream: A small scoop alongside a chilled bar creates an indulgent dessert plate.
- Whipped cream: A light dollop adds airiness that contrasts with the dense, fudgy layers.
- Flaky sea salt: A pinch of Maldon salt on top enhances the chocolate flavor and adds a gourmet touch.
Beverage Pairings:
- Hot coffee: The bitterness of black coffee balances the sweetness of the bars perfectly.
- Cold milk: A classic pairing that never fails, especially for children.
- Espresso martini: For adult gatherings, this cocktail matches the chocolate and coffee notes beautifully.
- Mint tea: The refreshing quality of mint tea cleanses the palate between bites of rich chocolate.
Storage and Reheating
Refrigerator: Store Nanaimo bars in an airtight container in the fridge for up to 2 weeks. The flavors actually improve after the first day, because the layers meld together over time.
Freezer: Wrap individual bars in plastic wrap and place them in a freezer bag. They keep well for up to 3 months. Thaw them in the refrigerator overnight, because thawing at room temperature can cause condensation on the chocolate.
Serving note: Nanaimo bars taste best when served cold directly from the refrigerator. Let them sit for just 5 minutes at room temperature before slicing. Unlike most desserts, these bars do not need reheating at all.
Common Mistakes to Avoid
1. Not Packing the Base Tightly Enough
A loose base crumbles when you slice the bars. Consequently, the layers separate and the presentation suffers. Press the base mixture down firmly with a flat tool. Spend extra time on the edges and corners where gaps tend to form.
2. Skipping the Chilling Steps
Each layer needs time to set before you add the next one. If you rush the process, the layers blend together and you lose the signature three-layer look. Patience is essential here. Allow at least 30 minutes of chilling between each layer for the best results.
3. Using Hot Chocolate on the Custard
Pouring very hot chocolate directly onto the chilled custard melts the filling underneath. This creates an unappealing muddy layer instead of a clean line between custard and chocolate. Always let the melted chocolate cool slightly before spreading it. A brief 2-minute rest solves this problem entirely.
Frequently Asked Questions
Do Nanaimo bars need to be refrigerated?
Yes, Nanaimo bars must stay in the refrigerator at all times. The custard filling and chocolate topping soften quickly at room temperature. For the best texture and food safety, store them chilled and only remove them 5 minutes before serving.
Can you freeze Nanaimo bars?
Absolutely. These bars freeze exceptionally well for up to 3 months. Wrap each bar individually in plastic wrap, then store them in a freezer-safe container. Thaw overnight in the refrigerator for the best results. This makes them an ideal make-ahead dessert for parties and holidays.
What is custard powder and can I substitute it?
Custard powder is a cornstarch-based product flavored with vanilla and colored yellow. Bird’s Custard Powder is the most widely available brand. If you cannot find it, use an equal amount of instant vanilla pudding mix as a substitute. You can also use cornstarch with a drop of vanilla extract and a tiny pinch of turmeric for the yellow color.
Why are they called Nanaimo bars?
These bars take their name from the city of Nanaimo on Vancouver Island in British Columbia, Canada. The earliest known version appeared in a Nanaimo community cookbook in 1953. Since then, the city has proudly claimed ownership of this dessert and even established an official Nanaimo Bar Trail for visitors.
How long do Nanaimo bars last in the fridge?
Properly stored Nanaimo bars stay fresh in the refrigerator for up to 2 weeks. The flavors develop and improve after the first day, so making them a day ahead actually produces better results. Keep them in an airtight container to prevent them from absorbing other fridge odors.
Variations and Adaptations
Mint Nanaimo Bars:
Add 1/2 teaspoon of peppermint extract and a few drops of green food coloring to the custard layer. This creates a refreshing mint chocolate combination that tastes like an after-dinner mint. The green color also makes for a stunning presentation, especially during the holiday season.
Peanut Butter Nanaimo Bars:
Replace the custard powder with 3 tablespoons of creamy peanut butter in the middle layer. This variation adds a salty, nutty richness that pairs wonderfully with the chocolate layers. Additionally, you can swap the almonds in the base for chopped peanuts to double down on the peanut flavor.
Mocha Nanaimo Bars:
Dissolve 1 tablespoon of instant espresso powder into the heavy cream before adding it to the custard layer. The coffee flavor complements the chocolate beautifully and creates a sophisticated adult version. Furthermore, sprinkle cocoa powder on top of the chocolate layer before it sets for an elegant finish.
Vegan Nanaimo Bars:
Use coconut oil instead of butter in all three layers. Replace the egg in the base with 1 tablespoon of cornstarch mixed with 2 tablespoons of water. For the custard layer, use vegan butter and coconut cream instead of dairy cream. Choose dairy-free dark chocolate for the topping. The result is surprisingly close to the original.
The Cultural Significance of Nanaimo Bars
Nanaimo bars hold a treasured place in Canadian culinary heritage. The dessert first gained widespread recognition after appearing in the 1953 edition of the Nanaimo Hospital Auxiliary cookbook under the name “chocolate square.” Over the following decades, the recipe spread across Canada and eventually became known by its current name. Today, Nanaimo bars appear at virtually every Canadian potluck, holiday gathering, and bakery counter.
The city of Nanaimo embraces its namesake dessert with remarkable pride. The Nanaimo Bar Trail guides visitors to dozens of bakeries and restaurants that serve their own unique interpretations. Some establishments offer deep-fried Nanaimo bars, while others transform them into cheesecakes, ice cream flavors, and even martinis. This creativity reflects how deeply the dessert has woven itself into Canadian food culture.
Beyond Canada, Nanaimo bars have gained international recognition as a symbol of Canadian identity. They appear alongside poutine and butter tarts as one of the country’s most celebrated culinary contributions. Making them at home connects you to a tradition that spans generations of Canadian bakers and brings a taste of the Pacific Northwest into your own kitchen.
Conclusion
Making Nanaimo bars at home is easier than you might expect. With no oven required and just a handful of simple ingredients, you can create this iconic Canadian dessert in your own kitchen. Remember to press the base firmly, chill each layer completely, and let the chocolate cool before pouring it over the custard. These three steps guarantee perfect results every time.
Whether you stick with the classic recipe or try one of the fun variations like mint or peanut butter, Nanaimo bars always deliver pure satisfaction. They also make fantastic gifts and travel well to parties. For more Canadian dessert inspiration, check out our butter tarts recipe or browse our complete collection of global recipes. Happy cooking!