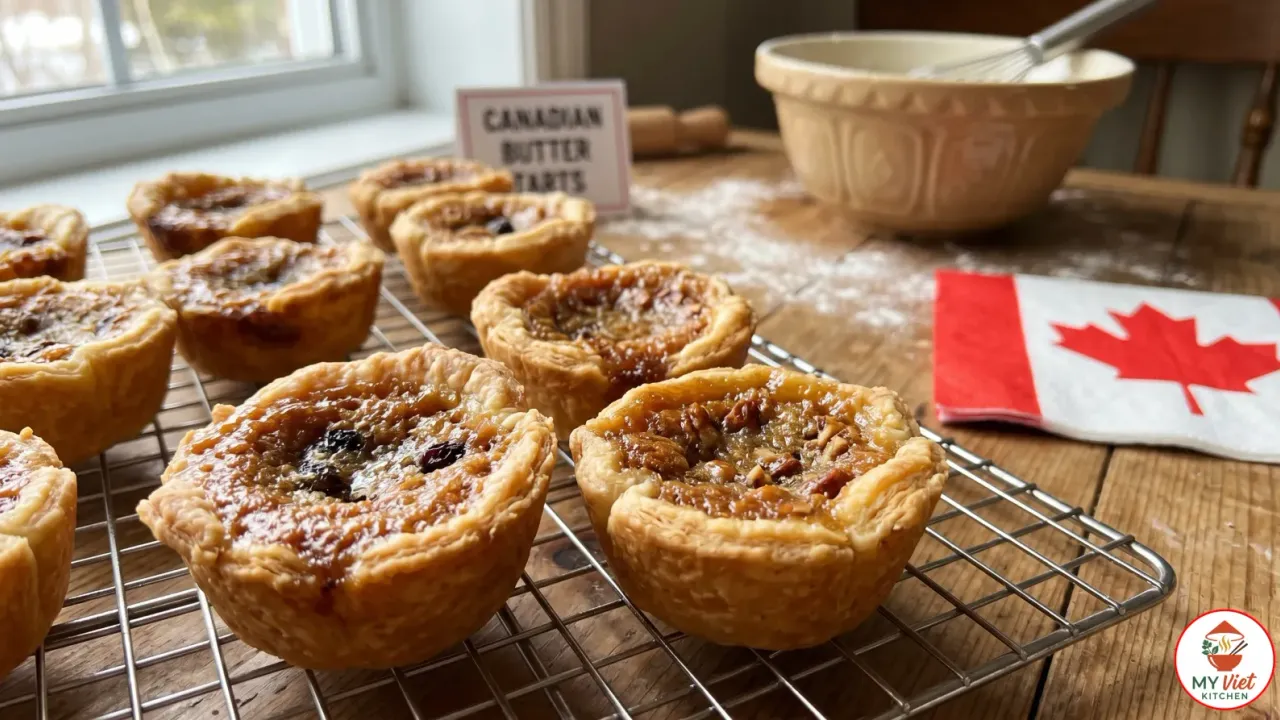
Butter tarts are one of Canada’s most beloved desserts, and for good reason. These small pastries feature a flaky, golden shell filled with a rich, gooey mixture of brown sugar, butter, and eggs. Whether you prefer them runny or firm, with raisins or without, this butter tart recipe delivers authentic Canadian flavor in every bite. In addition, this recipe is simple enough for beginners yet impressive enough for any holiday table. If you love exploring global desserts, then these iconic Canadian treats deserve a spot in your baking rotation.
Prep Time: 30 minutes | Cook Time: 20 minutes | Servings: 12 tarts
Difficulty: Easy | Calories: ~285 per serving
What Makes Butter Tarts Special?
Butter tarts hold a unique place in Canadian culinary history. They first appeared in Canadian cookbooks around 1900, and since then they have become a symbol of national pride. Unlike other pastry desserts, butter tarts focus on a delicate balance between the crisp shell and the sweet, caramelized filling. The filling itself relies on just a handful of pantry staples, yet it produces an incredibly complex flavor.
What truly sets butter tarts apart is their texture. The best versions offer a contrast between the shatteringly crisp pastry and the soft, almost molten center. Because the filling contains vinegar, it cuts through the sweetness and creates a subtle tang. This small addition makes a big difference in the final taste. Furthermore, the brown sugar caramelizes during baking, which adds depth and a toffee-like richness that you simply cannot find in other tarts.
Across Canada, bakeries and home cooks debate endlessly about the perfect butter tart. Some insist on raisins, while others prefer pecans or walnuts. Additionally, the runny versus firm filling debate divides families at every holiday gathering. Regardless of your preference, the recipe below gives you full control over the final texture.

Choosing the Right Butter
The quality of your butter directly affects the flavor and texture of your tarts. Since butter is the star ingredient, choosing the right type matters more here than in most recipes.
- Regular unsalted butter: This works well for both the pastry and filling. It provides a clean, rich dairy flavor without added salt.
- European-style butter (best choice): With a higher fat content of 82 to 86 percent, this butter creates a flakier crust and a silkier filling. Brands like Plugra or Kerrygold are excellent options.
- Salted butter: You can use salted butter, but then reduce or omit the added salt in the recipe. The result will be slightly different but still delicious.
Ingredients for Butter Tarts
For the Pastry Shell:
- 2 1/2 cups all-purpose flour
- 1 teaspoon salt
- 1 cup cold unsalted butter, cubed into small pieces
- 1/3 cup ice water, added gradually
For the Filling:
- 1 cup packed dark brown sugar
- 1/2 cup corn syrup (or maple syrup)
- 2 large eggs, lightly beaten
- 1/4 cup unsalted butter, melted and cooled slightly
- 1 teaspoon pure vanilla extract
- 1 tablespoon white vinegar
- 1/4 teaspoon salt
Optional Add-Ins:
- 1/2 cup raisins (soaked in warm water and drained)
- 1/2 cup chopped pecans or walnuts
Pro tip: For the flakiest pastry, keep every ingredient as cold as possible. Chill your flour, use frozen butter, and add the ice water slowly. Cold butter creates steam pockets during baking, and those pockets become the flaky layers you want.
Step-by-Step Instructions
Step 1: Make the Pastry Dough
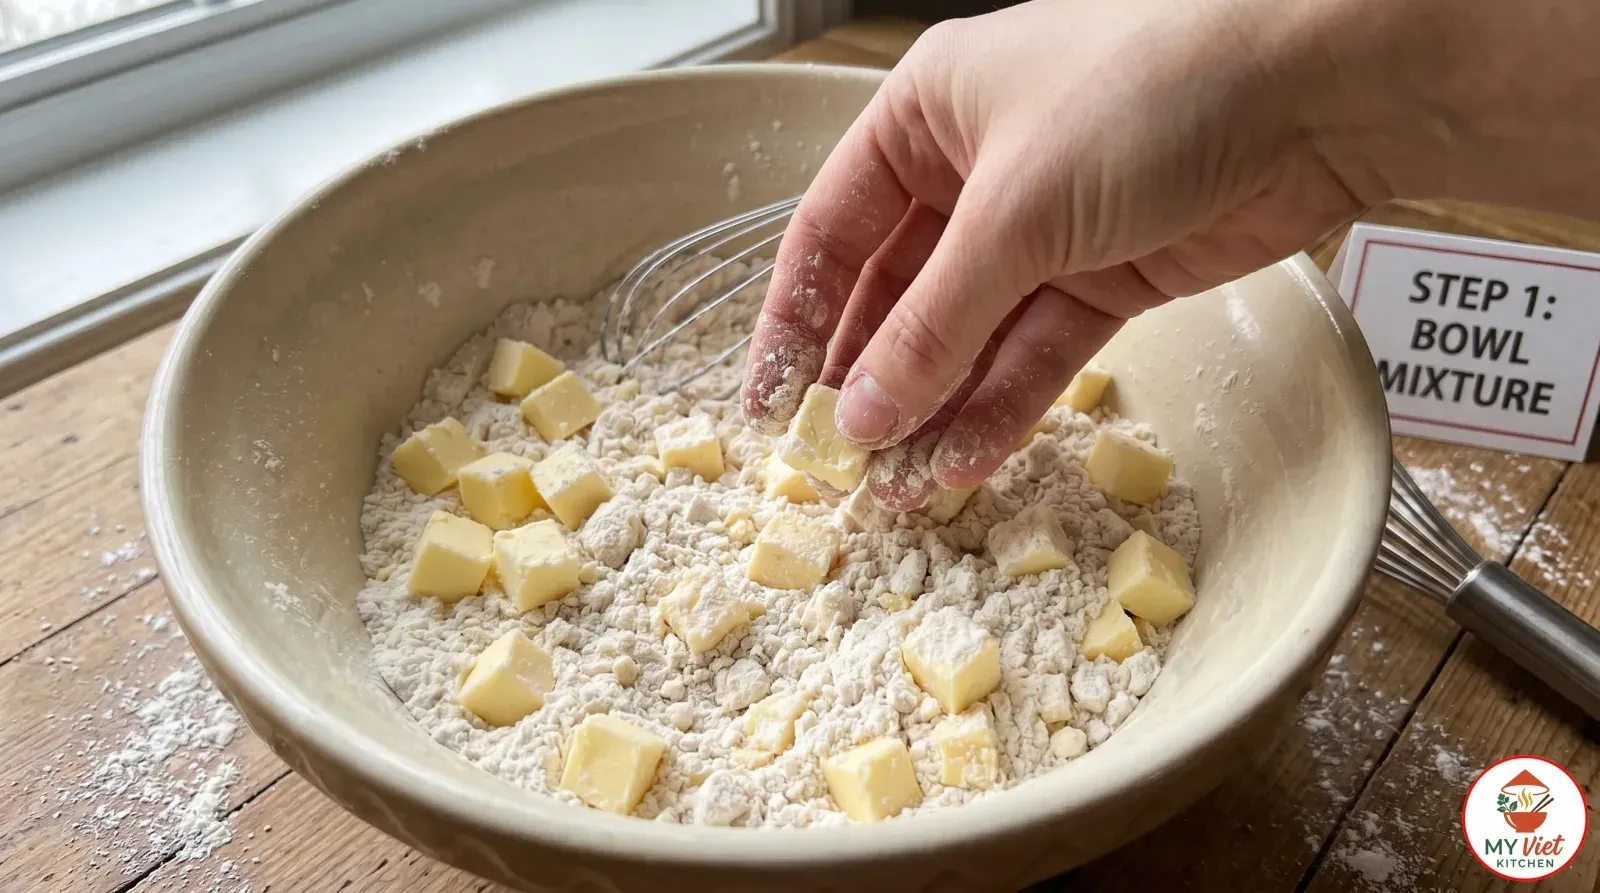
1Start by whisking the flour and salt together in a large bowl. Then add the cold, cubed butter. Use a pastry cutter or your fingertips to work the butter into the flour. Stop when the mixture looks like coarse crumbs with some pea-sized pieces remaining. Next, drizzle in the ice water one tablespoon at a time. Toss the mixture with a fork after each addition. The dough is ready when it holds together when you squeeze a handful. Shape it into a flat disc, wrap it tightly in plastic wrap, and refrigerate for at least 30 minutes. This resting period allows the gluten to relax and the butter to firm up again.
Step 2: Prepare the Filling
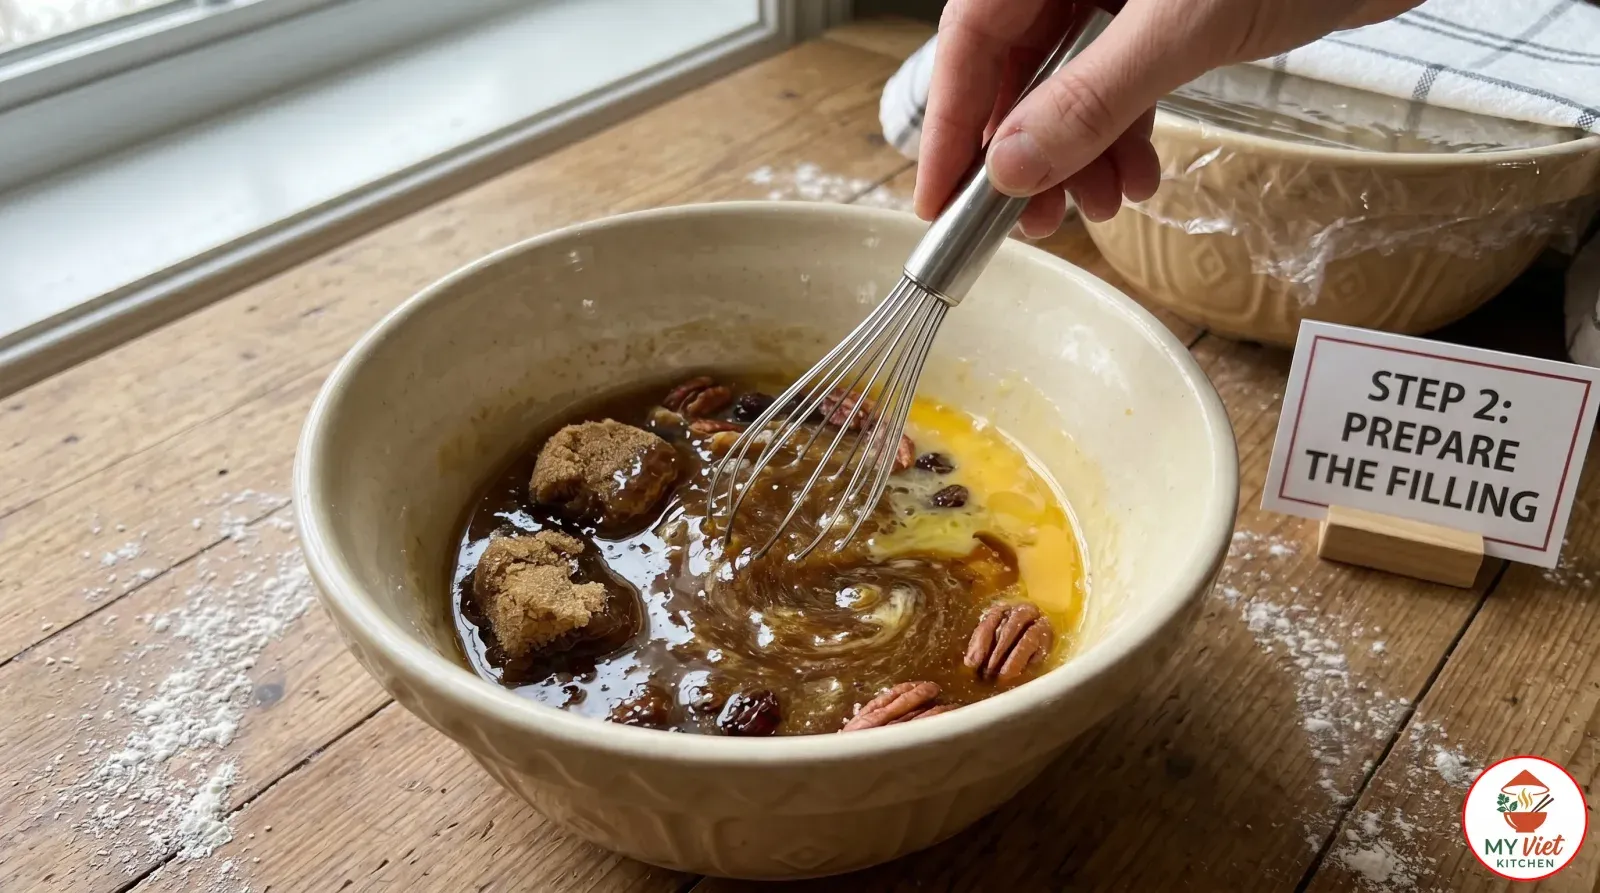
2While the dough chills, prepare the filling. In a medium bowl, combine the dark brown sugar and corn syrup. Stir them together until well blended. Then add the melted butter, beaten eggs, vanilla extract, vinegar, and salt. Whisk everything gently until smooth. Importantly, do not overmix or use an electric mixer. Overmixing introduces air, which causes the filling to puff up too much during baking and then collapse. If you want to add raisins or pecans, fold them in now.
Step 3: Roll and Cut the Pastry
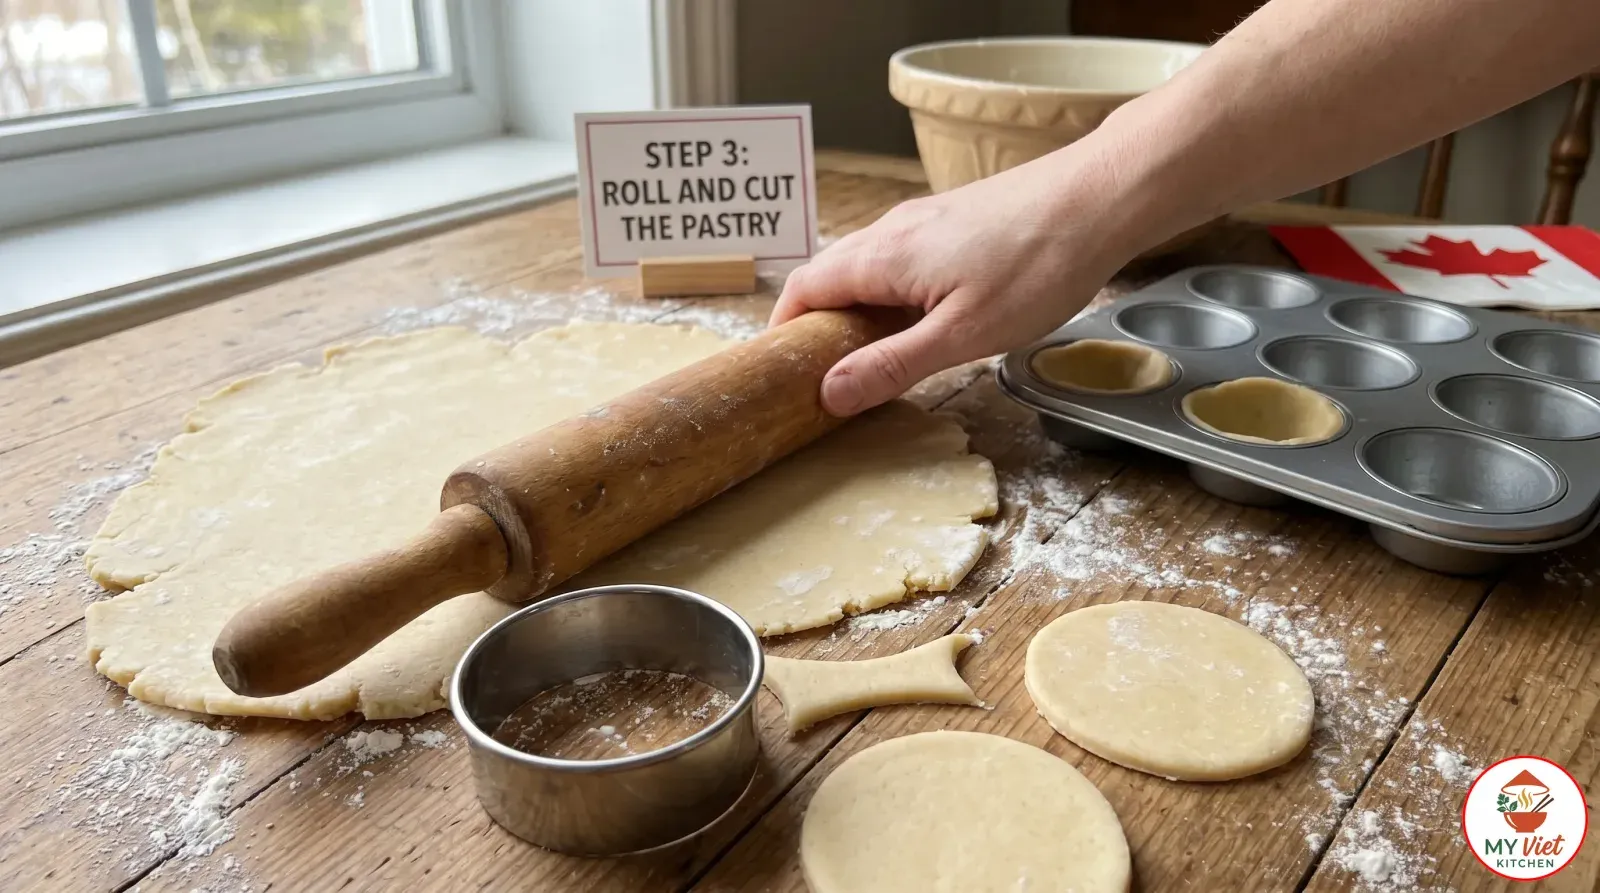
3Preheat your oven to 375F (190C). Remove the dough from the refrigerator and let it sit for five minutes. Then roll it out on a lightly floured surface to about 1/8-inch thickness. Use a 4-inch round cookie cutter to cut out 12 circles. Gently press each circle into a standard muffin tin cup. Make sure the pastry fits snugly against the bottom and sides. If the dough tears, simply press it back together with your fingers. Place the filled muffin tin in the refrigerator for 10 minutes while you finalize the filling.
Step 4: Fill and Bake
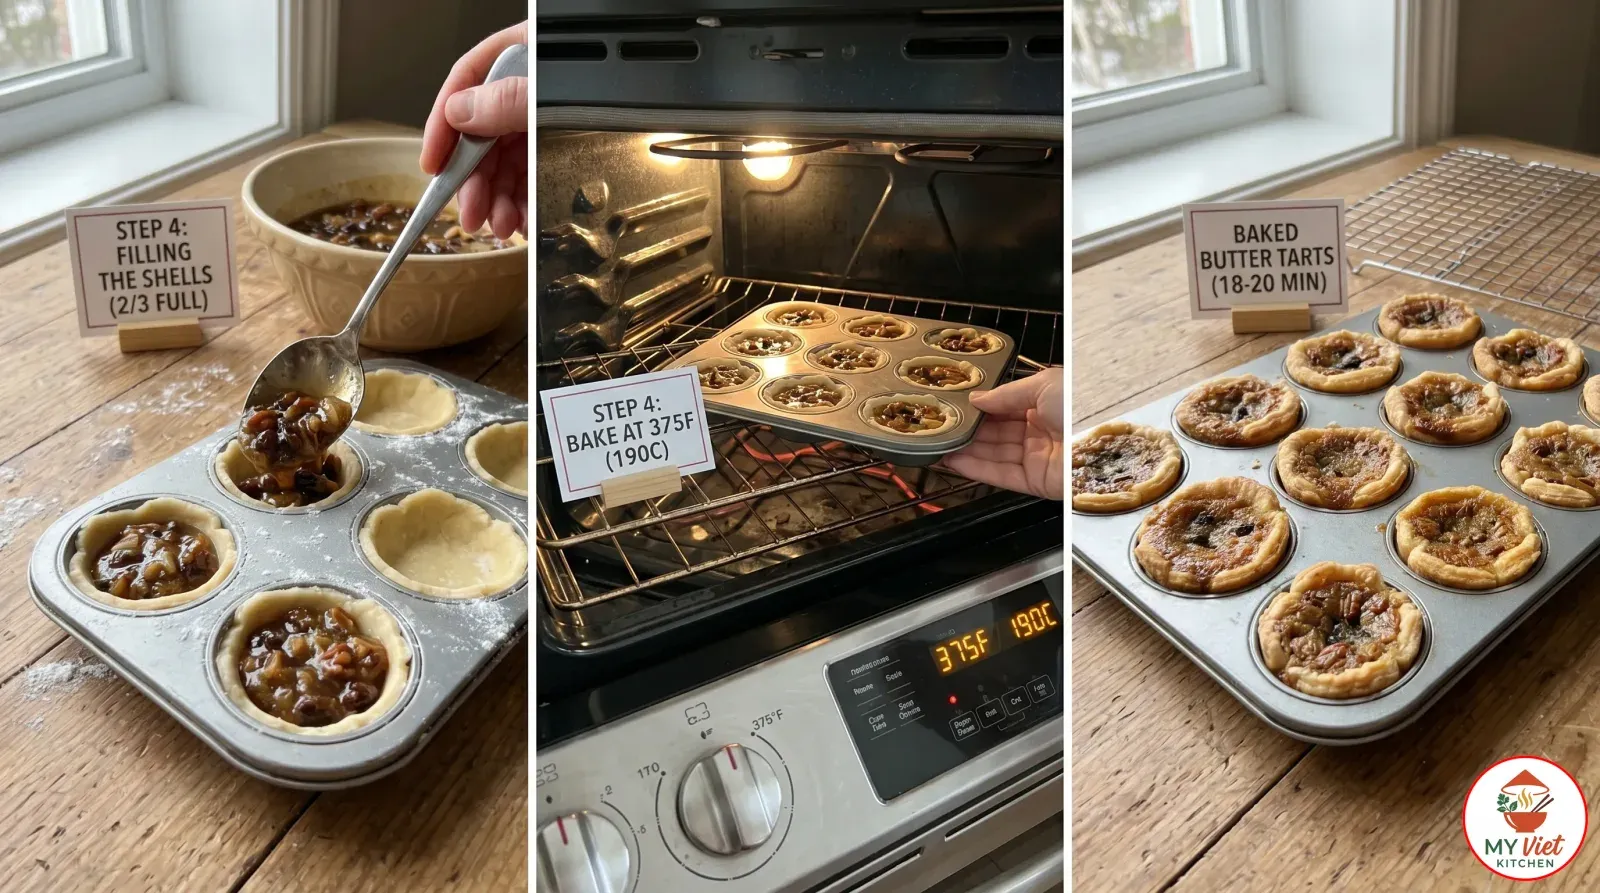
4Spoon the filling into each pastry shell. Fill them about two-thirds full, because the filling will bubble up during baking. Place the muffin tin on the middle rack of your oven. Bake for 18 to 20 minutes. The tarts are done when the pastry turns golden brown and the filling puffs up slightly. However, the center should still have a gentle jiggle. For runny butter tarts, pull them out at 18 minutes. For a firmer set, bake the full 20 minutes.
Step 5: Cool and Serve
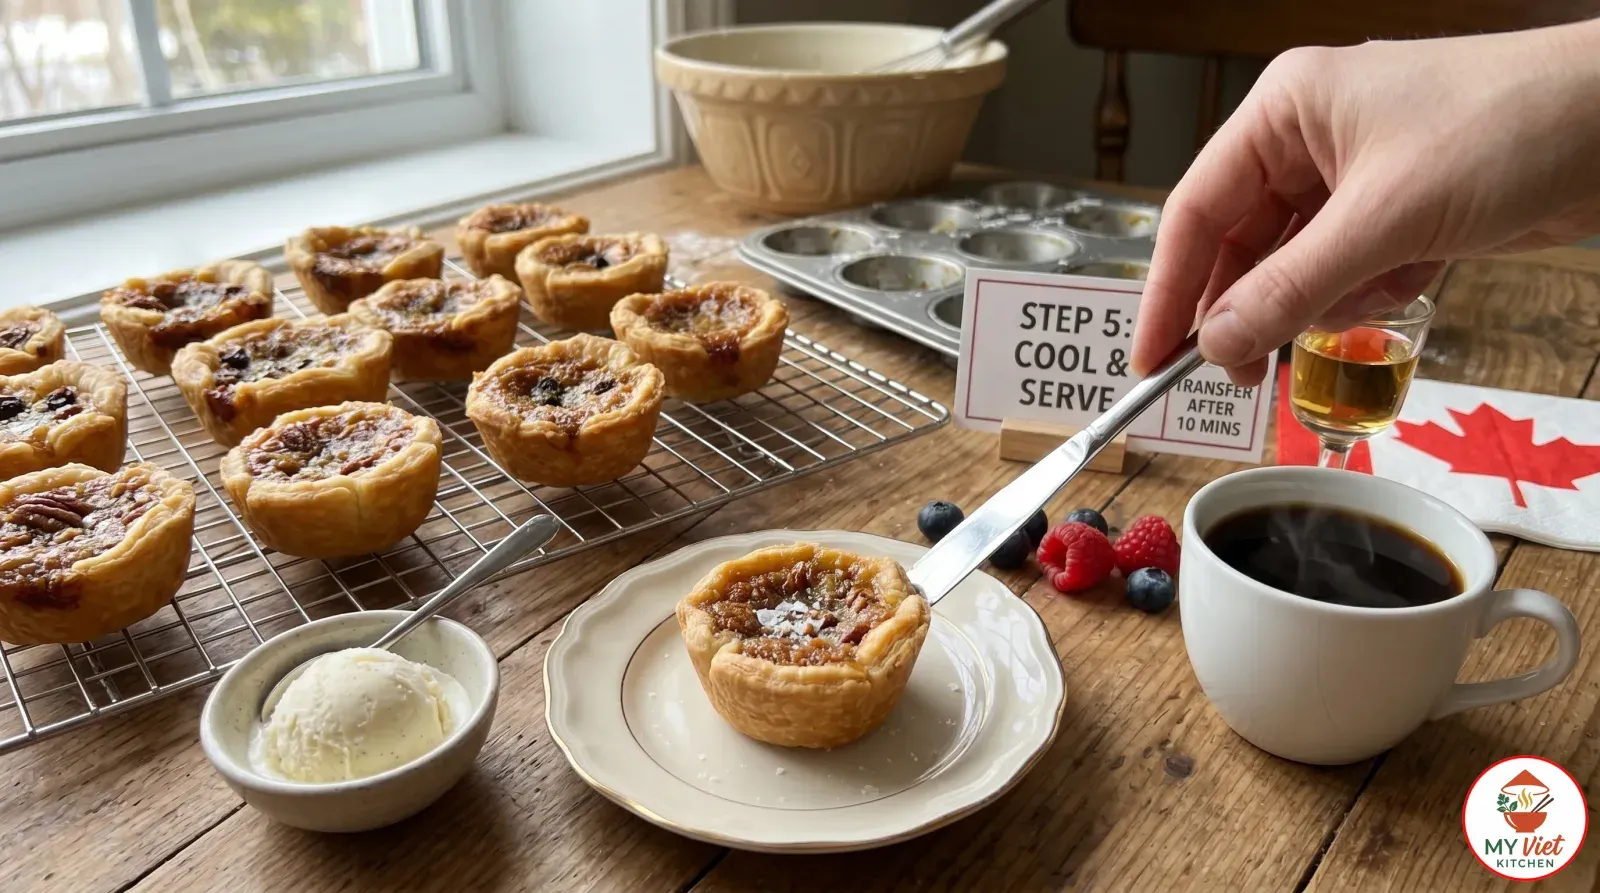
5Let the butter tarts cool in the muffin tin for exactly 10 minutes. This allows the filling to set just enough to hold its shape. After that, use a butter knife to gently loosen the edges and lift each tart out. Transfer them to a wire rack to cool completely. The filling will continue to firm up as it cools. Serve the tarts at room temperature for the best flavor and texture.
Expert Tips for Perfect Butter Tarts
Keep Everything Cold
The secret to flaky pastry lies in temperature control. Cold butter melts in the hot oven and releases steam, which creates layers. If the butter warms up before baking, it absorbs into the flour instead. As a result, you get a tough, dense crust. Therefore, work quickly and return the dough to the fridge whenever it feels soft.
Do Not Overfill
Fill each shell only two-thirds full. The filling bubbles vigorously during baking, and overfilled tarts will spill over the edges. This creates a mess and makes the tarts difficult to remove. Also, the overflow can burn on the pan and ruin the pastry edges.
Use Vinegar
A tablespoon of vinegar might seem odd in a sweet dessert, but it serves two important purposes. First, it balances the intense sweetness of the brown sugar and corn syrup. Second, it helps set the filling by reacting with the eggs during baking. Many traditional Canadian recipes include this ingredient, so do not skip it.
Runny vs. Firm Butter Tarts: The Great Canadian Debate
Canadians take their butter tarts seriously, and the biggest point of contention is the filling consistency. Here is how the two styles compare.
| Feature | Runny Butter Tarts | Firm Butter Tarts |
|---|---|---|
| Filling texture | Liquid, syrupy center | Set, fudge-like center |
| Baking time | 16 to 18 minutes | 20 to 22 minutes |
| Egg ratio | Fewer eggs (1 egg) | More eggs (2 eggs) |
| Best served | With a spoon or fork | Pick up by hand |
| Popularity | Most traditional style | Easier for gatherings |
Serving Suggestions
Butter tarts taste wonderful on their own, but you can elevate them further with the right accompaniments. Here are some ideas to make your dessert spread even more memorable.
The Perfect Accompaniments:
- Vanilla ice cream: A scoop of cold ice cream alongside a warm butter tart creates a delightful contrast in temperature and texture.
- Whipped cream: A dollop of lightly sweetened whipped cream balances the rich filling beautifully.
- Fresh berries: Tart raspberries or blueberries cut through the sweetness and add a pop of color.
- Flaky sea salt: A tiny pinch of Maldon salt on top enhances the caramel flavor dramatically.
Beverage Pairings:
- Black coffee: The bitterness of coffee pairs perfectly with the sweet, buttery filling.
- Hot apple cider: A warm, spiced cider complements the toffee notes in the tarts.
- Canadian ice wine: For a special occasion, a glass of Canadian ice wine makes a stunning match.
Storage and Reheating
Refrigerator: Store butter tarts in an airtight container in the fridge for up to 7 days. The flavor actually deepens after a day or two, so they taste even better the next day.
Freezer: Wrap individual tarts in plastic wrap, then place them in a freezer bag. They keep well for up to 3 months. Thaw them in the refrigerator overnight before serving.
Reheating: Warm butter tarts in a 300F (150C) oven for 5 to 8 minutes. This restores the flaky texture of the pastry without overcooking the filling. Avoid the microwave, because it makes the pastry soggy.
Common Mistakes to Avoid
1. Using Warm Butter for the Pastry
Warm butter blends too smoothly into the flour. Consequently, you lose the pockets that create flakiness. Always use butter straight from the freezer or refrigerator. If your kitchen is warm, chill the bowl and flour beforehand as well.
2. Overmixing the Filling
Vigorous mixing introduces air bubbles into the filling. During baking, those bubbles expand and cause the filling to puff up dramatically. Then it deflates and sinks as it cools, leaving a disappointing crater. Instead, use gentle hand whisking and stop as soon as everything combines.
3. Overbaking the Tarts
Butter tarts should still jiggle slightly when you remove them from the oven. The residual heat continues cooking the filling. If you wait until they look fully set in the oven, they will become hard and dry once cooled. Pull them out early and trust the process.
Frequently Asked Questions
What makes butter tarts different from pecan pie?
Butter tarts use individual pastry shells and a simpler filling. Pecan pie fills an entire pie dish and uses a heavier layer of pecans. Also, the butter tart filling is typically gooier and more concentrated in flavor because of its smaller size.
Should butter tarts be runny or firm?
This depends entirely on personal preference. Traditional Canadian butter tarts lean toward a runny center, but many people prefer a firmer set. You can control the texture by adjusting the baking time. Shorter baking gives you a runnier center, while longer baking produces a firmer result.
Can I make butter tarts without corn syrup?
Absolutely. Maple syrup is the most popular alternative, and it adds a distinctly Canadian twist. Golden syrup and honey also work well. Use the same amount as a direct replacement. Each substitute brings its own subtle flavor, so feel free to experiment.
How do I prevent butter tarts from sticking to the pan?
Grease your muffin tin generously with butter or non-stick spray. You can also line each cup with a small strip of parchment paper for easy removal. Most importantly, let the tarts cool for 10 minutes in the pan before attempting to remove them.
How long do butter tarts last?
Butter tarts last up to 3 days at room temperature and up to a week in the refrigerator. For longer storage, freeze them for up to 3 months. They taste best when served at room temperature, so let refrigerated or frozen tarts warm up before eating.
Variations and Adaptations
Maple Butter Tarts:
Replace the corn syrup entirely with pure Canadian maple syrup. This variation deepens the caramel notes and gives the tarts an unmistakably Canadian flavor. In addition, add a pinch of cinnamon for warmth.
Chocolate Butter Tarts:
Add 2 tablespoons of cocoa powder to the filling and stir in 1/3 cup of chocolate chips. The chocolate melts into the gooey filling and creates a decadent twist on the classic.
Pecan Pie Butter Tarts:
Press whole pecan halves into the top of each filled tart before baking. This gives you the best of both worlds. You get the buttery Canadian filling combined with the nutty crunch of a Southern pecan pie.
Gluten-Free Butter Tarts:
Swap the all-purpose flour for a 1-to-1 gluten-free baking blend. Add 1/2 teaspoon of xanthan gum if your blend does not already contain it. The filling is naturally gluten-free, so you only need to modify the pastry.
The Cultural Significance of Butter Tarts
Butter tarts are more than just a dessert in Canada. They are a cultural icon that represents home baking, community gatherings, and national identity. The earliest known recipe appeared in the 1900 edition of the Royal Victoria Cookbook in Ontario. Since then, butter tarts have spread across the country and become a staple at every bakery, fair, and family dinner.
In Ontario, the Butter Tart Trail attracts thousands of visitors each year. This driving route connects bakeries that specialize in butter tarts, and each one offers its own unique version. Some use maple syrup instead of corn syrup, while others add unexpected ingredients like bourbon or bacon. The trail highlights how deeply this simple pastry connects to Canadian culture and community.
Ultimately, butter tarts carry the warmth of a grandmother’s kitchen. Every Canadian family has their own version, passed down through generations. Baking them at home connects you to that tradition, regardless of where you live.
Conclusion
Making butter tarts at home is easier than you might think. With just a few pantry staples and about 50 minutes of your time, you can create these iconic Canadian pastries. Remember to keep your butter cold for the flakiest crust, and do not overmix the filling. Also, trust the jiggle test when deciding if your tarts are done baking.
Whether you choose runny or firm, raisins or pecans, plain or maple-infused, these butter tarts will quickly become a household favorite. For more sweet treats from around the world, check out our complete dessert collection. Happy baking!