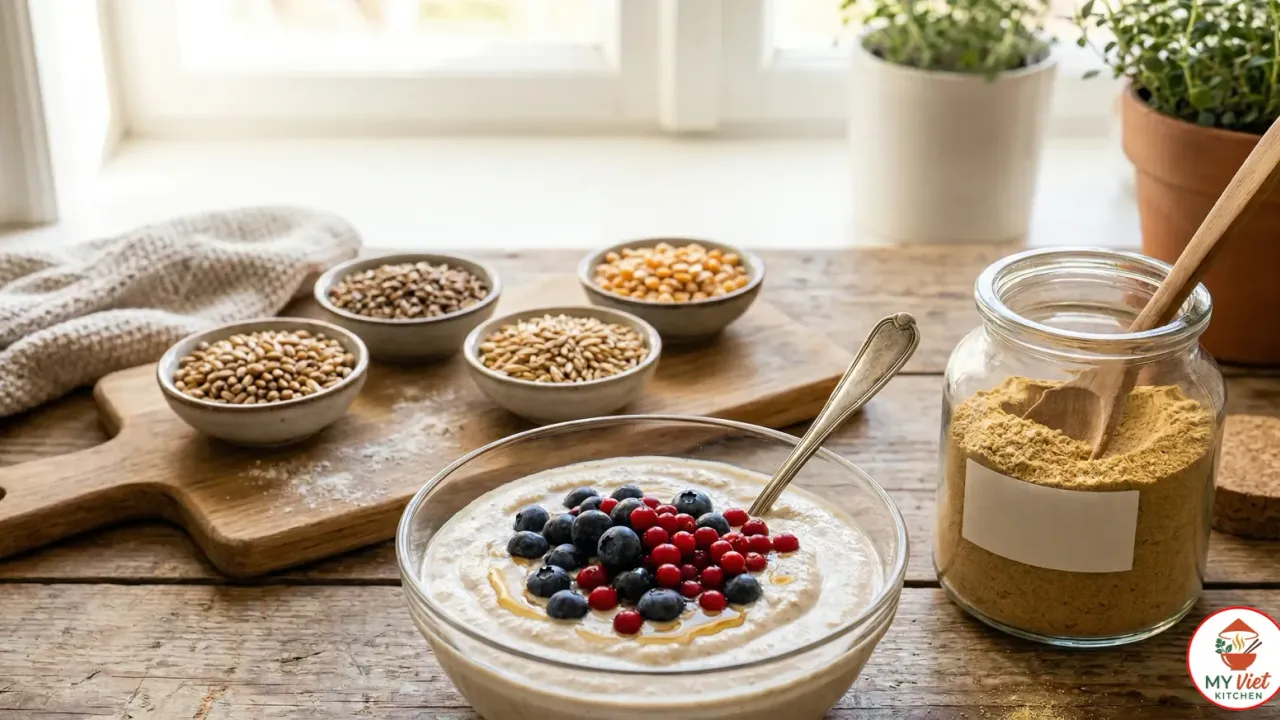
Kama is a beloved Estonian roasted grain flour mix that has nourished Baltic families for centuries, and this guide shows you exactly how to make it at home. This traditional blend of roasted barley, rye, oats, and dried peas produces a fine, golden flour with a warm, nutty aroma. Estonians stir kama into cold kefir, buttermilk, or yogurt to create a quick, wholesome breakfast or dessert that takes only seconds to prepare. Often called Estonia’s original superfood, kama delivers impressive fiber, protein, and complex carbohydrates in every spoonful. Follow along to discover why this humble grain flour holds a cherished place in Estonian food culture.
Prep Time: 10 minutes | Cook Time: 40 minutes | Servings: 8 (about 2 cups of flour)
Difficulty: Easy | Calories: ~180 per serving
What Makes Kama Special?
First, kama stands apart from other grain flours because of its unique roasting process. Unlike regular flour from a single raw grain, kama blends four grains and legumes that are each roasted before grinding. The dry-roasting transforms the starches and creates deep, toasty flavors through the Maillard reaction. As a result, kama has a warm, malty taste that no single grain flour can match. Indeed, this complexity is what makes it so satisfying even in the simplest form.
In addition, the history of kama stretches back to medieval Estonia. Farming families needed portable food that lasted long and required no cooking. Roasted grain flour met every need perfectly. Farmers carried pouches of kama into the fields and mixed it with water, milk, or beer for quick energy. Over time, the recipe settled on the four-grain blend that Estonians know today. Because the roasting removes moisture, kama keeps for months without spoiling. For that reason, it was vital before the age of refrigeration.
What truly sets kama apart is its cultural role in Estonia. The dish appears at summer festivals, family meals, and daily breakfasts. Furthermore, Estonian children grow up eating kama with kefir as a snack. In recent years, modern chefs have begun adding kama to ice creams, energy bars, and even cocktails. Despite these creative new uses, the classic mix of kama stirred into cold kefir with honey remains the top choice. Without doubt, many Estonians call this simple mixture the ultimate comfort food.

Choosing the Right Grains for Kama
Above all, the quality of your grains shapes the final flavor of your kama flour. Picking the right types and knowing their roles helps you get the most real result. Here are the four key parts and what each one adds.
- Barley (the base grain): Barley forms the backbone of kama and typically makes up the largest portion. When roasted, barley develops a deep, malty sweetness that defines the overall flavor. Use whole hulled barley or pearl barley. Hulled barley gives a more robust taste, while pearl barley produces a milder, smoother flour.
- Rye (for earthy depth): Rye grains add a distinctive earthy, slightly bitter note that balances the sweetness of roasted barley. Whole rye berries work best because they roast evenly and grind well. Rye also contributes a darker color to the finished kama, giving it that characteristic golden-brown hue.
- Oats (for creaminess): Oat groats bring a gentle, creamy quality to the mix. When roasted, oats develop a soft, biscuit-like flavor that rounds out the sharper notes of rye and barley. Use whole oat groats rather than rolled oats, since groats roast more evenly and produce a finer flour.
- Dried yellow peas (for protein): The peas are what make kama truly unique among grain flours. They add significant plant-based protein and a subtle, savory undertone. Dried yellow split peas or whole dried peas both work well. Roast them until they turn golden and smell nutty. The peas also give kama its impressive nutritional profile.
Ingredients for Kama
Kama Flour Blend:
- 1/2 cup barley grains (hulled or pearl)
- 1/2 cup rye berries (whole rye grains)
- 1/4 cup oat groats (whole oats)
- 1/4 cup dried yellow peas (split or whole)
For Serving (Kama with Kefir):
- 3 to 4 tablespoons kama flour per serving
- 1 cup cold kefir, buttermilk, or plain yogurt
- 1 to 2 tablespoons honey, maple syrup, or sugar
- Fresh berries for topping (blueberries, raspberries, or lingonberries)
Optional Additions:
- 1 tablespoon flaxseeds or hemp seeds for extra nutrition
- 1/2 teaspoon cinnamon for warmth
- Sliced banana or grated apple for natural sweetness
Pro tip: Toast each grain separately for the best control over roasting. Barley and rye need longer roasting than oats and peas. By roasting them individually, you prevent the lighter grains from burning while the heavier ones are still undercooked.
Step-by-Step Instructions
Step 1: Toast the Grains and Peas
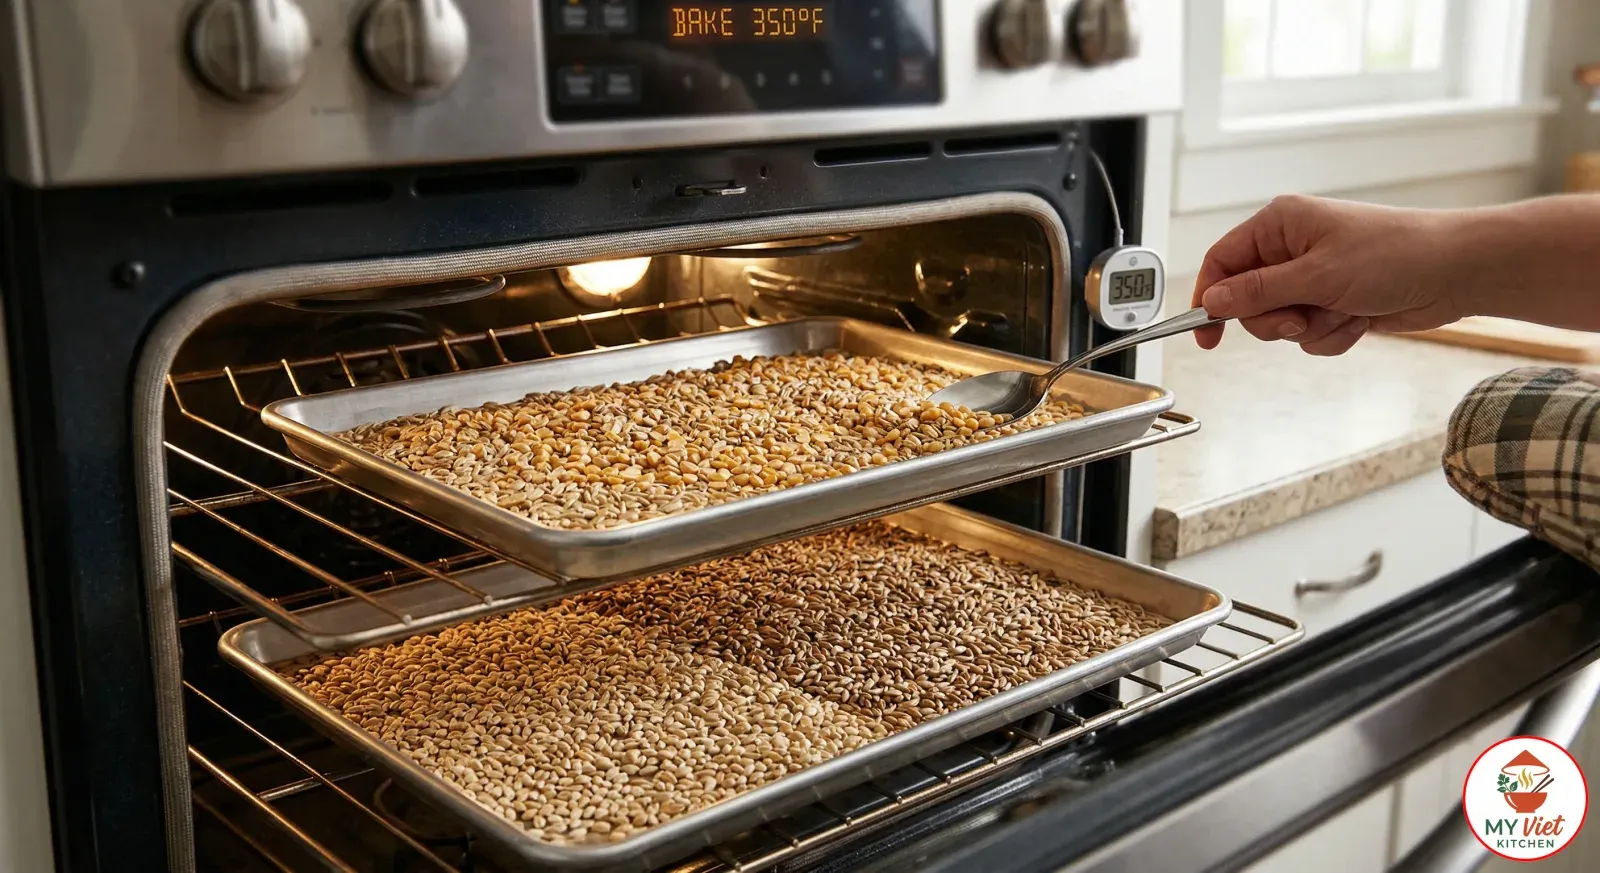
1 Preheat your oven to 350 degrees Fahrenheit. Spread the barley and rye grains in a single layer on a large rimmed baking sheet. Place the oat groats and dried peas on a separate baking sheet. Roast the barley and rye for 30 to 40 minutes, stirring every 10 minutes, until they turn golden brown and smell deeply toasty. Roast the oats and peas for 20 to 25 minutes, stirring halfway through, until they are lightly golden and fragrant.
Meanwhile, watch the oats and peas closely because they can burn fast. The grains are ready when they give off a warm, nutty smell and have turned one or two shades darker. Then remove both trays and let everything cool fully on the sheets. Cooling matters because grinding warm grains releases steam, which can make the flour clump and cut its shelf life.
Step 2: Grind the Roasted Grains
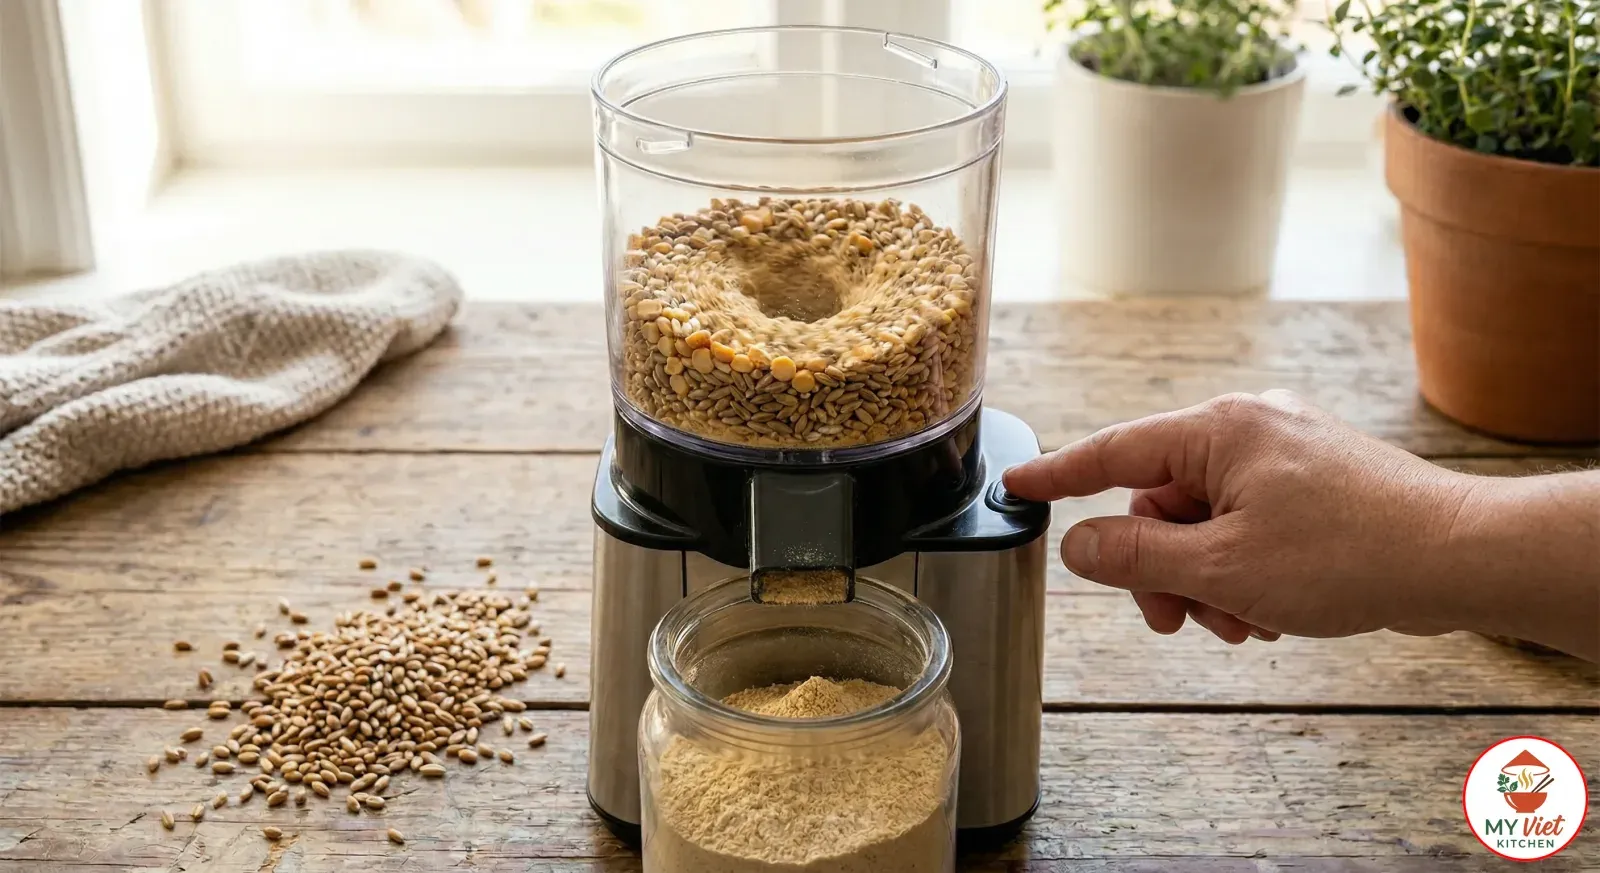
2 Transfer all the cooled roasted grains and peas to a high-powered blender, spice grinder, or grain mill. Grind in small batches, about half a cup at a time, for the most even results. Pulse the blender in short bursts rather than running it continuously. This prevents the motor from overheating and gives you better control over the texture. You want a fine, powdery flour without large gritty pieces.
If you use a basic blender, the flour may come out a bit coarse. That is fine for a rustic, old-style feel. However, for the smoothest result, a grain mill or coffee grinder works best. Also, grind each grain type on its own if you want to control the feel of each one. Then combine all the ground flours in a big bowl and whisk them well.
Step 3: Sift and Store the Kama Flour
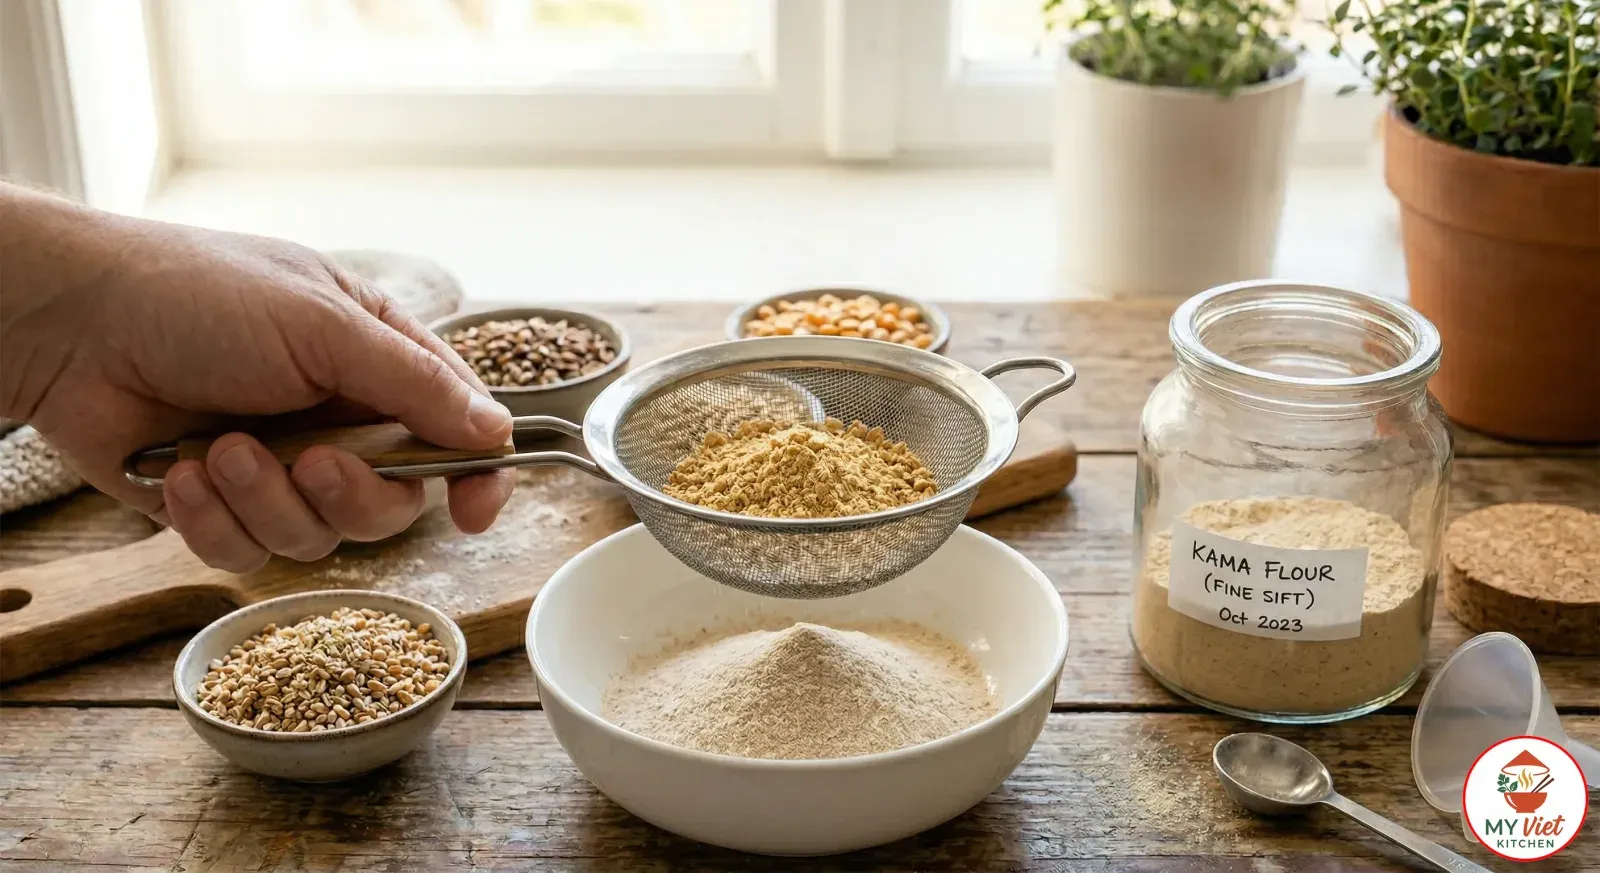
3 Next, pour the ground flour through a fine-mesh sieve into a clean bowl. Shake the sieve gently to let the fine bits fall through while catching any coarse pieces. Then collect the larger bits and grind them again. Repeat until all the flour passes through the sieve smoothly. The finished kama flour should feel silky and fine, similar to cornstarch.
After that, place the sifted kama flour in a clean, dry glass jar or airtight box. Label it with the date so you can track how fresh it is. Store the jar in a cool, dark pantry at room temperature. Properly stored kama flour stays good for up to 3 months. For longer storage, keep it in the fridge for up to 6 months or freezer for up to a year. This batch yields about 2 cups of kama flour, which gives you roughly 8 big servings.
Step 4: Mix Kama with Kefir and Serve
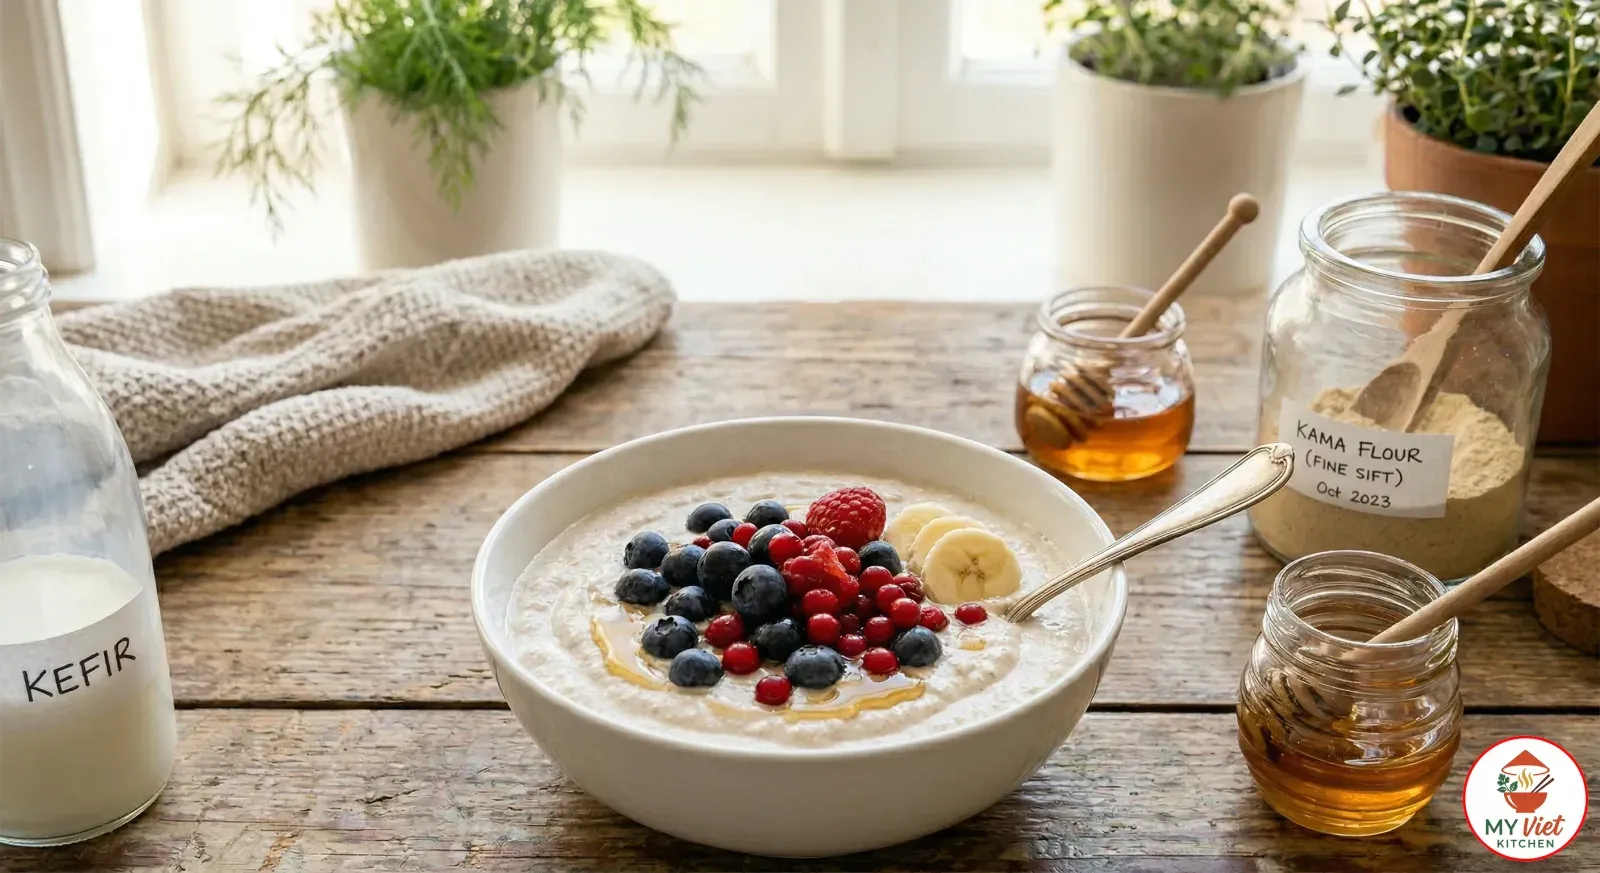
4 Pour one cup of cold kefir, buttermilk, or plain yogurt into a tall glass or bowl. Add 3 to 4 tablespoons of kama flour and stir vigorously with a spoon until the flour dissolves evenly into the liquid. The mixture should look creamy and slightly thick, similar to a smoothie. Add honey, maple syrup, or sugar to taste. Start with one tablespoon and adjust based on your preference.
Finally, top the mix with fresh berries, sliced banana, or a pinch of cinnamon. Serve right away and eat it with a spoon, since the flour keeps getting thicker as it sits. In Estonia, people enjoy kama at any time of day. For instance, it works well as a quick breakfast, a snack, or a light dessert after dinner. The tangy kefir pairs nicely with the warm, toasty grain flavor. Together, they create a balanced and deeply filling treat.
Expert Tips for Perfect Results
Roast Low and Slow
The roasting stage is the most vital step in making kama. Rushing it at high heat creates bitter, burnt flavors instead of warm, malty sweetness. So keep the oven at 350 degrees and stir the grains often. Even roasting is the goal. Each grain should turn a uniform golden brown with no dark spots. If you smell any burning, pull the tray out at once and remove the burnt grains.
Cool Completely Before Grinding
Grinding warm grains creates steam in the blender. That steam adds moisture back into the flour and causes clumping. Therefore, let the grains cool on the baking sheet for at least 30 minutes before you grind. Patience here pays off with a finer, drier flour that stores much better. Similarly, spreading the grains in a thin layer speeds up cooling.
Adjust the Grain Ratios to Your Taste
The classic ratio uses equal parts barley and rye with less oats and peas. However, you can change the blend to suit your taste. For example, more barley creates a sweeter, milder kama. More rye adds depth. Extra oats make the flour creamier in liquid. Also, more peas boost the protein and add a savory note. Try different ratios until you find your own favorite mix.
Kama Compared to Similar Grain Flours Worldwide
In fact, several cultures have their own roasted grain flour traditions. While kama shares traits with these foods, its grain blend and cultural roots make it unique. Here is how Estonian kama compares to its closest relatives.
| Grain Flour | Origin | Main Grains | How It Is Eaten |
|---|---|---|---|
| Kama | Estonia | Barley, rye, oats, peas | Mixed with kefir or buttermilk |
| Talkkuna | Finland | Barley, oats, peas | Mixed with milk or yogurt |
| Tsampa | Tibet | Roasted barley only | Mixed with butter tea |
| Misutgaru | South Korea | Mixed roasted grains and beans | Mixed with milk or water |
| Sattu | India | Roasted chickpea or barley | Mixed with water, lime, spices |
Serving Suggestions
The classic way to enjoy kama is stirred into cold kefir with a bit of sweetener. However, this handy flour works in many other ways too. Estonian cooks have found fun ways to use kama across all meals and events.
The Perfect Accompaniments:
- Cold kefir or buttermilk: The tangy, probiotic-rich liquid is the classic partner for kama. The acidity of kefir balances the toasty sweetness of the grain flour, and the combination provides both prebiotics from the grains and probiotics from the kefir.
- Fresh seasonal berries: Blueberries, raspberries, lingonberries, or strawberries add color, natural sweetness, and vitamins. Estonian summer berries pair especially well with kama because their bright acidity cuts through the earthy grain flavor.
- Honey or birch syrup: A drizzle of raw honey or birch syrup is the traditional sweetener. Honey enhances the malty notes of the roasted grains, while birch syrup adds a distinctly Nordic, caramel-like flavor that complements the Baltic character of kama.
- Thick Greek yogurt: For a richer, thicker texture, use plain Greek yogurt instead of kefir. The extra creaminess turns kama into a parfait-like dessert, especially when layered with berries and granola in a tall glass.
- Dark rye bread: In Estonia, a bowl of kama with kefir alongside a slice of dark rye bread makes a complete, satisfying breakfast. The shared rye flavor between the bread and the kama creates a harmonious, deeply Baltic meal.
Beverage Pairings:
- Kali (Estonian kvass): This lightly fermented bread drink is a traditional Estonian beverage. Its mild sourness and malty taste echo the flavors of kama beautifully. Together, they create a thoroughly Estonian culinary experience.
- Hot chamomile tea: A warm cup of herbal tea alongside a cold bowl of kama makes a soothing combination. The gentle floral notes of chamomile complement the earthy grain flavors without competing for attention.
- Fresh apple juice: Crisp, tart apple juice refreshes the palate between bites of thick, creamy kama. Estonian orchards produce excellent apples, and this pairing is popular during the autumn harvest season.
- Cold milk: Simple, cold whole milk stirred with kama flour and sugar is how many Estonian children first experience this traditional food. The plain milk lets the toasty grain flavor shine through without any competing tastes.
Storage and Reheating
Room temperature: Store kama flour in a tightly sealed glass jar or airtight container in a cool, dark pantry. It keeps well for up to 3 months at room temperature. The roasting process removes moisture from the grains, which naturally preserves the flour. Keep the jar away from heat, light, and humidity to maintain freshness.
Refrigerator: For extended storage, place the sealed container in the refrigerator. Cold storage extends the shelf life to about 6 months. Let the flour come to room temperature before using it, since cold kama can taste slightly muted. A few minutes on the counter is all it needs.
Freezer: Kama flour freezes exceptionally well for up to 1 year. Divide it into individual portions using small bags or containers. Thaw overnight in the refrigerator or at room temperature for 20 minutes before mixing. The flavor and texture remain excellent after freezing because the low moisture content prevents ice crystal damage.
Common Mistakes to Avoid
1. Burning the Grains During Roasting
The most frequent mistake is roasting at too high a temperature or forgetting to stir. Burnt grains produce bitter, acrid flour that ruins the entire batch. Set the oven to 350 degrees Fahrenheit and stir every 10 minutes. Remove each grain type as soon as it reaches a golden brown color. A few minutes of extra roasting can push the flavor from pleasantly toasty to unpleasantly charred.
2. Grinding the Grains While Still Warm
Impatient cooks often skip the cooling step, which introduces moisture back into the flour. This causes clumping and shortens the storage life significantly. Always let the roasted grains cool completely on the baking sheet before transferring them to the grinder. If the jar fogs up after you seal it, the flour was still too warm.
3. Using Rolled Oats Instead of Whole Groats
Rolled oats are already processed and flatten during roasting. They also burn much faster than whole oat groats. Use whole oat groats for even roasting and a better final texture. If whole groats are unavailable, steel-cut oats are a closer substitute than rolled oats. They hold up better to the extended roasting time.
4. Adding Too Much Kama Flour to the Liquid
Kama flour soaks up liquid fast and keeps getting thicker as it sits. So adding too much at once makes a dense, pasty mix that is hard to eat. Instead, start with 3 tablespoons per cup of kefir and add more bit by bit. Stir well after each spoonful. You can always add more flour, but you cannot thin a thick mix without watering down the flavor.
Frequently Asked Questions
What is Estonian kama?
Kama is a traditional Estonian flour blend made from roasted barley, rye, oats, and dried peas. The grains are dry-roasted until golden and then ground into a fine powder. Estonians mix kama with cold kefir, buttermilk, or yogurt and sweeten it with honey for a quick, nutritious meal. It has been part of Estonian food culture for centuries and is considered one of the country’s most iconic traditional foods.
Is kama a superfood?
Indeed, many experts call kama a superfood thanks to its rich nutrition. A single serving provides high fiber, plant protein, B vitamins, iron, and magnesium. In addition, the mix of whole grains and legumes forms a full amino acid profile. Because kama has no added sugars or preservatives, it stands for clean, whole-food eating in its simplest form.
What does kama taste like?
Kama has a warm, nutty, malty flavor with earthy notes from the rye and peas. When mixed with kefir and honey, it turns creamy, tangy, and gently sweet. In fact, many people liken it to roasted barley tea or malt powder. The toasty smell is inviting and makes kama feel warm even when served cold.
Can I buy kama flour instead of making it?
Yes, you can find pre-made kama flour at Estonian stores, Baltic shops, and some online sites. Brands like Tartu Mill sell ready-made kama flour. However, making it at home gives you full control over the grain ratios and roasting level. Moreover, homemade kama tastes much fresher than store versions that may have sat on shelves for months.
Is kama gluten-free?
No, traditional kama has barley and rye, both of which contain gluten. Therefore, people with celiac disease should avoid standard kama. However, you can make a gluten-free version by using buckwheat and millet in place of barley and rye. The taste shifts a bit, but the nutty, roasted feel stays. Always check grain labels for gluten traces.
How do I store homemade kama flour?
Store kama flour in an airtight glass jar at room temp for up to 3 months. Likewise, the fridge extends it to 6 months, and freezing keeps it for up to a year. The key is keeping moisture out. Always use a clean, dry spoon when scooping to stop moisture from getting in and causing spoilage.
Variations and Adaptations
Kama Smoothie Bowl:
Blend 3 tablespoons of kama flour with a frozen banana, half a cup of kefir, and a tablespoon of honey until thick and smooth. Pour the mixture into a bowl and top with granola, fresh berries, coconut flakes, and a drizzle of nut butter. This modern twist transforms traditional kama into a trendy breakfast bowl that looks as good as it tastes.
Kama Ice Cream:
Estonian ice cream makers have popularized kama-flavored ice cream, and you can replicate it at home. Stir 4 tablespoons of kama flour into a base of sweetened condensed milk and whipped cream. Freeze the mixture for at least 6 hours. The result is a creamy, malty frozen dessert with a uniquely Estonian character. This has become one of the most popular kama-based innovations in recent years.
Kama Energy Balls:
Mix half a cup of kama flour with a quarter cup of peanut butter, 2 tablespoons of honey, and a handful of dark chocolate chips. Roll the mixture into small balls and refrigerate for an hour until firm. These portable snacks deliver sustained energy from the whole grains and make an excellent pre-workout fuel or school lunchbox treat.
Gluten-Free Kama:
Replace the barley with roasted buckwheat groats and the rye with roasted millet. Keep the oats (certified gluten-free) and peas as they are. The buckwheat brings a strong, earthy flavor that mimics the depth of rye, while millet adds a mild sweetness similar to barley. This adaptation allows people with gluten sensitivities to enjoy the kama experience without compromising too much on taste.
The Cultural Significance of Kama
Kama holds a deeply meaningful place in Estonian culture. It is far more than a simple flour blend. For Estonians, kama stands for survival, skill, and a bond to the land. The practice of roasting and grinding grains goes back to a time when Estonia relied on barley, rye, and peas as main food sources. In those days, kama was not a choice but a need that kept families fed through long, harsh Baltic winters.
During the Soviet era, kama fell out of style as factory foods became common. However, after Estonia gained freedom in 1991, a strong wave of cultural pride brought kama back. Young Estonians embraced it as a symbol of national identity. Today, kama appears on restaurant menus, at Estonian food festivals, and in products like chocolate bars and craft cocktails. As a result, the grain flour that once fed peasant farmers now stands for pride in Estonian food culture.
Most importantly, kama connects generations. Grandparents who grew up eating kama out of need now share it with grandchildren who eat it by choice. Estonian food makers have worked hard to guard and promote kama as a unique national product. In 2019, Estonia put kama forward for the EU food heritage list. This effort ensures that future generations see kama not just as food, but as a living piece of history. Therefore, making kama at home is a small but real act of keeping that tradition alive.
Conclusion
In summary, this kama recipe gives you all you need to make real Estonian roasted grain flour at home. The steps are simple: roast barley, rye, oats, and peas until golden, then grind them into a fine flour. After that, stir the result into cold kefir with honey. The keys are patient, even roasting and thorough grinding. Once you have a jar of homemade kama, you have a handy base for smoothie bowls, ice cream, energy balls, and the classic Estonian breakfast.
Ready to explore more European food traditions? Browse our European dishes collection for recipes like Finnish karjalanpiirakka, Finnish salmon soup, and Latvian rye bread. Each recipe brings a unique taste of the continent to your kitchen.