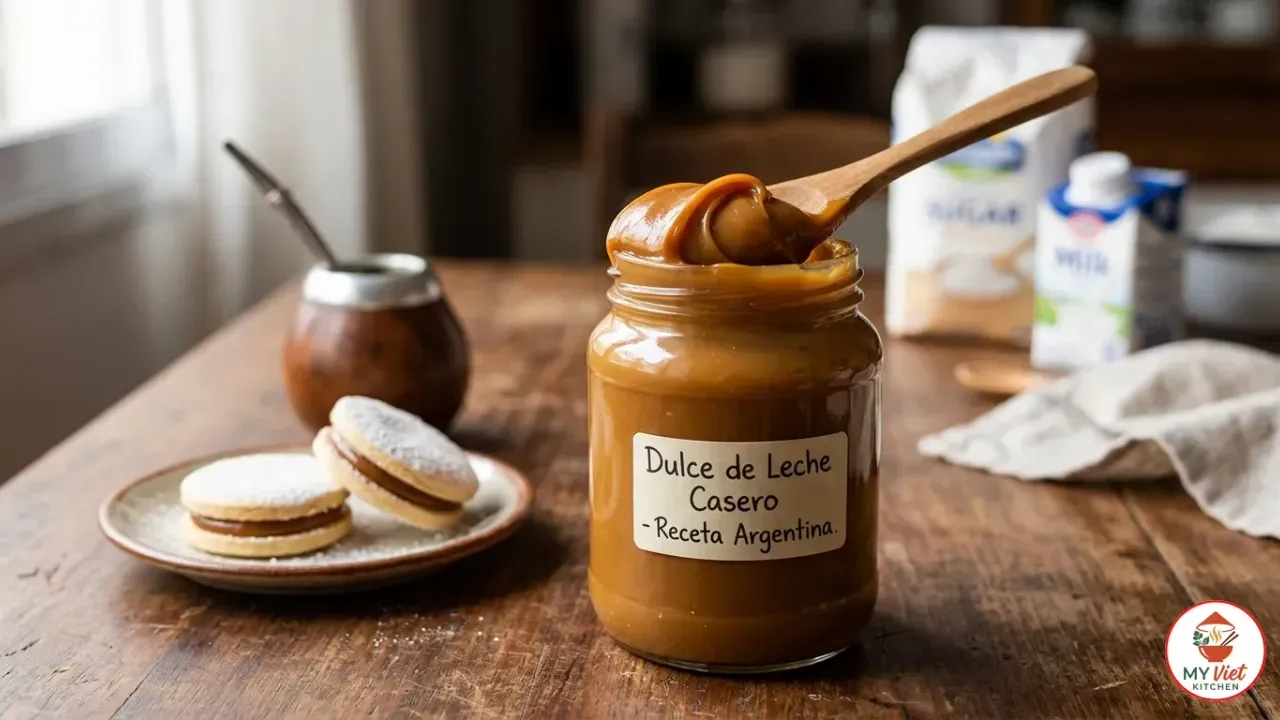
Dulce de leche is the caramel that conquered South America, and this recipe teaches you how to make it from scratch the authentic Argentine way. Nothing more than milk, sugar, and patience transforms into a thick, golden spread with a depth of flavor that store-bought versions cannot touch. This slow-cooked milk caramel is the soul of Argentine and Uruguayan pastry. Once you make your own dulce de leche at home, jars from the supermarket shelf will never satisfy you again.
Prep Time: 10 minutes | Cook Time: 120 minutes | Servings: 16 (about 2 cups)
Difficulty: Easy | Calories: ~120 per serving
What Makes Dulce de Leche Special?
Dulce de leche is not just another caramel. While regular caramel relies on direct sugar caramelization, this Argentine spread builds its flavor through the Maillard reaction, a chemical process between the milk proteins and sugars. As a result, this reaction creates hundreds of flavor compounds that simply do not exist in plain caramel. The finished product tastes of toffee, toasted milk, brown butter, and vanilla all at once. That rich depth is what makes it so hard to resist.
The texture sets it apart as well. Properly made, it is silky smooth and spreadable at room temperature. It clings to a spoon in thick ribbons. When warm, it pours like honey. When chilled, it firms into a scoopable paste that holds its shape in pastries. Because of this, it ranks as one of the most useful items in the Latin American kitchen. For instance, you can spread it on toast, swirl it into ice cream, pipe it into cookies, or eat it straight from the jar.
In Argentina and Uruguay, this caramel spread is not a luxury item. Rather, it is a household staple as common as butter or jam. Families go through jars of it every week. Children eat it on bread for breakfast. Similarly, bakers layer it into cakes, stuff it into churros, and sandwich it between alfajores. In fact, the entire pastry tradition of the Southern Cone revolves around this one ingredient. Making it from scratch connects you to a food heritage that spans many generations.
Choosing the Right Milk for Dulce de Leche
The milk you pick sets the final flavor, color, and richness of your batch. Since milk is the main ingredient, quality matters a great deal. Below are the best options and how each one changes the result.
- Whole milk (best choice): Full-fat whole milk produces the richest, most flavorful result. The extra fat leads to a creamier texture and deeper color. In addition, Argentine households traditionally use whole milk, and it remains the gold standard for this recipe.
- Raw or farm-fresh milk: If you have access to raw milk, the results are stunning. The natural cream adds extra richness. However, store-bought whole milk works just as well for this recipe.
- Reduced-fat or skim milk: These produce a thinner, less flavorful result that takes longer to thicken. The low fat means fewer rich flavors form during cooking. Therefore, avoid these if you can, because the taste gap is huge.
- Goat’s milk (for cajeta): Goat’s milk creates cajeta, the Mexican cousin of this caramel spread. It has a tangy, earthy flavor. Alternatively, some cooks blend half goat’s milk with half cow’s milk for a milder take.
Ingredients for Dulce de Leche
Main Ingredients:
- 4 cups (1 liter) whole milk
- 1 1/4 cups (250g) granulated sugar
- 1/2 teaspoon baking soda dissolved in 1 tablespoon water
For Finishing:
- 1 teaspoon pure vanilla extract
- Pinch of fine sea salt
Optional Flavor Additions:
- 1 cinnamon stick (removed before jarring)
- Zest of 1 orange or lemon (for citrus dulce de leche)
- 2 tablespoons dark rum or whiskey (stirred in at the end)
Pro tip: Use a heavy-bottomed pot that holds at least 4 quarts. A thin pot creates hot spots that scorch the milk. Steel or enameled cast iron works best because you can see the color change on the light surface. Also, avoid nonstick pots, since the long cook and constant stirring can harm the coating.
Step-by-Step Instructions
Step 1: Warm the Milk and Dissolve the Sugar
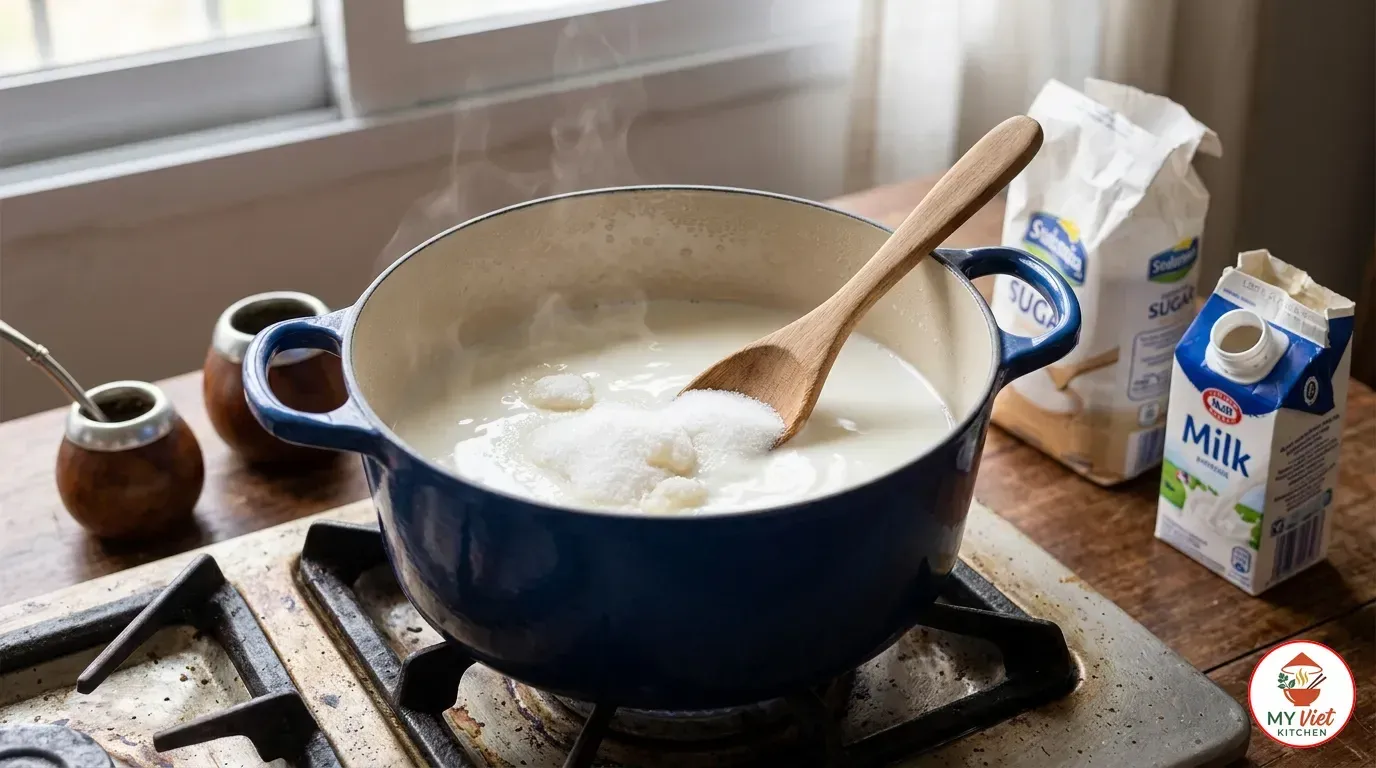
1 Pour the whole milk into a large, heavy-bottomed pot. Add the sugar and place the pot over medium heat. Stir gently with a wooden spoon or silicone spatula until every grain of sugar dissolves completely. This takes about 5 minutes. Most importantly, do not let the milk boil before the sugar dissolves, as undissolved sugar can crystallize later and create a grainy texture.
Once the sugar has melted into the milk, increase the heat slightly and bring the mixture to a gentle simmer. Small bubbles will form around the edges of the pot, and the milk will begin to steam. At this stage, the liquid looks like ordinary sweetened milk. However, over the next two hours, the Maillard reaction will transform it into something remarkable. Stir occasionally to keep the milk moving and also to prevent a skin from forming on the surface.
Step 2: Add the Baking Soda
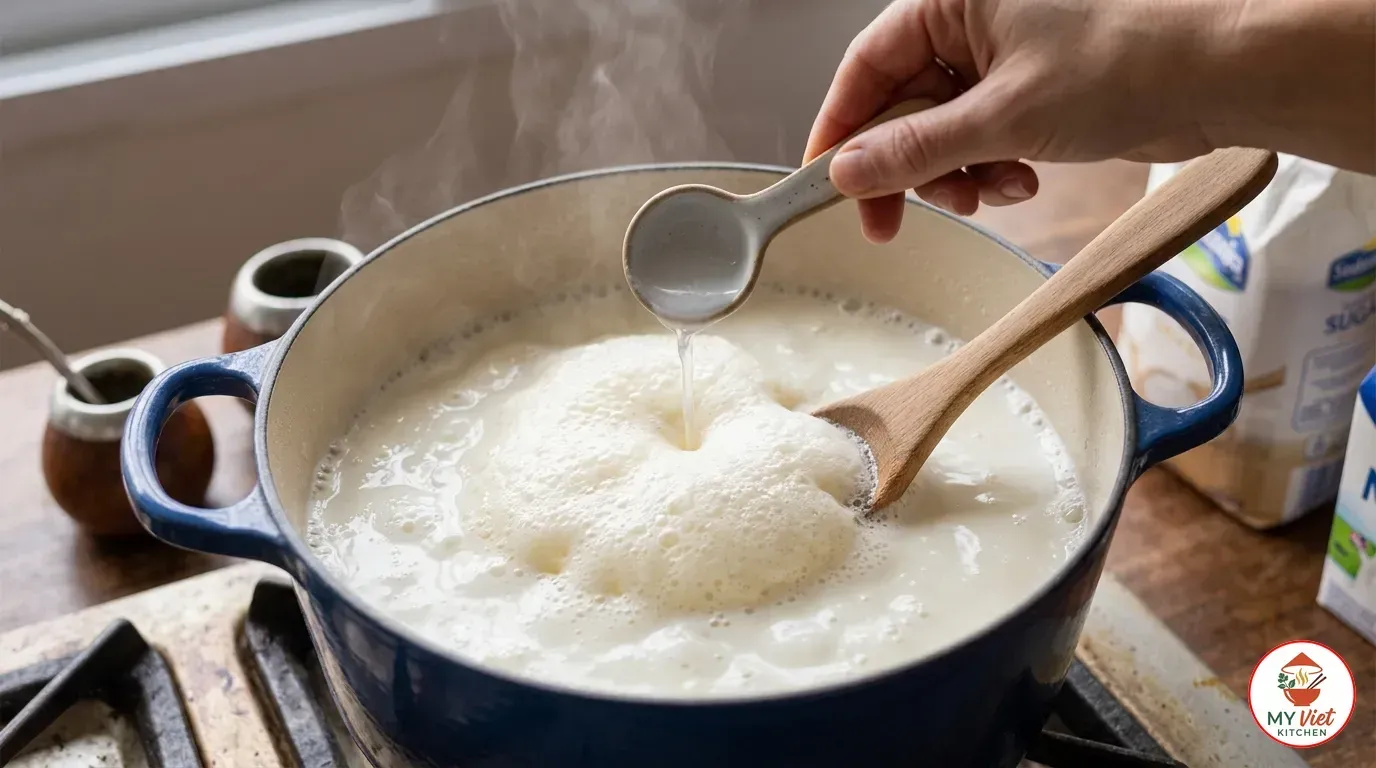
2 Dissolve half a teaspoon of baking soda in one tablespoon of water. Once the milk reaches a steady simmer, pour this mixture into the pot. Stand back slightly because the milk will foam up vigorously. After that, stir immediately to incorporate the baking soda throughout the liquid. Then reduce the heat to low.
The baking soda serves a critical purpose in this recipe. It raises the pH of the milk, which speeds up the Maillard reaction between the lactose and the milk proteins. Without it, the caramel would take much longer to develop its characteristic amber color and toasted flavor. Additionally, the higher pH stops the milk from curdling during the long cook. The foam subsides within a minute or two. After that, the milk settles into a calm, low simmer that you will maintain for the rest of the cooking time.
Step 3: Slow Cook and Stir Regularly
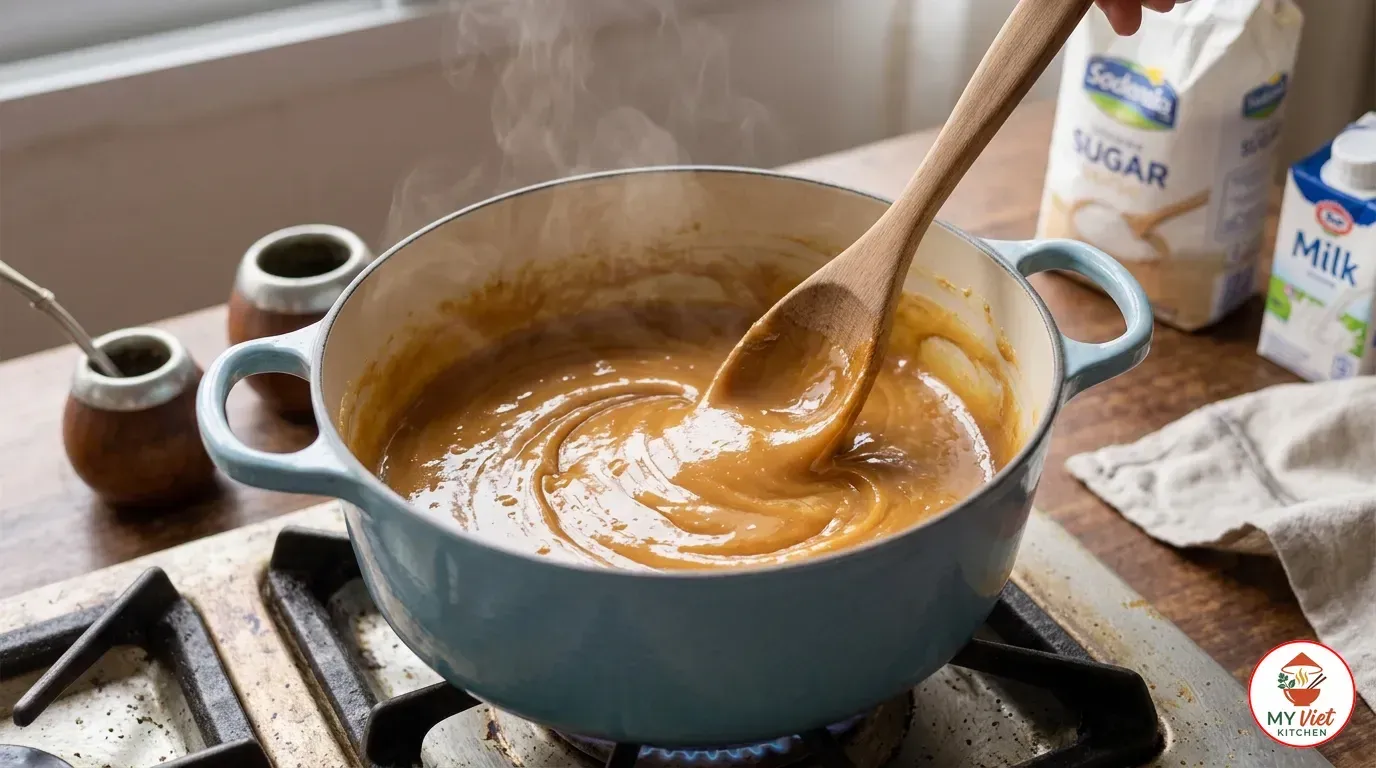
3 Maintain a very gentle simmer over the lowest heat your stove can hold. During the first hour, stir every 10 to 15 minutes. Scrape the bottom and sides of the pot with each pass to prevent milk solids from burning. Eventually, the liquid will reduce gradually, and you will notice the color shifting from white to pale yellow to light tan.
After about 60 minutes, the mixture thickens noticeably. At this point, increase your stirring frequency to every 5 minutes. Meanwhile, the color deepens from tan to golden amber, and the aroma shifts from plain heated milk to something rich and caramelized. Watch the heat carefully during this stage, because even a brief moment of high heat can scorch the bottom and introduce bitter, burnt flavors. Above all, patience is the key. Keep the flame low and stir consistently. The total cooking time ranges from 90 minutes to 2 hours, depending on your stove and pot.
Step 4: Test for Doneness and Finish
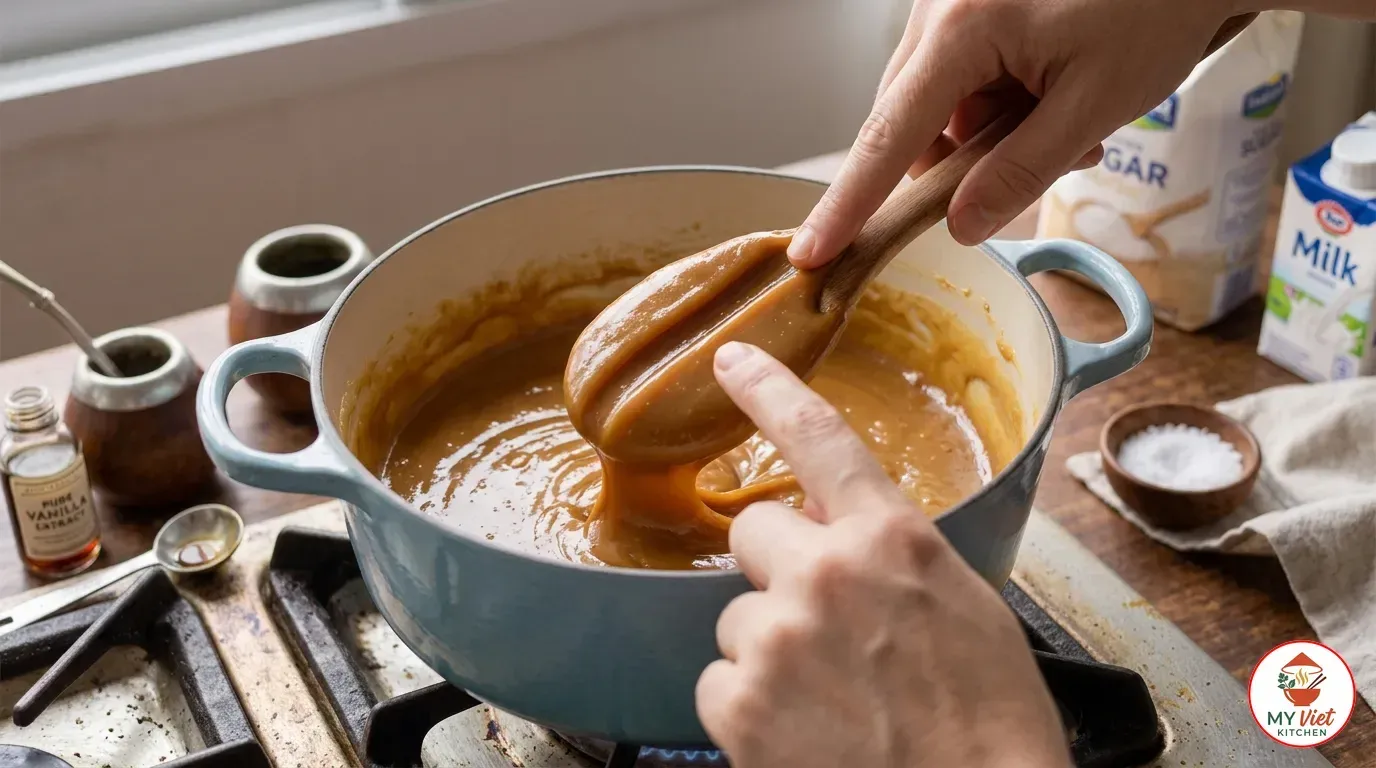
4 To test for doneness, dip a wooden spoon into the mixture and run your finger across the back. If the line holds its shape without the caramel running back together, it is ready. The color should be a warm, deep amber. In addition, the consistency should resemble thick honey or peanut butter at this stage.
Remove the pot from the heat immediately. Stir in the vanilla extract and a pinch of sea salt. The salt might seem unusual, but it is essential because it balances the sweetness and makes the caramel flavors pop. Let the mixture cool in the pot for about 10 minutes. Then pour it through a fine mesh strainer into a clean glass jar. Straining catches any small lumps or bits of cooked milk skin. As the spread cools to room temperature, it thickens further. Therefore, pull it off the heat when it seems slightly thinner than your target consistency.
Expert Tips for Perfect Dulce de Leche
Keep the Heat Low and Steady
The single most important factor in making great dulce de leche is heat control. A gentle simmer produces smooth, even caramelization. On the other hand, high heat causes the milk to scorch on the bottom of the pot, introducing bitter flavors that ruin the entire batch. If you see large, aggressive bubbles, your heat is too high. Instead, reduce it until you see only small, lazy bubbles rising occasionally from the bottom. Furthermore, a flame diffuser placed under the pot helps maintain an even, low temperature on gas stoves.
Choose a Wide, Heavy Pot
A wide pot exposes more surface area to evaporation, which speeds up the reduction process. Similarly, a heavy bottom distributes heat evenly and prevents hot spots. In contrast, thin pots focus heat right below the flame and scorch the milk before it can brown properly. Consequently, a Dutch oven or thick steel stockpot works far better than a light pan. The gap in quality is huge.
Stir More as It Thickens
During the first hour, the mixture is thin enough that occasional stirring suffices. However, as the liquid gets thicker, the risk of scorching goes up fast. In the final 30 minutes, stir almost continuously and scrape the bottom of the pot with every pass. The thicker the mixture gets, the more heat it retains and the faster it can burn. Ultimately, your attention during these last minutes determines whether you end up with a perfect batch or one with bitter undertones.
Dulce de Leche vs. Caramel: Understanding the Difference
Many people confuse this spread with caramel, but the two are fundamentally different in technique, flavor, and texture. Knowing this helps you see why this South American classic stands in a class of its own.
| Feature | Dulce de Leche | Caramel |
|---|---|---|
| Base Ingredients | Milk and sugar cooked together | Sugar melted alone, then cream added |
| Primary Reaction | Maillard reaction (milk proteins + sugar) | Caramelization (sugar browning) |
| Cooking Time | 1.5 to 2 hours at low heat | 15 to 20 minutes at high heat |
| Flavor Profile | Toasted milk, toffee, brown butter, complex | Burnt sugar, butterscotch, simpler |
| Texture | Thick, spreadable, silky | Pourable sauce or firm candy |
| Origin | Argentina / Uruguay | France / Europe |
Serving Suggestions
This caramel spread is one of the most versatile ingredients in the pastry world. In Argentina, it appears at every meal from breakfast to late-night snacking. Here are the most popular and delicious ways to enjoy your homemade batch.
Classic Argentine Uses:
- Alfajores: Sandwich the caramel between two crumbly shortbread cookies and roll the edges in shredded coconut. These are Argentina’s most iconic cookie and the perfect showcase for your homemade batch.
- Toast and medialunas: Spread it generously on warm toast, croissants, or Argentine medialunas for a simple but deeply satisfying breakfast. In fact, this is how most Argentines start their day.
- Pancakes and crepes: Drizzle the warm spread over pancakes or fill crepes with a generous layer. As a result, the warm caramel melts slightly and creates a luxurious filling.
- Churros: Fill freshly fried churros with this caramel using a piping bag. The combination of crispy fried dough and creamy filling is truly irresistible.
Beverage Pairings:
- Mate: The bitter, herbal flavor of Argentine mate tea provides a perfect counterpoint to the sweetness of this caramel. Indeed, this is the quintessential Argentine pairing.
- Espresso or strong coffee: A dark roast coffee cuts through the richness beautifully. Specifically, the bitterness balances the caramel sweetness in every sip and bite.
- Malbec wine: For a decadent dessert pairing, a glass of Argentine Malbec with its dark fruit notes complements the toasted milk flavors beautifully.
- Warm milk: Stir a spoonful into a glass of warm milk for a comforting, sweet drink that children especially love.
Storage and Reheating
Refrigerator: Transfer the cooled spread to a clean glass jar with a tight-fitting lid. It keeps in the refrigerator for up to 3 weeks because the high sugar content acts as a natural preservative. Always use a clean spoon to prevent contamination. Also, the texture firms in the fridge, so let it sit at room temperature for 15 minutes before using.
Freezer: This spread freezes beautifully for up to 3 months. Portion it into small containers or ice cube trays for easy thawing. In addition, leave a half inch of headspace in the container, as it expands slightly when frozen. Thaw overnight in the refrigerator. The texture remains smooth after thawing, though you may need to stir it briefly to restore consistency.
Reheating: Warm the spread gently in a small saucepan over low heat, stirring constantly. Alternatively, you can microwave it in 15-second intervals, stirring between each burst. If it has thickened too much in the fridge, stir in a teaspoon of warm milk until the desired consistency returns. However, never boil it during reheating, as high heat can cause it to seize or darken excessively.
Common Mistakes to Avoid
1. Cooking on High Heat
This is the most frequent mistake when making this caramel at home. High heat causes the milk to scorch on the bottom of the pot, creating dark specks and a bitter aftertaste that permeates the entire batch. Instead, maintain the lowest possible simmer throughout the cooking process. After all, the extra cooking time is the price of a smooth, perfectly caramelized result. Rushing this recipe never produces good results.
2. Forgetting to Stir
Milk proteins settle on the bottom of the pot and burn if left undisturbed. Therefore, regular stirring keeps the mixture moving and ensures even heat distribution. During the last 30 minutes especially, constant stirring prevents the thickened caramel from sticking and scorching. Set a timer if needed, because a few minutes of neglect during the final stage can ruin two hours of careful work.
3. Overcooking Past the Target Color
The finished product should reach a warm amber color, not dark brown. Overcooking pushes it past the pleasant caramel stage into bitter territory. Also, remember that the mixture continues to darken slightly as it cools. Therefore, remove it from the heat when the color is one shade lighter than your ideal. This residual heat carries the color forward to the perfect finish. In short, err on the side of lighter rather than darker.
Frequently Asked Questions
What is dulce de leche made of?
Authentic dulce de leche requires just milk and sugar as its core ingredients. Additionally, a small amount of baking soda accelerates the browning reaction, while vanilla extract and a pinch of salt enhance the final flavor. No cream, butter, or corn syrup is needed. Because of this, the technique matters a great deal. The slow cooking process does all the work of building complexity and depth.
Is dulce de leche the same as caramel?
Not at all. Caramel forms when sugar melts and browns at high heat, then cream and butter are added afterward. In contrast, dulce de leche cooks milk and sugar together from the start, relying on the Maillard reaction between proteins and sugars rather than direct caramelization. This key gap in method leads to a very different taste. For example, the Argentine version tastes of toasted milk and toffee, while caramel tastes primarily of burnt sugar and butter.
Can I make dulce de leche from condensed milk?
Yes, simmering a sealed can of sweetened condensed milk in a water bath for 2 to 3 hours creates a quick version. This shortcut works in a pinch and produces a sweet, caramelized spread. However, the flavor is one-dimensional compared to the from-scratch method, because the stovetop version builds deeper complexity through a longer, gentler process. For the best results, invest the full two hours in the traditional technique.
How long does homemade dulce de leche last?
Stored in a clean, airtight glass jar in the refrigerator, the homemade version lasts up to 3 weeks. The high sugar content acts as a natural preservative. Always use a clean utensil when scooping to avoid introducing bacteria. If the surface looks dry after storage, simply stir in a teaspoon of warm milk to restore smoothness. Furthermore, you can also freeze it for up to 3 months without significant quality loss.
Why did my dulce de leche turn grainy?
Graininess happens when sugar crystallizes during cooking. This typically occurs if the heat is too high or if sugar splashes onto the sides of the pot and dries into crystals that fall back into the mixture. To prevent this, stir regularly and wipe down the sides of the pot. Keeping the heat low and steady also helps considerably. If your batch does turn grainy, simply push it through a fine mesh strainer or blend it in a food processor to restore smoothness.
Variations and Adaptations
Condensed Milk Shortcut:
Place an unopened can of sweetened condensed milk in a large pot and cover it completely with water. Simmer for 2 to 3 hours, adding water as needed to keep the can submerged. Let the can cool completely in the water before opening. This method produces a sweeter, simpler version that works well for quick desserts. Although the flavor lacks the complexity of the stovetop method, the convenience is undeniable.
Cajeta (Mexican Goat’s Milk Version):
Replace the cow’s milk entirely with goat’s milk to make traditional Mexican cajeta. Follow the same stovetop method. Goat’s milk produces a tangier, earthier caramel with a slightly grainier texture. For a milder version, use half goat’s milk and half cow’s milk. Cajeta pairs beautifully with warm corn tortillas or drizzled over vanilla ice cream. Notably, it is especially popular in the state of Guanajuato.
Chocolate Dulce de Leche:
Stir 2 ounces of finely chopped dark chocolate into the hot caramel right after removing it from the heat. The residual warmth melts the chocolate smoothly into the spread. Then, add a tablespoon of cocoa powder for even deeper chocolate flavor. This variation makes an exceptional filling for cakes and a decadent ice cream topping. Most importantly, the bitterness of dark chocolate balances the sweetness perfectly.
Coffee Dulce de Leche:
Add 2 tablespoons of instant espresso powder to the milk at the beginning of cooking. As the liquid reduces, the coffee flavor concentrates beautifully. The result is a mocha-like caramel that tastes incredible in lattes, on brownies, or drizzled over cheesecake. Furthermore, this variation adds another layer of complexity to an already complex spread. Finally, stir in a splash of coffee liqueur at the end for an adult version.
The Cultural Significance of Dulce de Leche
Dulce de leche holds a position in Argentine and Uruguayan culture that no other food ingredient can match. Both countries claim to have invented it, and the debate has never been settled. According to legend, it was born by accident in 1829 when a servant left a pot of sweet milk on the stove during a meeting between rival generals. When she came back, the milk had turned into a thick, golden paste. Whether or not this tale is true, it captures the spirit of this beloved caramel. Indeed, great things come from patience and happy accidents.
Today, Argentina consumes more of this caramel per capita than any other country in the world. The average Argentine eats over 3 kilograms of it per year. It fills the iconic alfajores that line every bakery window and layers into elaborate cakes for birthdays and celebrations. Heladerias scoop dulce de leche ice cream alongside chocolate and vanilla as the three essential flavors, while street vendors fill churros with it. Meanwhile, families pass down their own recipes and techniques. Some swear by longer cooking times for a darker, more intense flavor. Others prefer it lighter and softer. These preferences run as deep as family identity itself.
In Uruguay, the tradition runs equally strong. Both nations jointly petitioned to have this spread recognized as a cultural heritage item. Moreover, it has also spread far beyond South America. French bakers fold it into macarons and tarts. American ice cream brands sell it as a top flavor. Japanese candy makers blend it into milk sweets. Yet the purest form is still the homemade kind, cooked slowly in a grandmother’s kitchen with a well-worn wooden spoon. Making it yourself ties you to that living tradition.
Conclusion
This dulce de leche recipe gives you the authentic Argentine version made entirely from scratch. Five items and two hours of gentle stovetop cooking give you a caramel that beats anything in stores. The method is simple. Warm the milk with sugar, add baking soda, then keep it at a low simmer and stir often. Patience and low heat do all the work. The result is a thick, golden, intensely flavored dulce de leche that you can spread on toast, fill into pastries, swirl into ice cream, or simply eat by the spoonful.
Want to explore more iconic dishes from around the world? Browse our South American dishes collection or discover beloved European classics like crepes, tiramisu, and creme brulee. Each recipe features the same detailed, step-by-step approach to bring world cuisine to your kitchen.