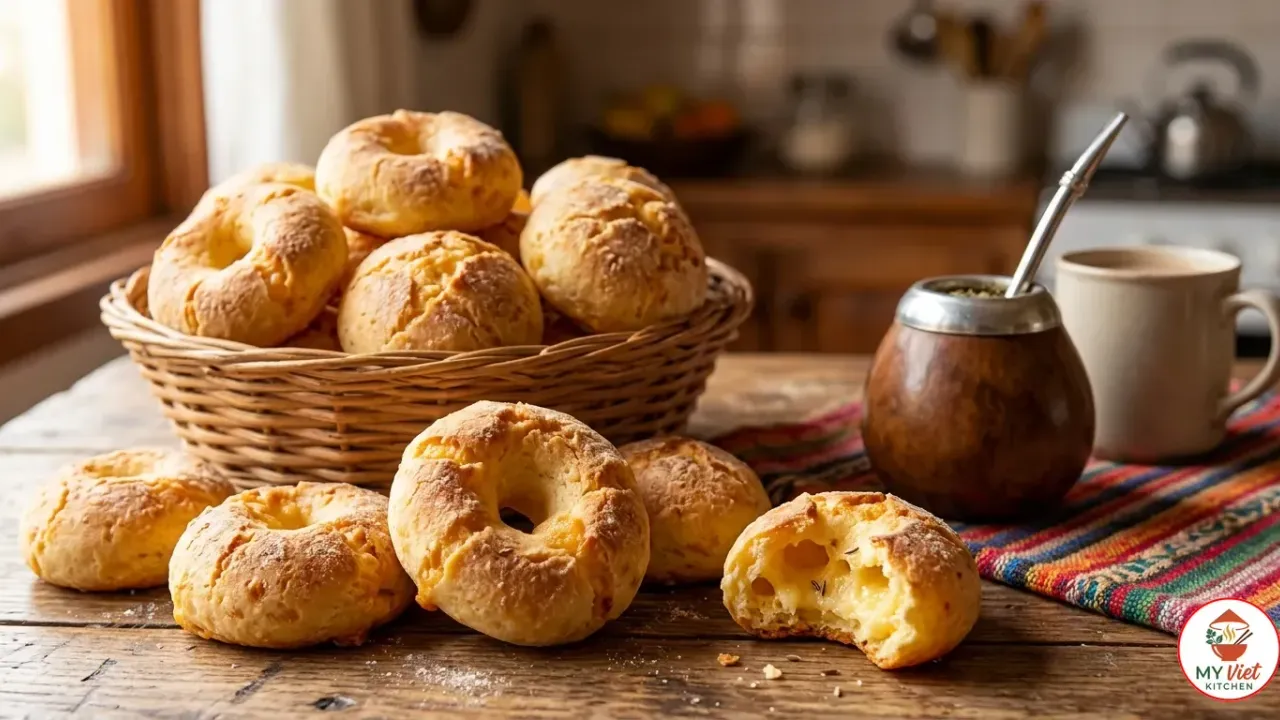
Chipa is the golden, chewy cheese bread that defines Paraguayan cuisine, and this recipe shows you exactly how to make it at home with cassava starch, queso paraguayo, and a handful of simple ingredients. Known as chipa paraguaya or simply chipa, these small rolls deliver a crispy, cracked shell that gives way to a warm, stretchy, intensely cheesy center with a subtle whisper of anise. This chipa recipe follows the traditional Paraguayan technique that has been passed through generations of home cooks and street vendors alike. Whether you serve them warm from the oven for breakfast, pack them for a road trip, or offer them as a snack alongside yerba mate, every bite carries the soul of Paraguay in its chewy, golden core.
Prep Time: 20 minutes | Cook Time: 25 minutes | Servings: 24 rolls
Difficulty: Easy | Calories: ~145 per serving
What Makes Chipa Special?
Chipa is not just another cheese bread. It is the national snack of Paraguay, so deeply woven into daily life that roadside vendors sell it from baskets at every bus stop, highway toll booth, and town square across the country. Walk through any Paraguayan city in the early morning and you will smell chipa baking before you see the vendors. No other food commands this level of constant presence in Paraguayan culture, and for good reason.
What sets chipa apart from other cheese breads is its base of cassava starch instead of wheat flour. Cassava starch, called almidon de mandioca in Paraguay, creates a texture that wheat cannot match. When baked, the starch forms a chewy, stretchy core that pulls apart in long strings. The outside turns firm and golden with small cracks. Because there is no gluten, the bread has no airy crumb. Instead, it has a dense, mochi-like chew that is both addictive and unique.
Moreover, anise seeds set chipa apart from its Brazilian cousin pao de queijo. Both breads use cassava starch and cheese, but the anise gives chipa a warm, sweet aroma that lingers in every bite. Paired with the tangy richness of queso paraguayo and plenty of butter, these flavors make a bread that tastes far more complex than its short list of parts suggests. In short, chipa proves that great baking needs no fancy methods. It only needs great parts and a tradition worth keeping.

Choosing the Right Cheese for Chipa
The cheese you pick shapes the flavor and feel of your chipa, so this choice matters more than any other. In Paraguay, cooks use queso paraguayo, a semi-soft, mild white cheese that melts well. Since it can be hard to find outside South America, here are your best options.
- Queso paraguayo (best choice): The authentic option with a mild, slightly tangy flavor and a creamy texture that melts into the dough during mixing. It provides the perfect balance of moisture and fat. Look for it at Latin American grocery stores or specialty cheese shops.
- Queso fresco or farmer cheese: The most accessible substitute outside South America. Queso fresco has a similar mild flavor and crumbly texture. It melts well and blends easily with the starch dough. Use the same quantity as you would queso paraguayo.
- Mozzarella and Parmesan blend: Combine grated low-moisture mozzarella with finely grated Parmesan at a 3:1 ratio. The mozzarella provides stretch and moisture, while the Parmesan adds the savory depth that queso paraguayo naturally carries. This blend works surprisingly well and is available everywhere.
Ingredients for Chipa
Main Ingredients:
- 2 cups cassava starch (almidon de mandioca)
- 1 cup tapioca starch
- 8 ounces queso paraguayo or queso fresco, finely grated
- 4 ounces mozzarella cheese, grated
For the Wet Mixture:
- 1/2 cup butter, softened at room temperature
- 3 large eggs
- 1/2 cup whole milk
Seasonings:
- 1 teaspoon salt
- 1 teaspoon anise seeds
Pro tip: Use room-temperature butter and eggs for best results. Cold butter refuses to cream properly with the cheese, and cold eggs cause the fat to seize up. When the butter is truly soft, it wraps around every grain of starch and creates a tender, even crumb. Pull the butter and eggs out of the fridge at least one hour before you start mixing.
Step-by-Step Instructions
Step 1: Mix the Dry Ingredients
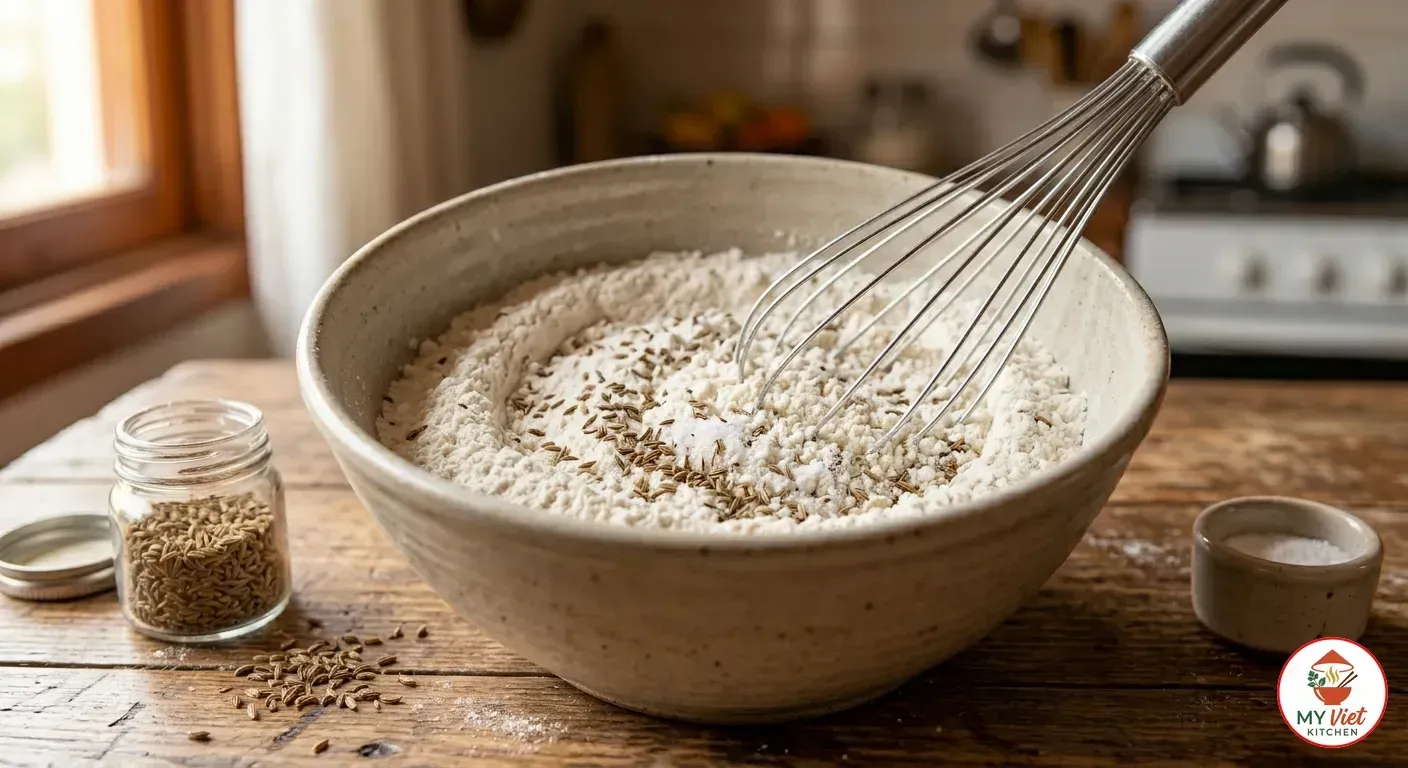
1 Combine the cassava starch and tapioca starch in a large mixing bowl. Add the salt and anise seeds, then whisk everything together until the seasonings spread evenly through the starch. The blend of two starches is important here. Cassava starch provides the dense, chewy body of the bread, while tapioca starch adds lightness and elasticity. Together, they produce the signature texture that makes chipa so distinctive.
Step 2: Cream the Butter and Cheese
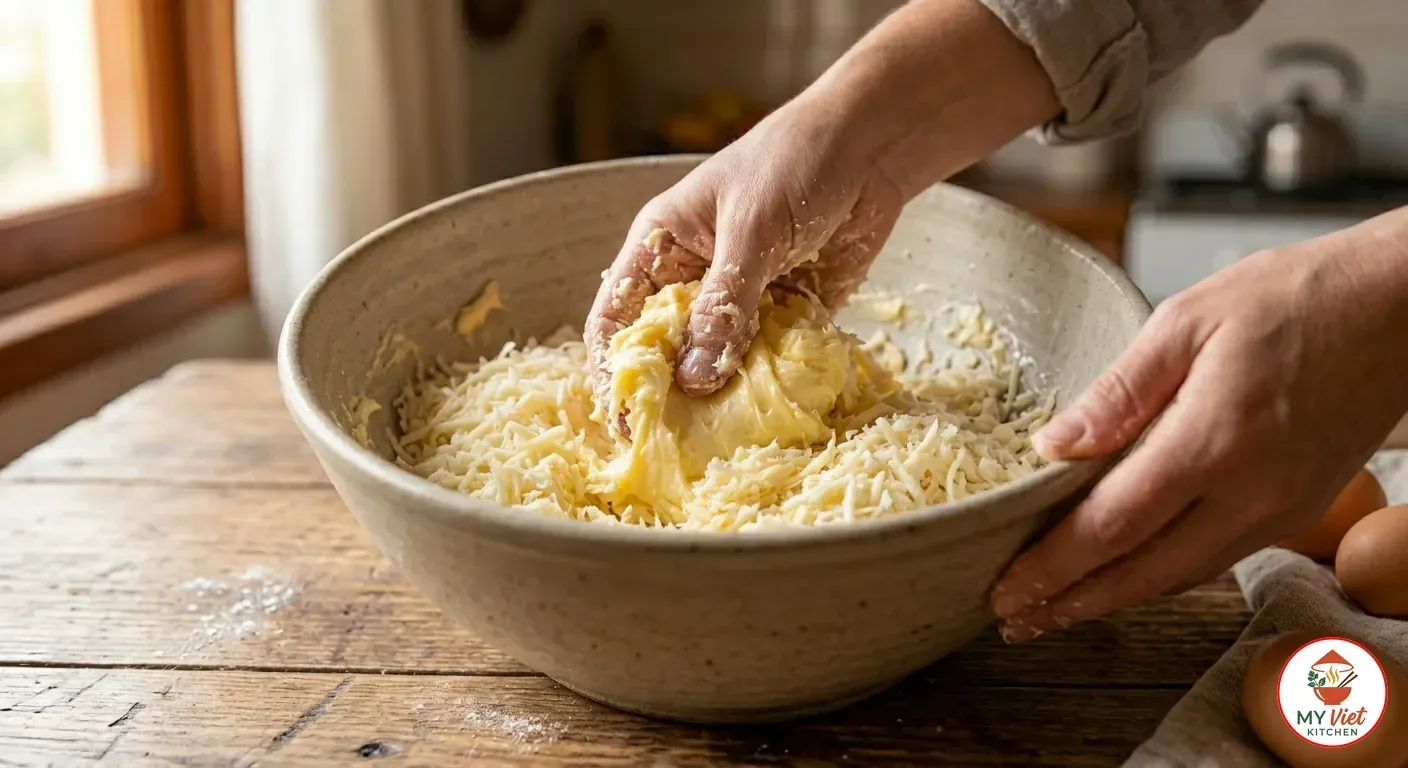
2 In a separate large bowl, beat the softened butter with your hands or a wooden spoon until it turns creamy and pale. Then add the grated queso paraguayo and mozzarella, working the cheese into the butter until you have a thick, cohesive paste. This step matters because the fat coats the cheese and creates a smooth base that distributes flavor evenly through the dough.
Next, add the eggs one at a time. Beat well after each egg before adding the next one. Each egg should disappear completely into the butter-cheese mix before the next goes in. If you add them all at once, the mixture breaks and curdles, which makes the dough uneven. After the third egg, the mixture should look glossy, thick, and slightly loose.
Step 3: Combine Wet and Dry Mixtures
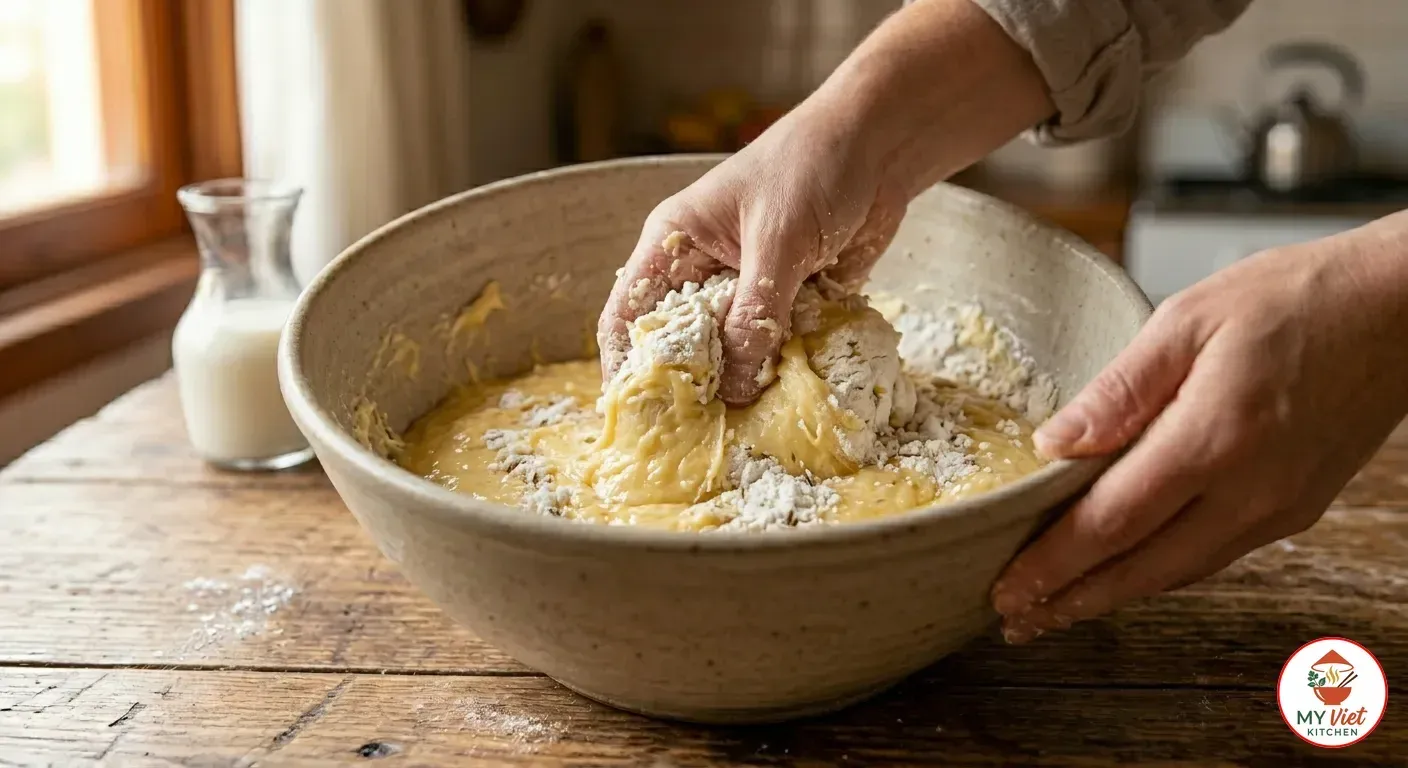
3 Add the starch mixture to the butter-cheese bowl in three batches, alternating with splashes of milk. After each addition, fold and press the mixture together with your hands. Do not dump everything in at once, because the starch absorbs liquid at different rates and you need to feel the texture as you go. The dough should come together into a smooth, slightly sticky ball that pulls away from the sides of the bowl.
If the dough feels too dry, add milk one spoon at a time until it holds. If it sticks to your hands, add a bit more starch. Good chipa dough is soft like playdough. It should not crack when pressed, and it should not leave wet marks on your palms. This balance is the most vital skill in chipa making.
Step 4: Shape the Chipa Rolls
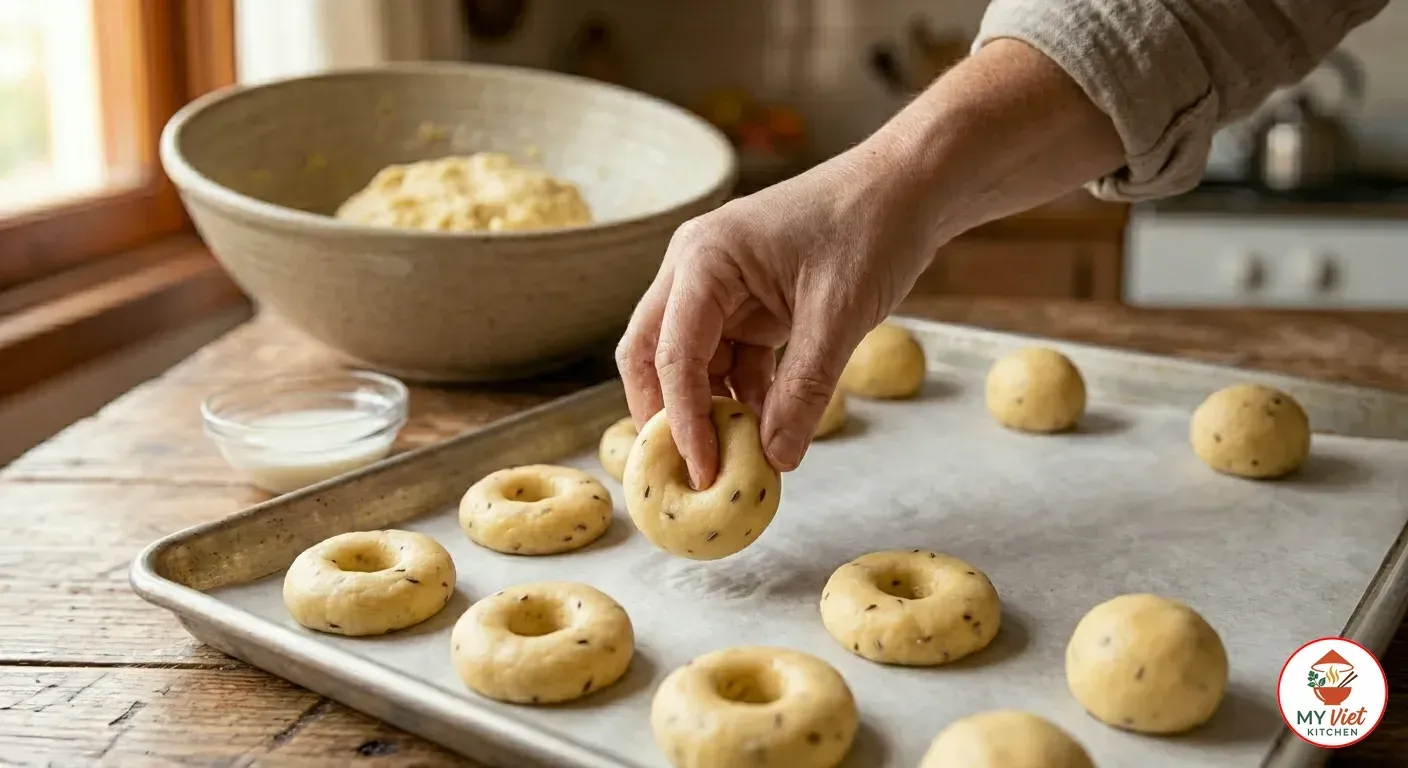
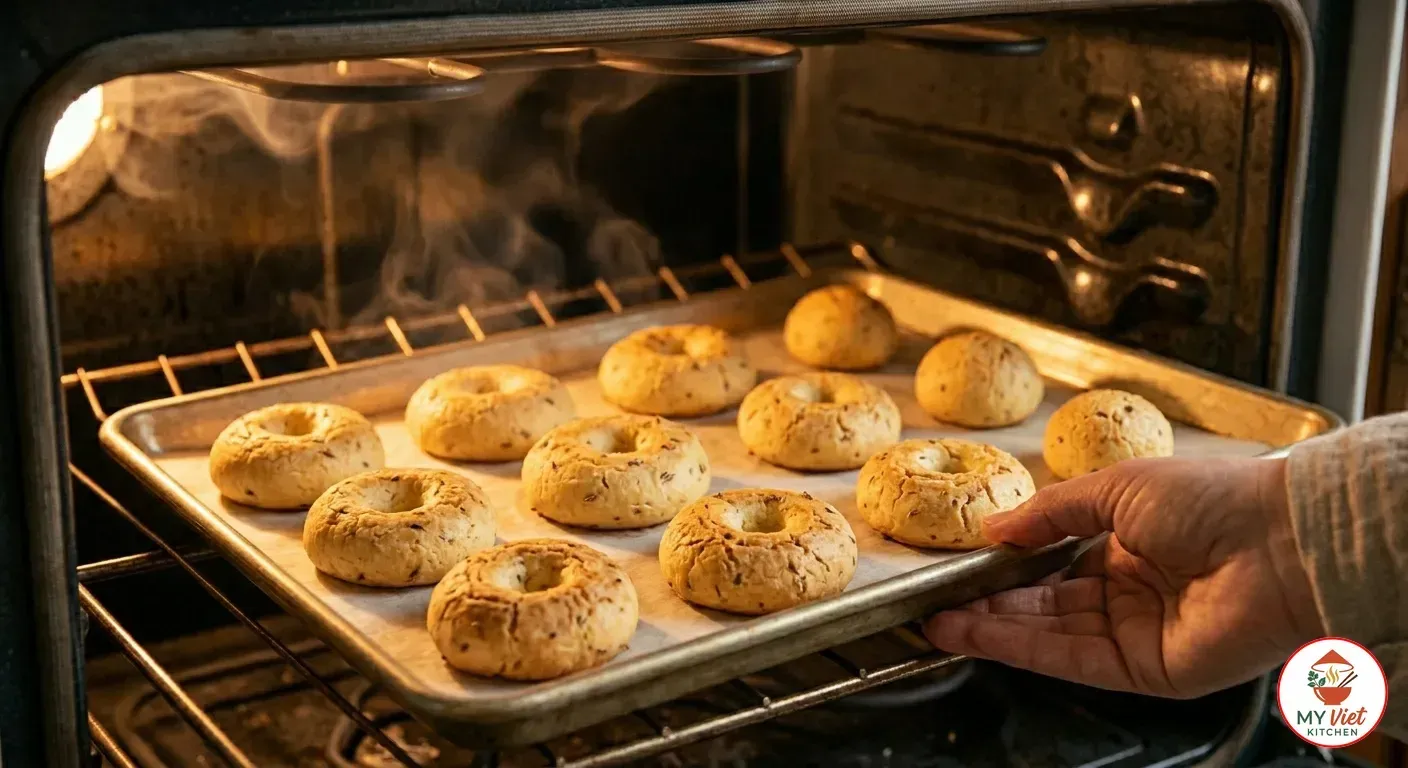
4 Pinch off pieces of dough about the size of a golf ball, roughly two tablespoons each. Roll each piece between your palms to form a smooth ball. For the traditional shape, poke a hole through the center with your thumb and stretch it gently into a small ring, like a miniature bagel. Alternatively, leave the balls round or shape them into small crescents. Place the shaped chipa on a parchment-lined baking sheet about two inches apart to allow for slight spreading.
Keep your hands lightly moistened with milk while shaping, because the dough sticks to dry skin. Work quickly and handle each piece as little as possible. Overworking the dough develops toughness, so aim for smooth shapes in just a few rolls. If the dough cracks while you shape it, the mix is too dry. Press the cracked piece back into the main dough, add a small splash of milk, and knead briefly before trying again.
Step 5: Bake Until Golden
5 Place the baking sheet in an oven preheated to 400 degrees Fahrenheit. Bake for 20 to 25 minutes, rotating the sheet halfway through for even browning. The chipa is ready when the surface turns golden brown with small cracks and the bottom feels firm when you tap it. The cracks are a sign that the interior has puffed and expanded against the setting crust, which means you have achieved the right texture.
Remove the sheet from the oven and let the chipa cool on the pan for 5 minutes. During this rest, the interior finishes setting while the crust firms up. Serve the chipa warm, when the inside is still soft, stretchy, and fragrant with melted cheese and anise. The contrast between the crispy shell and the chewy center is at its absolute peak within the first 30 minutes after baking.
Expert Tips for Perfect Chipa
Use Room-Temperature Ingredients
Cold ingredients are the most common reason chipa dough fails to come together properly. When butter is too firm, it refuses to cream with the cheese and creates lumps. Cold eggs shock the fat and cause the mixture to separate. As a result, the finished bread bakes unevenly with dense pockets. Instead, let butter, eggs, and milk sit at room temperature for at least one hour before you start. This simple step solves most texture problems.
Do Not Overbake
Chipa goes from perfectly golden to dry and hard very quickly because it lacks the moisture retention that gluten provides. Pull the rolls from the oven as soon as they turn golden with visible cracks. If you wait until they look deeply browned, the inside will lose its chewy stretch and become crumbly. Set a timer and check at 18 minutes. Every oven runs differently, so trust the color more than the clock.
Grate the Cheese Finely
Large chunks of cheese melt unevenly and create holes in the dough. For the smoothest chipa, grate the cheese on the finest side of a box grater or pulse it in a food processor until it resembles coarse sand. Finely grated cheese blends seamlessly into the butter, which means every bite has consistent flavor and texture. This small extra step makes a noticeable difference in the final result.
Chipa vs. Other South American Cheese Breads
Chipa belongs to a family of cassava-starch cheese breads found across South America. Each country has its own version, and the differences in cheese, seasoning, and technique produce distinctly different results. Here is how chipa compares to its closest relatives across the continent.
| Bread | Country | Cheese Used | Key Difference |
|---|---|---|---|
| Chipa | Paraguay | Queso paraguayo | Anise seeds, dense and chewy texture |
| Pao de queijo | Brazil | Queijo minas, Parmesan | Lighter, puffier, no anise |
| Pan de yuca | Ecuador | Queso fresco | Smaller, crispier, often with more cheese |
| Pan de bono | Colombia | Cuajada, mozzarella | Uses cornmeal blend, slightly sweet |
| Cunapé | Bolivia | Queso fresco | Similar to chipa but typically smaller |
| Almojábana | Colombia | Cuajada | Uses cornmeal, sweeter flavor profile |
Serving Suggestions
Paraguayans eat chipa at almost any time of day, but it appears most frequently at breakfast and as a mid-afternoon snack called merienda. The bread is rich enough to stand on its own, yet it pairs beautifully with both beverages and simple accompaniments that complement its cheesy, anise-scented flavor.
The Perfect Accompaniments:
- Cocido (Paraguayan burnt mate tea): The most traditional pairing. Cocido is made by caramelizing sugar in a pot, then steeping yerba mate in the burnt sugar water. Its smoky, bittersweet flavor cuts through the richness of the cheese bread perfectly.
- Fresh fruit: Sliced papaya, mango, or passion fruit provides a refreshing tropical contrast to the dense, savory bread. The natural sweetness and acidity cleanse the palate between bites.
- Dulce de guayaba (guava paste): A thin slice of guava paste alongside warm chipa creates a sweet-savory combination that Paraguayans adore. The fruity sweetness plays against the tangy cheese in a way that keeps you reaching for more.
- Butter and honey: For a simple breakfast option, split a warm chipa and spread it with butter and a drizzle of local honey. The melted butter seeps into the chewy crumb while the honey adds floral sweetness.
Beverage Pairings:
- Yerba mate: The undisputed national drink of Paraguay. Hot mate in winter or cold terere in summer alongside chipa is the most Paraguayan combination imaginable. The herbal bitterness balances the rich cheese.
- Terere (cold mate): During Paraguay’s hot summers, terere with cold water or fruit juice replaces hot mate. Its cool, herbal refreshment pairs wonderfully with warm chipa fresh from the oven.
- Coffee with milk: A strong cup of coffee with warm milk alongside chipa makes an excellent breakfast. The coffee bitterness contrasts with the buttery, cheesy bread.
- Fresh juice: Orange juice, grapefruit juice, or passion fruit juice all work well. The citrus acidity cuts through the richness of the cheese and refreshes the palate.
Storage and Reheating
Refrigerator: Store baked chipa in an airtight container for up to 3 days. The texture changes as the starches firm up during cooling, but reheating restores most of the original chewiness. Many Paraguayans actually enjoy cold chipa as a portable snack, embracing the denser texture.
Freezer: Chipa freezes beautifully for up to 3 months. Freeze the shaped, unbaked rolls on a baking sheet until solid, then transfer them to a freezer bag. Bake directly from frozen at 400 degrees Fahrenheit, adding 5 to 8 extra minutes to the baking time. You can also freeze baked chipa and reheat them later.
Reheating: Warm leftover chipa in a 350-degree Fahrenheit oven for 8 to 10 minutes until the crust crisps again and the inside softens. The oven method works far better than the microwave, which makes the exterior rubbery instead of crisp. For a quick option, slice the chipa in half and toast it cut-side down in a dry skillet for 2 to 3 minutes.
Common Mistakes to Avoid
1. Using Cold Butter
Cold butter cannot cream properly with the cheese, so you end up with a lumpy, uneven dough. The butter must be soft enough to dent easily with your finger but not melted. Melted butter changes the dough structure entirely and produces greasy, flat rolls. If you forgot to soften the butter, cut it into small cubes and microwave in 5-second bursts until pliable. Check after each burst to avoid melting.
2. Adding Too Much Milk
The milk should be added gradually, not poured in all at once. Too much liquid makes the dough sticky and impossible to shape. Since different brands of cassava starch absorb moisture at different rates, you may need more or less milk than the recipe states. Add it in small splashes while kneading, and stop as soon as the dough comes together smoothly. You can always add more, but you cannot take it back out.
3. Overbaking Until Hard
Chipa dries out rapidly once it passes the golden-brown stage. Unlike wheat bread, cassava starch breads have no gluten network to retain moisture. Because of this, even two or three extra minutes in the oven can transform your chewy chipa into hard, dry rolls. Set a timer and start checking early. The surface should be golden with small cracks, and the bread should still give slightly when pressed. Pull them out while they feel just barely firm.
4. Skipping the Anise Seeds
While some modern recipes omit anise, the seeds are a defining feature of authentic Paraguayan chipa. Without them, you have cheese bread. With them, you have chipa. The anise provides a warm, slightly sweet perfume that sets this bread apart from every other cassava cheese bread in South America. If you dislike anise, try using just half a teaspoon rather than cutting it out entirely. The flavor is subtle enough at that amount to add complexity without dominating.
Frequently Asked Questions
What is the difference between chipa and pao de queijo?
Both chipa and pao de queijo use cassava starch and cheese as their foundation, but they differ in several important ways. Chipa includes anise seeds, which give it a distinctive warm aroma that pao de queijo lacks entirely. Chipa also uses queso paraguayo, while pao de queijo relies on queijo minas or Parmesan. In terms of texture, chipa tends to be denser and chewier, while pao de queijo puffs up into lighter, airier balls. The shaping also differs. Chipa often takes a ring or crescent form, while pao de queijo is almost always a simple round ball.
Can I make chipa without cassava starch?
Cassava starch is the ingredient that gives chipa its signature chewy, stretchy quality, so replacing it completely changes the character of the bread. Tapioca starch is your closest alternative, since it also comes from the cassava root. However, all-tapioca chipa tends to be slightly gummier. Wheat flour is not a viable substitute because it produces a completely different texture. For the best results, seek out cassava starch at Latin American stores, where it may appear as almidon de mandioca or almidon de yuca.
What cheese works best if I cannot find queso paraguayo?
Queso fresco or farmer cheese makes the best readily available substitute. These mild, crumbly cheeses have a similar moisture content and melting behavior. You can also combine grated mozzarella with Parmesan at a 3:1 ratio for a blend that approximates the original flavor. Avoid strongly flavored cheeses like sharp cheddar or blue cheese. Feta also works but is saltier, so reduce the added salt in the recipe if you use it.
Is chipa naturally gluten-free?
Yes, traditional chipa contains no wheat flour or gluten-containing grains. Both cassava starch and tapioca starch are naturally gluten-free, which makes chipa an excellent bread option for people who avoid gluten. However, always verify that your starch products have not been processed on shared equipment with wheat if you have celiac disease or a severe sensitivity. The cheese and other ingredients are also naturally gluten-free.
Why did my chipa turn out flat and dense?
Flat, dense chipa almost always points to a problem with the butter or eggs. If the butter was cold or melted rather than softened, it could not trap the air needed for a light texture. Similarly, if the eggs were added all at once instead of one at a time, the mixture likely did not emulsify properly. Also check your oven temperature. A cool oven lets the dough spread before the crust sets. Always preheat fully to 400 degrees and verify the temperature with an oven thermometer if your results seem inconsistent.
How long does chipa stay fresh after baking?
Chipa is at its absolute best within the first hour after baking. The crispy crust and warm, stretchy interior peak during this window. After that, the cassava starch begins to firm up, and the crust softens. At room temperature in an airtight container, chipa stays enjoyable for up to 2 days. After that, the texture declines noticeably. For longer storage, freeze the rolls and reheat them in the oven to restore much of the original quality.
Variations and Adaptations
Chipa Guazu (Corn Chipa):
This variation replaces cassava starch with fresh corn kernels, creating a moist, cake-like bread that is closer to a savory corn pudding. Blend fresh corn with eggs, cheese, and milk, then bake in a casserole dish until set and golden on top. Chipa guazu is one of the most beloved dishes in Paraguay, especially during the corn harvest season. It tastes completely different from regular chipa but shares the same spirit of cheesy, comforting simplicity.
Chipa So’o (Meat-Filled Chipa):
For a heartier version, wrap the chipa dough around a small ball of seasoned ground beef cooked with onions, peppers, and hard-boiled egg. The result is a handheld meat pie with a chewy cassava shell and a savory filling. Chipa so’o is popular as street food in Paraguay. Shape each piece into a disc, place the filling in the center, then fold the dough around it and seal the edges before baking.
Sweet Chipa (Chipa Mestiza):
Add two tablespoons of sugar and a teaspoon of vanilla extract to the dough while reducing the salt to half a teaspoon. This sweet version makes an excellent breakfast bread or dessert. Some cooks also fold in raisins or dried coconut for extra flavor. The sweetness stays subtle rather than dessert-like, creating a bread that works alongside coffee or as a standalone treat.
Herb and Spice Chipa:
Replace the anise seeds with finely chopped fresh herbs such as cilantro, scallions, or oregano. You can also add a pinch of smoked paprika or cayenne pepper for a spicy kick. These modern variations respect the traditional technique while introducing new flavors that appeal to adventurous cooks. The cheesy base of chipa pairs well with almost any herb or spice, so feel free to experiment.
The Cultural Significance of Chipa
Chipa holds a place in Paraguayan life that goes far beyond mere food. It is one of the oldest foods still made in the country. Its roots trace back to the Guarani people, who first grew cassava and learned to turn it into starch. When Spanish settlers arrived and brought cattle, the Guarani began adding cheese and butter to their cassava breads. Indeed, this blend of native skill and European dairy gave birth to chipa as we know it, making it a living symbol of Paraguay’s mixed heritage.
The connection between chipa and Paraguayan identity runs especially deep during Semana Santa, the Holy Week before Easter. During this period, families across the country gather to make enormous batches of chipa in wood-fired ovens. The tradition, called chipa rehi, turns bread baking into a communal celebration where neighbors share ingredients, ovens, and labor. Children learn the craft by watching their mothers and grandmothers shape the dough, and the recipe passes forward through hands rather than cookbooks. Consequently, every family’s chipa tastes slightly different, and every family considers theirs to be the best.
Furthermore, chipa shapes daily life in Paraguay year-round. Vendors called chiperas carry enormous baskets of freshly baked rolls on their heads, walking through neighborhoods and bus terminals calling out their wares. On highways, chipa sellers run alongside slowing cars with baskets held high, selling warm rolls through open windows. At every Paraguayan gathering, from birthday parties to funerals, chipa appears on the table without question. In the end, chipa is not simply food in Paraguay. It is a thread that ties together history, family, and national pride in every chewy, golden bite.
Conclusion
This chipa recipe gives you everything you need to create authentic Paraguayan cheese bread at home. The keys are properly softened butter creamed with finely grated cheese, a well-balanced dough that feels like playdough, and careful baking at high heat to achieve the golden crust with a chewy interior. These techniques produce the signature contrast of crispy outside and stretchy, cheese-filled inside that has made chipa a national treasure. Whether you serve it alongside yerba mate for breakfast or pack it as a portable snack, chipa rewards you with a bread that carries centuries of Paraguayan tradition in every bite.
Ready to explore more South American bread traditions? Browse our South American dishes collection for recipes like empanadas, arepas, and pao de queijo. Each one brings a taste of a different culinary tradition to your kitchen table.