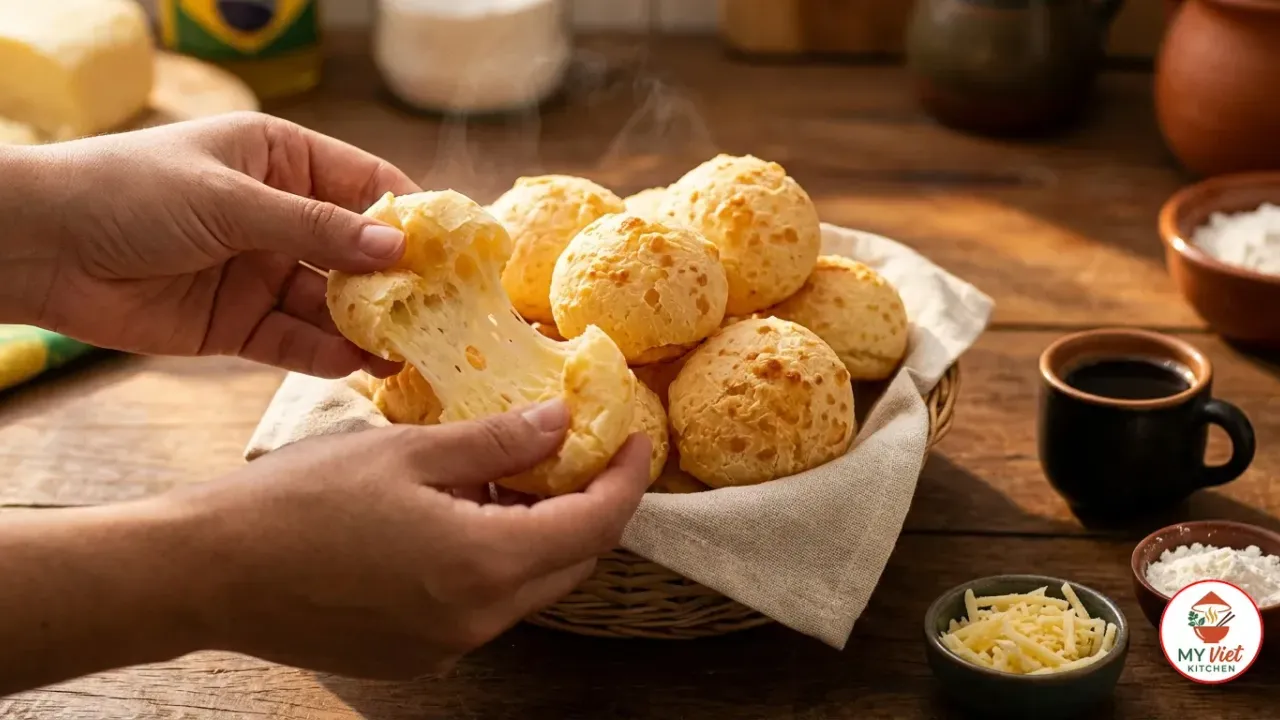
Pao de queijo is the irresistible Brazilian cheese bread that has captivated bread lovers across the world. These small, golden rolls with their crispy shell and impossibly chewy, cheese-laced interior are one of the most beloved snacks in all of South America. Originally from the state of Minas Gerais in southeastern Brazil, pao de queijo uses tapioca flour instead of wheat, making it naturally gluten-free long before gluten-free eating became a global trend. This recipe delivers authentic results with simple pantry ingredients and just 40 minutes of your time.
Prep Time: 15 minutes | Cook Time: 25 minutes | Servings: 24 rolls
Difficulty: Easy | Calories: ~95 per roll
What Makes Pao de Queijo Special?
Pao de queijo translates to “cheese bread” in Portuguese. Yet calling it bread barely captures what these rolls really are. Unlike normal bread that relies on gluten, pao de queijo builds its structure on gelatinized tapioca starch. When hot liquid hits the tapioca flour, the starch granules swell and burst. They form a sticky gel that traps air and moisture during baking. Consequently, the result is a roll that defies the rules of traditional bread making. There is no yeast, no rising time, and no kneading. The texture sits between a French gougere and Japanese mochi. A crackling crust gives way to a stretchy, cheesy interior.
The origins of this bread stretch back to the 18th century in Minas Gerais. This landlocked state is known for its dairy farms and artisanal cheese. Eventually, enslaved workers on these farms discovered that tapioca starch could be mixed with leftover whey and scraps of cheese. The result was a simple, nourishing roll. After abolition in 1888, the recipe spread through local families. It eventually reached the rest of Brazil. By the mid-20th century, pao de queijo had become a national icon. You could find it at bakeries, gas stations, and breakfast tables from Sao Paulo to Manaus.

Homemade vs. Store-Bought
What sets an authentic pao de queijo apart from the frozen supermarket versions sold internationally is the quality of the tapioca flour and the cheese. Traditional recipes call for queijo minas curado. This semi-hard cheese has a sharp, slightly tangy flavor unique to Brazilian dairy. Since queijo minas is difficult to find outside Brazil, a blend of aged Parmesan and mozzarella delivers the closest match. The Parmesan adds sharp, salty depth. Meanwhile, the mozzarella contributes the stretchy, melting quality. Together, they create a pao de queijo that honors the original without requiring specialty imports.
Choosing the Right Tapioca Flour
The single most important ingredient in pao de queijo is the tapioca flour. Brazilian recipes use two types, and the one you pick greatly affects the outcome. Here is what you need to know.
- Polvilho azedo (sour tapioca starch, best choice): This fermented starch is the top choice in Minas Gerais. The fermentation gives it a subtle tang and more puff during baking. Rolls made with polvilho azedo rise higher and develop a crispier crust. Look for it at Latin American grocery stores or online.
- Polvilho doce (sweet tapioca starch): This unfermented version makes softer, denser rolls with a milder flavor. It is easier to find and is often labeled simply as tapioca starch. Indeed, many cooks blend equal parts of both types for the best of both worlds.
- Asian tapioca starch: The tapioca starch sold at Asian grocery stores works fine too. It tends to be finer, which can produce a smoother dough. Use the same amounts but expect a slightly less crispy crust.
Ingredients for Pao de Queijo
Main Dough:
- 2 cups (250g) tapioca flour (polvilho azedo or polvilho doce)
- 1 cup (240ml) whole milk
- 1/3 cup (80ml) vegetable oil or melted unsalted butter
- 1 teaspoon fine salt
For Binding and Flavor:
- 2 large eggs, at room temperature
- 1 cup (100g) freshly grated Parmesan cheese
- 1/2 cup (60g) shredded mozzarella cheese
Pro tip: Grate the Parmesan from a block. Do not use pre-grated cheese from a container. Pre-grated Parmesan has cellulose powder added. This anti-caking agent absorbs moisture and stops the cheese from melting well into the dough. Fresh cheese melts better and tastes stronger. Also, bring the eggs to room temp before adding them. Cold eggs can shock the warm dough and create lumps.
Step-by-Step Instructions
Step 1: Heat the Liquid Mixture
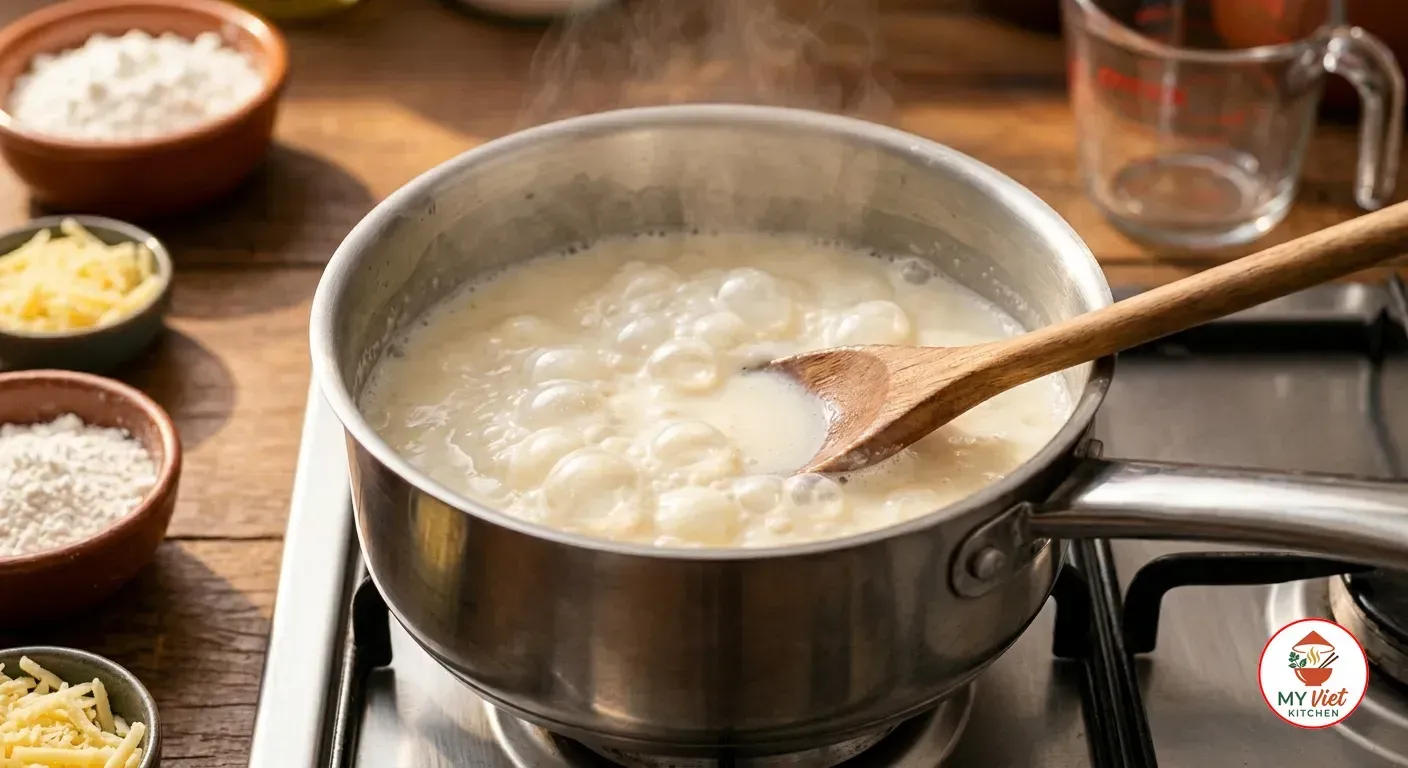
1 Combine the whole milk, vegetable oil or melted butter, and salt in a medium saucepan. Place the pan over medium heat and bring the mixture to a full boil. Watch carefully because milk boils over quickly. You will see small bubbles forming around the edges, then the surface will begin to ripple. As soon as the mixture reaches a rolling boil, remove it from the heat immediately. The liquid must be at boiling temperature when it hits the tapioca flour. Anything less than a boil will fail to gelatinize the starch properly, and your rolls will turn out flat and dense rather than puffy and chewy.
Step 2: Scald the Tapioca Flour
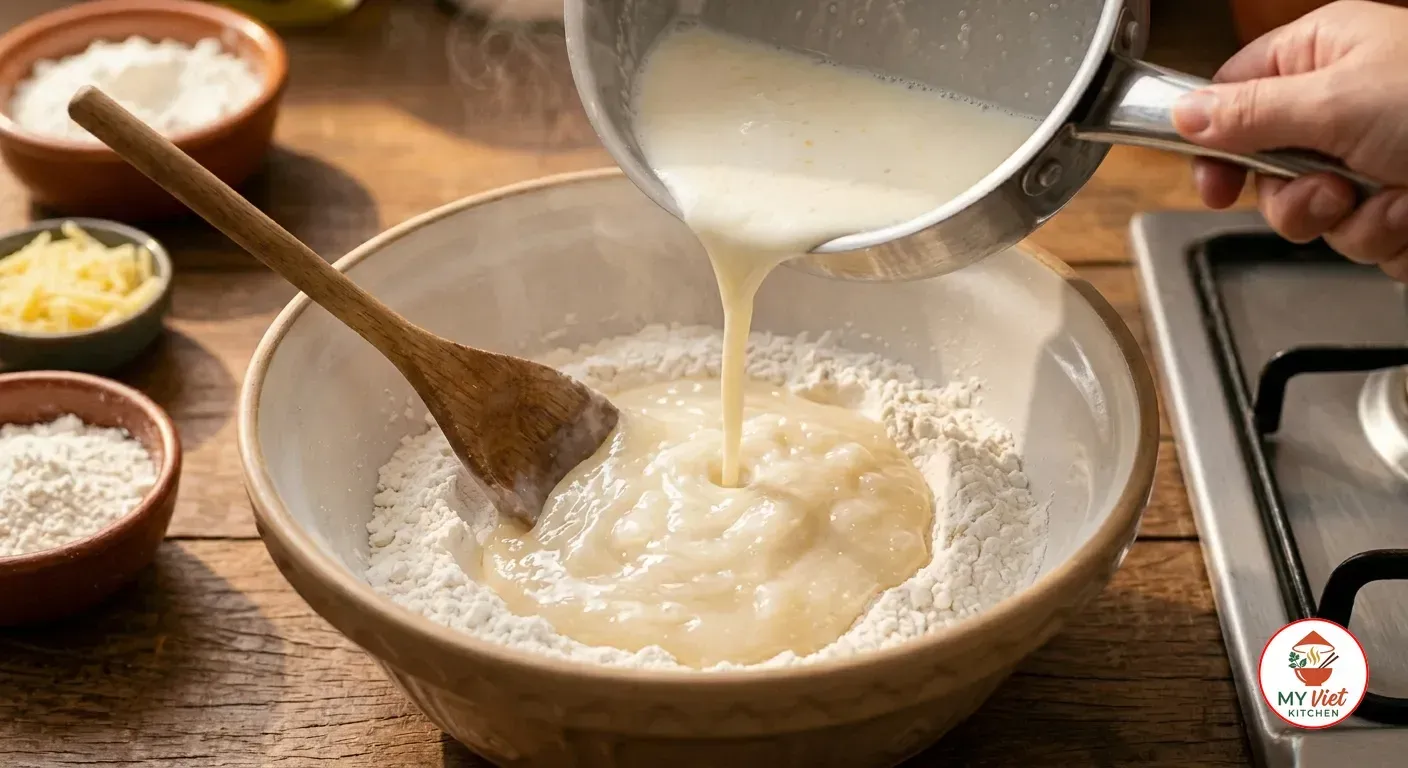
2 Measure the tapioca flour into a large mixing bowl. Pour the boiling milk mixture over the flour in one steady stream. Stir with a wooden spoon or sturdy spatula until no dry patches remain. The dough will be thick, sticky, and lumpy at first. Keep stirring for about 2 minutes until it becomes a cohesive, glossy mass. This scalding step is the foundation of the recipe. The boiling liquid causes the starch granules to swell, rupture, and form a gel. That gel traps moisture and air. Allow the dough to cool in the bowl for 10 to 15 minutes. It should feel warm but not hot enough to cook the eggs.
Step 3: Add Eggs and Cheese
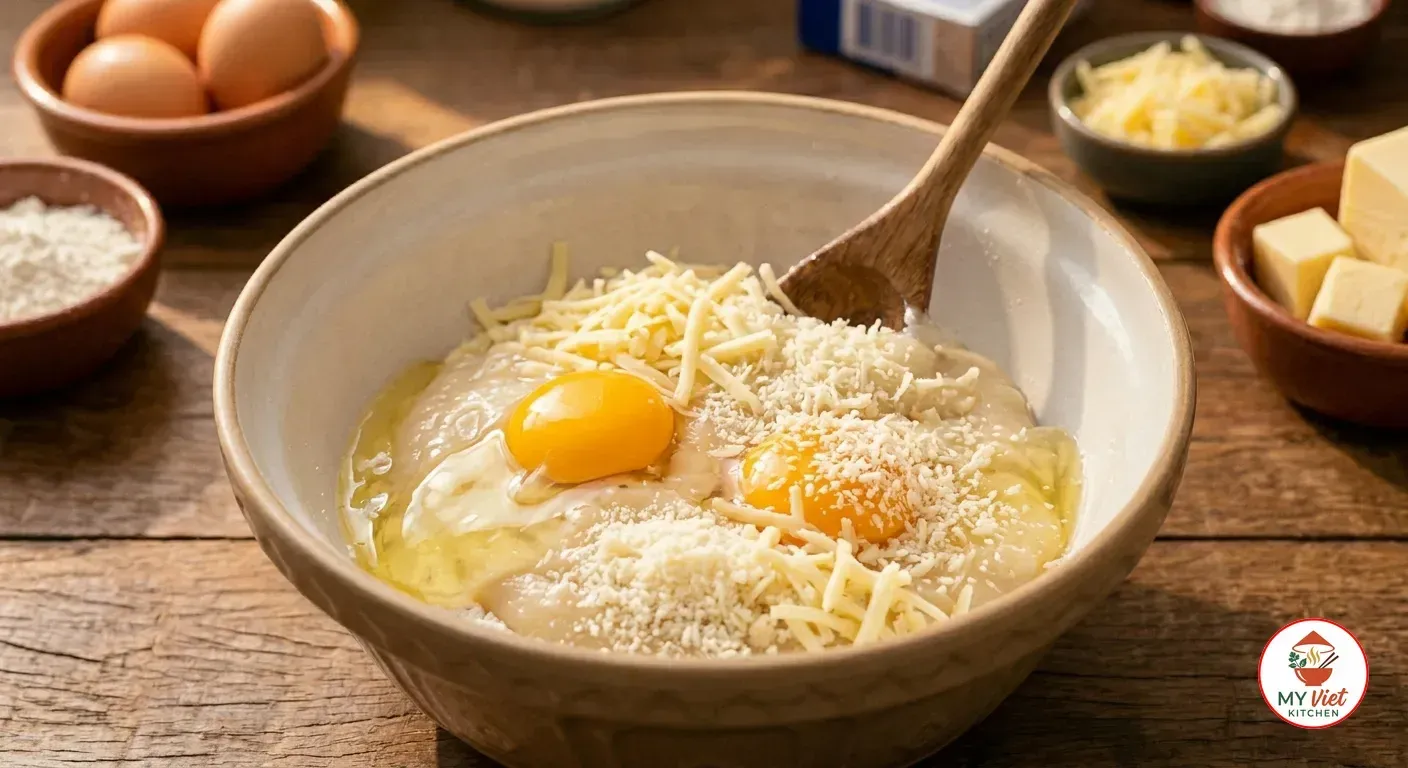
3 Crack one egg into the warm dough and stir vigorously. The dough will look broken and slippery at first, as though it will never come together. Keep stirring. After about 30 seconds of aggressive mixing, the egg will incorporate and the dough will become smooth again. Add the second egg and repeat the process. Then fold in the grated Parmesan and shredded mozzarella. Mix until every piece of cheese distributes evenly throughout the dough. The final consistency should be soft, sticky, and slightly elastic. If the dough feels too stiff, add one tablespoon of milk and mix again. If it feels too loose, sprinkle in an extra tablespoon of tapioca flour.
Step 4: Shape the Rolls
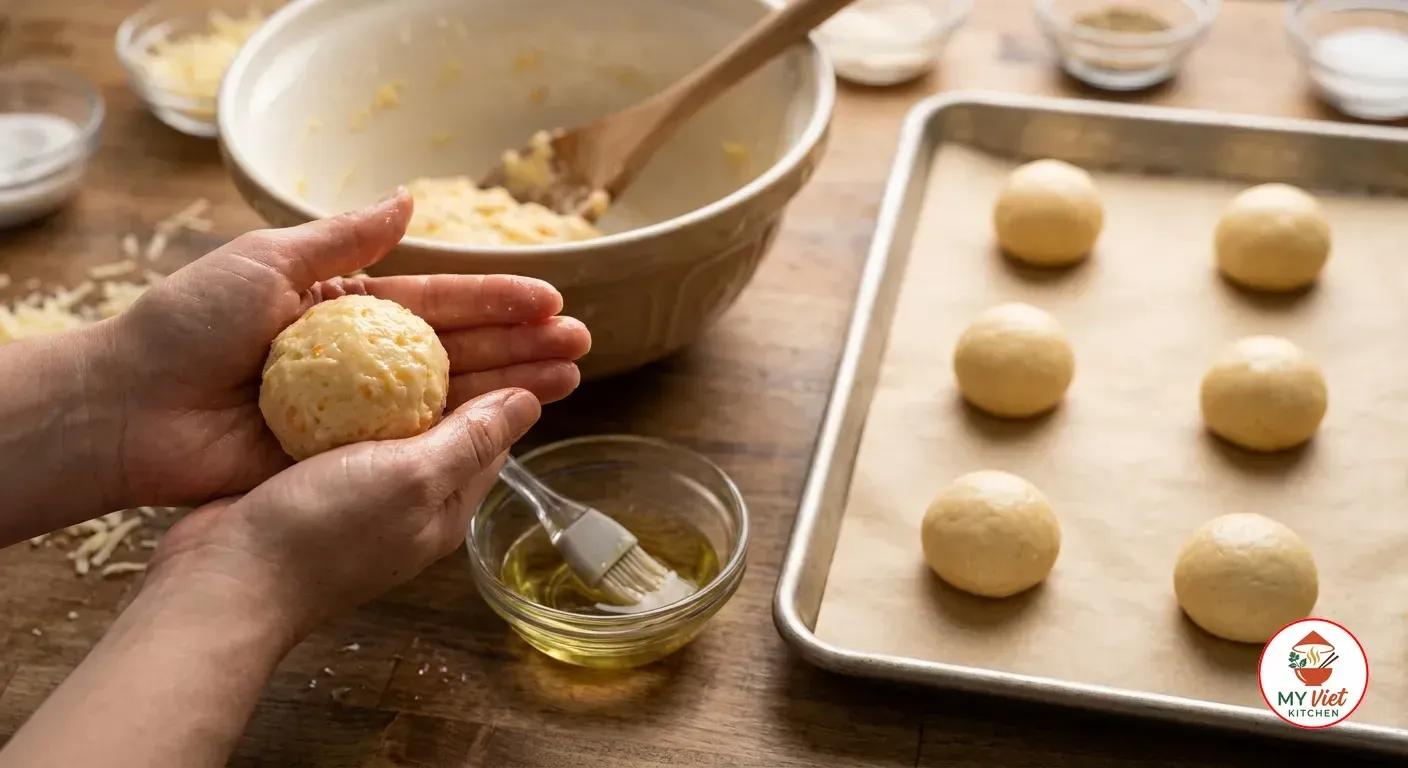
4 Preheat your oven to 400 degrees Fahrenheit (200 degrees Celsius). Line a baking sheet with parchment paper. Lightly oil your hands with vegetable oil to prevent the dough from sticking. Scoop about 1.5 tablespoons of dough using a cookie scoop or spoon. Roll the dough between your palms to form a smooth ball. Aim for roughly the size of a golf ball. Place each ball on the baking sheet about 2 inches apart. Re-oil your hands as needed. You should get about 24 rolls from this batch. For uniform size, weigh each ball at about 25 grams.
Step 5: Bake Until Golden
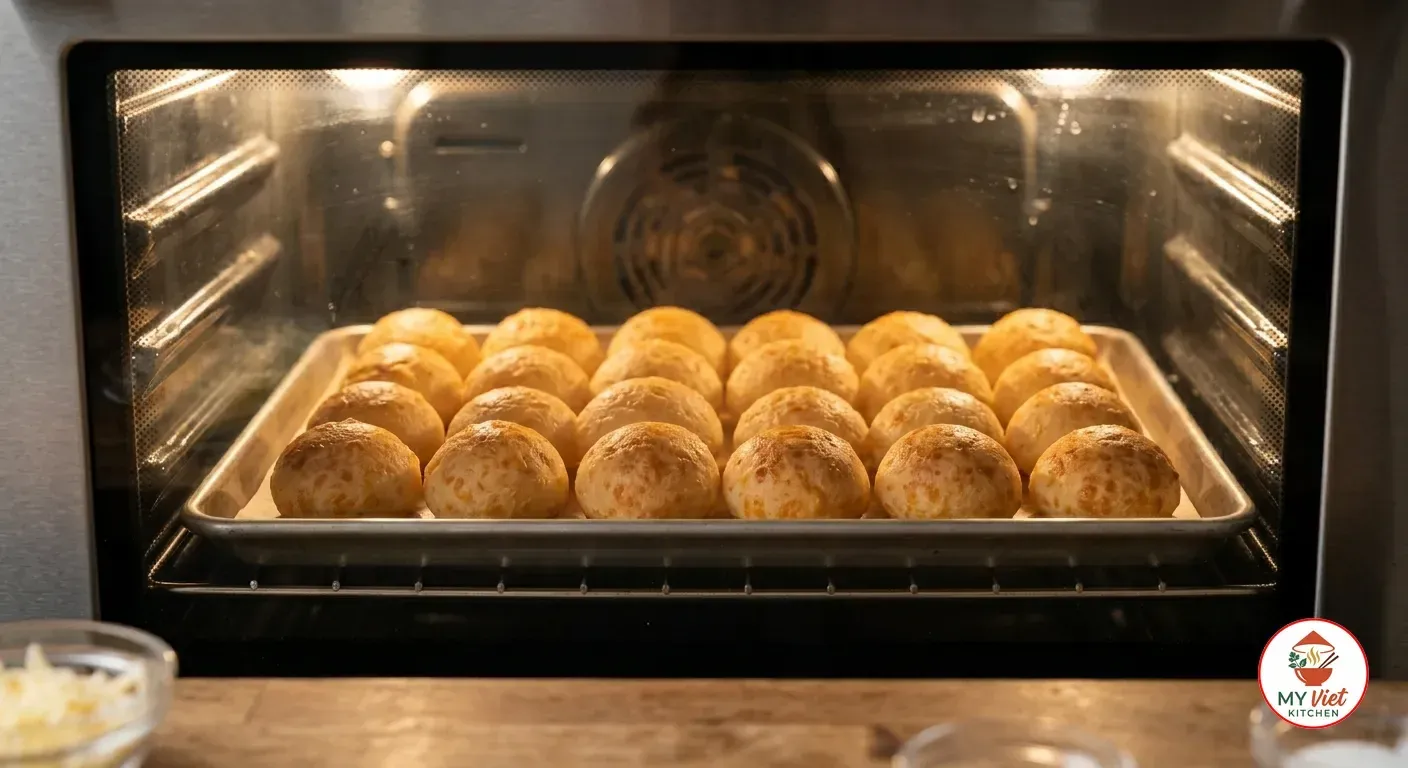
5 Place the baking sheet on the middle rack of the preheated oven. Bake for 20 to 25 minutes until the rolls puff up significantly and develop a golden brown crust on top. Do not open the oven door during the first 15 minutes. The initial burst of steam inside the rolls creates the hollow, airy interior. Opening the door too early releases that steam and causes the rolls to collapse. After 20 minutes, check for doneness. The rolls should feel light when lifted and sound slightly hollow when tapped on the bottom. Remove from the oven, let them rest on the baking sheet for 5 minutes, then serve warm. Pao de queijo tastes best within the first 30 minutes of baking, while the exterior remains crisp and the interior stays molten and stretchy.
Expert Tips for Perfect Pao de Queijo
Temperature Control Is Everything
The three temperature transitions in this recipe determine whether your cheese bread succeeds or fails. First, the milk must reach a full boil before hitting the flour. Second, the dough must cool to warm before you add the eggs. Third, the oven must be fully preheated to 400 degrees Fahrenheit. Skip any of these steps and you get flat, dense, or gummy rolls. Use a thermometer if unsure. The dough should be about 110 degrees Fahrenheit when you add the eggs.
Use a Stand Mixer for Larger Batches
While hand mixing works perfectly for a single batch, doubling or tripling the recipe benefits from a stand mixer fitted with the paddle attachment. In particular, the mixer incorporates the eggs more evenly and distributes the cheese throughout the dough without overworking it. Mix on low speed for about 2 minutes after each egg addition. Brazilian bakeries use large mixers for this reason. A home stand mixer gives you the same edge on a smaller scale.
Do Not Overbake
The window between perfectly baked and overbaked cheese bread is narrow. Overbaked rolls lose their chewy center and turn dry. Pull them out as soon as the tops turn golden, even if the sides look pale. The leftover heat cooks them further on the sheet. For extra crisp, bake the full 25 minutes. For more chew, pull them at 20 minutes.
Traditional vs. Modern Pao de Queijo
Brazilian cheese bread has evolved considerably from its humble origins. Here is how the traditional Minas Gerais version compares to the modern adaptations found in cities and international kitchens today.
| Traditional Minas Gerais | Modern Adaptations |
|---|---|
| Uses polvilho azedo exclusively | Often uses polvilho doce or a blend |
| Queijo minas curado for sharp flavor | Parmesan and mozzarella blend |
| Lard or pork fat for richness | Vegetable oil or butter |
| Hand-mixed in a large bowl | Stand mixer or food processor |
| Baked in wood-fired ovens | Standard home oven at 400 degrees Fahrenheit |
| Irregular, rustic shapes | Uniform balls using cookie scoops |
| Served at breakfast with coffee | Served as appetizers and party snacks |
Serving Suggestions
In Brazil, pao de queijo appears at nearly every meal and social occasion. Traditionally, Brazilians eat these cheese rolls at breakfast alongside strong cafezinho coffee. They also serve them as a late-afternoon snack called lanche, as appetizers at parties, and as a side dish with soups and stews. The versatility of pao de queijo makes it welcome at virtually any table.
The Perfect Accompaniments:
- Brazilian cafezinho: The traditional pairing. Strong, sweet black coffee cuts through the richness of the cheese and enhances the tangy notes of the tapioca.
- Guava paste (goiabada): The classic Minas Gerais combination of cheese and guava, known as Romeo e Julieta, extends to pao de queijo. Spread a thin slice alongside each roll.
- Black bean soup (caldo de feijao): The cheese bread serves as a perfect dipper for thick, smoky Brazilian black bean soup.
- Chimichurri or herb butter: A bright, garlicky chimichurri adds a herbaceous contrast to the rich, cheesy rolls.
Beverage Pairings:
- Cafezinho (traditional strong Brazilian coffee)
- Guarana soda (Brazil’s iconic soft drink)
- Caipirinha (the lime and cachaca cocktail complements the salty cheese)
- Sparkling water with lime (a refreshing, lighter option)
Storage and Reheating
Refrigerator: Store baked pao de queijo in an airtight container for up to 3 days. The texture will firm up as the tapioca starch retrogrades. Reheat in the oven to restore the crispy exterior.
Freezer (unbaked dough): Shape the dough into balls and freeze on a parchment-lined baking sheet until solid. Transfer to a freezer bag and store for up to 3 months. Bake directly from frozen at 400 degrees Fahrenheit for 25 to 30 minutes. This is the preferred storage method because freshly baked pao de queijo always tastes better than reheated.
Freezer (baked rolls): Fully baked rolls freeze well for up to 2 months. Reheat from frozen at 350 degrees Fahrenheit for 10 to 12 minutes.
Reheating: Always use the oven or a toaster oven at 350 degrees Fahrenheit for 5 to 8 minutes. Avoid the microwave, which makes the rolls rubbery and destroys the crispy crust. For the best results, reheat only as many rolls as you plan to eat immediately.
Common Mistakes to Avoid
1. Using Lukewarm Milk Instead of Boiling
The milk must reach a full, rolling boil before you pour it over the tapioca flour. Lukewarm milk fails to gelatinize the starch, which means the dough cannot trap air during baking. Consequently, the result is flat, dense rolls that lack the characteristic puff and chew of proper pao de queijo. If you are unsure whether the milk is hot enough, use a thermometer. It should read at least 200 degrees Fahrenheit.
2. Adding Eggs to Hot Dough
Above all, patience during the cooling stage is key. If the dough is still too hot when you add the eggs, the heat will partially cook them on contact. As a consequence, cooked egg streaks create an uneven texture and reduce the binding power that eggs provide. Let the dough cool for at least 10 minutes. It should feel warm to the touch, similar to bathwater. Test with the inside of your wrist if you are unsure.
3. Opening the Oven Door Too Early
After all, these cheese rolls rely on steam to puff up during the first half of baking. Opening the oven door in the first 15 minutes releases that trapped steam, and the rolls will deflate permanently. Resist the temptation to check on them. Instead, use the oven light to monitor progress through the window. Only open the door after 20 minutes to check for doneness.
4. Using Pre-Grated Cheese
Unfortunately, pre-grated Parmesan from a canister contains cellulose powder and other anti-caking agents that prevent the cheese from melting smoothly. These additives absorb moisture from the dough and create a grainy texture. Always grate cheese from a block. In short, the extra 2 minutes of effort yields a smoother dough and stronger cheese flavor.
Frequently Asked Questions
What is pao de queijo made of?
This Brazilian cheese bread requires just five core ingredients: tapioca flour, milk, oil or butter, eggs, and cheese. The tapioca flour comes from cassava root and contains no gluten. Traditional Brazilian recipes use queijo minas, a regional cheese from Minas Gerais, though Parmesan and mozzarella work well as accessible substitutes. The hot milk scalds the starch to create the chewy texture that defines this bread.
Can I freeze pao de queijo dough before baking?
Absolutely. In fact, freezing unbaked dough is the preferred method in Brazilian households. Shape the dough into balls, freeze them on a tray until solid, then transfer to a freezer bag. They keep for up to 3 months. Bake directly from frozen, adding 5 to 8 extra minutes to the baking time. In fact, many Brazilians prefer this method because each roll emerges fresh from the oven.
What is the difference between polvilho doce and polvilho azedo?
Polvilho doce is sweet, unfermented tapioca starch. Polvilho azedo is sour tapioca starch that undergoes natural fermentation before drying. The fermentation gives polvilho azedo more expanding power and a subtle tang. As a result, rolls made with polvilho azedo puff up higher and get crispier crusts. For best results, use polvilho azedo alone or blend equal parts of both types.
Why did my pao de queijo turn out flat?
Flat rolls usually stem from three causes: the milk was not hot enough to gelatinize the starch, the eggs were added to dough that was still too hot, or the oven door was opened too early during baking. Ensure the milk reaches a full boil, let the dough cool to about 110 degrees Fahrenheit before adding eggs, and keep the oven door closed for the first 15 minutes of baking.
Can I make pao de queijo dairy-free or vegan?
Yes, though the texture will differ from the traditional version. Replace the milk with oat milk or coconut milk, use coconut oil instead of butter, and substitute vegan cheese that melts well. For eggs, use aquafaba at 3 tablespoons per egg. A cashew-based mozzarella provides the closest melting properties. The result will be less stretchy than the original but still delicious.
How do I reheat pao de queijo?
Reheat the cheese rolls in the oven at 350 degrees Fahrenheit for 5 to 8 minutes. The oven restores the crispy exterior while warming the chewy center. Never use the microwave, which turns the rolls rubbery and tough. For frozen baked rolls, reheat at 350 degrees Fahrenheit for 10 to 12 minutes directly from the freezer.
Variations and Adaptations
Stuffed Pao de Queijo:
Flatten a portion of dough in your palm, place a small cube of cream cheese, guava paste, or requeijao in the center, then wrap the dough around the filling and seal. Bake as normal. The filling melts during baking and creates a molten surprise inside each roll. This variation is popular at Brazilian parties and padarias.
Herb and Garlic Pao de Queijo:
Add 2 tablespoons of finely chopped fresh chives and 1 minced garlic clove to the dough along with the cheese. The herbs add a savory, aromatic dimension that pairs especially well with soups and stews. You can also use rosemary, oregano, or a combination of Italian herbs for a Mediterranean twist.
Spicy Pao de Queijo:
Mix in 1 to 2 teaspoons of finely diced jalapeno or a pinch of cayenne pepper with the cheese. Replace the mozzarella with pepper jack for an additional layer of heat. Serve these spicy rolls alongside cold beer or as a snack during football matches. The capsaicin from the peppers contrasts beautifully with the rich, melty cheese interior.
Mini Pao de Queijo for Parties:
Use a teaspoon instead of a tablespoon to shape bite-sized rolls. Reduce the baking time to 15 to 18 minutes. These miniature versions work perfectly as finger food for cocktail parties and gatherings. One batch yields approximately 48 mini rolls, which is enough for a small crowd.
The Cultural Significance of Pao de Queijo
Pao de queijo occupies a unique place in Brazilian national identity. It is more than a snack. It is a symbol of Minas Gerais warmth and one of the few Brazilian foods known across the globe. In Minas Gerais, giving a guest pao de queijo is a deep act of kindness rooted in local culture. The smell of cheese bread in a hot oven ties people to their roots, their family, and the dairy farms that shaped the land.
From Regional Staple to National Icon
Nationally, pao de queijo became a unifying food during Brazil’s rapid urbanization in the 1950s and 1960s. As families from Minas Gerais migrated to Sao Paulo, Rio de Janeiro, and Brasilia, they carried their cheese bread recipes with them. As a result, bakeries and cafes across every major city began serving these cheese rolls, and they quickly transcended its regional origins to become a national treasure. Today, Brazil’s pao de queijo industry generates over $1 billion annually. Frozen versions are sold in every supermarket, and dedicated pao de queijo chains operate in shopping malls from north to south. According to Taste Atlas, pao de queijo ranks among the most highly rated breads in the world. Internationally, Brazilian immigrants have introduced it to the United States, Europe, and Asia, where it has found enthusiastic audiences among both the gluten-free community and lovers of artisanal bread.
Conclusion
Making pao de queijo at home is one of the most rewarding baking projects you can undertake. With just seven ingredients, no yeast, no kneading, and no rising time, you can produce golden, puffy cheese rolls that rival the best Brazilian bakeries. The key techniques to remember are simple: boil the milk fully before scalding the flour, let the dough cool before adding eggs, use freshly grated cheese, and keep the oven door closed during baking. Master these four steps and you will produce perfect pao de queijo every time.
Whether you serve them at breakfast with strong coffee, as an appetizer for a dinner party, or as a gluten-free snack for your family, these Brazilian cheese rolls deliver joy with every bite. For more South American recipes, explore our collection of South American dishes and discover the flavors of this extraordinary continent.