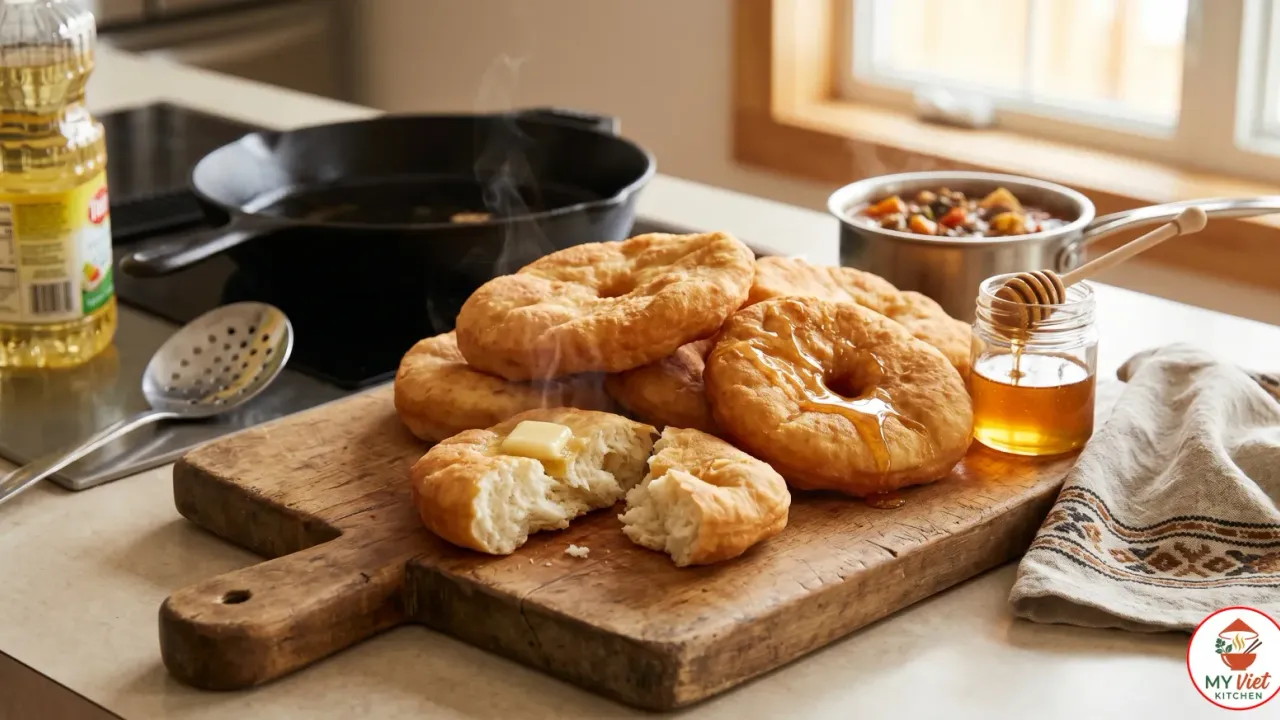
Bannock is a beloved traditional bread that has nourished Indigenous communities across Canada for generations. This golden, crispy fry bread features a soft and pillowy interior, and it comes together in under 30 minutes with just a handful of pantry staples. Whether you enjoy it alongside a hearty stew or drizzled with honey for dessert, this bannock recipe delivers authentic flavor every single time. In this complete bannock recipe guide, you will learn exactly how to make perfect bannock at home, along with expert tips and tasty variations.
Prep Time: 10 minutes | Cook Time: 15 minutes | Servings: 8
Difficulty: Easy | Calories: ~220 per serving
What Makes Bannock Special?
Bannock holds a cherished place in Canadian Indigenous food culture. For centuries, Indigenous peoples prepared this versatile bread using locally sourced ingredients and open-fire cooking methods. As a result, bannock became a symbol of resilience, community, and resourcefulness. Today, it remains a staple at gatherings, powwows, and family meals across the country.
What truly sets bannock apart from other breads is its incredible simplicity. Unlike yeast-based breads that require hours of rising, bannock uses baking powder for a quick lift. Therefore, you can go from mixing the dough to enjoying warm, golden bread in about 25 minutes. The texture strikes a beautiful balance between crispy and tender, especially when fried.
Moreover, bannock is remarkably adaptable. You can fry it for a rich and indulgent treat, bake it for a lighter option, or even cook it on a stick over a campfire. Each method produces a distinctly different texture and flavor, so you can customize bannock to suit any occasion. This flexibility is one reason why this bannock recipe has endured for so many generations.

Choosing the Right Flour for Bannock
The type of flour you select has a direct impact on the texture of your bannock. Here are the best options to consider for this bannock recipe.
- All-purpose flour (best choice): This is the most traditional and widely used option. It provides the ideal balance of structure and tenderness for perfect bannock every time.
- Whole wheat flour: You can substitute up to half the all-purpose flour with whole wheat for a nuttier flavor. However, this will create a denser and heavier bannock.
- Gluten-free flour blend: For a gluten-free version, use a one-to-one gluten-free baking blend. Additionally, add half a teaspoon of xanthan gum to help bind the dough together.
Ingredients for Bannock
Main Ingredients:
- 3 cups all-purpose flour
- 1 tablespoon baking powder
- 1 teaspoon salt
- 1/4 cup melted butter or lard
- 1 1/4 cups warm water
For Frying:
- About 2 cups vegetable oil (or enough for 1 inch depth in your pan)
Optional Toppings:
- Honey or maple syrup for a sweet version
- Butter and jam for a classic pairing
- Ground beef, beans, and cheese for Indian tacos
- Cinnamon sugar for a dessert treat
Pro tip: Use lard instead of butter for the most authentic and traditional flavor. Lard also creates a slightly crispier crust when frying.
Step-by-Step Instructions
Step 1: Mix the Dry Ingredients
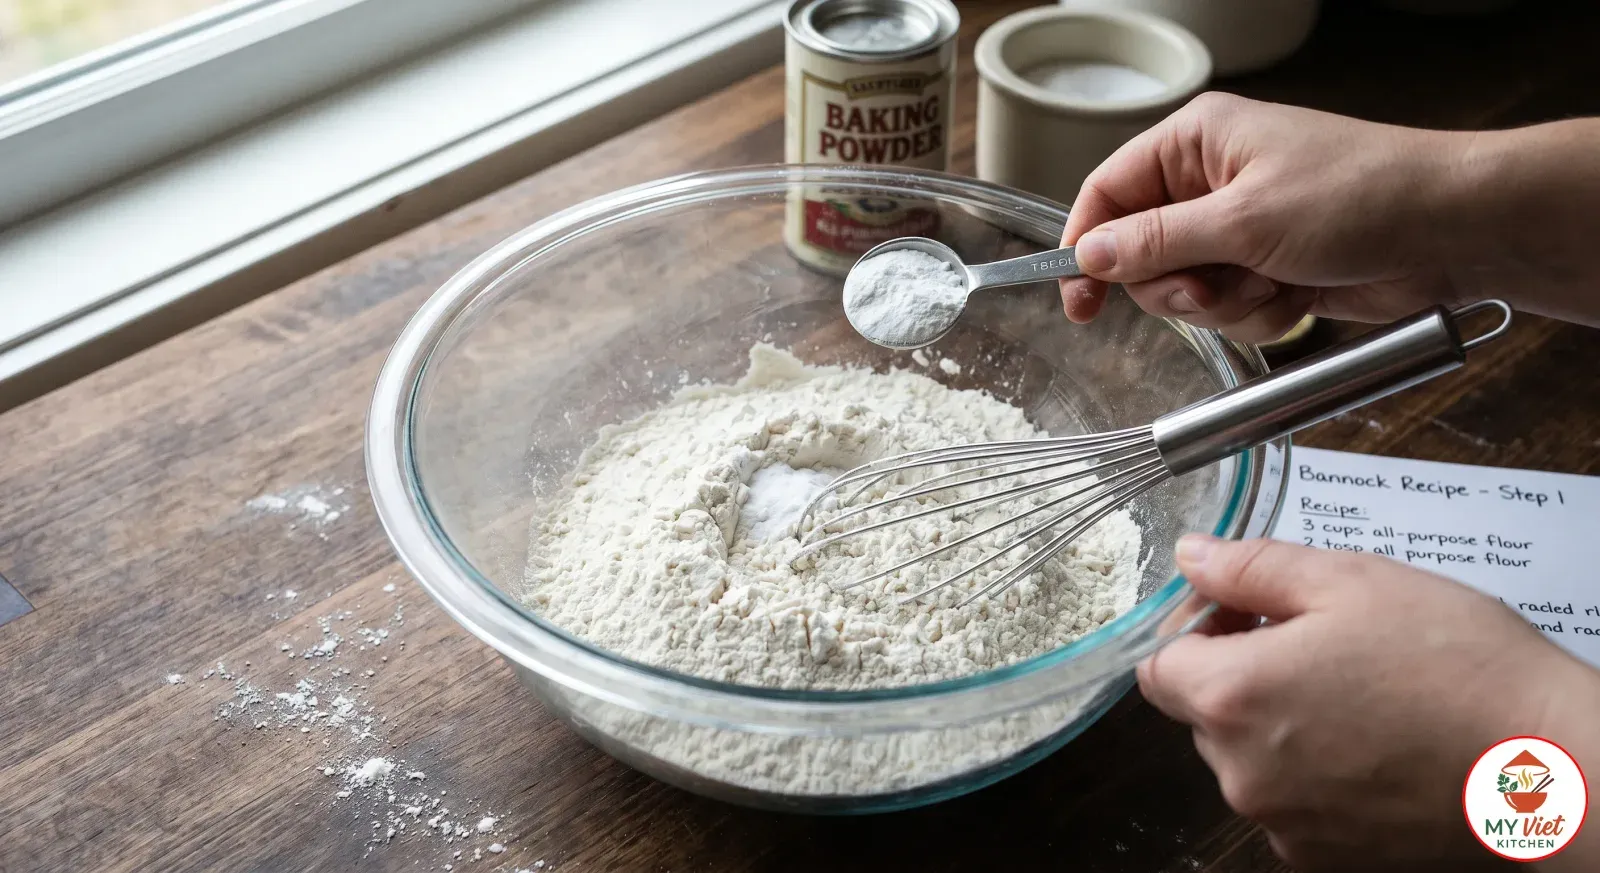
1First, whisk together 3 cups of all-purpose flour, 1 tablespoon of baking powder, and 1 teaspoon of salt in a large mixing bowl. Make sure you distribute the baking powder evenly throughout the flour. This step ensures that every piece of bannock rises properly and has a consistent texture.
Step 2: Form the Dough
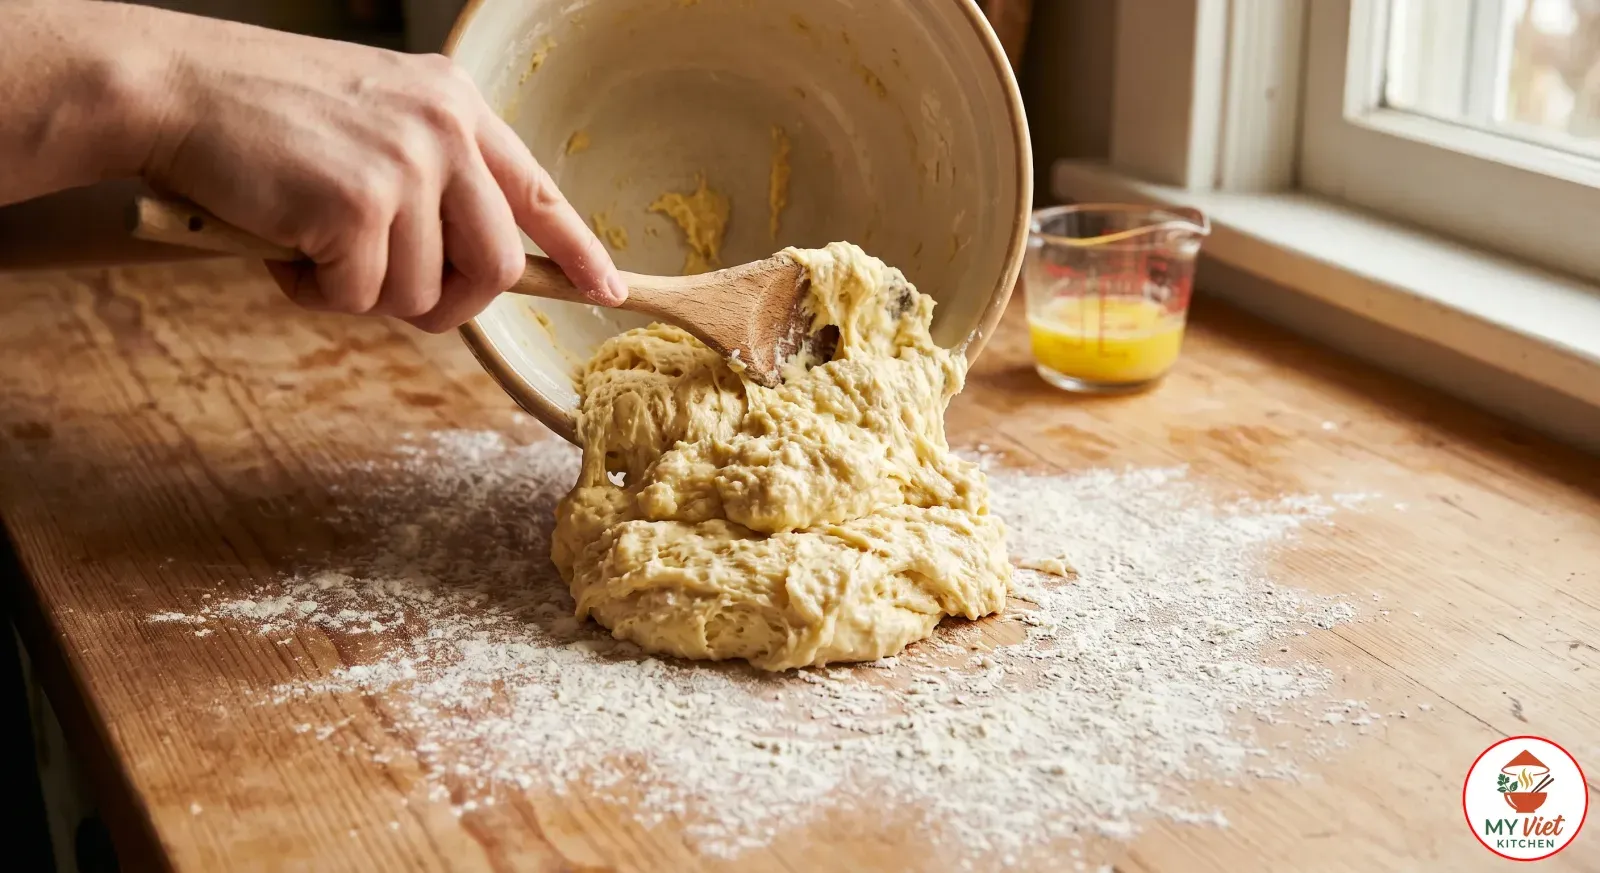
2Next, pour the melted butter and warm water into the dry ingredients. Stir everything together with a wooden spoon until a shaggy dough begins to form. Then, turn the dough onto a lightly floured surface and knead it gently for about 1 minute. Be careful not to overwork the dough, because too much kneading makes bannock tough and chewy instead of light and tender.
Step 3: Shape the Bannock
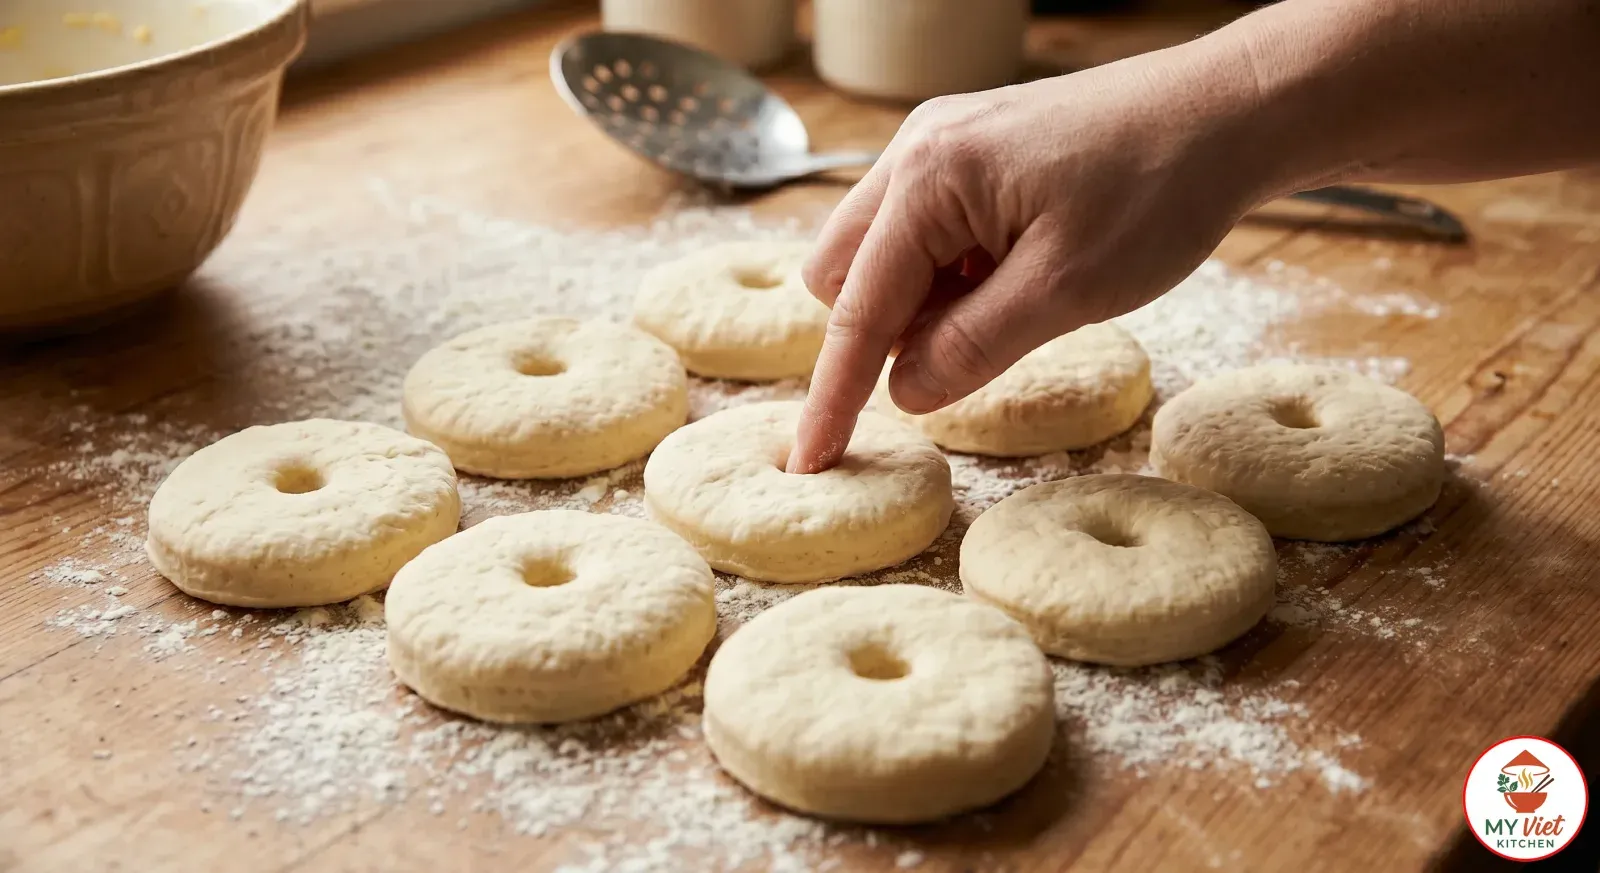
3Now, divide the dough into 8 equal portions. Roll each portion into a ball, then flatten it into a round disc about half an inch thick. After that, poke a small hole in the center of each disc with your finger. This hole allows the oil to circulate and cook the bannock evenly from all sides.
Step 4: Fry the Bannock Until Golden
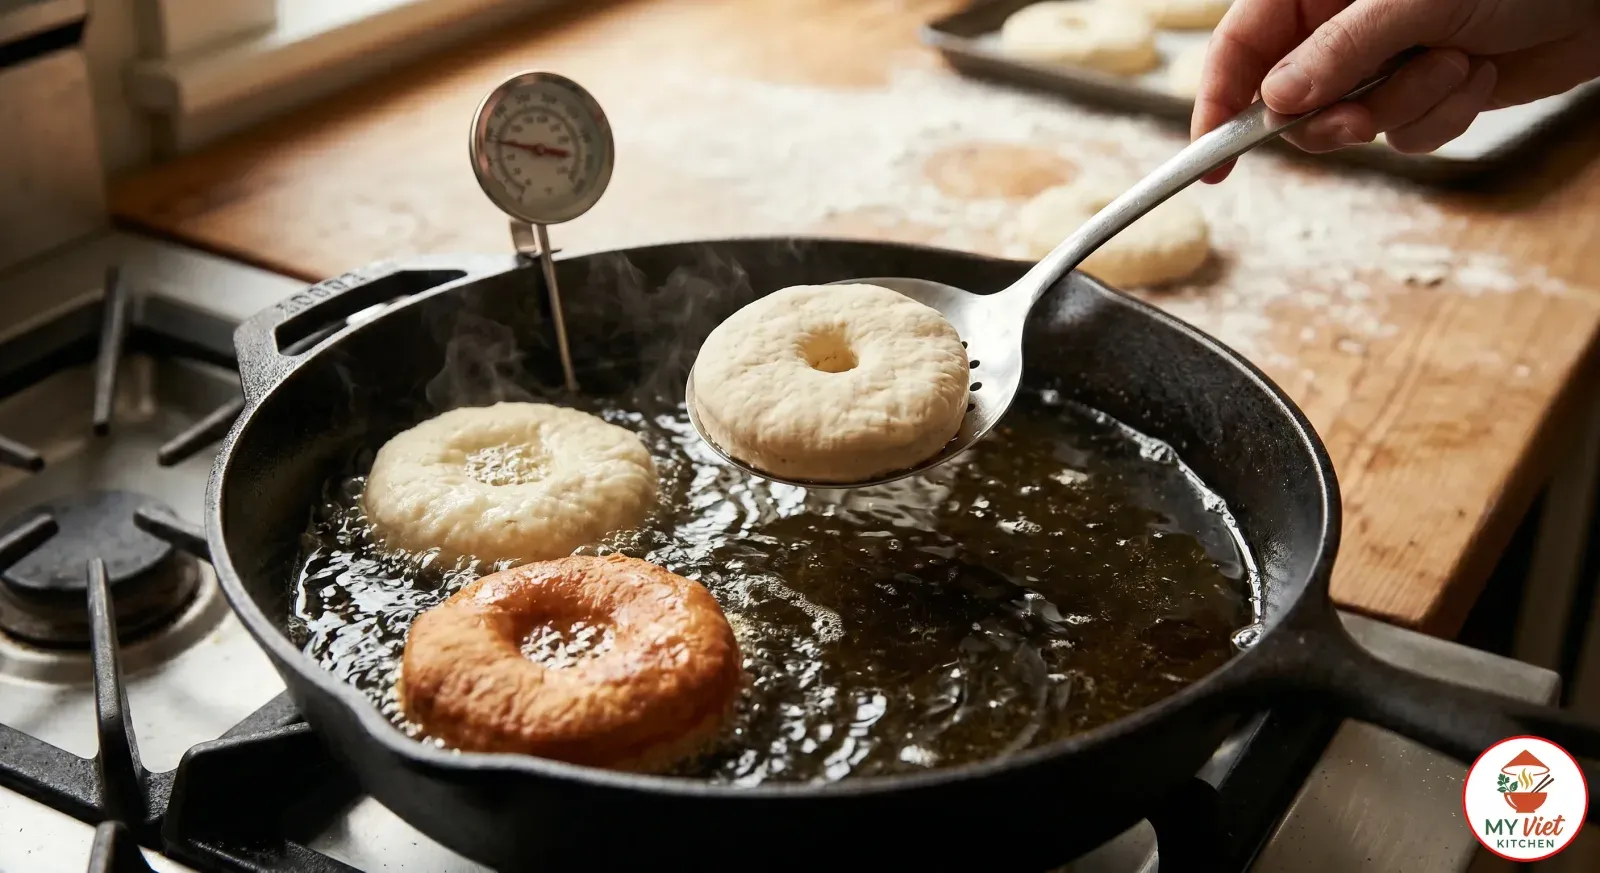
4Heat about 2 cups of vegetable oil in a deep skillet or heavy-bottomed pot over medium-high heat. The oil should reach 350 degrees Fahrenheit before you begin frying. Carefully lower each dough disc into the hot oil using a slotted spoon. Fry for 2 to 3 minutes per side until the bannock turns a beautiful golden brown. Work in batches so you do not overcrowd the pan.
Step 5: Drain and Serve Warm
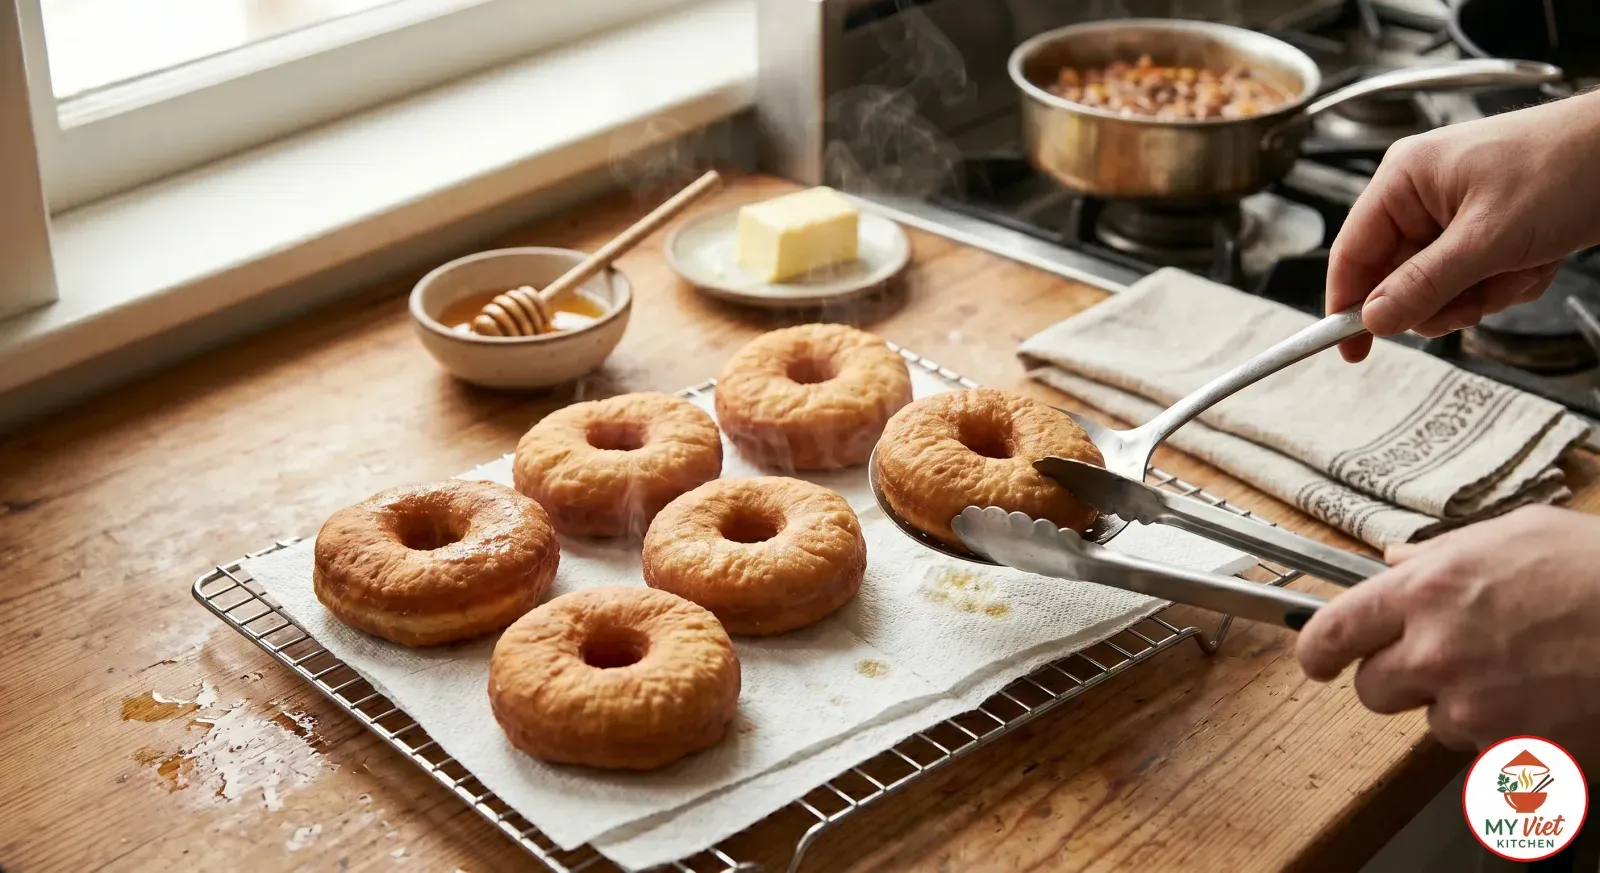
5Finally, remove the bannock from the oil with a slotted spoon. Place it on a wire rack or a plate lined with paper towels to drain the excess oil. Serve your bannock warm for the best flavor and texture. You can enjoy it plain, with butter, or loaded with your favorite toppings.
Expert Tips for Perfect Bannock
Control Your Oil Temperature
Oil temperature is the single most important factor for crispy bannock. If the oil is too hot, the outside burns while the inside stays raw. If it is too cool, the bannock absorbs excess oil and becomes greasy. Therefore, use a kitchen thermometer and maintain the oil at a steady 350 degrees Fahrenheit throughout the frying process.
Do Not Overwork the Dough
Gentle handling is key to tender bannock. Knead the dough just until it comes together, which should take no more than 1 minute. Overworking activates too much gluten, and as a result, your bannock will turn out tough and dense instead of light and fluffy.
Fried Bannock vs. Baked Bannock
Both methods produce delicious results, but they differ in texture and flavor. Here is a quick comparison to help you decide which style suits your preference.
| Feature | Fried Bannock | Baked Bannock |
|---|---|---|
| Texture | Crispy outside, soft inside | Dense and bread-like |
| Cook Time | 2-3 minutes per side | 20-25 minutes in oven |
| Calories | Higher (oil absorption) | Lower (no frying oil) |
| Best For | Indian tacos, sweet toppings | Soup dipping, sandwiches |
| Difficulty | Easy (watch oil temperature) | Very easy (set and forget) |
Serving Suggestions
Bannock is incredibly versatile, so it pairs beautifully with both sweet and savory dishes. Here are some popular ways to enjoy this traditional bread.
The Perfect Accompaniments:
- Indian Tacos: Top your bannock with seasoned ground beef, beans, lettuce, cheese, and salsa for a hearty meal.
- Stews and Soups: Use bannock to scoop up thick stews, chili, or other comfort food recipes.
- Honey Butter: Spread warm bannock with butter and a generous drizzle of honey for a simple yet satisfying snack.
- Berry Jam: Pair your bannock with traditional Saskatoon berry jam or any fruit preserve you enjoy.
Beverage Pairings:
- Hot Tea: A strong black tea or herbal Labrador tea complements bannock wonderfully.
- Coffee: Enjoy bannock alongside a fresh cup of coffee for a comforting breakfast.
- Hot Chocolate: For a sweet pairing, serve cinnamon sugar bannock with rich hot chocolate.
Storage and Reheating
Refrigerator: Store leftover bannock in an airtight container for up to 2 days. The texture softens slightly over time, but it still tastes great when reheated.
Freezer: Wrap each piece of bannock individually in plastic wrap, then place them in a freezer bag. Frozen bannock keeps well for up to 3 months.
Reheating: For the best results, reheat bannock in a 350-degree oven for 5 to 8 minutes. Alternatively, you can warm it in a skillet over medium heat for a couple of minutes on each side. Avoid the microwave if possible, because it tends to make bannock chewy.
Common Mistakes to Avoid
1. Using Cold Water
Cold water makes the butter solidify in the dough, which creates an uneven texture. Always use warm water to keep the fat distributed evenly. This small step makes a noticeable difference in any bannock recipe.
2. Overcrowding the Pan
Frying too many pieces at once drops the oil temperature rapidly. Consequently, the bannock absorbs more oil and becomes heavy and greasy. Fry only 2 to 3 pieces at a time to maintain the proper temperature.
3. Skipping the Center Hole
The small hole in the center of each disc is not just decorative. It helps the bannock cook through evenly by allowing hot oil to reach the middle. Without it, you may end up with doughy, undercooked centers.
Frequently Asked Questions
What is bannock bread?
Bannock is a traditional bread that holds deep cultural significance for Indigenous peoples across Canada. You can fry it, bake it, or cook it over an open fire. The result is a golden, crispy exterior with a soft and fluffy interior that pairs well with countless dishes.
Can you bake bannock instead of frying it?
Yes, you can absolutely bake bannock. Simply place the shaped dough on a greased baking sheet and bake at 375 degrees Fahrenheit for 20 to 25 minutes. Baked bannock has a denser texture and a lighter crust compared to the fried version.
What does bannock taste like?
Bannock has a mild, slightly buttery flavor. It tastes similar to a cross between a biscuit and a flatbread. When fried, it develops a satisfying golden crust while the inside stays pillowy and tender.
Is bannock the same as fry bread?
Bannock and fry bread are closely related, but they have different origins. Canadian Indigenous bannock predates European contact and was originally prepared with local ingredients over open flames. Meanwhile, fry bread developed among Native American communities in the United States during the forced relocations of the 1800s. You can learn more about the history of bannock on Wikipedia.
Variations and Adaptations
Sweet Bannock:
Add 2 tablespoons of sugar and a teaspoon of vanilla extract to the dough. After frying, toss the warm bannock in cinnamon sugar. This version makes an excellent dessert or a sweet breakfast treat.
Herb and Cheese Bannock:
Mix in half a cup of shredded cheddar cheese and a tablespoon of dried herbs such as rosemary or thyme. Bake this version for the best results, because the cheese can burn quickly in hot oil.
Campfire Bannock on a Stick:
Wrap strips of dough around a clean, thick stick and cook over hot campfire coals. Turn the stick slowly for even browning. This method is a fun and traditional way to enjoy bannock outdoors, and it works especially well for camping trips.
The Cultural Significance of Bannock
Bannock is far more than just a simple bread. For Indigenous peoples in Canada, it represents a living connection to ancestral traditions and community bonds. Before European contact, Indigenous communities made early forms of bannock using ground roots, corn, and other local ingredients. Over time, the recipe adapted to include wheat flour, which became available through trade.
Today, bannock appears at nearly every Indigenous celebration, from powwows and feasts to family dinners and community gatherings. In many families, the traditional bannock recipe passes down through generations, and each family adds its own unique touch. Some prefer thick, bread-like bannock, while others favor paper-thin, extra-crispy versions. Regardless of the style, sharing bannock remains an act of hospitality and love.
Furthermore, bannock has gained recognition in the broader Canadian food scene. Restaurants and food trucks now feature gourmet bannock topped with modern ingredients. This growing popularity helps preserve and celebrate Indigenous food traditions for future generations. If you enjoy exploring diverse bread traditions, also check out our collection of recipes from around the world.
Conclusion
Making bannock at home is a rewarding experience that connects you to one of Canada’s oldest and most cherished bread traditions. With just a few basic ingredients and about 25 minutes of your time, you can produce golden, crispy bannock that rivals any you have ever tasted. Remember to keep the dough handling gentle, maintain your oil at 350 degrees, and avoid overcrowding the pan.
Whether you serve it as Indian tacos, dip it into a warm stew, or enjoy it with honey butter, bannock always delivers comfort and satisfaction. Give this bannock recipe a try and discover why this traditional bread has stood the test of time. For more delicious recipes, explore our homepage at My Viet Kitchen.