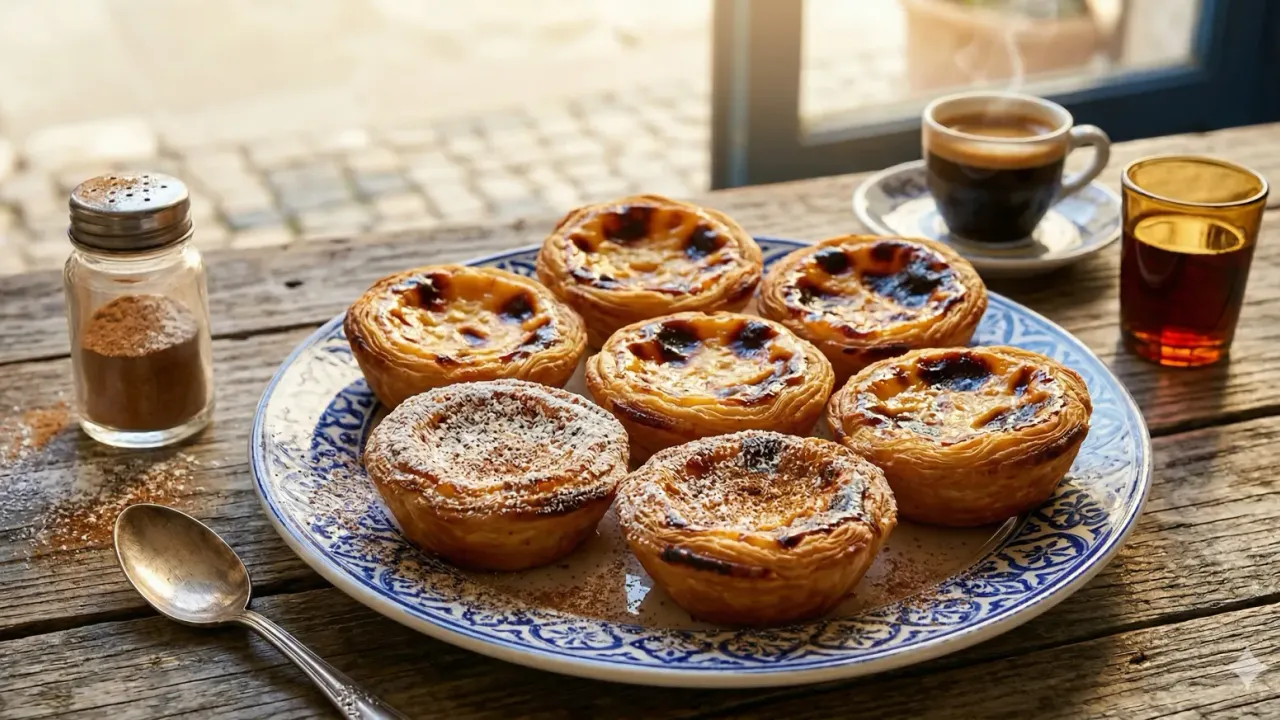
Pasteis de nata are the golden, crispy custard tarts that Portugal gave to the world. This pasteis de nata recipe walks you through every step to create flaky, caramelized perfection at home. Born in the monasteries of Lisbon over 200 years ago, these tiny tarts pack an enormous punch of flavor. Each bite delivers shattering pastry, silky egg custard, and bittersweet charred spots on top. Whether you have visited Belem or simply dream of it, this recipe brings Portugal to your kitchen.
Prep Time: 40 minutes | Cook Time: 15 minutes | Servings: 12 tarts
Difficulty: Medium | Calories: ~195 per tart
What Makes Pasteis de Nata Special?
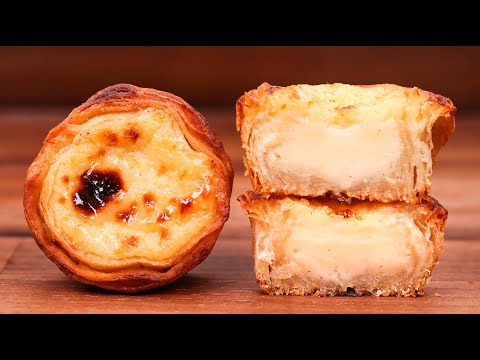
Most egg tarts around the world use shortcrust pastry and a gentle bake. Pasteis de nata break every one of those rules. The pastry is made from tightly rolled puff dough that, when sliced and pressed into a mold, creates dozens of paper-thin spiral layers. The oven temperature is cranked to a blistering 500 degrees Fahrenheit. At that heat, the pastry puffs and crisps in minutes while the custard surface blisters into dark, caramelized patches.
That interplay of textures is what makes pasteis de nata unforgettable. The outer shell shatters like glass. The custard inside stays wobbly and barely set, with a richness that comes from using egg yolks only. Then those charred spots on top add a whisper of bitterness that balances the sweetness. No other pastry achieves this exact combination, and that is why pasteis de nata have become one of the most beloved desserts on the planet.
The origin story traces back to the Jeronimos Monastery in Belem, a neighborhood in Lisbon. Monks used egg whites to starch their clothes, leaving mountains of leftover yolks. Rather than waste them, they created rich custard tarts. After the monastery closed in 1834, the recipe was sold to a nearby sugar refinery. That shop, Pasteis de Belem, still operates today and sells over 20,000 tarts every single day.
Choosing the Right Puff Pastry
The pastry shell is half the battle when making pasteis de nata. Your choice of puff pastry directly affects the crispness and flavor of the final tart. Here are the best options to consider.
- All-butter puff pastry (best choice): Brands like Dufour or Pepperidge Farm make all-butter sheets that crisp beautifully at high heat. The butter flavor is essential for authentic pasteis de nata. Thaw according to the package directions before rolling.
- Homemade puff pastry: If you have time, making your own dough gives you the most control. Traditional Portuguese dough uses a simple lamination technique with butter or lard. The result is superior crispness, though it adds several hours to the process.
- Shortening-based puff pastry (avoid if possible): Some supermarket brands use vegetable shortening instead of butter. These sheets still puff, but they lack flavor and do not crisp as well. The greasy mouthfeel is noticeable. Always check the ingredient list and pick butter over shortening.
Ingredients for Pasteis de Nata
Pastry Shells:
- 1 sheet store-bought all-butter puff pastry, thawed
- Flour for dusting
Custard Filling:
- 1 cup whole milk
- 1 tablespoon cornstarch
- 5 large egg yolks
- 1 teaspoon vanilla extract
- Pinch of fine sea salt
Sugar Syrup:
- 2/3 cup granulated sugar
- 1/3 cup water
- 1 cinnamon stick
- 1 strip of lemon peel (about 2 inches)
For Serving (Optional):
- Ground cinnamon for dusting
- Powdered sugar for dusting
Pro tip: Separate your eggs while cold, because the yolks are firmer and less likely to break. However, let the yolks come to room temperature before mixing them into the custard. Cold yolks dropped into a hot syrup can scramble instantly. Give them 15 minutes on the counter while you prepare the other components.
Step-by-Step Instructions
Step 1: Roll and Shape the Pastry
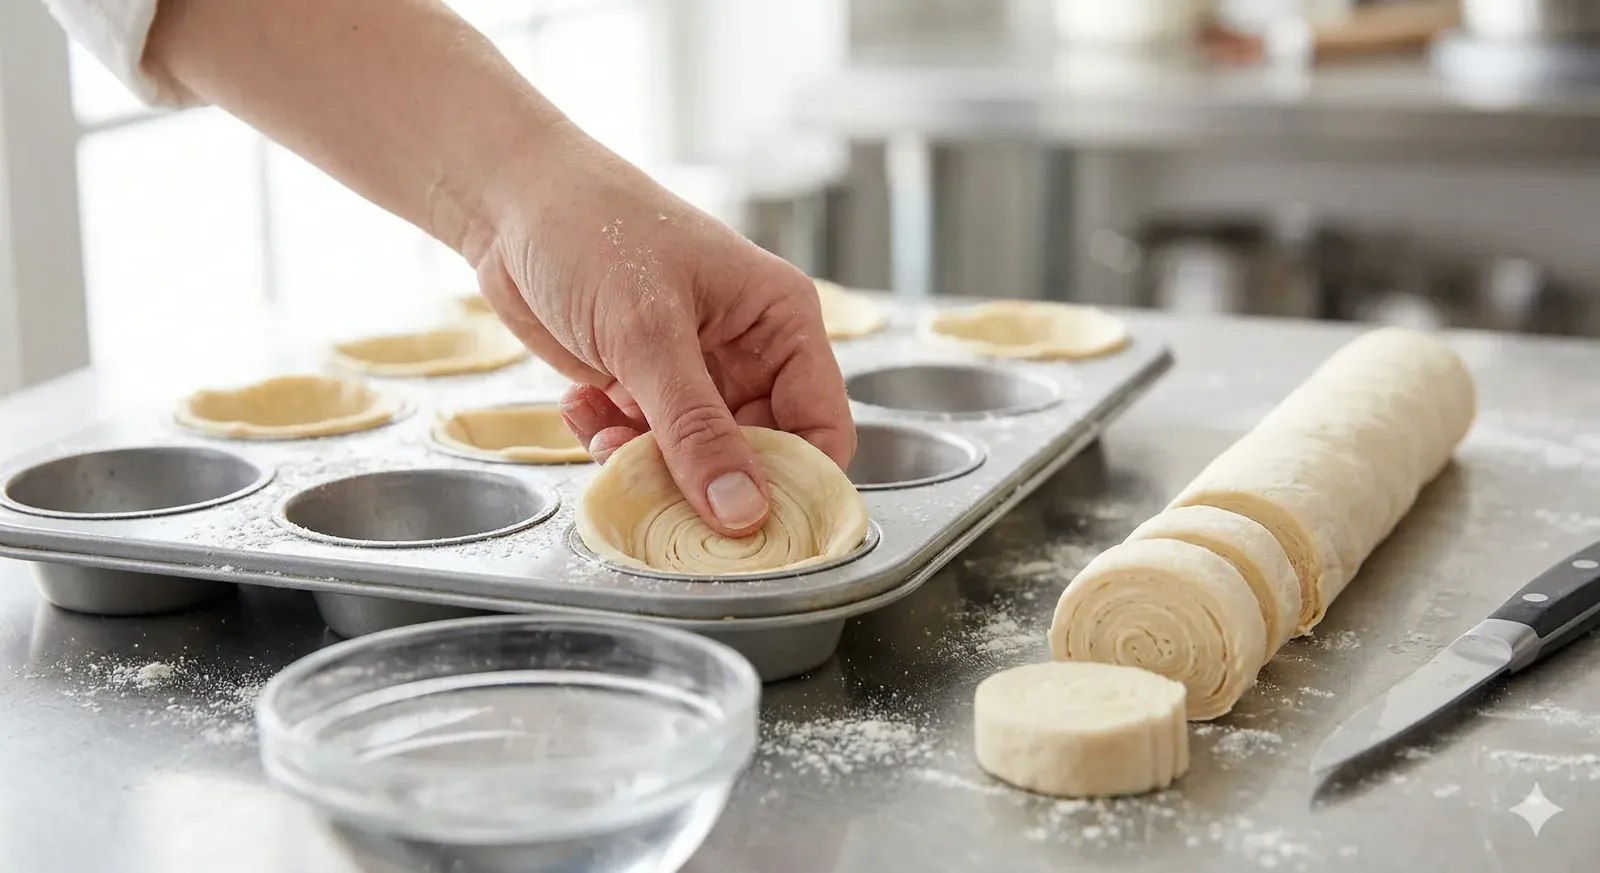
1 Lightly flour your work surface and unroll the puff pastry sheet. Starting from one of the short sides, roll the pastry into a tight log, like a Swiss roll. This rolling technique creates the spiral layers that are the hallmark of pasteis de nata. Press the seam to seal the log firmly.
Using a sharp knife, cut the log into 12 equal rounds, each about 3/4 inch thick. Lightly grease a standard 12-cup muffin tin with butter or cooking spray. Place one round cut-side up into each cup. Dip your thumb in cold water, then press the dough from the center outward and up the sides of the cup. The pastry should be very thin, almost translucent at the base. Thicker pastry leads to a doughy, undercooked bottom. Chill the prepared tin in the freezer for 10 minutes while you make the custard.
Step 2: Make the Sugar Syrup
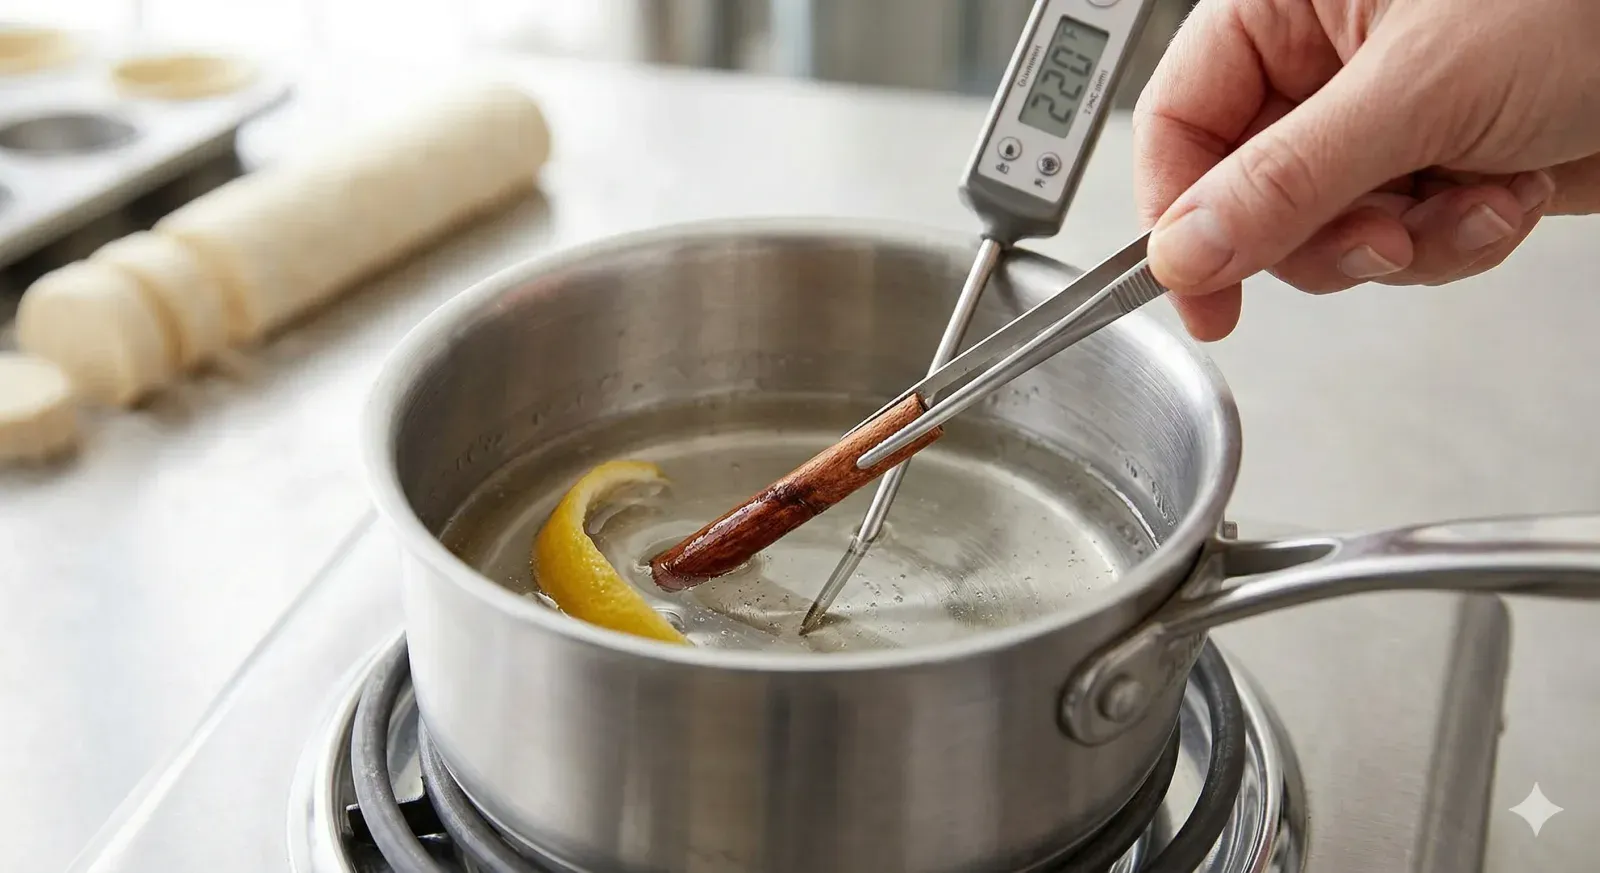
2 Combine the sugar, water, cinnamon stick, and lemon peel in a small saucepan. Set it over medium-high heat and stir until the sugar dissolves completely. Once it reaches a boil, stop stirring. Let the syrup bubble undisturbed until it hits 220 degrees Fahrenheit on a candy thermometer. This takes about 3 to 4 minutes.
Remove the pan from heat immediately. Fish out the cinnamon stick and lemon peel with tongs. The syrup should be clear and slightly thickened but not colored. If it turns amber, you have gone too far and the tarts will taste like caramel instead of the clean, sweet custard that defines proper pasteis de nata. Set the hot syrup aside while you prepare the milk mixture.
Step 3: Prepare the Custard
3 In a separate saucepan, whisk the cornstarch into the cold milk until fully dissolved. Place the pan over medium heat and whisk constantly. After about 2 minutes, the mixture will thicken slightly, resembling thin cream. Remove it from the heat as soon as you feel resistance in the whisk. Do not let it boil or it will form lumps.
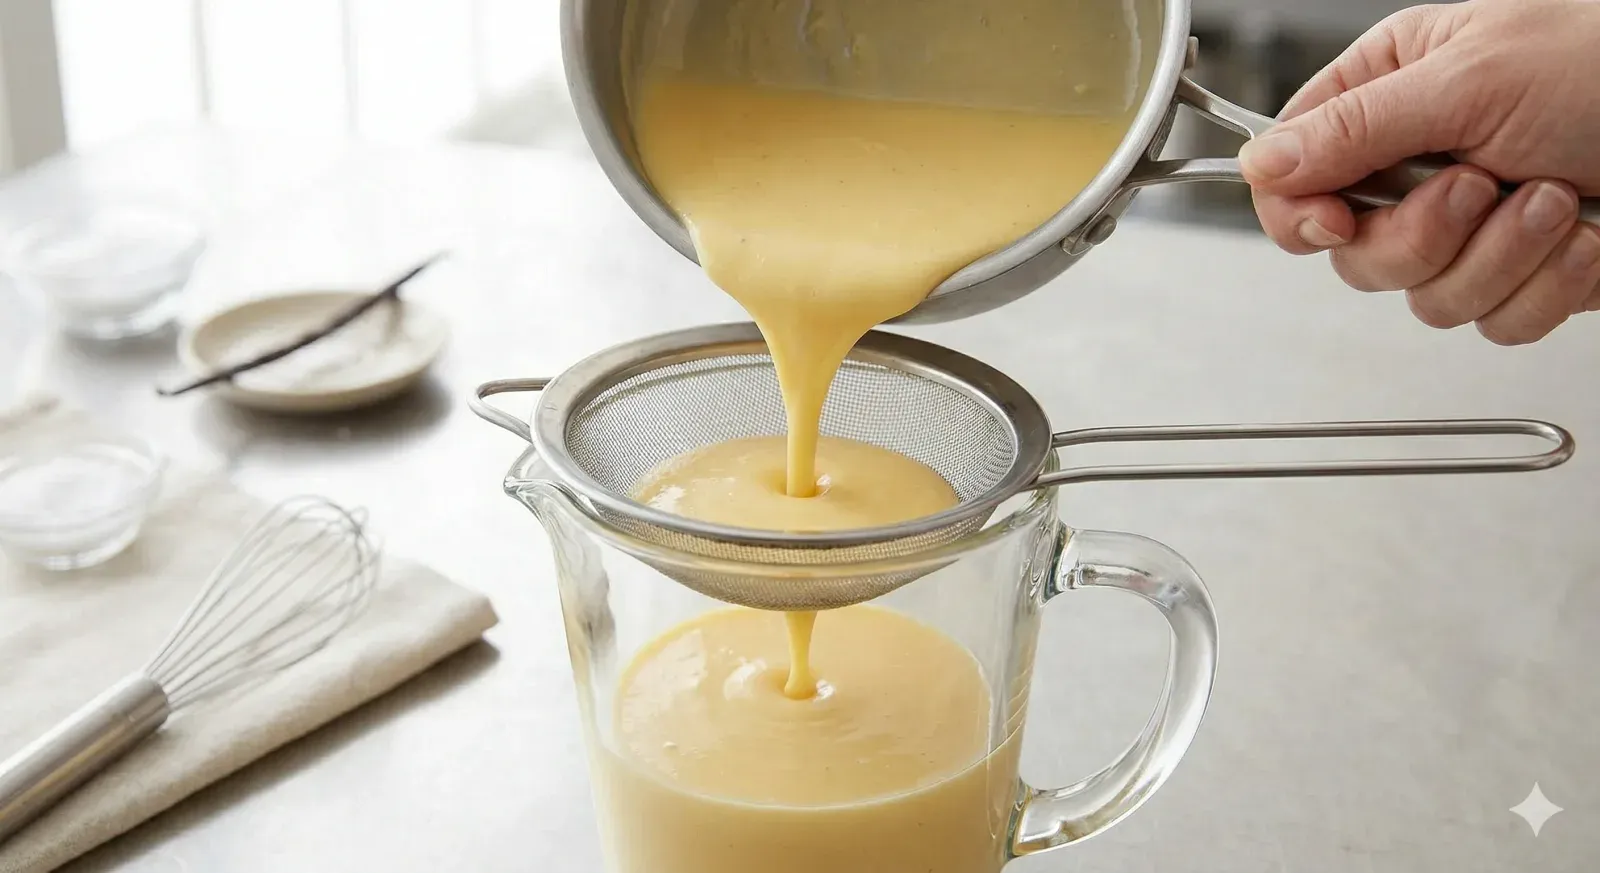
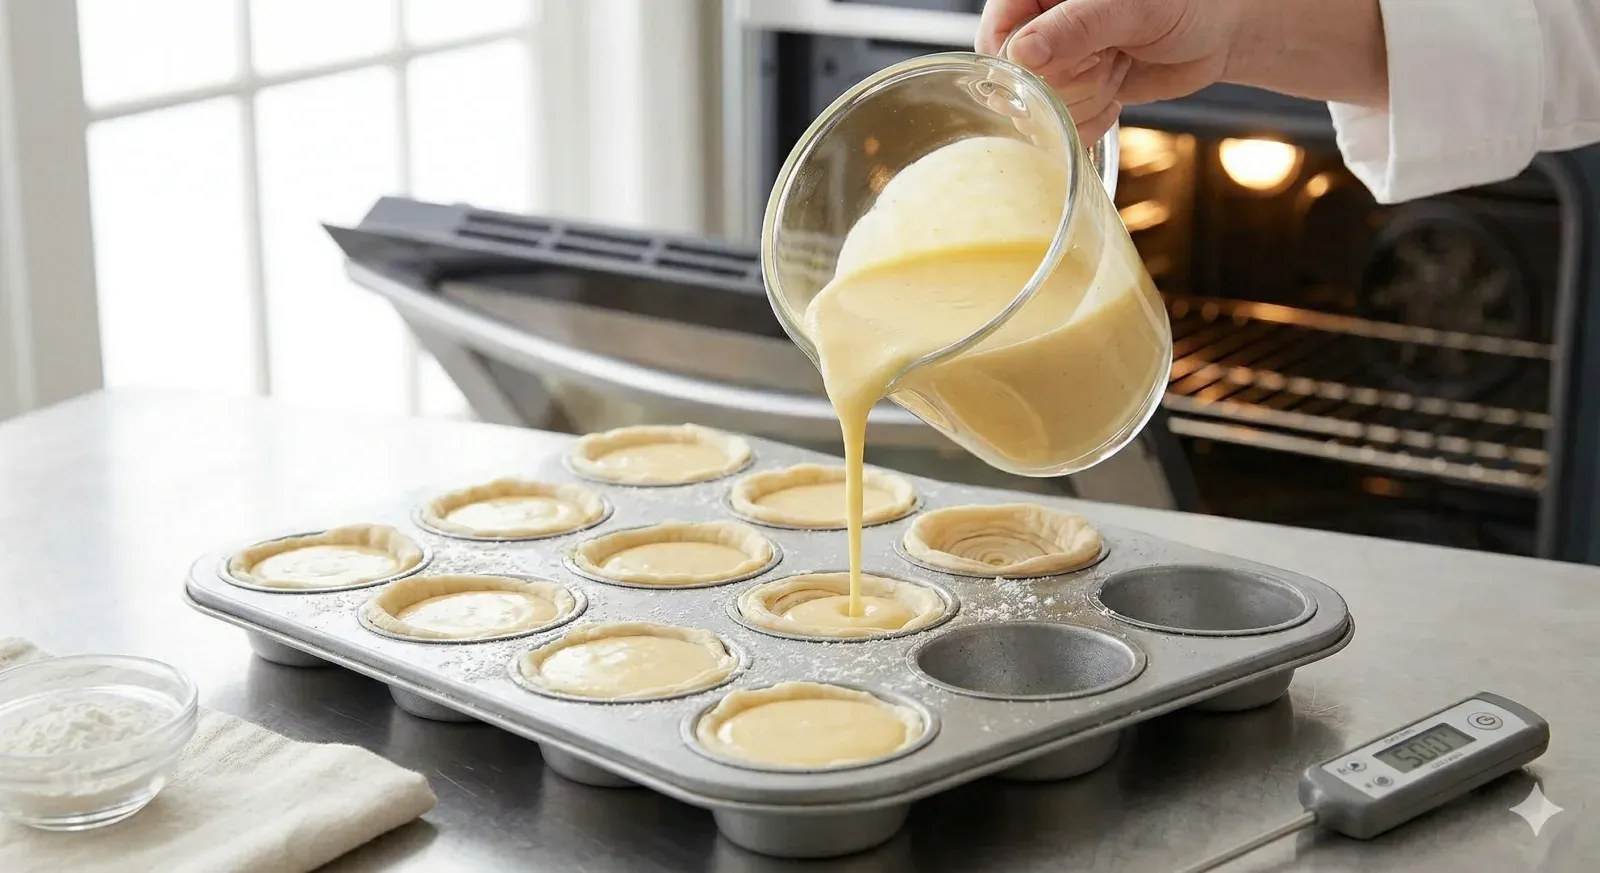
Now slowly pour the hot sugar syrup into the warm milk mixture in a thin stream while whisking vigorously. This tempers the two liquids together without cooking the starch further. Next, add the egg yolks one at a time, whisking well after each addition. Stir in the vanilla extract and salt. Finally, pour the entire custard through a fine-mesh sieve into a clean bowl or pitcher. Straining removes any lumps and ensures a perfectly smooth filling. The custard should be pourable, like heavy cream.
Step 4: Fill and Bake
4 Preheat your oven to 500 degrees Fahrenheit (260 degrees Celsius). Position a rack in the upper third of the oven. This placement brings the tarts closer to the top heating element, which helps create those signature charred spots on the custard surface. A fully preheated oven is absolutely critical for pasteis de nata.
Remove the muffin tin from the freezer. Pour the custard into each pastry shell, filling them about three-quarters full. Do not overfill, because the custard puffs up during baking and can overflow. Bake for 12 to 15 minutes, rotating the tin once halfway through. The tarts are done when the pastry is deeply golden brown and the custard tops show dark blistered spots. Let them cool in the tin for 5 minutes, then gently twist each tart out and place it on a wire rack. Serve warm or at room temperature.
Expert Tips for Perfect Pasteis de Nata
Get Your Oven Screaming Hot
The single most important factor is oven temperature. Pasteis de nata must bake at 500 degrees Fahrenheit or higher. At this extreme heat, the pastry crisps before it can absorb moisture from the custard. Meanwhile, the custard surface blisters and caramelizes. If your oven only reaches 475, add 1 to 2 minutes of broiler time at the end to get those charred spots.
Press the Pastry Thin
Thick pastry is the top cause of soggy bottoms in pasteis de nata. When you press the dough into the muffin tin, use wet thumbs and work from the center outward. The base should be nearly see-through. Thin pastry crisps evenly and creates more visible layers. Thick pastry stays doughy underneath the custard and ruins the texture.
Strain the Custard Every Time
Even if your custard looks smooth, strain it through a fine-mesh sieve. Tiny bits of cooked egg or cornstarch clumps hide in the mixture. Straining takes 30 seconds and guarantees a silky filling. Skipping this step risks lumpy custard that detracts from the refined texture of proper pasteis de nata.
Portuguese Egg Tarts Around the World
Portuguese sailors and merchants spread pasteis de nata across the globe centuries ago. Today, many countries have their own version. Here is how the major styles compare to the original.
| Country | Name | Key Differences | Serving Style |
|---|---|---|---|
| Portugal | Pasteis de Nata | Puff pastry spiral, baked at 500F, charred custard top | Dusted with cinnamon and powdered sugar, served warm |
| Macau / Hong Kong | Dan Tat (Egg Tart) | Shortcrust or puff pastry, lower heat, smooth golden top | Served warm from dim sum carts or bakery counters |
| Brazil | Pastel de Nata | Nearly identical to Portuguese, sometimes with coconut | Paired with cafezinho (strong espresso) |
| Japan | Nata | Lighter custard, less sugar, delicate caramelization | Sold at specialty bakeries, often in gift boxes |
| United Kingdom | Custard Tart | Shortcrust pastry, nutmeg-spiced custard, no charring | Served cold as a tea-time treat |
Serving Suggestions
In Portugal, pasteis de nata are eaten at all hours. They appear at breakfast tables, afternoon coffee breaks, and late-night dessert runs. The ritual is simple: grab a warm tart, dust it with cinnamon and powdered sugar, and eat it standing at the counter. Here are the best ways to enjoy them.
Classic Accompaniments:
- Cinnamon and powdered sugar: The traditional finish. A light dusting of both adds warmth and sweetness. In Lisbon, shakers of each sit on every bakery counter.
- Fresh fruit: Sliced strawberries, raspberries, or orange segments cut through the richness. A small fruit salad alongside the tarts makes a lovely brunch spread.
- Other European pastries: Build a dessert platter with pasteis de nata alongside French crepes, Italian cannoli, or Spanish churros for a continental tasting.
Beverage Pairings:
- Espresso (bica): The classic Portuguese pairing. A short, strong espresso balances the sweetness of the custard. In Lisbon, ordering a bica with a nata is a daily ritual for millions.
- Galao (Portuguese latte): A tall glass of warm milk with a shot of espresso. It is milder than a bica and perfect if you prefer a gentler coffee with your tart.
- Port wine: A small glass of tawny port pairs beautifully with the caramelized custard. The wine’s nutty sweetness echoes the cinnamon and vanilla in the filling.
- Sparkling water or fresh orange juice: For a non-alcoholic option, sparkling water cleanses the palate between bites. Fresh-squeezed orange juice is a popular morning choice in Portuguese cafes.
Storage and Reheating
Room temperature: Pasteis de nata are best within 2 to 3 hours of baking. The pastry stays crisp and the custard is still slightly warm. Keep them uncovered on a wire rack. Covering them traps moisture and softens the shell.
Refrigerator: Store leftover tarts in an airtight container for up to 2 days. The custard holds up well, but the pastry will soften. This is unavoidable with any custard-filled pastry. Let them come to room temperature before eating.
Reheating: Place chilled tarts in a 400-degree oven for 5 to 7 minutes. This crisps the pastry and warms the custard back to its original silky state. Never microwave pasteis de nata. The microwave turns the delicate pastry into a limp, rubbery shell and overheats the custard into a curdled mess.
Freezing: You can freeze the unbaked pastry shells in the muffin tin, wrapped tightly in plastic. They keep for up to 1 month. When ready, fill with fresh custard and bake straight from frozen, adding 2 to 3 extra minutes to the baking time. Do not freeze baked tarts, as the texture suffers greatly.
Common Mistakes to Avoid
1. Oven Not Hot Enough
This is the most common failure. If your oven is set below 475 degrees, the pastry bakes slowly and absorbs moisture from the custard. The result is a pale, soggy tart with no charring on top. Always preheat fully to 500 degrees and use an oven thermometer to verify. Most home ovens run 25 to 50 degrees cooler than the dial says.
2. Overfilling the Shells
Custard expands as it bakes. Filling the shells to the brim causes overflow, which glues the tarts to the tin and creates a sticky mess. Three-quarters full is the target. The custard will puff up during baking, then settle as it cools. Leave room for that expansion every time.
3. Thick Pastry Shells
Rushing the pressing step leads to uneven, thick pastry. Thick dough at the base does not cook through at high heat. It stays raw and doughy underneath the custard. Take your time pressing with wet thumbs. The base should be paper-thin, almost transparent when you hold it up to the light.
4. Skipping the Straining Step
Egg yolks can leave small lumps even when whisked well. Cornstarch sometimes clumps when heated. Straining catches all of these imperfections. A lumpy custard filling looks unappealing and feels grainy on the tongue. Thirty seconds with a fine sieve solves the problem entirely.
Frequently Asked Questions
What is the difference between pasteis de nata and regular egg tarts?
Pasteis de nata use rolled puff pastry that creates visible spiral layers when baked. Regular egg tarts from Hong Kong or Britain typically use shortcrust pastry. The Portuguese version also bakes at much higher heat, which produces those distinctive charred spots on the custard. Additionally, the sugar syrup flavored with cinnamon and lemon gives pasteis de nata a unique depth that standard egg tarts do not have.
Why do pasteis de nata need such a high oven temperature?
The extreme heat serves two purposes. First, it crisps the thin pastry layers rapidly before they soak up moisture from the filling. Second, it caramelizes the custard surface into dark, blistered patches. Those charred spots are not burnt. They are controlled caramelization that adds a complex, slightly bitter flavor. Without high heat, you just get a regular baked custard tart.
Can I make pasteis de nata with store-bought puff pastry?
Absolutely. Store-bought all-butter puff pastry produces excellent results. The key is rolling it into a tight log and slicing rounds to mimic the traditional spiral. Avoid brands that use vegetable shortening instead of butter. The flavor difference is significant, and butter-based pastry crisps better at high heat. Thaw according to package directions for best handling.
How do I get the charred spots on top of pasteis de nata?
High sugar content and extreme heat work together to create the charring. Make sure your oven is at a full 500 degrees and place the rack in the upper third. The proximity to the top element intensifies the browning. If your oven maxes out lower, use the broiler for the last minute or two. Watch closely, because the spots go from perfect to actually burnt in seconds.
How long do pasteis de nata stay fresh?
They taste best within a few hours of baking. The pastry is at peak crispness and the custard is still slightly warm. After that, the shell gradually softens. You can refrigerate them for up to 2 days, but expect a texture change. A quick reheat in a 400-degree oven for 5 minutes restores much of the original crunch.
Why do my pasteis de nata have a soggy bottom?
Three things cause soggy bottoms. The oven is too cool, the pastry is too thick, or the shells are overfilled. Address all three by preheating to the full 500 degrees, pressing the dough paper-thin, and filling only three-quarters full. Chilling the shells in the freezer before baking also helps them hold their shape and crisp faster.
Variations and Adaptations
Chocolate Pasteis de Nata:
Add 2 tablespoons of unsweetened cocoa powder to the custard base before straining. The result is a dark, bittersweet chocolate custard that still develops charred spots on top. Pair with a dusting of cinnamon rather than powdered sugar. This variation is popular in modern Portuguese bakeries and adds a dramatic visual contrast to the golden pastry.
Matcha Green Tea Version:
Whisk 1 tablespoon of high-quality matcha powder into the warm milk mixture before adding the egg yolks. The earthy, vegetal flavor of matcha pairs surprisingly well with the buttery pastry. This fusion version has become trendy in Asian-Portuguese bakeries in Macau and beyond. Dust the finished tarts with a pinch of extra matcha instead of cinnamon.
Coconut Pasteis de Nata:
Replace half the whole milk with coconut milk for a tropical twist inspired by Brazilian variations. Add a tablespoon of toasted coconut flakes on top of each tart after baking. The coconut adds richness and a subtle sweetness that works well with the cinnamon-lemon syrup. This version is popular in former Portuguese colonies across Asia and South America.
The Cultural Significance of Pasteis de Nata
In Portugal, pasteis de nata are more than a dessert. They are a national symbol and a source of immense pride. Every neighborhood in Lisbon has a pastelaria that bakes fresh tarts throughout the day. The rhythm of Portuguese life often revolves around stopping for a coffee and a nata. Morning commuters grab one on the way to work. Students eat them after class. Families share a box after Sunday lunch.
The most famous source is Pasteis de Belem, the bakery next to the Jeronimos Monastery. They have guarded their original 1837 recipe in a vault, and only three bakers know it at any time. Tourists line up around the block, but locals have their own favorite neighborhood shops. Every Portuguese person has a strong opinion about which pastelaria makes the best pasteis de nata. That passion speaks to how deeply these tiny tarts are woven into the fabric of Portuguese identity.
Portuguese explorers carried this tradition across oceans. In Macau, the legacy lives on as egg tarts in every dim sum restaurant. In Brazil, every padaria stocks them. From Goa to Mozambique, wherever the Portuguese sailed, custard tarts followed. Today pasteis de nata are experiencing a global renaissance, with dedicated shops opening in London, Tokyo, Sydney, and New York.
Conclusion
This pasteis de nata recipe gives you everything you need to make authentic Portuguese custard tarts at home. The keys are simple: roll the pastry thin, make a smooth custard, and bake at the highest heat your oven can manage. Follow these steps faithfully and you will pull golden, blistered tarts from your oven that rival any Lisbon bakery. The shattering pastry, the silky custard, and those charred spots on top make pasteis de nata one of the most satisfying things you will ever bake.
Ready to explore more European baking? Browse our European dishes collection for recipes like French crepes, Italian tiramisu, and bacalhau a bras. Each recipe brings a taste of the continent straight to your kitchen.