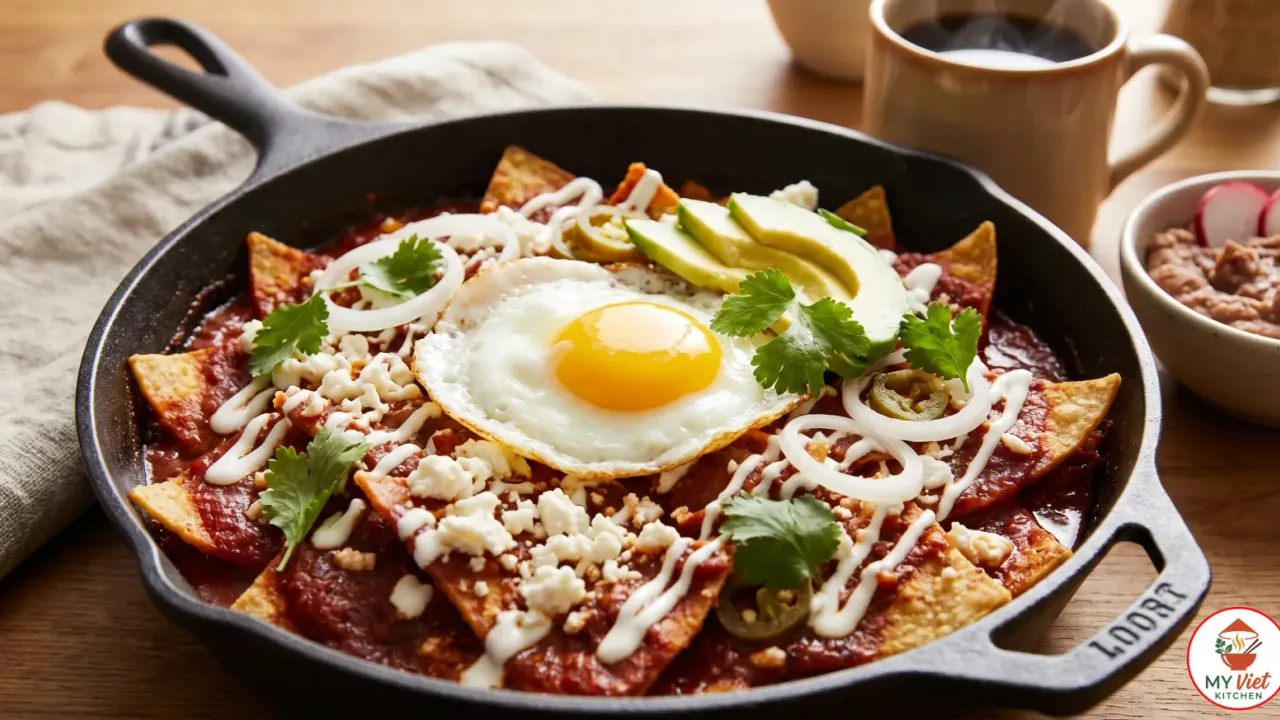
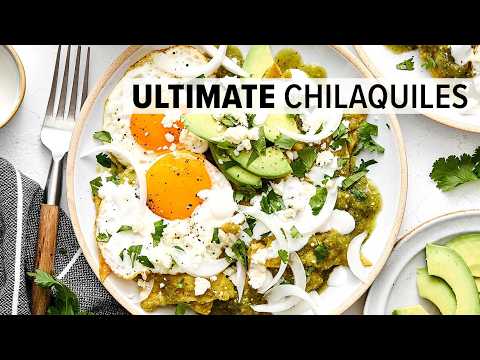
Chilaquiles are the crown jewel of the Mexican breakfast table. This beloved dish transforms humble corn tortilla chips into something extraordinary by simmering them in a rich, deeply flavored salsa roja made from roasted tomatoes and dried chiles. Topped with creamy queso fresco, a drizzle of Mexican crema, and a perfectly fried egg, chilaquiles deliver a stunning combination of textures and flavors that no other breakfast dish can match. Once you master this recipe at home, weekend mornings will never be the same.
Prep Time: 15 minutes | Cook Time: 25 minutes | Servings: 4
Difficulty: Easy | Calories: ~420 per serving
What Makes Chilaquiles Special?
Chilaquiles hold a unique place in Mexican cuisine because they celebrate leftovers rather than fresh items. The dish was born from a simple need: use up day-old tortillas and leftover salsa. Mexican home cooks found that frying stale tortillas and bathing them in warm salsa made something far greater than the sum of its parts. The chips soak up the rich salsa while keeping a crunch at their centers. This play between crispy and soft is what sets chilaquiles apart from every other tortilla dish.
The name “chilaquiles” comes from the Nahuatl word “chil-a-quilitl,” which roughly translates to “chiles and greens.” This ancient origin reveals how deeply rooted the dish is in pre-Columbian food culture. Indeed, for centuries, indigenous cooks prepared variations of fried tortillas in chile-based sauces. After the Spanish arrival brought dairy products like cheese and cream, the dish evolved into the version we know today. Consequently, every plate of chilaquiles carries layers of culinary history spanning thousands of years.
What truly elevates chilaquiles beyond a simple breakfast is the homemade salsa. A properly made salsa roja from roasted tomatoes and toasted dried chiles delivers a depth of flavor that no jarred sauce can replicate. The charring process caramelizes the natural sugars in the tomatoes. At the same time, the dried chiles add earthy, smoky depth. When the fried chips meet this salsa, they change fast. The edges soften and soak up the sauce while the centers stay crisp. Timing this step right is the most important skill in making perfect chilaquiles.
Choosing the Right Tortillas
The foundation of great chilaquiles is the tortilla. However, not all corn tortillas perform equally in this dish. The age, thickness, and type of corn all affect the final result. In fact, the right tortilla is the first thing that separates good chilaquiles from exceptional ones.
- Day-old corn tortillas (best choice): Stale tortillas have lost enough moisture to fry up crisp. As a result, they absorb less oil and hold their shape longer in the salsa. If you plan ahead, leave fresh tortillas uncovered on a baking sheet overnight. This simple step makes a remarkable difference in the final texture of your chilaquiles.
- Fresh corn tortillas: These contain more moisture. Therefore, they need a slightly longer frying time. Spread them on a rack and let them air-dry for at least 30 minutes before cutting. Alternatively, place them in a 200-degree Fahrenheit oven for 15 minutes to drive off excess moisture. Fresh tortillas produce softer chilaquiles overall.
- Store-bought thick tortilla chips: These work as a quick shortcut when time is limited. Choose unseasoned, thick-cut varieties from the Mexican food section. Avoid thin, heavily salted chips, as they dissolve almost instantly in the salsa. While convenient, store-bought chips lack the homemade flavor and custom thickness that make truly great chilaquiles.
Ingredients for Chilaquiles
For the Tortilla Chips:
- 12 corn tortillas, cut into triangles or strips
- Vegetable oil for frying (about 1 cup / 240ml)
- Pinch of salt
For the Salsa Roja:
- 6 Roma tomatoes, halved
- 3 dried guajillo chiles, stemmed and seeded
- 1 dried ancho chile, stemmed and seeded
- 1/2 medium white onion, roughly chopped
- 3 cloves garlic, unpeeled
- 1 cup (240ml) chicken broth
- 1 teaspoon ground cumin
- 1/2 teaspoon dried Mexican oregano
- 1 tablespoon vegetable oil for frying the salsa
- Salt to taste
For Topping and Serving:
- 1/2 cup (120ml) Mexican crema or sour cream
- 1/2 cup (60g) crumbled queso fresco
- 1/4 medium white onion, thinly sliced into rings
- Fresh cilantro leaves
- 4 fried eggs
- 1 ripe avocado, sliced
- Pickled jalapeños (optional)
Pro tip: Toast the dried chiles in a dry skillet until they puff slightly and release their aroma. This takes only 30 seconds per side. Over-toasting makes them bitter, so watch them closely. Additionally, save a handful of fried tortilla chips before adding them to the salsa. Crumble these reserved chips over the finished dish for an extra layer of crunch that contrasts beautifully with the salsa-softened pieces below.
Step-by-Step Instructions
Step 1: Prepare and Fry the Tortillas
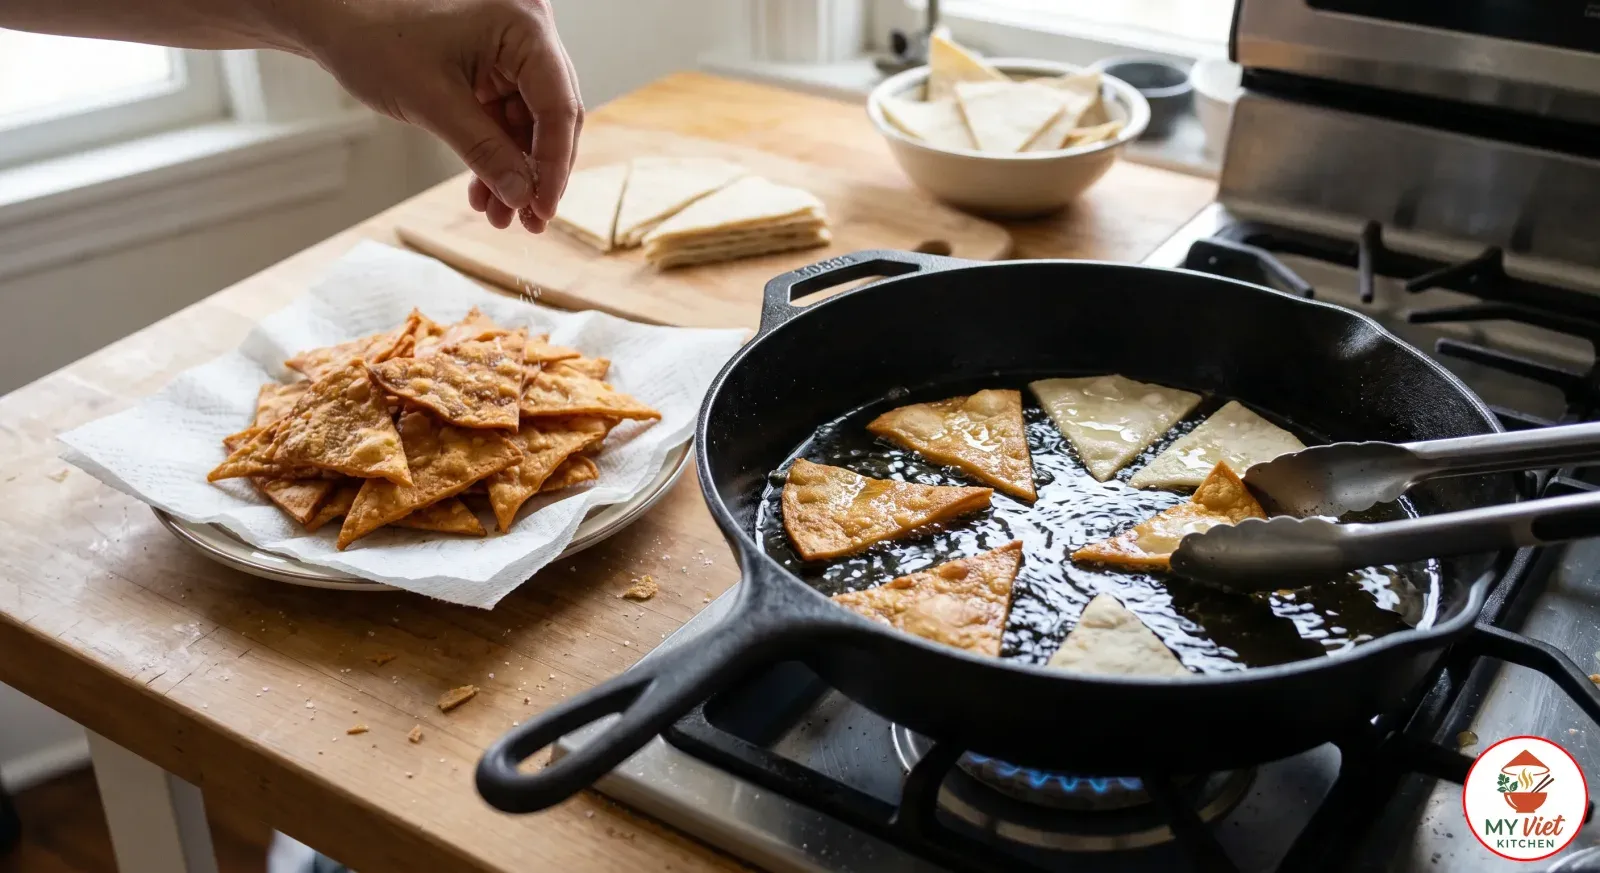
1 Cut each corn tortilla into 6 triangles, like slicing a pizza. If using fresh tortillas, spread the pieces on a baking sheet and let them air-dry for at least 30 minutes. This step removes surface moisture and gives you a crispier fry. However, stale tortillas from the day before can skip this drying step entirely.
Heat about half an inch of vegetable oil in a large heavy skillet over medium-high heat until it reaches 350 degrees Fahrenheit. Fry the tortilla pieces in small batches to avoid crowding the pan. Cook each batch for 2 to 3 minutes, flipping once, until they turn golden brown and feel rigid when lifted with tongs. Transfer the chips to a plate lined with paper towels. Season immediately with a light pinch of salt while the oil is still hot. The salt sticks better to warm, oily surfaces. Then set the chips aside while you prepare the salsa.
Step 2: Roast the Vegetables and Toast the Chiles
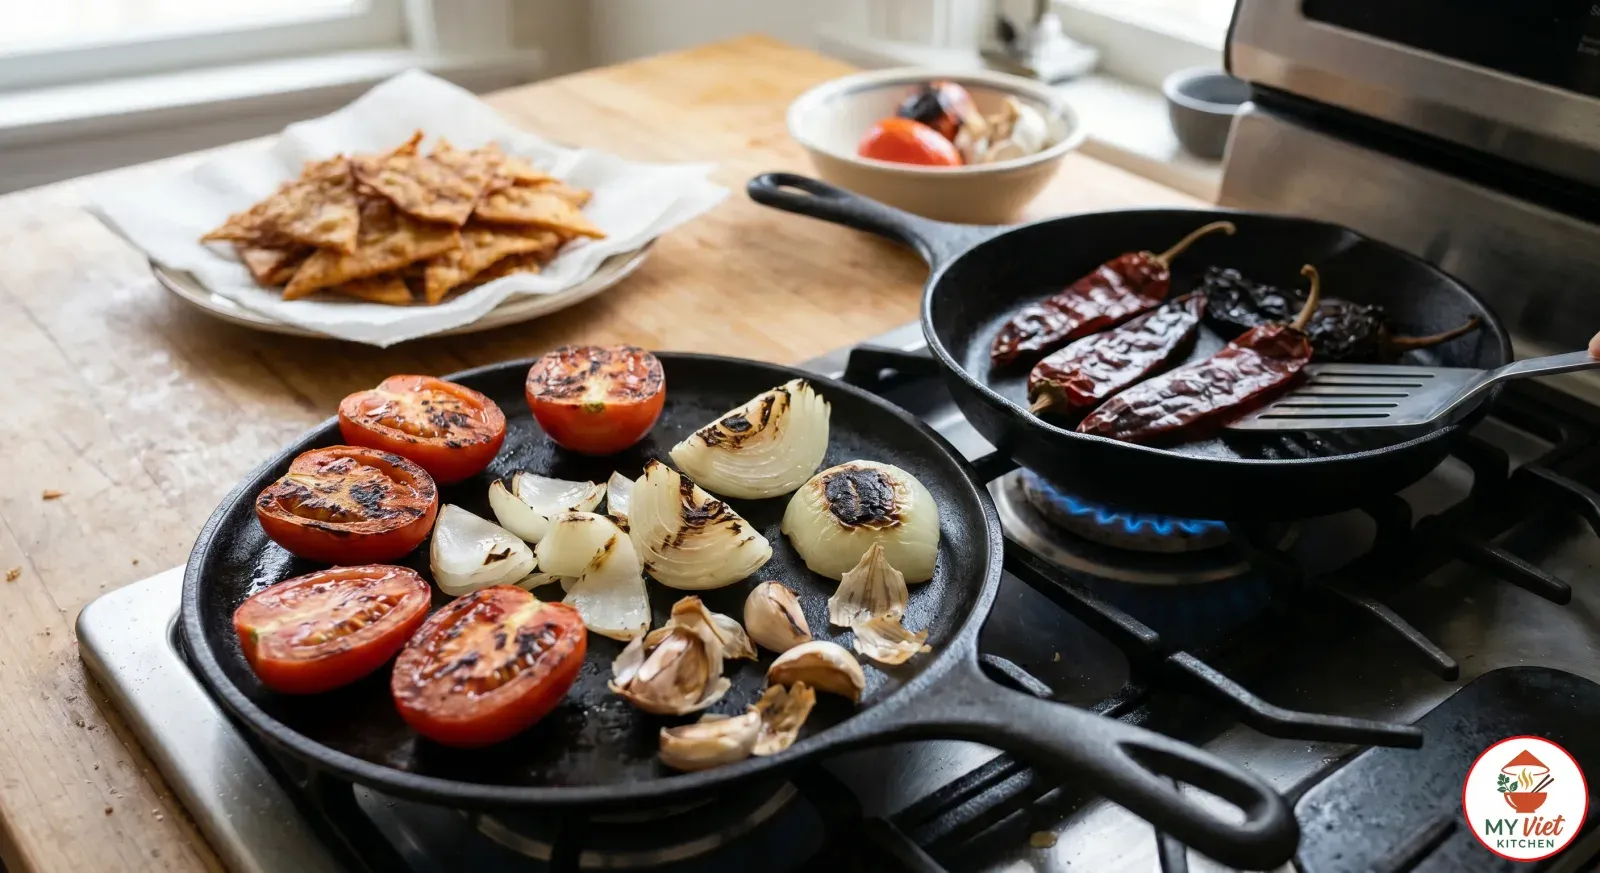
2 Place the halved Roma tomatoes cut-side down on a dry comal or cast-iron skillet over high heat. Add the roughly chopped onion and the unpeeled garlic cloves alongside them. Let them char without moving for 3 to 4 minutes. Then flip and char the other side. The goal is deep black spots and blistered skin. Because this charring step caramelizes the tomato sugars, it adds a smoky depth that raw tomatoes simply cannot provide.
In a separate dry skillet over medium heat, toast the stemmed and seeded guajillo and ancho chiles. Press them flat against the hot surface with a spatula. Toast for about 30 seconds per side until they puff slightly and release a warm, earthy aroma. Next, transfer them to a bowl of hot water. Let the chiles soak for 15 minutes until they become soft and pliable. Also, reserve a few tablespoons of the soaking liquid in case you need to thin the salsa later. Meanwhile, peel the charred garlic cloves and set all the roasted vegetables aside.
Step 3: Blend the Salsa Roja
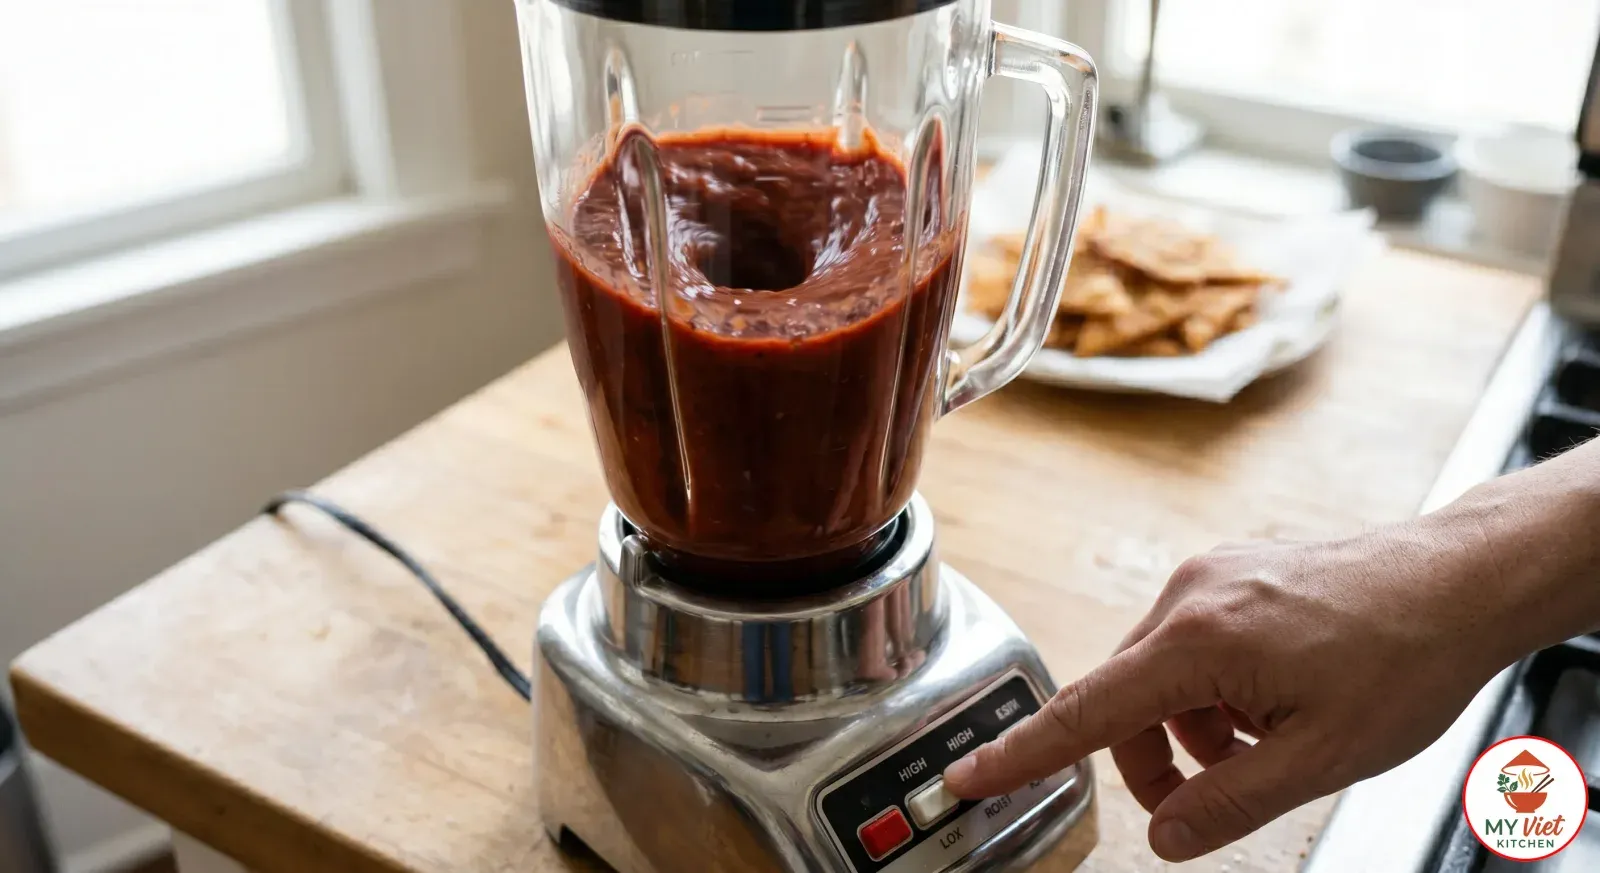
3 Transfer the charred tomatoes, roasted onion, peeled garlic, and drained chiles to a blender. Add the chicken broth, ground cumin, and dried Mexican oregano. Blend on high speed until smooth. This should take about 60 seconds. Then taste the salsa and add salt. It should taste vibrant and slightly smoky, with a nice balance of sweet tomato and earthy chile.
If the salsa seems too thick, add a tablespoon of the chile soaking liquid and blend again. For a silkier finish, strain it through a fine-mesh sieve. This straining step is optional but it does produce a more refined result. Ultimately, the salsa should pour easily from a spoon. You want enough body to coat the chips well.
Step 4: Fry and Simmer the Salsa
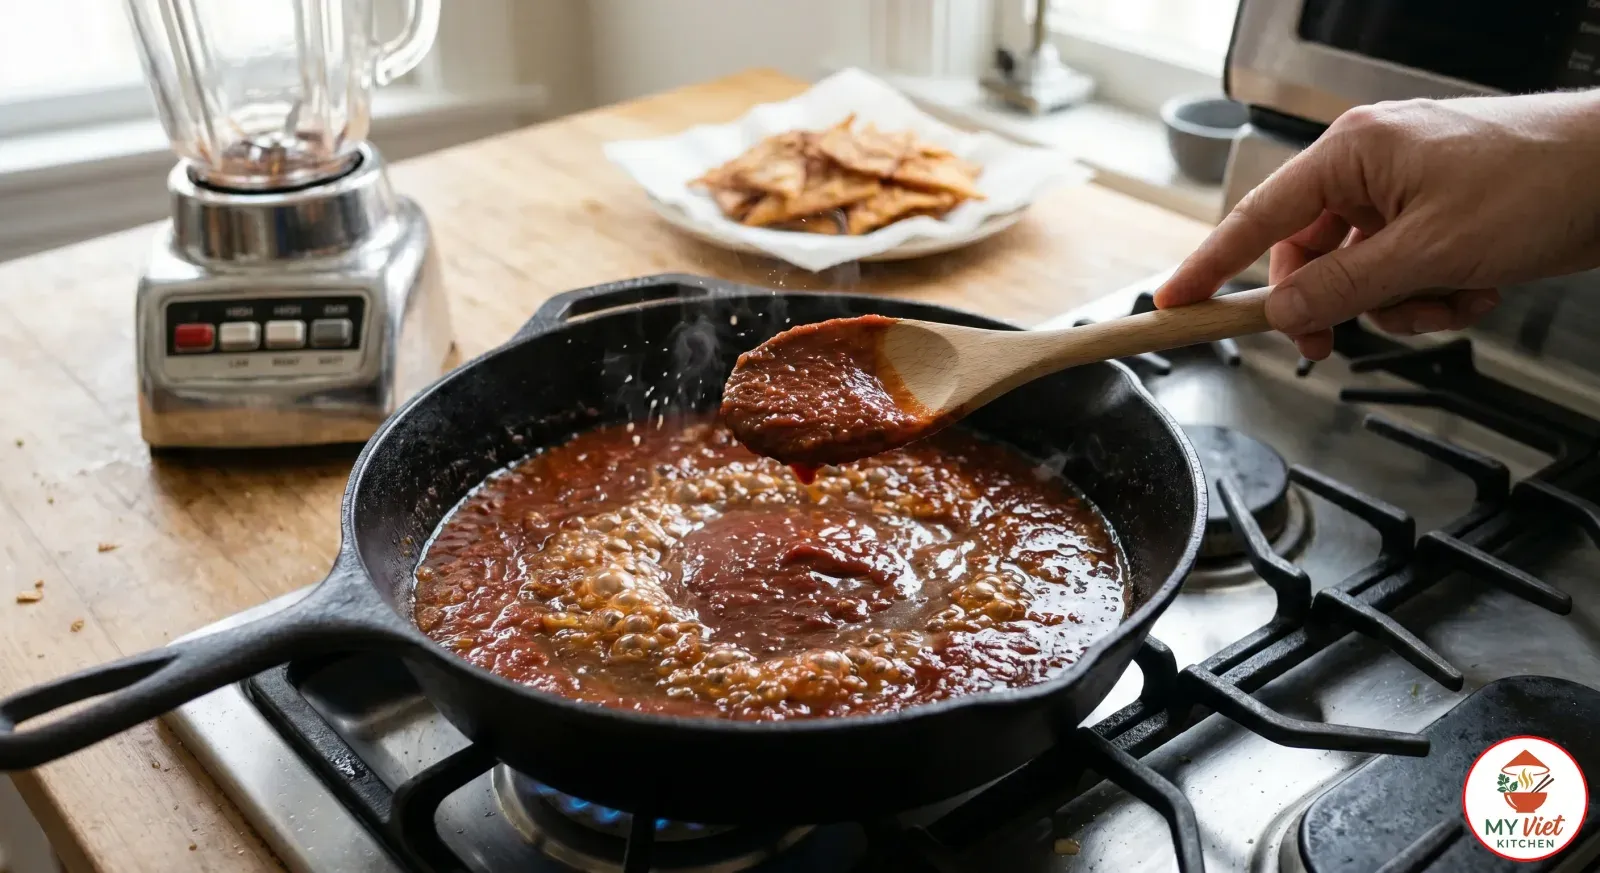
4 Heat one tablespoon of vegetable oil in a large, deep skillet over medium-high heat. When the oil shimmers, pour in the blended salsa all at once. It will sizzle and sputter, so stand back slightly. This “frying” step is essential in Mexican cooking because the heat removes the raw tomato taste. Additionally, it deepens the color from bright red to a rich, dark crimson.
Stir the salsa for the first minute to stop it from burning. Then reduce the heat to medium and let it simmer for 8 to 10 minutes. As a result, the salsa will thicken as the moisture cooks off. You will know it is ready when it coats the back of a wooden spoon and holds a line when you drag your finger across the spoon. Taste once more and adjust the salt. Indeed, this fried salsa is the soul of great chilaquiles. Rushing this step leads to a thin, flat result.
Step 5: Combine the Chips and Salsa, Then Serve
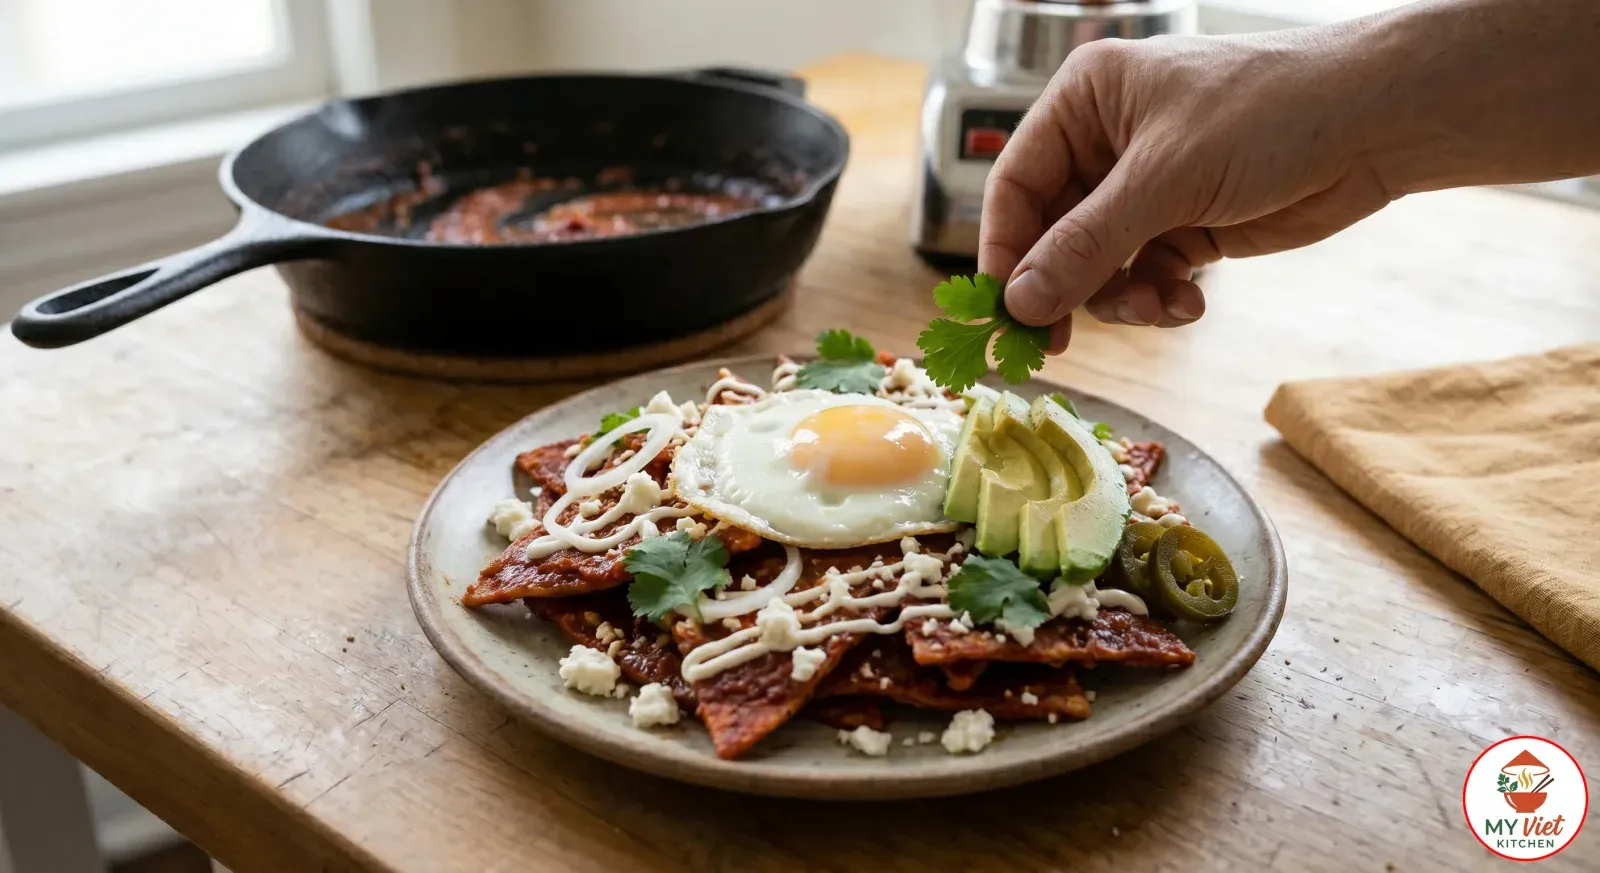
5 This final step demands speed and confidence. Add all the fried tortilla chips to the simmering salsa at once. Use a large spatula to fold the chips gently through the salsa. Every piece should get an even coat. Cook for just 1 to 2 minutes. The edges of the chips will soften and absorb the salsa while the centers remain delightfully crisp. This contrast is the defining characteristic of properly made chilaquiles.
Then transfer the chips to plates or a large platter right away. Top each plate with a fried egg, crumbled queso fresco, a drizzle of crema, sliced onion rings, avocado, and fresh cilantro. Also add pickled jalapeños for extra heat if you like. Serve without delay because chilaquiles wait for no one. Every minute on the plate lets the chips absorb more salsa. Eat them while the crunch still sings.
Expert Tips for Perfect Chilaquiles
Fry the Tortillas Until Deeply Golden
Underfrying is the most common reason chilaquiles turn soggy. Specifically, the chips need a deep golden color and a rigid texture out of the oil. Pale, bendable chips lack the strength to survive the salsa. So fry them until they snap cleanly when bent. This extra minute creates a stronger starch layer that blocks moisture. As a result, the chips maintain their satisfying crunch even after simmering in the salsa.
Always Fry the Salsa Before Adding Chips
Pouring raw blended salsa over the chips is a mistake many home cooks make. Instead, fry the salsa in hot oil before adding the chips. First, this step reduces the water and makes the flavor more intense. Second, the heat triggers the Maillard reaction, which creates hundreds of new flavor compounds. The gap between fried and unfried salsa is as wide as the gap between raw and roasted garlic. Ultimately, this 10-minute step transforms the entire dish.
Time the Assembly Precisely
Chilaquiles have a window of perfection that lasts just 3 to 5 minutes after assembly. During this time, the edges soften while the centers stay crispy. Before this window, the chips taste too dry. After it, they turn uniformly soft. Therefore, have all your toppings ready before you add the chips to the salsa. Work quickly, plate at once, and serve the moment the garnishes are in place. This urgency is not fussiness. Rather, it is the key to truly great chilaquiles.
Chilaquiles Rojos vs. Chilaquiles Verdes
The great debate in Mexican kitchens is whether red or green chilaquiles reign supreme. Both versions follow the same technique. The only difference is the salsa. Understanding what each version offers helps you choose the right one for your taste and occasion.
| Feature | Chilaquiles Rojos (Red) | Chilaquiles Verdes (Green) |
|---|---|---|
| Base Ingredients | Roasted tomatoes, guajillo and ancho chiles | Tomatillos, serrano or jalapeño peppers |
| Flavor Profile | Deep, earthy, mildly smoky, slightly sweet | Bright, tangy, herbaceous, sharper heat |
| Heat Level | Mild to medium | Medium to hot |
| Color | Dark crimson red | Vibrant green |
| Best Paired With | Fried eggs, queso fresco, crema | Shredded chicken, crema, avocado |
| Regional Popularity | Central and northern Mexico | Central and southern Mexico |
Serving Suggestions
Chilaquiles are traditionally a breakfast or brunch centerpiece. In Mexican homes, they arrive at the table as part of a spread that balances richness with freshness. The right accompaniments turn a plate of chilaquiles into a complete, satisfying meal.
Classic Accompaniments:
- Refried beans (frijoles refritos): A spoonful of creamy refried pinto or black beans alongside the chilaquiles adds protein and a smooth, earthy contrast. In Mexico, refried beans appear at nearly every breakfast table. They are as essential as the chilaquiles themselves.
- Mexican rice (arroz rojo): For a more substantial meal, serve tomato-flavored Mexican rice on the side. The rice absorbs any extra salsa on the plate and extends the dish into a full lunch or dinner portion.
- Sliced radishes and lime wedges: Fresh radish slices provide a peppery crunch that cuts through the rich salsa. A squeeze of lime brightens every bite. These raw garnishes add color and freshness to the plate.
- Warm corn tortillas on the side: Extra tortillas allow diners to scoop up bites of sauced chips, beans, and egg together. This is the traditional way to eat chilaquiles in many Mexican households.
Beverage Pairings:
- Cafe de olla: This traditional Mexican cinnamon-spiced coffee is the classic companion to chilaquiles. The warm spice notes complement the earthy dried chiles in the salsa. Brew it strong and sweeten with piloncillo for an authentic experience.
- Agua de horchata: This creamy rice and cinnamon drink cools the palate between bites. The mild sweetness balances the spice of the salsa perfectly. Serve it ice-cold for maximum refreshment.
- Fresh-squeezed orange juice: The bright acidity of orange juice provides a clean counterpoint to the rich, fatty elements of the dish. Many Mexican breakfast spots serve it alongside every plate of chilaquiles.
- Michelada: For a weekend brunch, this Mexican beer cocktail with lime juice, hot sauce, and Worcestershire sauce is an indulgent match. The savory, spicy beer pairs exceptionally well with the bold flavors of chilaquiles rojos.
Storage and Reheating
Refrigerator: Store leftover chilaquiles in an airtight container in the refrigerator for up to 2 days. Of course, the chips will keep absorbing salsa in storage, so the texture will soften fully. Interestingly, many Mexican families actually prefer this softer version the next morning. The salsa alone keeps for up to 5 days in the fridge and tastes even better after the flavors have had time to meld overnight.
Freezer: Freeze the salsa roja separately in airtight containers for up to 3 months. However, do not freeze assembled chilaquiles because the chips lose all texture when thawed. Instead, freeze only the salsa and fry fresh chips when you are ready to serve. This approach gives you a head start on future batches while preserving the quality of the finished dish.
Reheating: Warm leftover assembled chilaquiles in a skillet over medium heat. Add a tablespoon of water or broth to loosen the thickened salsa. The chips will be entirely soft at this point, which creates a different but still delicious texture. For the best experience, reheat only the salsa and combine it with freshly fried chips right before serving.
Common Mistakes to Avoid
1. Using Flour Tortillas Instead of Corn
Flour tortillas turn gummy and pasty when cooked in salsa. They lack both the structure and the corn flavor that define authentic chilaquiles. In contrast, corn tortillas have a starch makeup that lets them crisp up during frying and then soften slowly in the salsa. Always use corn tortillas for this recipe. There is simply no good flour substitute.
2. Simmering the Chips Too Long in the Salsa
The most common mistake is leaving the chips in the salsa too long. After 2 minutes, they start losing their crispy centers. After 5 minutes, they go fully soft. Yet chilaquiles should have a clear contrast between soft edges and a crispy core. So toss the chips in the salsa fast and plate right away. Speed matters more than precision here.
3. Skipping the Salsa Frying Step
Pouring raw salsa over the chips leads to a watery, flat result. Instead, fry the salsa in hot oil before assembly. This key Mexican technique is called “refrying.” It cuts the water, boosts the flavor, and builds new aroma through the Maillard reaction. As a result, a good salsa becomes an exceptional one. Never skip it.
4. Overcrowding the Pan When Frying Chips
Dropping too many tortilla pieces into the oil at once lowers the heat fast. Instead of crisping, the chips soak up oil and turn greasy. So fry in small batches with plenty of space between pieces. The oil should keep a steady sizzle the whole time. Work through the batches with patience. Eventually, you will have a full plate of golden, crispy chips.
Frequently Asked Questions
What is the difference between chilaquiles and nachos?
Despite both starting with tortilla chips, these are entirely different dishes. Chilaquiles involve simmering fried tortilla pieces in salsa until they partly soften, then topping them with crema, cheese, and eggs. By contrast, nachos are a Tex-Mex snack where chips get melted cheese and cold toppings. The technique, flavor depth, and cultural context differ completely. Chilaquiles are a traditional Mexican breakfast with centuries of history. Nachos are a modern snack food invented at a restaurant near the Texas border in 1943.
What is the difference between chilaquiles rojos and chilaquiles verdes?
The key difference lies in the salsa. Chilaquiles rojos use a red salsa made from dried chiles and roasted tomatoes. This version is earthy, mildly smoky, and slightly sweet. On the other hand, chilaquiles verdes use a green salsa from tomatillos, serrano peppers, and cilantro. The green version is tangier, brighter, and generally spicier. Both variations follow the same technique of simmering fried chips in the salsa. In Mexico, the choice between rojos and verdes is a deeply personal preference that often sparks friendly debate.
Can I use store-bought tortilla chips for chilaquiles?
Store-bought chips work in a pinch. However, the results differ from homemade. Choose thick, unseasoned chips. Thin or heavily flavored chips break apart too fast and add odd flavors to the salsa. Frying your own from corn tortillas takes just 10 minutes and gives a much better texture. If convenience matters most, store-bought chips are fine. But if quality matters most, fry your own.
Are chilaquiles a breakfast or dinner dish?
Traditionally, chilaquiles are a morning meal in Mexico. They rank among the most popular breakfast dishes in the country. However, there are no strict rules. Restaurants serve them all day long. Similarly, many families enjoy them for a casual dinner. Adding shredded chicken, pulled pork, or steak turns chilaquiles into a heartier dish for lunch or dinner. The beauty of this recipe is its fit for any meal.
How do I keep chilaquiles from getting soggy?
Three factors control the texture. First, fry the chips until they are deeply golden and rigid. Pale chips soak up salsa too fast. Second, use a thick salsa rather than a thin, watery one. Third, combine the chips and salsa only when you are ready to serve. Then plate within 2 minutes. Speed is the best weapon against sogginess. So have all toppings prepped before you add the chips to the pan.
What type of tortillas are best for chilaquiles?
Corn tortillas are the only good choice. Use standard yellow or white corn tortillas. Day-old ones that have dried out produce the crispiest results. If you only have fresh tortillas, let them air-dry for 30 minutes or put them in a low oven before cutting and frying. Flour tortillas should never be used for this dish because they absorb too much moisture and turn gummy.
Variations and Adaptations
Chilaquiles Verdes:
Simply replace the red salsa with a tangy green version. First, boil 1 pound of tomatillos until soft. Then blend them with 2 serrano peppers, half an onion, a clove of garlic, and fresh cilantro. Fry the green salsa in the same way as the red one. The resulting chilaquiles taste brighter and more herbaceous. Top with shredded chicken and avocado slices for the classic green chilaquiles experience found throughout central Mexico.
Chilaquiles with Shredded Chicken:
Add 2 cups of shredded poached chicken to the salsa before tossing in the tortilla chips. Because the chicken absorbs the salsa flavors, it also adds solid protein to the dish. This variation transforms breakfast chilaquiles into a hearty lunch or dinner. Use bone-in, skin-on chicken thighs poached in seasoned broth for the most flavorful shredded meat. Consequently, you get a more complete meal that satisfies bigger appetites.
Baked Chilaquiles (Oven Method):
For a hands-off approach, layer the fried tortilla chips and salsa in a baking dish. Top with shredded cheese and bake at 375 degrees Fahrenheit for 15 minutes. The cheese melts over the top and creates a bubbly, golden crust. This method produces softer chilaquiles overall, but it is convenient for feeding a crowd. Prepare the dish the night before and refrigerate it. Then bake it in the morning for an effortless weekend brunch.
Vegetarian and Vegan Chilaquiles:
For this version, swap the chicken broth for vegetable broth. Also, skip the egg and crema for a fully vegan dish. Top instead with mashed avocado, pickled red onions, and a squeeze of lime juice. Additionally, nutritional yeast adds a cheesy flavor without dairy. Black beans on the side provide the protein. This plant-based take loses none of the bold salsa flavor that makes chilaquiles so tasty.
The Cultural Significance of Chilaquiles
Chilaquiles represent the heart of Mexican home cooking philosophy: nothing goes to waste, and simplicity yields greatness. The dish lives by the Mexican motto “no se tira nada” — nothing goes to waste. Day-old tortillas, leftover salsa, and scraps of cheese turn into a dish that people crave. This resourcefulness is not born from need alone. Rather, it reflects a deep respect for food and a wisdom that turns the ordinary into the extraordinary. In Mexican culture, the best cooks are often judged not by elaborate dishes but by how well they prepare the everyday ones. Chilaquiles are the ultimate test.
Across Mexico, chilaquiles serve as a social equalizer. They appear in humble street market stalls, in middle-class breakfast nooks, and on the menus of upscale restaurants in Mexico City. According to Taste Atlas, chilaquiles consistently rank among the best-rated breakfast dishes in the world. Regional variations abound. Oaxacan cooks use mole negro instead of salsa. In Sinaloa, green chilaquiles come topped with fresh cheese curds. Meanwhile, Guadalajara insists on a fried egg as an absolutely non-negotiable topping. These regional differences reflect the incredible diversity of Mexican cuisine. Yet every version shares the same soul: crispy tortillas, bold salsa, and the warmth of a meal made with care. Explore more of our Mexican dishes collection to discover the rich flavors of this extraordinary cuisine.
Conclusion
Chilaquiles prove that the most satisfying dishes often come from the simplest ingredients. Corn tortillas, dried chiles, tomatoes, and a few fresh toppings create a breakfast that is bold, beautiful, and rooted in Mexican tradition. The technique is clear once you know the key steps: fry the chips until deeply golden, roast every part of the salsa, fry the blended salsa to make it thick, and combine everything at the last moment. Master these steps and you will make chilaquiles that rival any Mexican breakfast spot.
Ready to explore more iconic dishes from around the world? Check out our collection of international recipes for dishes like feijoada, goulash, and carbonara. If you try this chilaquiles recipe, share your experience and leave a rating in the comments below.