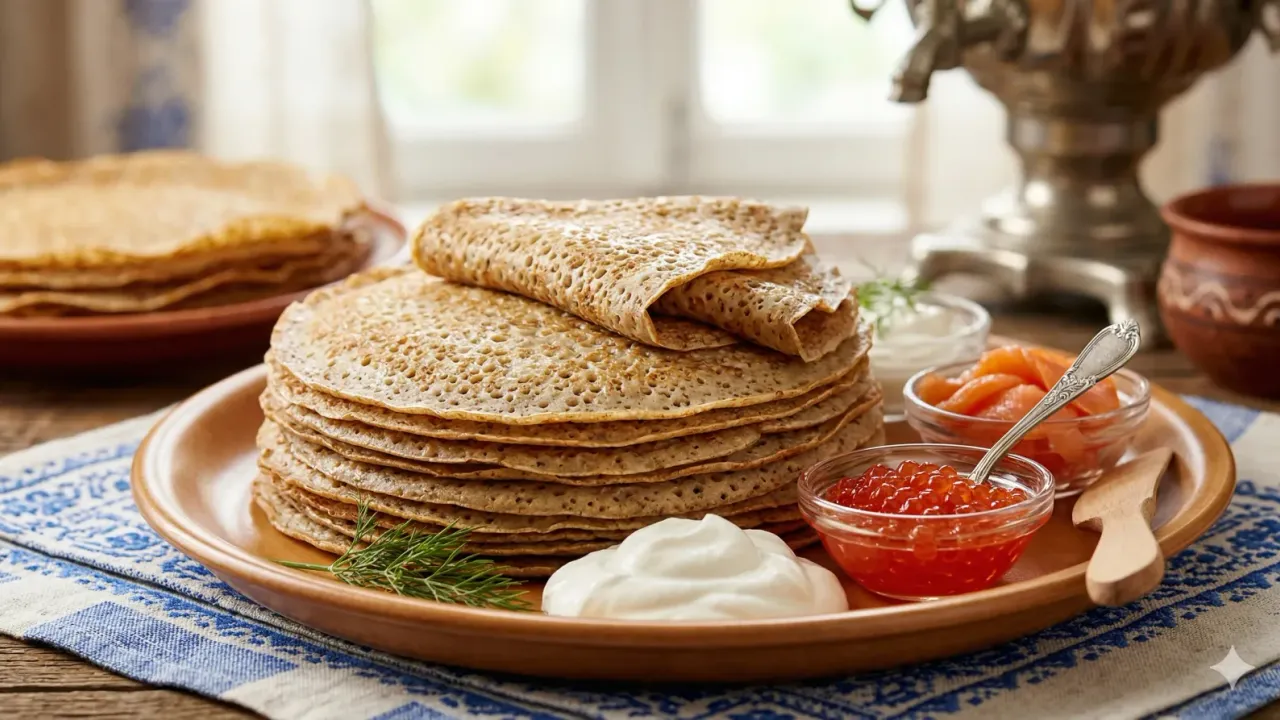
Blini are one of Russia’s most treasured culinary traditions. These light, fluffy buckwheat pancakes have graced Russian tables for centuries. Moreover, they remain a beloved centerpiece during Maslenitsa, the Russian festival that celebrates the end of winter. This blini recipe teaches you to make authentic yeasted buckwheat pancakes at home. The result is a golden, slightly tangy pancake that pairs beautifully with sour cream, caviar, or smoked salmon.
Prep Time: 20 minutes | Cook Time: 25 minutes | Rising Time: 1.5 hours | Servings: 4 (about 20 blini)
Difficulty: Medium | Calories: ~280 per serving
What Makes Blini Special?
Blini stand apart from every other pancake in the world for one simple reason: yeast. Unlike American pancakes or French crepes, blini rely on a slow yeast rise. This fermentation gives them a subtle tang. It also creates a texture that is both airy and slightly chewy. Furthermore, the buckwheat flour adds an earthy, nutty depth you will not find in wheat-only batters. Each bite carries centuries of Russian tradition.
The shape of blini carries deep meaning in Russian culture. Their round, golden form once symbolized the sun during pagan Slavic festivals. Today, they remain the star of Maslenitsa, the festive week before Lent. During this celebration, families cook hundreds of blini. They serve them with every meal. In fact, the saying goes that the first blini is always lumpy. This proverb has become a Russian expression for any clumsy first attempt.
What truly makes this blini recipe special is the combination of buckwheat and all-purpose flour. Pure buckwheat batter can feel heavy and crumbly. However, blending it with white flour creates a balance of flavor and structure. Additionally, folding in whipped egg whites lifts the batter to a pillowy lightness. As a result, you get a pancake that tastes rich yet feels delicate on the tongue. The history of blini stretches back over a thousand years, making them one of the oldest prepared foods in Eastern Europe.

Choosing the Right Buckwheat Flour
Buckwheat flour is the soul of authentic blini. However, not all buckwheat flour behaves the same way. The type you choose affects both flavor and texture. Here are your best options for making perfect blini at home.
- Light buckwheat flour (best choice): This flour comes from hulled buckwheat groats. It has a mild, nutty taste and a lighter color. Therefore, it produces blini with a delicate flavor that does not overpower the toppings. Most Russian grandmothers prefer this type for classic blini.
- Dark buckwheat flour: Made from unhulled groats, this flour has a stronger, more robust flavor. It also contains more fiber and nutrients. Besides the deeper taste, it gives blini a darker speckled look. Use it if you want a heartier, more rustic pancake.
- Home-ground buckwheat: Grinding raw buckwheat groats in a blender gives you the freshest flour possible. Consequently, the flavor is brighter and more aromatic. Meanwhile, the texture may be slightly coarser. Sift it through a fine mesh strainer before using it in the batter.
Ingredients for Blini
Blini Batter:
- 1 cup buckwheat flour
- 1 cup all-purpose flour
- 1 1/2 cups warm whole milk (105-110F)
- 1/2 cup warm water
- 2 large eggs, separated
- 2 teaspoons active dry yeast
- 1 tablespoon granulated sugar
- 1/2 teaspoon salt
- 2 tablespoons unsalted butter, melted and cooled
For Cooking:
- 2 tablespoons unsalted butter, melted (for brushing the pan)
- Additional melted butter for brushing cooked blini
Classic Toppings:
- Sour cream (smetana)
- Smoked salmon, thinly sliced
- Red or black caviar
- Fresh dill sprigs
- Pickled onions or capers (optional)
Pro tip: Warm milk is essential for activating the yeast. However, milk that is too hot will kill the yeast and flatten your blini. Therefore, always test the temperature on the inside of your wrist. It should feel comfortably warm, not hot. Aim for 105 to 110 degrees Fahrenheit for the best rise.
Step-by-Step Instructions
Step 1: Activate the Yeast
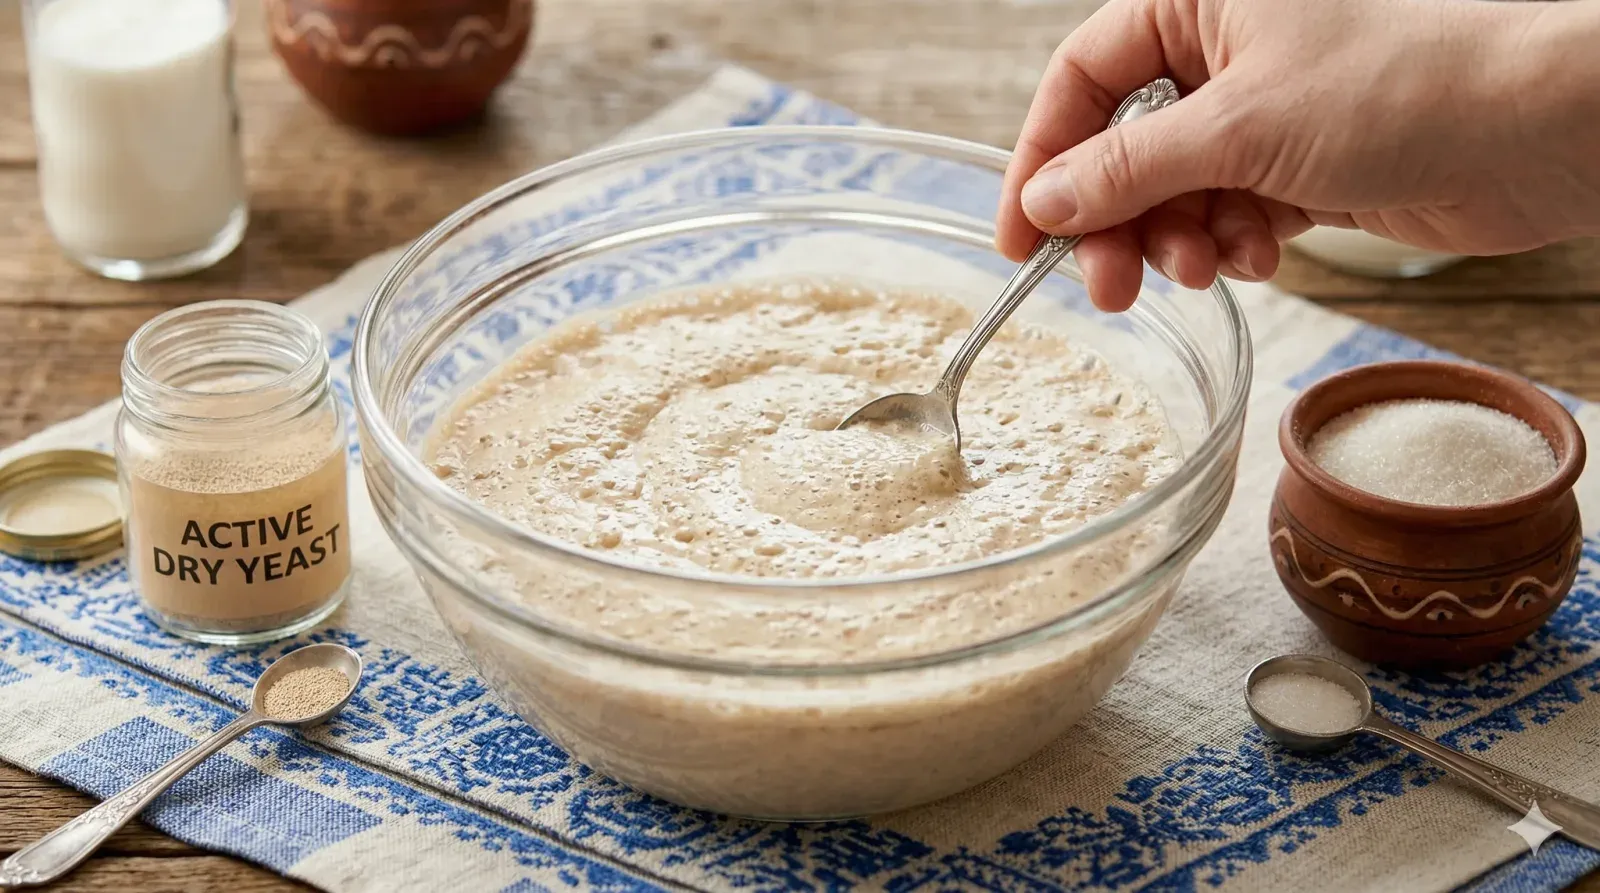
1 Pour the warm water into a small bowl. Add the sugar and stir until dissolved. Sprinkle the yeast over the surface. Let it sit undisturbed for 10 minutes. The mixture should become foamy and bubbly. If nothing happens, your yeast is dead. In that case, start over with fresh yeast. This step takes just a few minutes. However, it is the foundation of the entire recipe.
Step 2: Mix the Batter
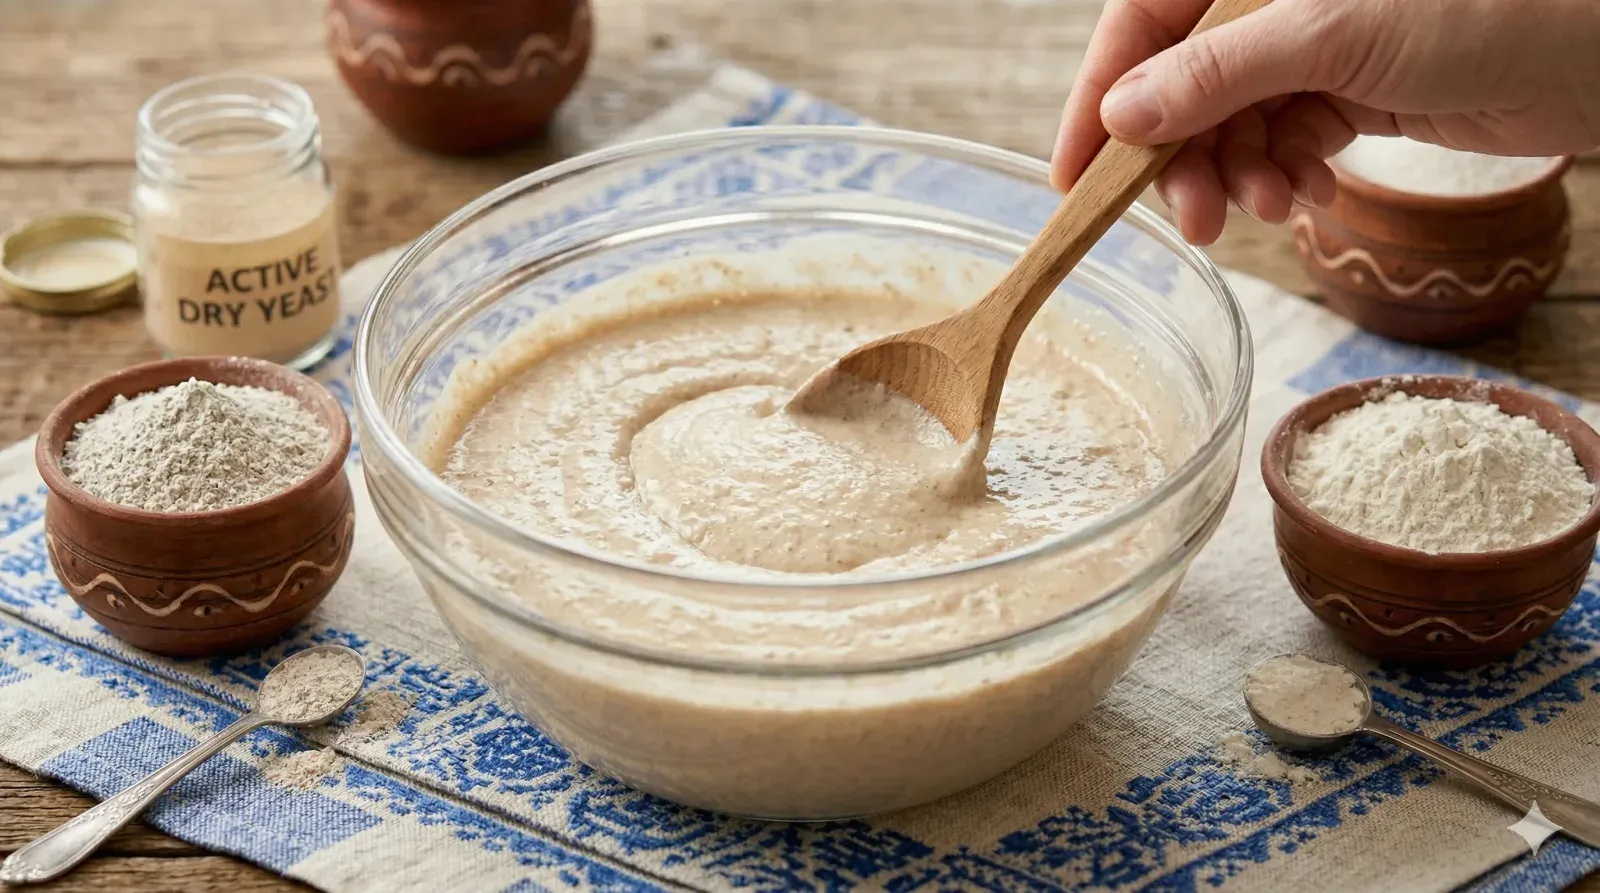
2 Whisk the buckwheat flour and all-purpose flour together in a large mixing bowl. Make a well in the center. Pour in the warm milk, foamy yeast mixture, egg yolks, melted butter, and salt. Stir with a wooden spoon until the batter is smooth. It should have the thickness of heavy cream. Additionally, scrape down the sides of the bowl to catch any dry pockets of flour.
The batter may look slightly grainy at this stage. That is perfectly normal for buckwheat. Furthermore, the yeast will break down those particles during the rise. Do not worry about small lumps. They will disappear as the batter ferments.
Step 3: Let the Batter Rise
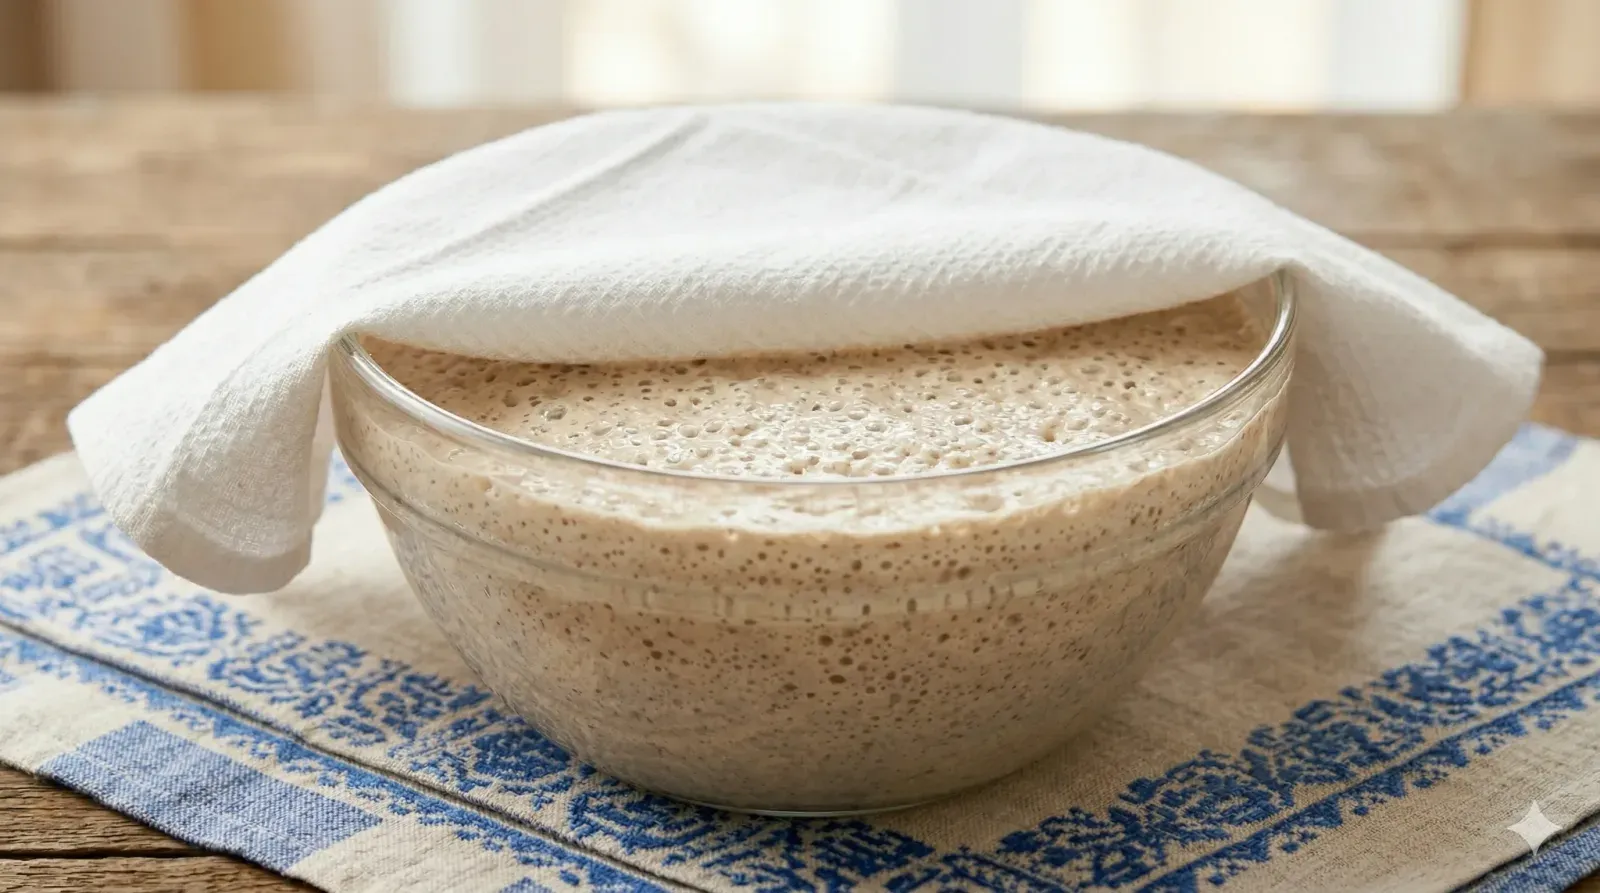
3 Cover the bowl with a clean kitchen towel or plastic wrap. Place it in a warm, draft-free spot. Let the batter rise for 1 to 1.5 hours. It should double in size and look bubbly on top. The fermentation process is what separates blini from ordinary pancakes. Consequently, do not rush this step. The longer rise develops a subtle tanginess.
If your kitchen is cool, try this trick. Turn your oven on to 200 degrees Fahrenheit for 2 minutes. Then turn it off. Place the covered bowl inside the warm oven. This creates a perfect rising environment. Meanwhile, you can prepare your toppings and set the table.
Step 4: Fold in the Egg Whites
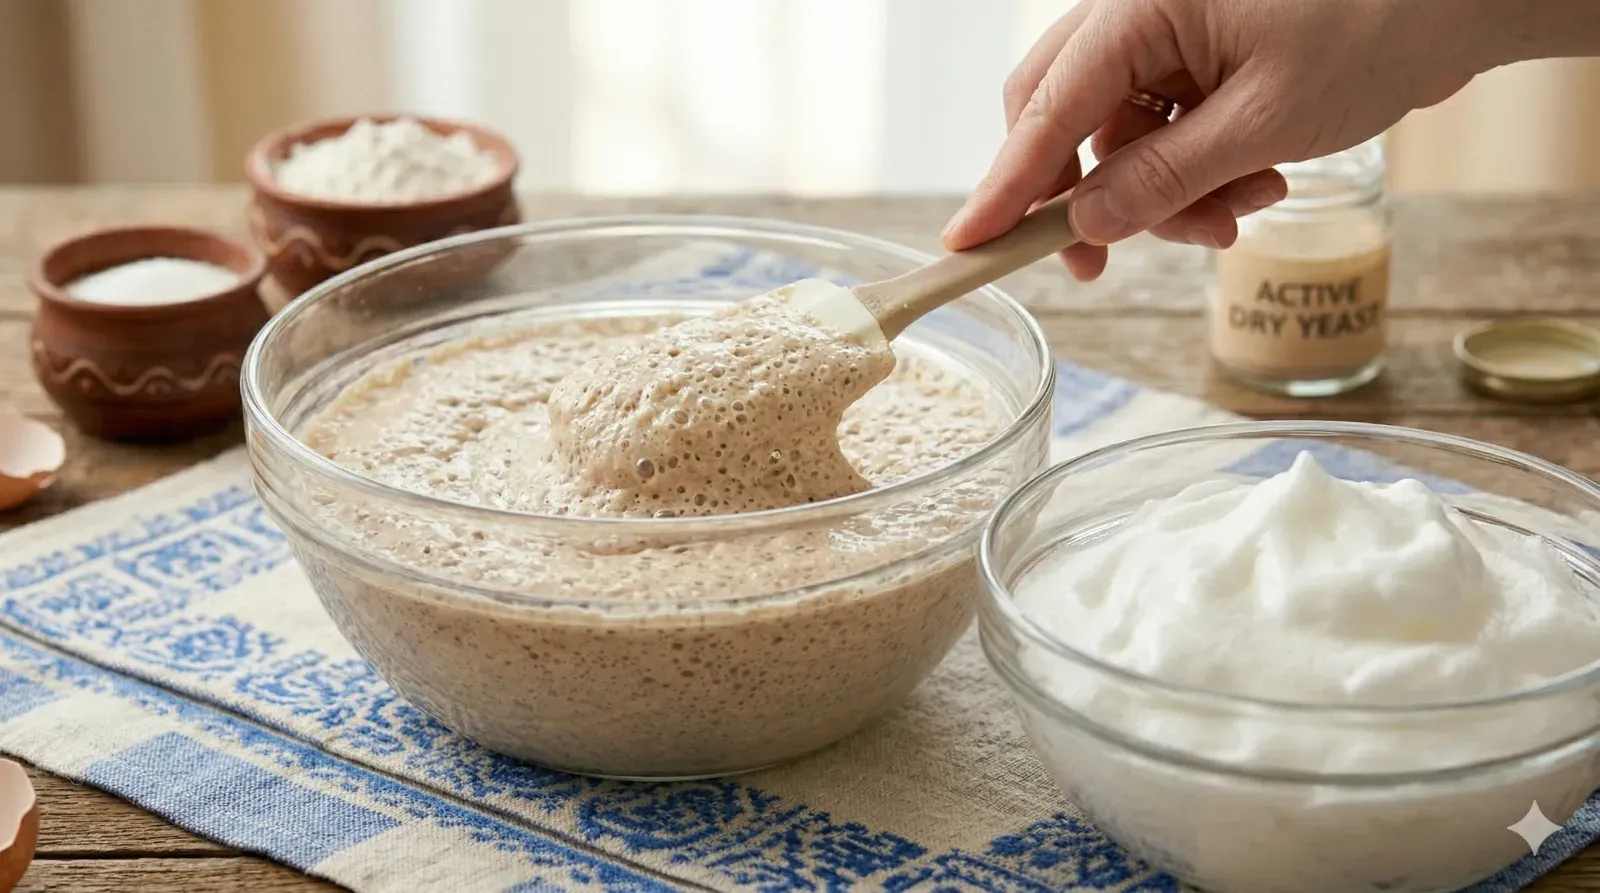
4 Beat the egg whites in a clean bowl with a pinch of salt. Use an electric mixer or a whisk. Beat until stiff peaks form. The whites should hold their shape when you lift the beater. Now gently fold them into the risen batter. Use a rubber spatula and make slow, sweeping motions from bottom to top. Do not stir or whisk. This step adds airiness. Therefore, treat the batter with care.
The folding technique matters greatly here. Think of it like mixing clouds into the batter. Similarly, each fold should lift the heavier batter over the whites. Stop folding when you see just a few white streaks remaining. A slightly uneven batter is better than an overmixed one. As a result, your blini will puff up beautifully on the pan.
Step 5: Cook the Blini
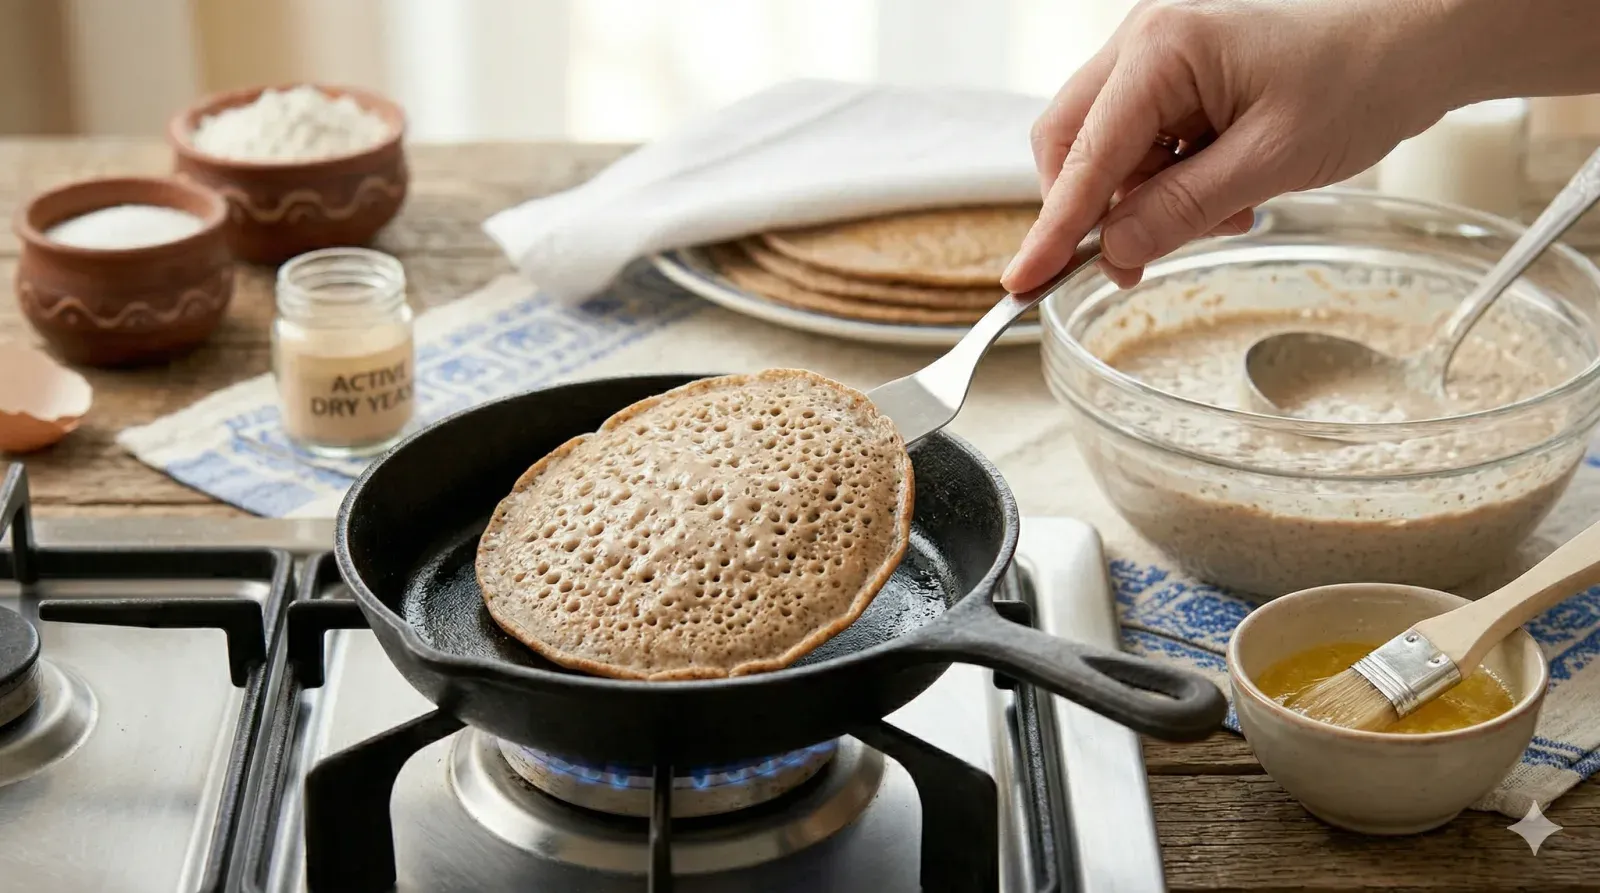
5 Heat a non-stick skillet or well-seasoned cast-iron pan over medium heat. Brush the surface with melted butter. Pour about 2 tablespoons of batter for each blini. Cook for approximately 2 minutes. Watch for small bubbles forming across the surface. When the edges look set and the bottom turns golden, flip the blini. Cook for 1 more minute on the other side.
Brush each cooked blini with a little melted butter while it is still warm. Stack them on a plate and cover with a clean towel. This keeps them soft and pliable. Besides keeping moisture in, the towel traps heat so the blini stay warm. Cook the remaining batter in batches. Likewise, brush the pan with fresh butter before each new round.
Step 6: Serve with Toppings
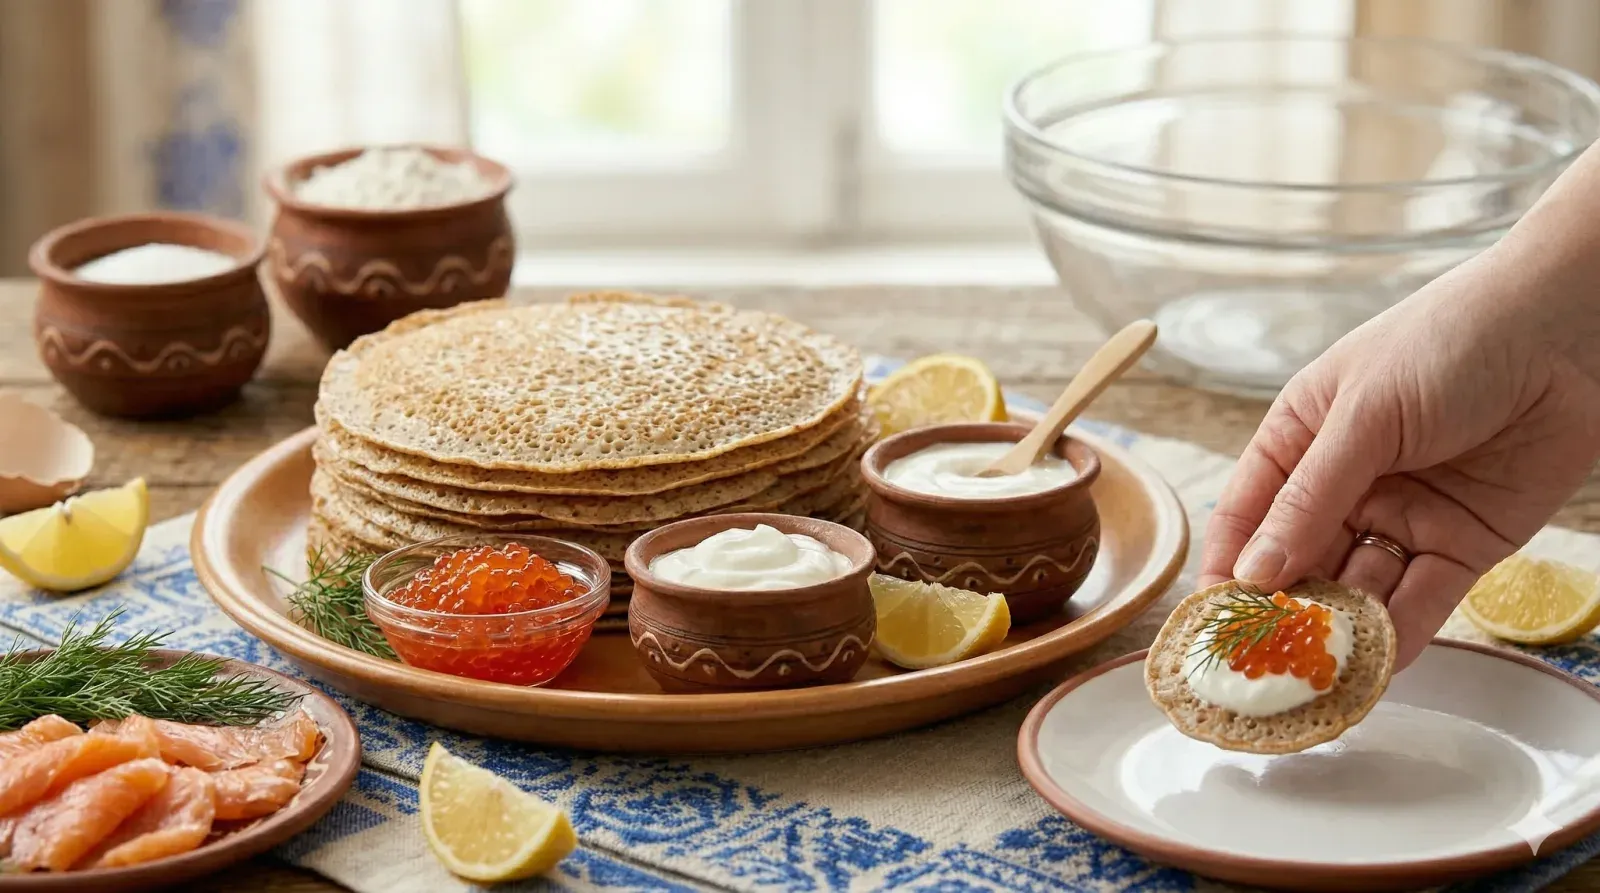
6 Arrange the warm blini on a serving platter. Set out bowls of sour cream, smoked salmon, and caviar. Let your guests build their own combinations. For an elegant presentation, fold each blini in half or roll it into a cone. Garnish with fresh dill sprigs. In addition, a squeeze of lemon juice brightens the flavors. Serve immediately for the best taste and texture.
Expert Tips for Perfect Blini
Control the Heat Carefully
Medium heat is your best friend when cooking blini. A pan that is too hot will burn the outside before the inside cooks through. Conversely, a pan that is too cool will dry out the batter. The ideal temperature allows the blini to turn golden in about 2 minutes per side. If the first blini browns in under a minute, lower the heat immediately.
Use Room Temperature Ingredients
Cold eggs and milk slow down the yeast. Therefore, take all your dairy and eggs out of the fridge 30 minutes before you start. Room temperature ingredients mix more evenly. They also help the yeast work faster. As a result, your batter rises in the expected time frame.
Do Not Overmix After the Rise
Once the batter has risen, handle it gently. Stirring vigorously knocks out the gas bubbles that yeast created. Instead, fold in the egg whites with minimal strokes. Likewise, scoop the batter from the bowl carefully when pouring onto the pan. Those bubbles are what make your blini light and fluffy.
Blini vs. Other Pancakes: A Regional Comparison
Pancakes appear in nearly every food culture. However, each version reflects its region’s ingredients and traditions. Here is how blini compare to other popular pancakes around the world.
| Feature | Russian Blini | French Crepes | American Pancakes | Dutch Pannenkoeken |
|---|---|---|---|---|
| Leavening | Yeast | None | Baking powder | None or minimal |
| Key Flour | Buckwheat blend | All-purpose wheat | All-purpose wheat | All-purpose wheat |
| Thickness | Medium, fluffy | Paper-thin | Thick, fluffy | Thin to medium |
| Flavor Profile | Nutty, tangy | Mild, buttery | Sweet, neutral | Mild, egg-rich |
| Rising Time | 1-1.5 hours | 30 min rest | None | None |
| Typical Serving | Savory toppings | Sweet or savory | Sweet toppings | Sweet or savory |
Serving Suggestions
Russian blini shine brightest when served fresh and warm. Traditionally, they come to the table in a tall stack. Each person takes a blini and adds their favorite toppings. In Russia, the serving ritual is part of the experience. For example, a proper blini spread includes both savory and sweet options so guests can try many combinations.
The Perfect Accompaniments:
- Sour cream (smetana): This is the most essential blini topping. The cool tanginess of sour cream balances the warm, nutty buckwheat flavor.
- Smoked salmon: Thinly sliced smoked salmon draped over a blini creates an elegant appetizer. Add a tiny dollop of sour cream and a dill sprig.
- Caviar: Red salmon roe or black sturgeon caviar turns blini into a luxurious treat. The salty pop of caviar against the soft pancake is unforgettable.
- Pickled herring: A traditional pairing in Russian households. The brininess of herring complements the earthy buckwheat beautifully.
- Honey and jam: For sweet blini, drizzle with honey or spread a thin layer of berry jam. Condensed milk is another beloved Russian option.
Beverage Pairings:
- Russian tea from a samovar: Strong black tea with sugar or jam is the classic non-alcoholic pairing for blini.
- Chilled vodka: A small glass of ice-cold vodka alongside savory blini with caviar is a quintessentially Russian combination.
- Sparkling wine or champagne: The bubbles and acidity cut through the richness of sour cream and smoked salmon.
- Kefir or buttermilk: These tangy fermented drinks complement the fermented flavor of the yeast batter.
Storage and Reheating
Refrigerator: Store cooked blini in an airtight container with parchment paper between layers. They keep well for up to 3 days. However, the texture is best within the first day. The yeast flavor deepens slightly as they sit.
Freezer: Blini freeze exceptionally well for up to 2 months. Lay them flat on a baking sheet and freeze until solid. Then stack them in a freezer bag with parchment between each one. This prevents sticking. Consequently, you can pull out exactly the number you need.
Reheating: Warm blini in a dry skillet over medium-low heat for about 30 seconds per side. Alternatively, wrap a stack in foil and heat in a 300F oven for 8 to 10 minutes. The microwave works in a pinch, but it can make them slightly rubbery. Instead, use the skillet method for the best results.
Common Mistakes to Avoid
1. Killing the Yeast with Hot Liquid
Yeast dies at temperatures above 120 degrees Fahrenheit. Therefore, always check that your milk and water are warm but not hot. Use a kitchen thermometer if you are unsure. The ideal range is 105 to 110 degrees. Dead yeast means flat, dense blini with no rise at all.
2. Skipping the Egg White Step
Some recipes skip the whipped egg whites entirely. Although this saves time, it costs you texture. The beaten whites create pockets of air throughout the batter. Without them, blini turn out denser and heavier. For the lightest, fluffiest result, always take the extra five minutes to whip and fold.
3. Cooking on High Heat
High heat scorches the delicate buckwheat batter fast. The outside burns while the inside stays raw. Instead, keep your burner on medium. Patience is key. Each blini needs about 2 minutes per side. Golden brown, not dark brown, is the target color. Adjust the heat as you go because the pan gets hotter over time.
4. Deflating the Risen Batter
After the batter rises, resist the urge to stir it vigorously. That beautiful, bubbly batter holds gas from the fermentation. Aggressive stirring releases those bubbles. Consequently, your blini lose their signature lightness. Fold in the egg whites gently. Scoop the batter softly when pouring onto the pan.
Frequently Asked Questions
What is the difference between blini and regular pancakes?
Blini use yeast as a leavening agent, while regular pancakes rely on baking powder. Traditional blini also contain buckwheat flour. This gives them a nutty, earthy flavor that standard pancakes lack. Additionally, blini batter must rise for 1 to 1.5 hours before cooking. The fermentation creates a tangy depth of flavor you simply cannot get from a quick batter.
Can I make blini without buckwheat flour?
You can substitute all-purpose flour for buckwheat flour. However, the result will taste different from traditional Russian blini. Buckwheat gives blini their signature earthy, nutty character. If buckwheat is unavailable, whole wheat flour works as a closer substitute. It provides some of that hearty flavor, though not the same distinctive taste.
What are the best toppings for blini?
Classic Russian toppings include sour cream, red or black caviar, smoked salmon, pickled herring, and melted butter. For sweet versions, try jam, honey, condensed milk, or fresh berries with whipped cream. The earthy buckwheat flavor pairs especially well with rich, savory toppings. In fact, a simple smear of sour cream and a few grains of caviar is the most traditional combination.
Why are my blini not fluffy?
Flat blini usually come from dead yeast or deflated egg whites. First, make sure your yeast is fresh. Check that the water temperature stays between 105 and 110 degrees Fahrenheit. Second, fold the whipped egg whites into the batter gently. Stirring too hard pushes out the air. As a result, the blini become dense instead of light.
How long does blini batter need to rise?
The batter needs 1 to 1.5 hours in a warm spot to double in size. The ideal rising temperature is around 75 to 80 degrees Fahrenheit. If your kitchen is cold, place the bowl near a warm oven. The batter is ready when it looks bubbly and has clearly grown. Besides visual cues, you may notice a pleasant, yeasty aroma.
Can I prepare blini batter the night before?
Yes, you can let the batter rise slowly in the refrigerator overnight. Make the batter, cover it tightly, and refrigerate for up to 12 hours. Take it out 30 minutes before cooking to bring it to room temperature. The slow, cold rise actually develops more flavor. Moreover, fold in the whipped egg whites just before you cook for the best texture.
Variations and Adaptations
Gluten-Free Blini:
Buckwheat is naturally gluten-free, so you are already halfway there. Replace the all-purpose flour with a gluten-free flour blend. Look for one that contains xanthan gum for binding. The texture may be slightly more delicate. Therefore, handle these blini carefully when flipping. They taste just as nutty and delicious.
Mini Cocktail Blini:
For party appetizers, make tiny blini using just 1 tablespoon of batter each. These bite-sized rounds are perfect for topping with a single piece of smoked salmon and a dot of cream cheese. Furthermore, they cook in under a minute per side. Guests love them because they are elegant yet easy to eat in one bite.
Dairy-Free Blini:
Swap the whole milk for oat milk or almond milk. Use melted coconut oil instead of butter. The yeast works the same way regardless of the milk type. Although the flavor profile shifts slightly, the blini still rise beautifully. Serve with coconut yogurt instead of sour cream for a fully dairy-free experience.
Savory Herb Blini:
Add 2 tablespoons of finely chopped fresh dill and 1 tablespoon of chives directly to the batter. These herb-infused blini pair wonderfully with smoked fish and cream cheese. The herbs add color and a fresh aroma. In addition, you can experiment with other soft herbs like parsley or tarragon.
The Cultural Significance of Blini
Blini hold a place in Russian culture that goes far deeper than food. For ancient Slavic peoples, the round, golden blini represented the sun. They were a prayer for warmth and the return of spring after long, harsh winters. This connection to the sun survives today through Maslenitsa, the week-long festival held before Lent. During Maslenitsa, Russians eat blini every single day. Families compete to see who can cook the most beautiful golden stack.
Beyond Maslenitsa, blini appear at nearly every important occasion in Russian life. They are served at weddings, funerals, and name-day celebrations. In earlier centuries, blini were also part of memorial feasts for the departed. The round shape symbolized the eternal cycle of life. Consequently, offering blini to guests carried deep spiritual meaning. It was not just a meal. It was an act of generosity and remembrance.
Today, blini remain a source of national pride. Every Russian home cook has a trusted recipe. Street vendors in Moscow and Saint Petersburg sell them with dozens of filling options. From humble peasant kitchens to elegant restaurants, blini bridge the gap between everyday comfort and fine dining. They prove that the simplest foods often carry the richest stories. Similarly, the best blini still come from home kitchens where the recipes are measured by heart, not by cups.
Conclusion
Making authentic Russian blini at home is a rewarding experience. The process is straightforward once you understand the key steps. Activate fresh yeast, let the batter rise fully, and fold in whipped egg whites with care. These three techniques separate a good blini from a great one. Moreover, the nutty buckwheat flavor and tangy yeast depth make this recipe unlike any other pancake you have tried.
Whether you serve blini with elegant caviar or a simple dollop of sour cream, they bring warmth and tradition to any table. This recipe connects you to a thousand years of Russian culinary heritage. Furthermore, the versatility of blini means you can enjoy them for breakfast, as appetizers, or as a festive centerpiece. Try this recipe and discover why blini have stood the test of time. For more European classics, explore our full collection at European Dishes.