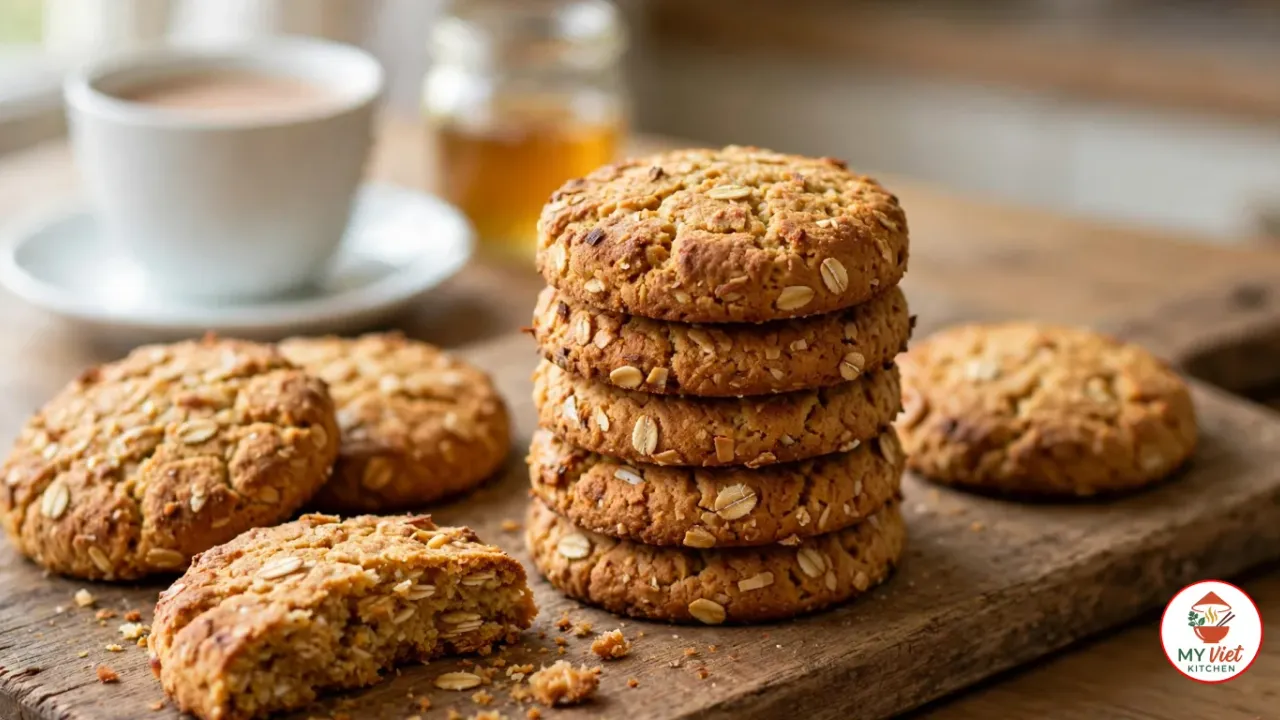
ANZAC biscuits are one of Australia’s most treasured baked goods, and every bite carries more than a century of history. These golden, chewy biscuits are made with rolled oats, desiccated coconut, golden syrup, and butter. Originally baked by women on the Australian home front during World War I, ANZAC biscuits were sent to soldiers serving overseas because the egg-free recipe meant they survived the long sea voyage without spoiling. Today, these iconic biscuits remain a symbol of remembrance and national pride. This recipe shows you how to make authentic ANZAC biscuits at home with the perfect balance of chewiness and crunch.
Prep Time: 15 minutes | Cook Time: 15 minutes | Servings: 24 biscuits
Difficulty: Easy | Calories: ~145 per biscuit
What Makes ANZAC Biscuits Special?
ANZAC biscuits hold a unique place in Australian and New Zealand culture. Unlike most cookies, they were born out of wartime necessity rather than culinary creativity. During World War I, the Australian and New Zealand Army Corps (ANZAC) served thousands of miles from home. Women’s groups and families needed a recipe that could survive weeks at sea in tins without refrigeration. The solution was a biscuit with no eggs, no milk, and no ingredients that could spoil quickly.
The genius of the recipe lies in its simplicity. Rolled oats and coconut provide structure and texture. Golden syrup acts as both a binder and a flavoring agent, replacing eggs while adding a distinctive caramel sweetness. Butter holds everything together, and baking soda creates just enough lift to keep the biscuits from becoming rock-hard. The result is a biscuit that stays chewy for weeks when stored properly.
What truly sets ANZAC biscuits apart, however, is their emotional significance. Every year on April 25th, Australians and New Zealanders observe ANZAC Day to honor those who served and sacrificed. Baking ANZAC biscuits has become part of this tradition. Schools, community groups, and families make them as a way to connect with the past. According to the Australian War Memorial, the biscuits have become one of the most enduring symbols of the home front contribution during the war.

Choosing the Right Ingredients for ANZAC Biscuits
Although the ingredient list is short, each component plays a critical role in the final texture and flavor. Choosing the right version of each ingredient makes a noticeable difference. Here is what to look for when shopping.
- Rolled oats (best choice): Use traditional rolled oats, not quick oats or steel-cut oats. Rolled oats provide the signature chewy texture and visible oat flakes that define these biscuits. Quick oats dissolve too much during baking and produce a denser, less interesting texture.
- Golden syrup: This is the essential ingredient that gives the biscuits their distinctive caramel flavor. Lyle’s Golden Syrup is the most widely available brand. Do not substitute with honey or maple syrup if you want authentic results, as both change the flavor profile significantly.
- Desiccated coconut: Use fine desiccated coconut, not shredded or flaked coconut. The fine texture integrates into the dough evenly and creates a subtle coconut flavor throughout. Shredded coconut produces uneven texture and can burn on the surface during baking.
- Butter: Use unsalted butter for the best control over the final flavor. Salted butter works in a pinch, but reduce or omit the pinch of salt in the recipe. The butter must be melted gently with the golden syrup, never browned or boiled.
If you love baking with oats, try our oatmeal cookies recipe for another delicious take on this versatile grain.
Ingredients for ANZAC Biscuits
Dry Ingredients:
- 1 cup rolled oats
- 1 cup plain flour (all-purpose flour)
- 1 cup desiccated coconut
- 3/4 cup caster sugar (superfine sugar)
- Pinch of salt
Wet Ingredients:
- 125g (1/2 cup) unsalted butter
- 2 tablespoons golden syrup
- 1 teaspoon baking soda (bicarbonate of soda)
- 2 tablespoons boiling water
Pro tip: Measure your golden syrup by dipping the tablespoon in boiling water first. The syrup slides right off a hot spoon instead of sticking, giving you an accurate measurement every time. This small trick also makes cleanup much easier.
Step-by-Step Instructions
Step 1: Combine the Dry Ingredients
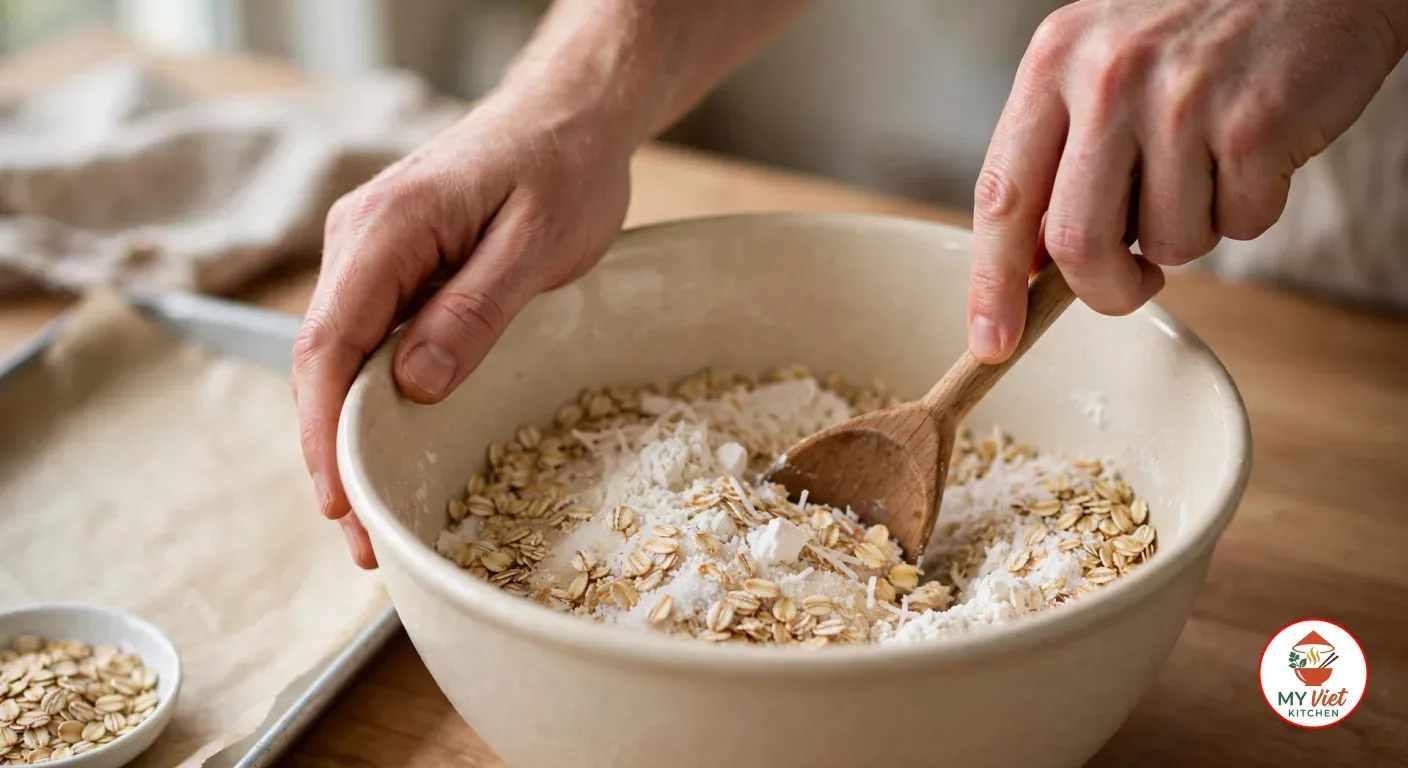
1 Preheat your oven to 160 degrees Celsius (320 degrees Fahrenheit). Line two large baking trays with parchment paper and set them aside. In a large mixing bowl, combine the rolled oats, plain flour, desiccated coconut, caster sugar, and a pinch of salt. Stir with a wooden spoon until everything is evenly distributed. Make a well in the center for the wet ingredients.
The low oven temperature is important for this recipe. A hotter oven causes the outside to brown too fast while the center stays raw. The gentle heat allows the biscuits to bake evenly throughout, creating the signature golden color from edge to edge.
Step 2: Melt the Butter and Golden Syrup
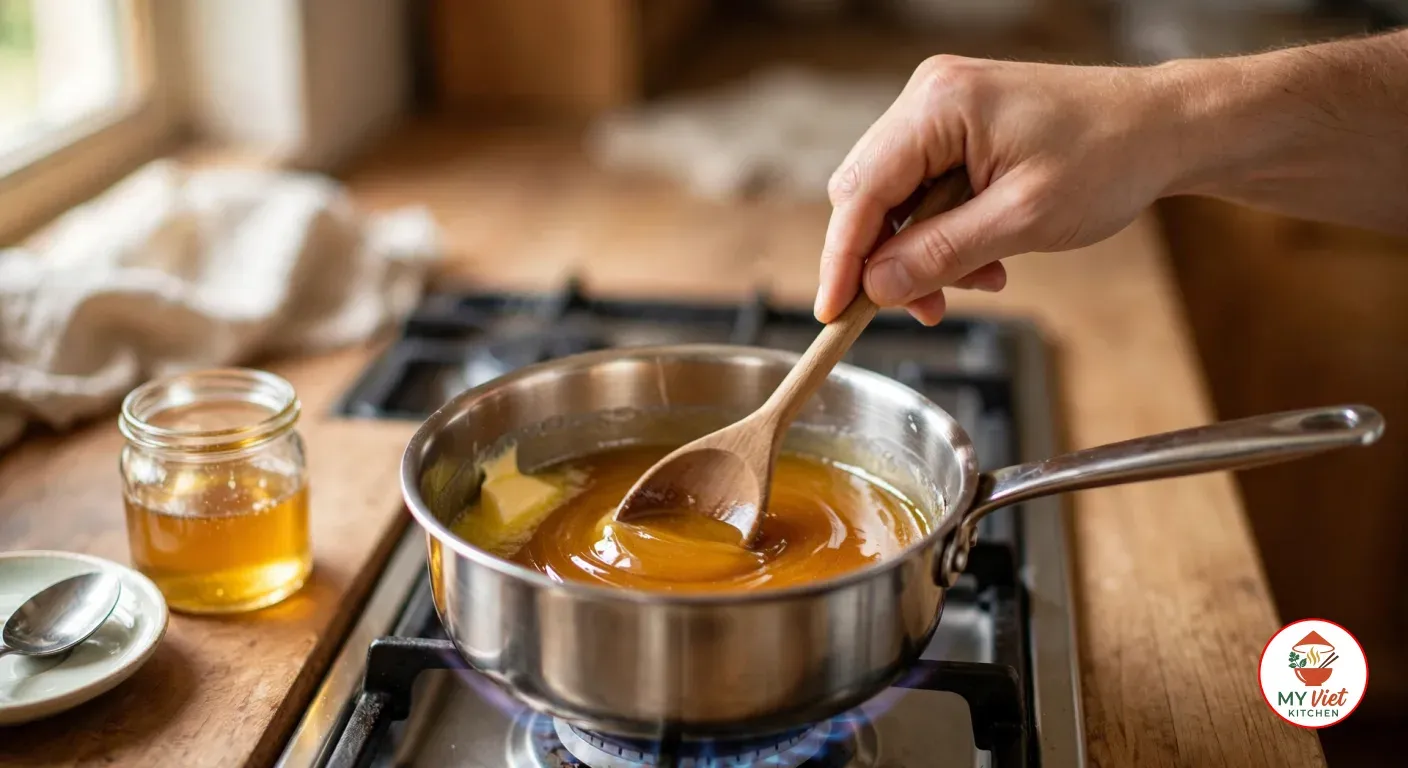
2 Place the butter and golden syrup in a small saucepan over low heat. Stir gently and continuously until the butter melts completely. The mixture should be smooth, golden, and fragrant. Do not let it boil or brown, as this will change the flavor of the finished biscuits.
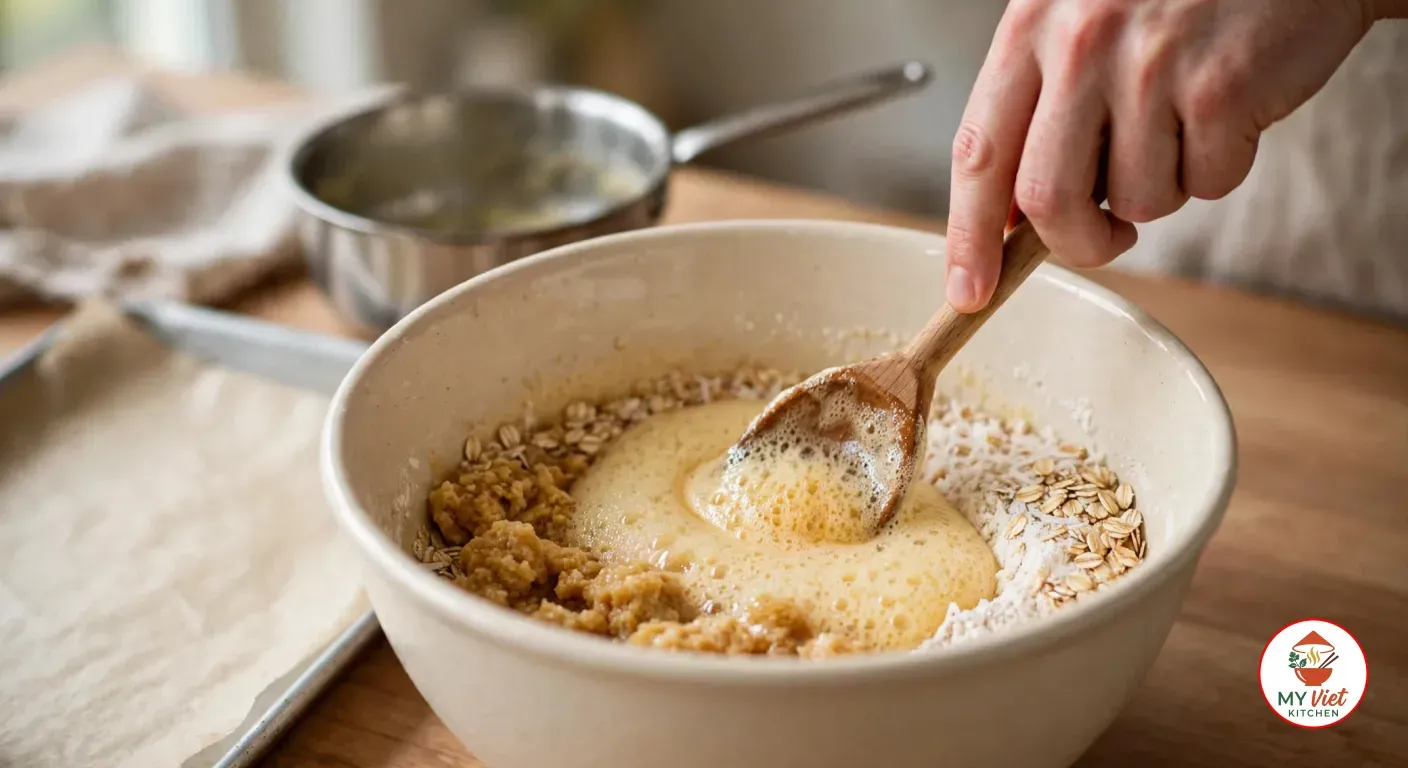
Meanwhile, dissolve the baking soda in the boiling water. It will fizz slightly. Pour this fizzing mixture into the melted butter and golden syrup. The entire contents will foam up dramatically. Stir immediately to combine. This foaming reaction is what gives the biscuits their characteristic slight lift and open texture.
Step 3: Mix the Dough
3 Pour the foaming butter mixture into the well you made in the dry ingredients. Stir with a wooden spoon until every bit of the dry mixture is coated and the dough comes together. It should look rough and slightly crumbly but hold its shape when pressed in your hand. If the dough feels too dry, add one more teaspoon of melted butter. If it feels too wet, add a tablespoon of flour.
Do not overmix the dough. Unlike cake batter, this dough benefits from a light hand. Overmixing develops the gluten in the flour and produces a tough, dense biscuit instead of a tender, chewy one.
Step 4: Shape and Bake
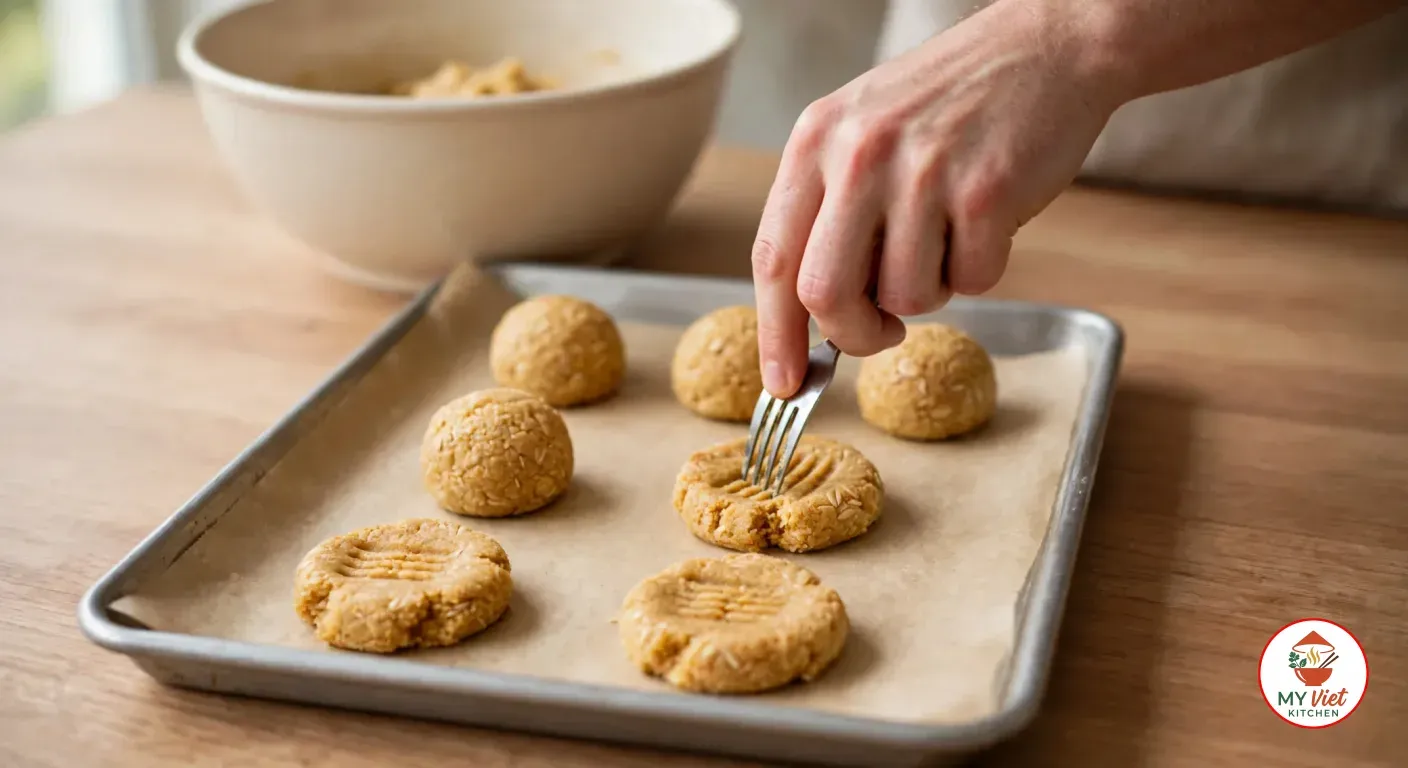
4 Roll level tablespoons of dough into balls between your palms. Place them on the prepared baking trays, leaving about 5 centimeters (2 inches) between each ball. The biscuits will spread during baking, so this spacing prevents them from merging together. Flatten each ball slightly with the back of a fork or your fingertips to about 1 centimeter thick.
Bake for 12 to 15 minutes until the biscuits turn golden brown across the surface. They will still feel soft and slightly underset when you press them gently. This is normal and expected. The biscuits firm up considerably as they cool. Removing them too early produces chewy biscuits, while leaving them longer produces a crunchier texture. Choose your baking time based on your personal preference.
Step 5: Cool and Serve
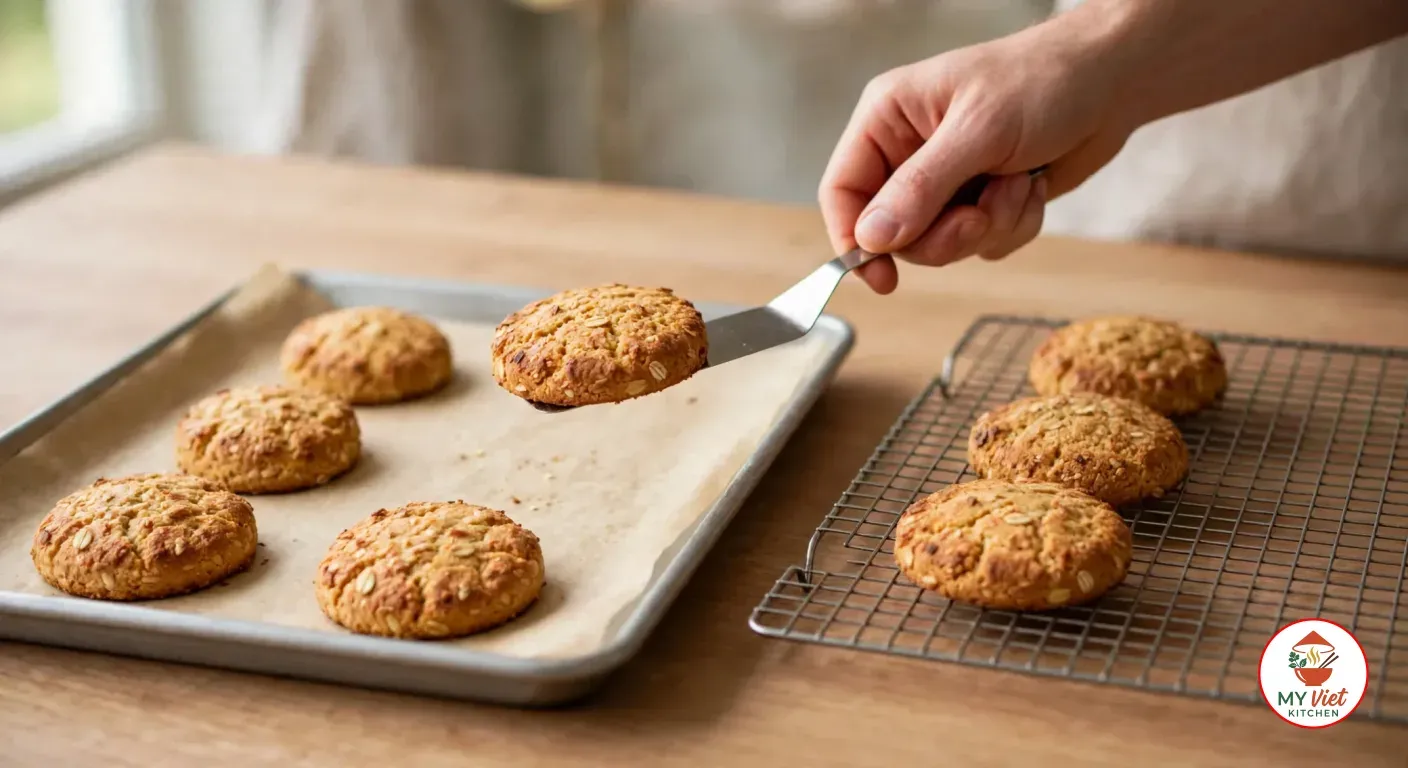
5 Allow the biscuits to cool on the baking tray for 5 minutes after removing them from the oven. During this time, the golden syrup and butter set, and the structure firms up. Trying to move them immediately will cause them to break apart. After 5 minutes, use a spatula to transfer the biscuits to a wire cooling rack. Let them cool completely before storing.
Once cooled, the biscuits are ready to enjoy. They taste wonderful on their own with a cup of tea or coffee. Store them in an airtight tin or container at room temperature. They keep beautifully for up to two weeks, getting slightly chewier with each passing day.
Expert Tips for Perfect ANZAC Biscuits
Control Chewiness vs. Crunchiness
The texture depends almost entirely on baking time. For soft, chewy biscuits, bake for just 10 to 12 minutes until lightly golden around the edges but still pale in the center. For crispy, crunchy biscuits, extend the baking to 15 to 18 minutes until deep golden throughout. Both versions are authentically Australian. In fact, the chewy versus crunchy debate is one of Australia’s most passionate food arguments.
Do Not Skip the Baking Soda Reaction
Dissolving the baking soda in boiling water before adding it to the butter mixture is not optional. This step activates the baking soda and creates carbon dioxide, which aerates the dough. Without this reaction, the biscuits will turn out flat, dense, and heavy. The foaming may look dramatic, but it is essential for the texture. Always add the baking soda solution to the butter mixture while it is still warm.
Use the Right Oats
Traditional rolled oats are essential for an authentic result. Quick oats or instant oats absorb too much moisture and break down during mixing. The result is a smooth, dense biscuit that lacks the characteristic oat flake texture. Steel-cut oats go too far in the other direction, remaining hard and chewy even after baking. Stick with regular rolled oats for the best balance of texture and flavor.
Chewy vs. Crunchy ANZAC Biscuits: A Comparison
Australians are deeply divided on whether their beloved biscuits should be chewy or crunchy. Both styles are equally authentic, and the difference comes down to technique rather than ingredients. Here is how the two styles compare side by side.
| Feature | Chewy ANZAC Biscuits | Crunchy ANZAC Biscuits |
|---|---|---|
| Baking time | 10-12 minutes | 15-18 minutes |
| Color when done | Light golden, pale center | Deep golden throughout |
| Texture | Soft, bendy, moist | Firm, snappy, dry |
| Best enjoyed | Within 3-4 days | Keeps well for 2+ weeks |
| Butter amount | Standard (125g) | Reduce by 15g for extra crunch |
| Thickness | Slightly thicker balls | Flatten more before baking |
| Historical style | Modern preference | Closer to wartime original |
Many bakers compromise by pulling half the tray out early for chewy biscuits and leaving the rest to bake longer for crunch. This way, everyone at the table is happy. Both versions taste wonderful alongside a strong cup of tea, which is the traditional pairing.
Serving Suggestions
These biscuits are traditionally enjoyed as an everyday tea-time treat or as part of ANZAC Day commemorations on April 25th. Their sturdy texture and rich flavor make them versatile enough for many occasions. Here are the best ways to serve them.
Classic Pairings:
- Black tea with milk: The classic Australian pairing. The tannins in the tea cut through the buttery sweetness perfectly.
- Flat white coffee: Australia’s coffee contribution to the world pairs beautifully with the caramel notes of golden syrup.
- Ice cream sandwich: Place a scoop of vanilla ice cream between two chewy ANZAC biscuits for an indulgent summer dessert.
- Crumbled over yogurt: Break crunchy ANZAC biscuits into pieces and scatter over Greek yogurt with fresh fruit for breakfast.
Gift and Care Package Ideas:
- ANZAC Day bake sale: Package the biscuits in cellophane bags tied with ribbon for fundraising events.
- Care packages: True to their origins, these biscuits are ideal for sending in the mail because they travel well and last for weeks.
- Holiday gift tins: Layer the biscuits with parchment paper in decorative tins for a thoughtful homemade gift.
For more biscuit and cookie inspiration, explore our desserts collection featuring sweet treats from around the world.
Storage and Shelf Life
Room temperature: Store the biscuits in an airtight tin or container at room temperature for up to 2 weeks. They actually improve over the first few days as the flavors meld together. Chewy versions stay soft, while crunchy versions maintain their snap.
Freezer: Both baked and unbaked dough freeze well for up to 3 months. For baked biscuits, cool completely and layer with parchment paper in a freezer-safe container. For unbaked dough balls, freeze on a tray until solid, then transfer to a freezer bag. Bake from frozen, adding 2 to 3 extra minutes to the baking time.
Refreshing stale biscuits: If your biscuits lose their crunch, spread them on a baking tray and warm them in a 150-degree Celsius oven for 5 minutes. Let them cool completely, and the crisp texture returns. For soft biscuits that have dried out, place them in a container with a slice of bread overnight. The biscuits absorb moisture from the bread and soften up again.
Common Mistakes to Avoid
1. Using the Wrong Type of Oats
Quick oats and instant oats are too fine for this recipe. They absorb moisture rapidly and create a dense, paste-like dough. The finished biscuits lack the visible oat flakes and chewy pockets that define the texture. Always use traditional rolled oats. They hold their shape during mixing and baking, providing the signature rustic texture that makes ANZAC biscuits so satisfying.
2. Overheating the Butter Mixture
The butter and golden syrup should melt together gently over low heat. If the mixture boils, the butter can separate and the golden syrup may start to caramelize unevenly. This leads to biscuits with a slightly bitter edge and inconsistent texture. Stir continuously and remove the saucepan from heat the moment the butter melts fully. Patience during this step ensures smooth, consistent flavor.
3. Not Leaving Enough Space on the Tray
The dough spreads significantly during baking. Crowding them on the tray results in one giant biscuit sheet instead of individual rounds. Leave at least 5 centimeters between each dough ball. If your trays are small, bake in three batches rather than two. The extra effort guarantees evenly shaped biscuits with golden edges all around.
4. Moving Biscuits Too Soon After Baking
Fresh-from-the-oven biscuits are extremely fragile. The golden syrup and butter are still liquid, and the structure has not set yet. Moving them immediately causes crumbling and breakage. Wait a full 5 minutes for them to cool on the tray before transferring to a wire rack. This short rest period transforms them from fragile to firm.
Frequently Asked Questions
Why are they called ANZAC biscuits?
ANZAC biscuits are named after the Australian and New Zealand Army Corps. During World War I, women on the home front baked these biscuits and sent them to soldiers overseas. The egg-free recipe meant the biscuits lasted the long sea voyage without spoiling. Over time, the name became permanently associated with the biscuits as a tribute to the soldiers who served at Gallipoli and beyond.
What makes ANZAC biscuits different from regular oat cookies?
Several key differences set ANZAC biscuits apart from ordinary oat cookies. They contain no eggs, which produces a denser, chewier texture. Golden syrup provides a unique caramel flavor that vanilla extract cannot replicate. Desiccated coconut is essential, adding richness and a subtle tropical note. Together, these ingredients create a flavor and texture that is distinctly Australian and unlike any standard cookie.
Can I substitute golden syrup in ANZAC biscuits?
Golden syrup is the heart of the recipe, but if it is truly unavailable, light treacle or light corn syrup mixed with a teaspoon of molasses comes closest. Honey is a possible substitute, though it produces a noticeably different flavor and a slightly crispier texture. Maple syrup is not recommended because it overpowers the delicate caramel and oat notes. For a truly authentic result, sourcing golden syrup is worth the effort.
How do I make chewy ANZAC biscuits instead of crunchy ones?
For chewy results, bake the biscuits for just 10 to 12 minutes at 160 degrees Celsius. Remove them while they still look slightly underdone and pale in the center. They will firm up as they cool but stay wonderfully soft and chewy inside. Additionally, make the dough balls slightly thicker and avoid flattening them too much before baking.
Is it illegal to sell ANZAC biscuits commercially?
Selling ANZAC biscuits is not illegal, but the word “ANZAC” is legally protected in both Australia and New Zealand. The biscuits must be called ANZAC biscuits, never ANZAC cookies. Commercial use of the ANZAC name requires government approval. Home bakers selling at fundraisers or charity events generally have no issues, especially when the proceeds support veteran organizations.
Variations and Adaptations
Chocolate-Dipped ANZAC Biscuits:
Melt 200 grams of dark chocolate and dip each cooled biscuit halfway into the chocolate. Place on parchment paper and let the chocolate set at room temperature or in the fridge for 10 minutes. The bittersweet chocolate pairs beautifully with the sweet caramel and coconut flavors. This variation is popular at Australian bakeries and makes an impressive gift.
Macadamia and White Chocolate ANZAC Biscuits:
Add 1/2 cup of roughly chopped macadamia nuts and 1/2 cup of white chocolate chips to the dry ingredients before mixing. The Australian macadamia nuts bring a buttery crunch while the white chocolate adds pockets of creamy sweetness. This modern twist stays true to the spirit of the original while showcasing another iconic Australian ingredient. If you enjoy nut-based baking, our macadamia nut cookies are another great option.
Gluten-Free ANZAC Biscuits:
Replace the plain flour with a cup of gluten-free flour blend and ensure your rolled oats are certified gluten-free. Everything else in the recipe remains unchanged. However, this version tends to be slightly more crumbly, so handle them gently and let them cool completely before moving. Fortunately, the flavor is virtually identical to the original version.
Vegan ANZAC Biscuits:
Since the traditional recipe already contains no eggs, making a vegan version is simple. Replace the butter with coconut oil or a plant-based butter substitute. Use the same amount and melt it with the golden syrup exactly as the original recipe directs. Coconut oil actually enhances the coconut flavor in the biscuits, making this adaptation a natural fit.
The History and Cultural Significance of ANZAC Biscuits
The story of ANZAC biscuits begins with the Gallipoli Campaign of 1915. When Australian and New Zealand troops landed on the shores of the Gallipoli Peninsula in Turkey, they faced months of brutal trench warfare far from home. Women’s organizations, church groups, and families rallied on the home front, baking and sending food parcels to the troops. The biscuits they created needed to survive a sea voyage that could last two months or more.
The original wartime versions were harder and drier than today’s recipe. They were designed for survival, not indulgence. Soldiers soaked them in tea to soften them before eating. Over the decades, the recipe evolved into the softer, more buttery version we know today. Nevertheless, the core ingredients have remained remarkably consistent for more than a century.
Today, baking ANZAC biscuits is an act of remembrance. Schools teach the recipe to children as part of ANZAC Day education. Veterans’ organizations sell them at fundraisers. Families bake them together as a way to honor those who served. The protection of the ANZAC name under Australian law reflects how seriously the nation takes this connection between a simple biscuit and the memory of sacrifice. If you are interested in exploring more recipes with deep cultural roots, check out our Asian dishes collection and our European dishes collection.
Conclusion
Making ANZAC biscuits at home is one of the simplest and most rewarding baking projects you can tackle. With just nine pantry-friendly ingredients and 30 minutes from start to finish, you get a batch of golden, flavorful biscuits that carry over a century of history in every bite. The keys to success are straightforward: use rolled oats for texture, melt the butter and golden syrup gently, activate the baking soda properly, and watch the baking time closely for your preferred level of chewiness or crunch.
Whether you bake these ANZAC biscuits for ANZAC Day, as an afternoon tea treat, or simply because you love the combination of oats, coconut, and golden syrup, this recipe delivers every time. They taste even better the next day as the flavors deepen, and they make a wonderful gift packed in a simple tin. Once you try them, you will understand why ANZAC biscuits have remained a beloved part of Australian and New Zealand culture for more than 100 years. Explore more of our dessert recipes for sweet inspiration from around the globe.