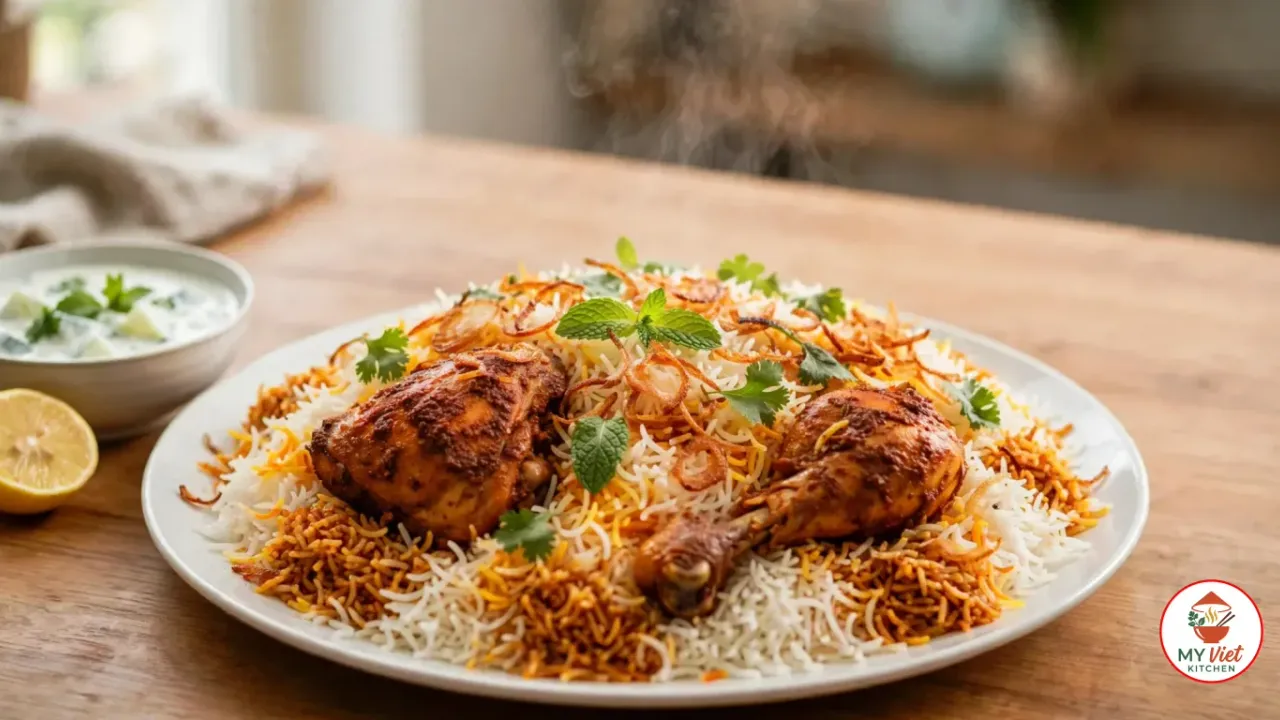
Biryani is the crown jewel of South Asian cooking, and this biryani recipe brings the authentic flavors of India and Pakistan right to your kitchen. This layered rice dish combines tender marinated meat with fragrant basmati rice, saffron, and aromatic whole spices. Moreover, every grain of rice carries the rich perfume of cardamom, cinnamon, and slow-cooked meat juices. Whether you are new to Indian cooking or a seasoned home chef, this step-by-step guide will help you make perfect biryani every single time.
Prep Time: 30 minutes (plus 4 hours marinating) | Cook Time: 60 minutes | Servings: 6
Difficulty: Medium | Calories: ~520 per serving
What Makes This Biryani Recipe Special?
Biryani stands apart from every other rice dish because of its unique cooking method. Unlike a simple pilaf, biryani layers marinated meat and parboiled rice in a heavy pot. Then the pot is sealed tightly and cooked on the lowest heat. This technique is called dum, which means “to breathe” in Persian. As a result, steam circulates inside the sealed pot. The meat juices rise and flavor every grain of rice from the bottom up.
The origins of biryani trace back centuries to the Mughal Empire, which ruled much of South Asia from the 1500s to the 1800s. Mughal royal kitchens blended Persian cooking techniques with local Indian spices. Consequently, biryani was born as a dish fit for emperors. According to historical records, the Mughal queen Mumtaz Mahal once visited army barracks and found soldiers malnourished. She asked the cooks to prepare a single pot meal of rice and meat with spices. That dish evolved into the biryani we know today.
What truly sets great biryani apart from average versions is attention to three things. First, the meat must marinate long enough for the spices to penetrate deeply. Second, the rice must be parboiled to exactly 70 percent doneness. Third, the dum cooking stage must happen on the lowest possible heat. Skipping any of these steps will give you a one-pot rice dish, but not a true biryani. Therefore, patience is the most important ingredient in this recipe.

Choosing the Right Rice for Biryani
Rice is half the dish in biryani, so your choice matters greatly. The wrong rice turns your biryani into sticky mush. Here are your best options for long, fluffy grains that stay separate after cooking.
- Aged basmati rice (best choice): Basmati rice that has been aged for 1 to 2 years is the gold standard for biryani. Aged grains have less moisture, so they absorb more flavor and expand in length without breaking. They also stay firm and separate after cooking.
- Regular basmati rice: Fresh basmati still works well if aged rice is not available. However, reduce the soaking time to 20 minutes and be extra careful not to overcook during parboiling. Fresh basmati is softer and breaks more easily.
- Sella basmati (parboiled basmati): This rice is pre-steamed before milling, which makes the grains very firm. It is nearly impossible to overcook, so it is a forgiving choice for beginners. The grains stay perfectly separate but have a slightly different texture.
- Jasmine or short-grain rice: Avoid these for biryani. They are too sticky and starchy. Biryani needs rice that stays fluffy and separates into individual grains. Sticky rice clumps together and ruins the layered effect.
Ingredients for Biryani Recipe
For the Chicken Marinade:
- 500g bone-in chicken pieces (thighs and drumsticks)
- 1 cup plain yogurt (full-fat)
- 2 tablespoons ginger-garlic paste
- 1 teaspoon Kashmiri red chili powder
- 1 teaspoon turmeric powder
- 1/2 tablespoon biryani masala or garam masala
- 1 tablespoon lemon juice
- 1 teaspoon salt
For the Rice:
- 2 cups basmati rice (aged, if possible)
- 4 green cardamom pods
- 4 whole cloves
- 2 bay leaves
- 1 cinnamon stick (2-inch piece)
- 1 star anise
- 1 teaspoon whole black peppercorns
- Water for boiling (about 8 cups)
- 1 tablespoon salt for the boiling water
For Layering and Cooking:
- 2 large onions, thinly sliced
- 2 tomatoes, chopped
- 3 tablespoons ghee or vegetable oil
- 2 tablespoons vegetable oil for frying onions
- 1/4 teaspoon saffron threads soaked in 3 tablespoons warm milk
- 1/2 tablespoon biryani masala or garam masala
- 1/2 cup fresh mint leaves
- 1/2 cup fresh cilantro leaves
- 2 green chilies, slit lengthwise
- 1 tablespoon rose water (optional)
- Fried onions for garnish
Pro tip: Always wash basmati rice gently until the water runs clear. This removes excess surface starch, which is the main cause of sticky, clumpy biryani. Additionally, soaking the rice for 30 minutes before cooking allows the grains to absorb water gradually. As a result, they expand evenly and are less likely to break during boiling.
Step-by-Step Biryani Recipe Instructions
Step 1: Marinate the Chicken
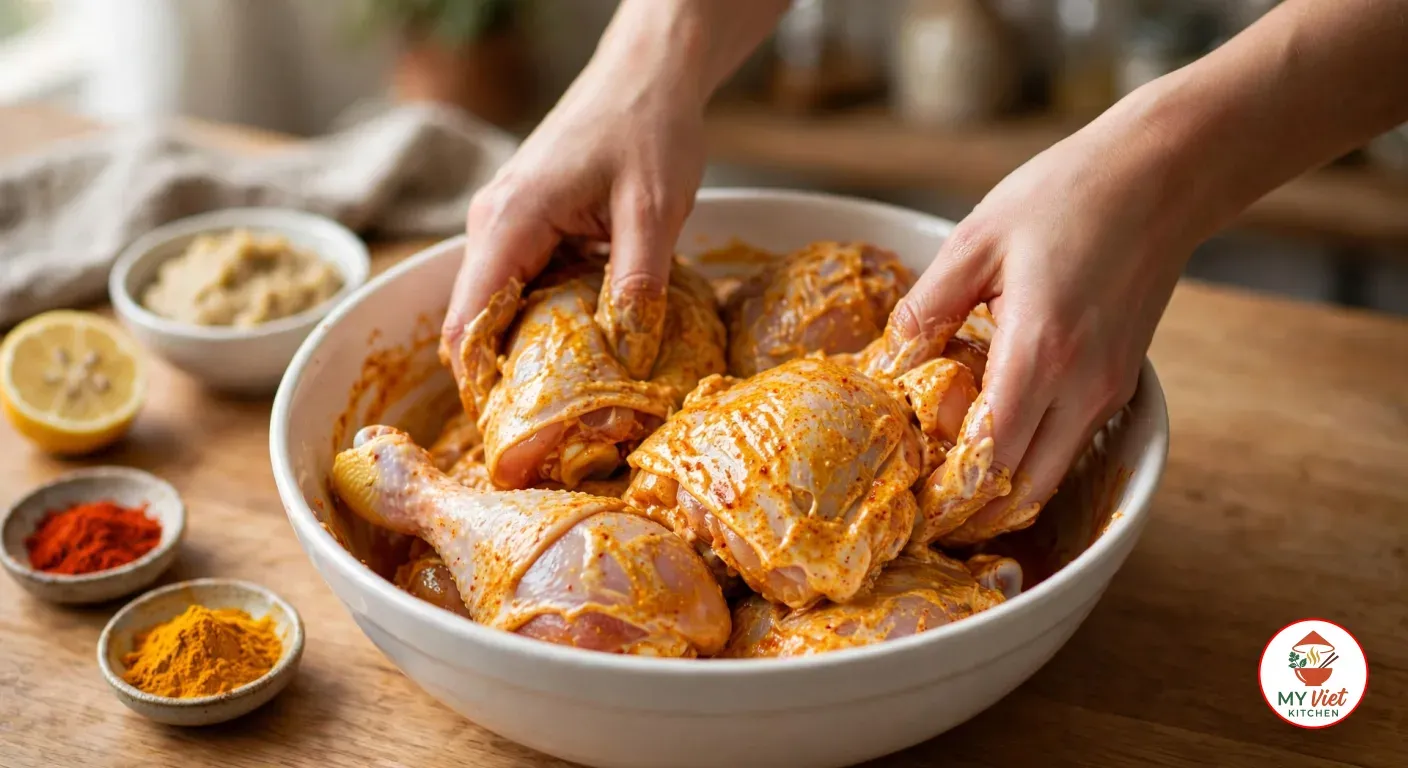
1 Place the chicken pieces in a large bowl. Add the yogurt, ginger-garlic paste, Kashmiri chili powder, turmeric, half the biryani masala, lemon juice, and salt. Then mix everything together using your hands. Make sure every piece is coated fully with the marinade. The yogurt acts as a tenderizer because its lactic acid slowly breaks down the protein fibers in the meat.
Cover the bowl tightly and place it in the refrigerator. Marinate for at least 4 hours, but overnight is best. The longer the chicken sits in the spiced yogurt, the more tender and flavorful it becomes. Specifically, an overnight soak lets the ginger-garlic paste and spices reach deep into the meat near the bone. Take the chicken out 30 minutes before cooking so it reaches room temperature.
Step 2: Prepare the Fried Onions
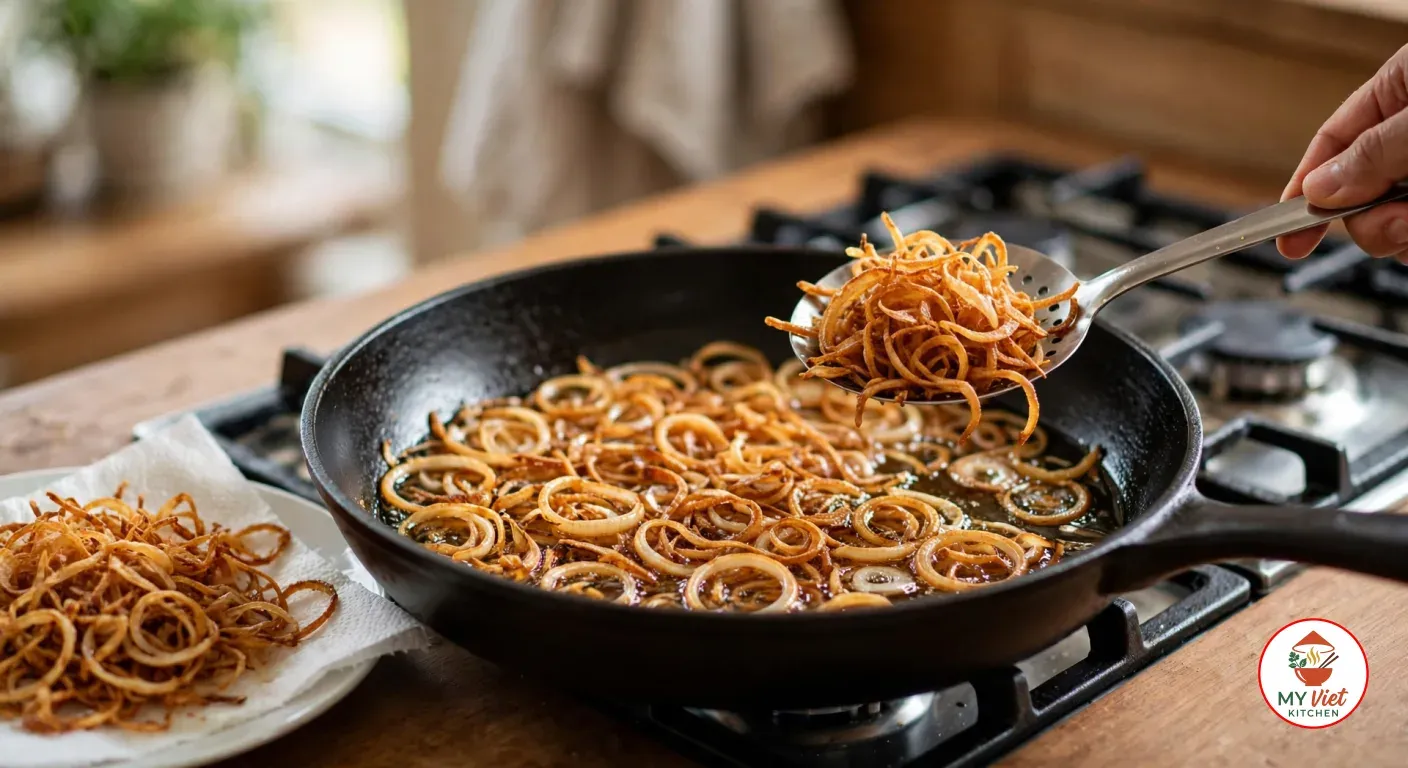
2 Slice the onions into thin, even rings. Then heat the vegetable oil in a wide pan over medium heat. Add the sliced onions and stir them often. Cook slowly for 15 to 20 minutes until they turn deep golden brown and crispy. Patience is essential here because rushing with high heat burns the edges while the centers stay raw.
Remove the fried onions with a slotted spoon and spread them on paper towels to drain. They will crisp up further as they cool. Afterward, divide them into two portions. Crush half and mix them into the marinated chicken. Reserve the other half for garnishing the finished biryani. These fried onions, called birista in Indian cooking, add a sweet, caramelized depth that is essential to authentic biryani flavor.
Step 3: Parboil the Rice
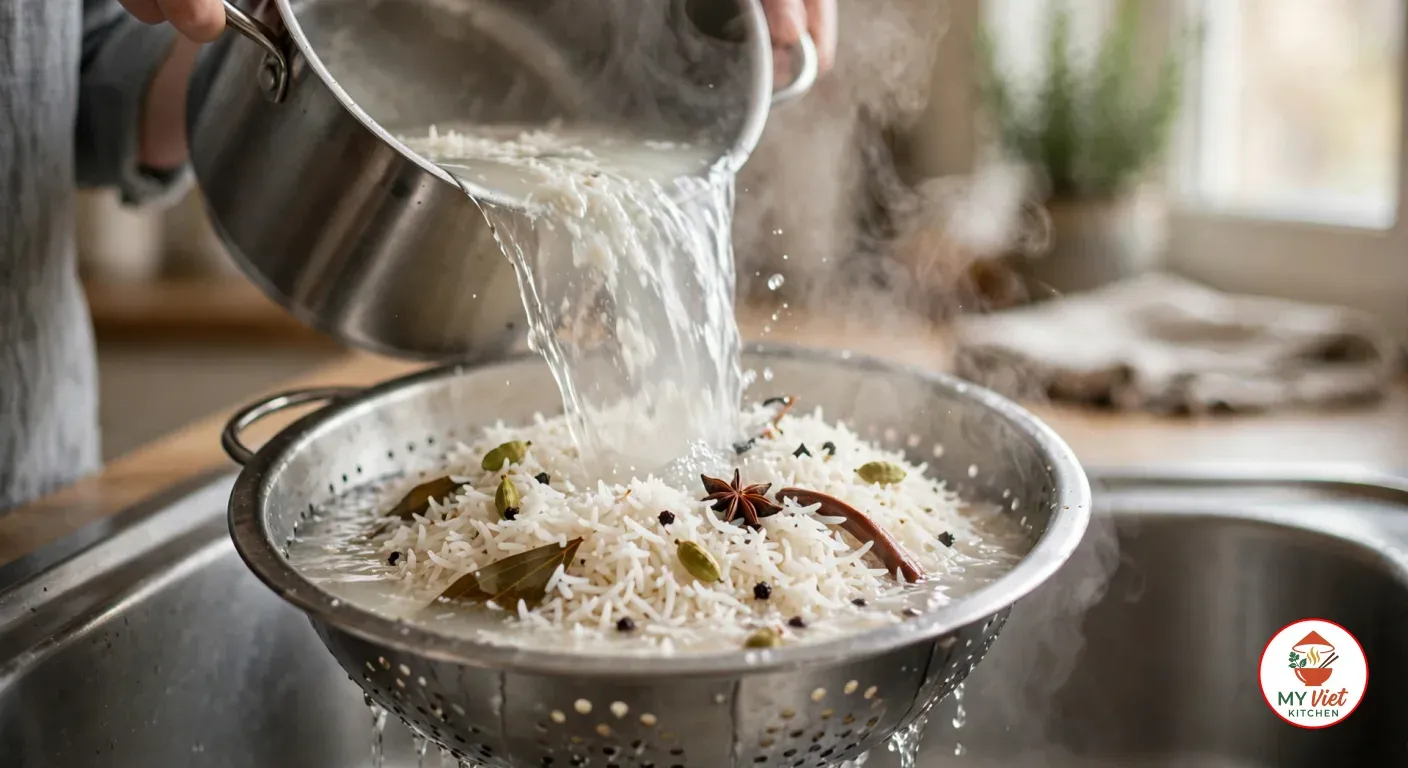
3 Wash the basmati rice in cold water 4 to 5 times until the water runs clear. Then soak the rice in fresh water for 30 minutes. Meanwhile, bring a large pot of water to a rolling boil. Add the salt, bay leaves, cardamom pods, cloves, cinnamon stick, star anise, and peppercorns to the boiling water. These whole spices infuse the rice with aroma as it cooks.
Drain the soaked rice and add it to the boiling spiced water. Cook for exactly 5 to 6 minutes. The rice should be about 70 percent done. To test this, press a grain between your thumb and finger. It should be soft on the outside but still have a firm white core. Immediately drain the rice in a colander. Do not rinse it. The residual heat continues to cook the grains slightly, so timing is crucial at this stage.
Step 4: Cook the Chicken Base
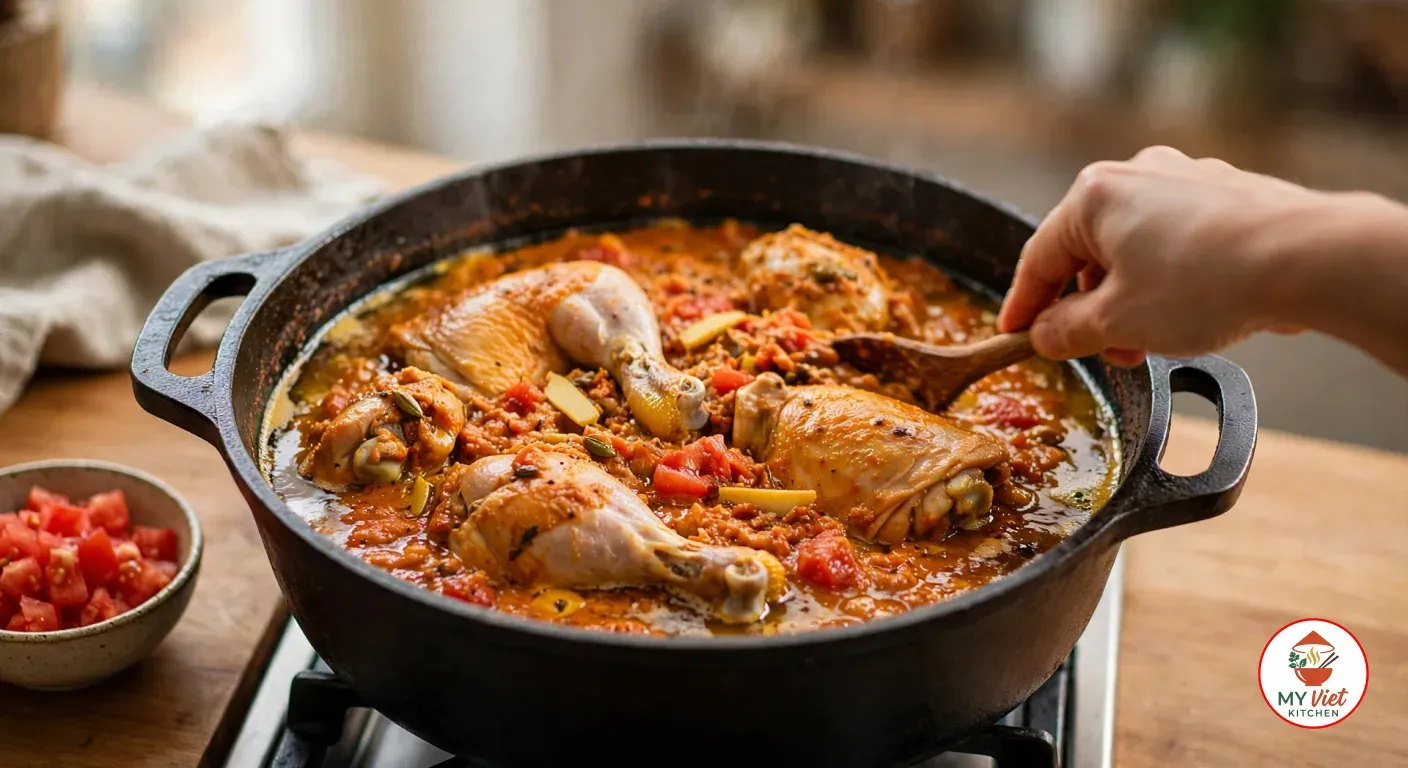
4 Heat the ghee in a heavy-bottomed pot or Dutch oven over medium-high heat. Add the marinated chicken along with the chopped tomatoes. Stir well and cook for 8 to 10 minutes. The chicken does not need to be fully cooked at this point. Instead, you want the yogurt marinade to reduce and thicken. The oil should start to separate from the masala along the edges of the pot.
This step builds the flavor base of your biryani. The tomatoes break down and create a thick gravy that coats each piece of chicken. Furthermore, the ghee carries the fat-soluble flavor compounds from the spices, which means more aroma in the final dish. If the mixture looks too dry, add 2 tablespoons of water. However, avoid making it too wet because excess liquid makes the rice soggy during dum cooking.
Step 5: Layer and Dum Cook the Biryani
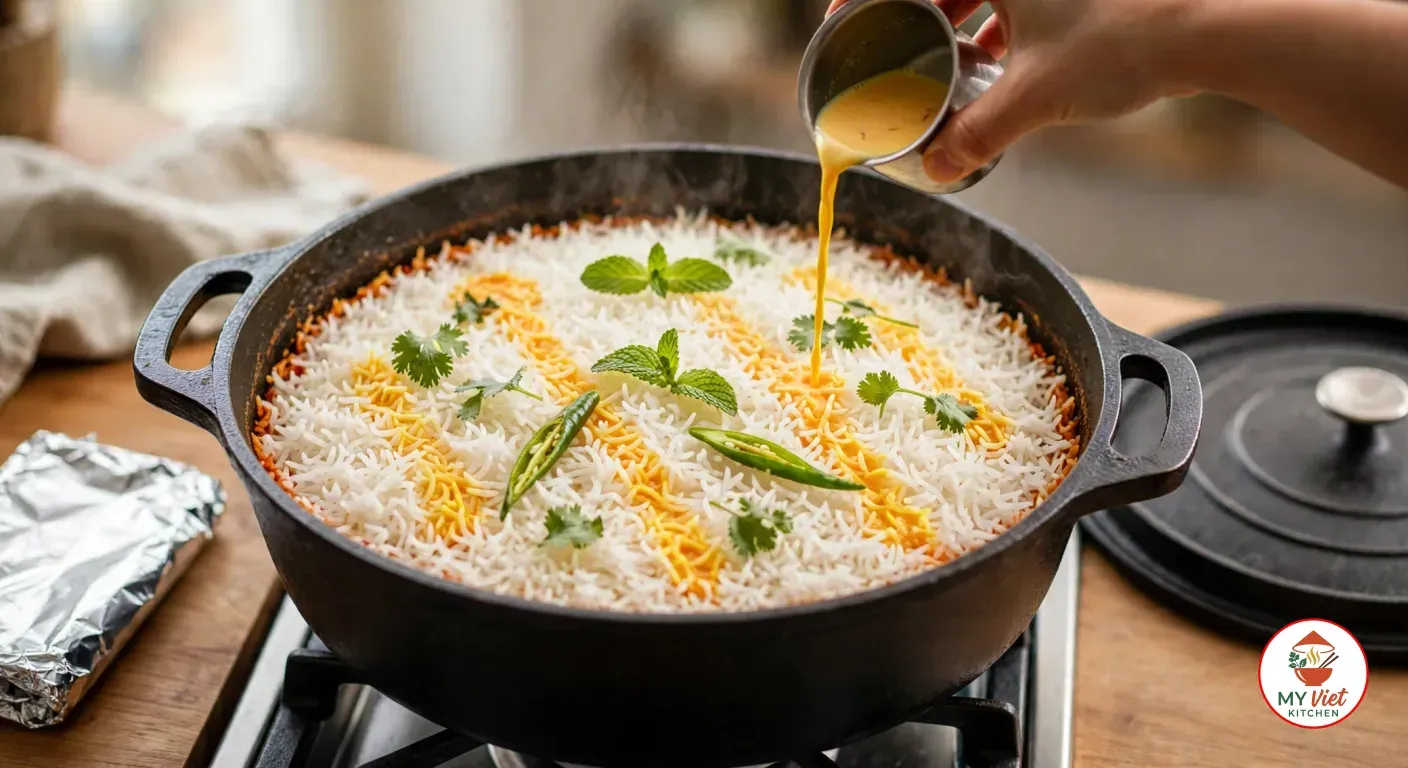
5 Spread the chicken evenly across the bottom of the pot. Next, carefully layer the parboiled rice on top of the chicken. Do not press down or pack the rice. Instead, spread it gently so the grains stay loose and fluffy. Drizzle the saffron-soaked milk over the rice in streaks. This creates the beautiful golden patches that are the hallmark of authentic biryani.
Sprinkle the remaining biryani masala over the rice. Then scatter the fresh mint leaves, cilantro, slit green chilies, and rose water on top. Place a sheet of aluminum foil over the pot and press the edges down firmly. Then put the lid on top of the foil. This double seal traps all the steam inside. Finally, reduce the heat to the absolute lowest setting and cook for 25 to 30 minutes. Do not lift the lid during this time.
Step 6: Rest and Serve
6 Turn off the heat and let the biryani rest for 5 minutes without opening the lid. This resting period allows the steam to settle and the flavors to set. Afterward, remove the lid and foil. Use a wide, flat spatula to gently fold the rice and chicken together. Be careful not to break the rice grains or shred the meat.
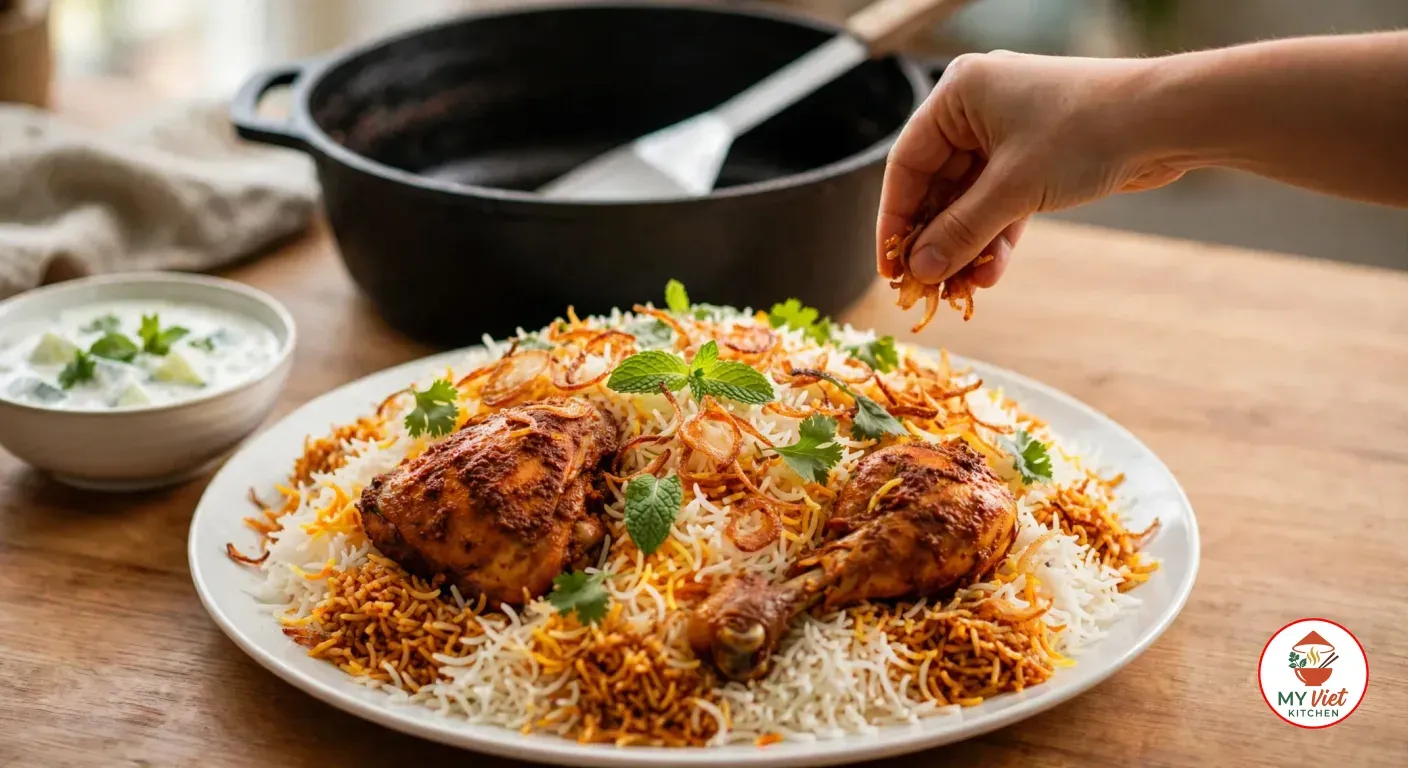
Transfer the biryani to a large serving platter. Garnish generously with the reserved fried onions, fresh mint, and cilantro leaves. Serve immediately while the steam still rises from the rice. In India and Pakistan, biryani is always served with raita (a cooling yogurt side) and mirchi ka salan (a tangy green chili curry). A simple onion-tomato salad with lemon juice also works well alongside this dish.
Expert Tips for Perfect Biryani
Use a Heavy-Bottomed Pot
A heavy pot distributes heat evenly during the dum stage. Thin pots create hot spots that burn the bottom layer while the top stays undercooked. A Dutch oven or cast iron pot works best. Alternatively, place a flat tawa (griddle) under a regular pot to diffuse the heat. This simple trick prevents burning and ensures even cooking throughout.
Get the Rice Texture Right
The most common mistake in biryani is overcooking the rice during parboiling. Remember, the rice continues to cook for another 25 to 30 minutes inside the sealed pot. Therefore, you must stop cooking when the grain still has a firm white center. If you cook it fully at the parboiling stage, the finished biryani will have mushy, broken grains. Also, add plenty of salt to the boiling water. The rice only absorbs salt during this stage, not during dum cooking.
Seal the Pot Properly
The dum technique depends entirely on trapped steam. If steam escapes through gaps in the lid, the rice dries out on top while the bottom gets wet. Use aluminum foil under the lid to create a tight seal. In traditional Indian cooking, cooks seal the pot with a ring of dough around the rim. This method, called purdah, creates an airtight seal that locks in every drop of steam and aroma.
Regional Biryani Styles Compared
Biryani has many regional variations across South Asia. Each city and region has its own style, spice blend, and cooking method. Here is how the major styles differ from one another.
| Style | Region | Key Feature | Spice Level |
|---|---|---|---|
| Hyderabadi (Kacchi) | Hyderabad, India | Raw marinated meat layered with rice | Medium to hot |
| Lucknowi (Pakki) | Lucknow, India | Pre-cooked meat, subtle and aromatic | Mild |
| Kolkata | Kolkata, India | Includes potatoes, lighter spicing | Mild |
| Sindhi | Sindh, Pakistan | Uses sour yogurt and dried plums | Medium |
| Karachi | Karachi, Pakistan | Extra spicy with lots of potatoes | Hot |
| Malabar | Kerala, India | Uses small-grain rice called kaima | Medium |
| Dindigul | Tamil Nadu, India | Uses seeraga samba rice, tangy flavor | Hot |
The recipe in this post follows the Hyderabadi style, which is considered the most popular and widely known. However, each regional style has its own loyal fans. For example, Kolkata biryani always includes a boiled egg and potato alongside the meat. Similarly, Lucknowi biryani uses a gentler approach with pre-cooked meat and more delicate spicing. If you enjoy Rendang or other slow-cooked meat dishes, you will love exploring these different biryani styles.
Serving Suggestions
In India and Pakistan, biryani is always served with specific side dishes that balance its rich, spiced flavors. These accompaniments cool the palate and add contrasting textures to every bite. Additionally, serving biryani with the right sides turns a great dish into a complete feast.
The Perfect Accompaniments:
- Raita: This cooling yogurt side mixed with cucumber, onion, and mint is the most traditional pairing. It calms the heat of the spices and adds a refreshing contrast to the warm, fragrant rice.
- Mirchi ka salan: A tangy, spicy curry made with green chilies, peanuts, and sesame seeds. This Hyderabadi specialty is the classic partner for biryani in South India.
- Onion-tomato salad: Sliced onions and tomatoes dressed with lemon juice, salt, and a pinch of chaat masala. This simple salad adds a raw, crunchy element that cuts through the richness.
- Boiled egg: Many biryani traditions include a whole boiled egg per serving. The egg soaks up the spiced gravy and adds protein to the dish.
Beverage Pairings:
- Mango lassi: The sweet, creamy mango flavor pairs beautifully with the savory spices. It also soothes the palate if you find the biryani spicy.
- Salted lassi (chaas): A lighter, more refreshing option than mango lassi. This thin, salted yogurt drink aids digestion and complements rich dishes.
- Rose sherbet: A chilled rose-flavored drink that is traditionally served with biryani at weddings and celebrations in Pakistan and North India.
Storage and Reheating
Refrigerator: Store leftover biryani in an airtight container for up to 3 days. The flavors actually deepen overnight as the spices continue to infuse the rice. Many biryani lovers believe that day-old biryani tastes even better than fresh. Keep it in a single container to maintain the layered flavors.
Freezer: Biryani freezes well for up to 2 months. Portion it into individual containers before freezing so you can thaw only what you need. Thaw overnight in the refrigerator for the best texture. Avoid freezing biryani with raita because the yogurt separates when frozen.
Reheating: The best method is to sprinkle 2 tablespoons of water over the biryani and reheat it in a covered pot on low heat for 10 minutes. This steaming method restores the moisture without drying out the rice. Alternatively, microwave it with a damp paper towel on top for 3 to 4 minutes. Avoid reheating at high heat because it dries out the rice and toughens the chicken.
Common Mistakes to Avoid
1. Overcooking the Rice
This is the number one reason biryani fails. If you cook the rice fully during parboiling, it will turn to mush during the dum stage. Instead, cook it to only 70 percent doneness. The grain should still snap when you bite it. Subsequently, the sealed pot finishes the cooking gently with steam. Set a timer and test the rice frequently after the 4-minute mark.
2. Skipping the Fried Onions
Fried onions are not just a garnish in biryani. They are a core flavor component. The caramelized sugars in the onions add sweetness and depth to the gravy. Without them, biryani tastes flat and one-dimensional. Therefore, take the time to fry the onions slowly until they are deep golden brown. Likewise, mixing crushed fried onions into the marinade is essential for building layers of flavor.
3. Using Too Much Water
Excess water in the chicken gravy or insufficiently drained rice leads to soggy biryani. The rice should be well drained after parboiling. Also, the chicken base should be thick, not watery. During dum cooking, the trapped steam provides all the moisture the rice needs. Consequently, adding extra water results in a wet, porridge-like texture instead of fluffy, separate grains.
Frequently Asked Questions
What is the difference between biryani and pulao?
Biryani uses a layering method where marinated meat and parboiled rice are cooked separately and then combined in layers. Pulao, on the other hand, cooks everything together in one pot with broth. As a result, biryani has distinct layers and richer flavor. Pulao is simpler and quicker to make, but it lacks the complex depth that the dum cooking technique gives biryani.
Can I make biryani without saffron?
Yes, you can still make good biryani without saffron. Use a quarter teaspoon of turmeric dissolved in warm milk for color. Add a few drops of rose water or kewra water for fragrance. However, saffron adds a unique floral note that no substitute can fully match. Even a small pinch of saffron makes a noticeable difference in the final dish. So use it if your budget allows.
Can I use lamb or goat meat instead of chicken?
Absolutely. In fact, mutton (goat meat) biryani is the most traditional version of this dish. Lamb and goat have more flavor than chicken and hold up well to long cooking. However, they need more time. Marinate for at least 6 hours and pre-cook the meat for 20 to 25 minutes before layering with rice. Also increase the dum cooking time to 35 to 40 minutes for tender results.
Why is my biryani not flavorful enough?
The most common reasons are short marinating time and not enough salt in the rice water. First, marinate for at least 4 hours so the spices penetrate the meat. Second, the boiling water for rice should taste noticeably salty because this is the only time the rice absorbs salt. Additionally, make sure your whole spices are fresh. Old cardamom and cloves lose their potency quickly. Finally, do not skip the fried onions because they contribute a major share of the flavor.
Is biryani healthy?
Biryani is a balanced meal that contains protein from the meat, carbohydrates from the rice, and beneficial compounds from the spices. Each serving provides about 520 calories, 28 grams of protein, and 62 grams of carbohydrates. The spices used in biryani, such as turmeric and cardamom, have anti-inflammatory properties. To make it lighter, use less ghee and more chicken breast instead of thigh. You can also reduce the rice portion and add more vegetables.
Variations and Adaptations
Vegetable Biryani:
Replace the chicken with a mix of vegetables like cauliflower, potatoes, carrots, peas, and paneer. Marinate the vegetables briefly in yogurt and spices for 30 minutes. Since vegetables cook faster than meat, reduce the dum cooking time to 15 to 20 minutes. This version is perfect for vegetarians and still delivers the classic biryani aroma and taste.
Egg Biryani:
Hard-boil eggs and shallow-fry them until golden brown. Then place them in the pot before layering the rice. The fried eggs soak up the spiced gravy and develop a rich, savory coating. This is a popular budget-friendly variation in South India. Moreover, it is quick to prepare because eggs need no marinating time.
Prawn Biryani:
Use large prawns instead of chicken for a coastal twist. Marinate the prawns for just 30 minutes because they are delicate. Cook them only briefly before layering with rice. Then reduce the dum cooking time to 15 minutes. This variation is popular in Malabar and Kolkata. The prawns add a sweet, briny flavor that pairs well with the saffron and whole spices. If you enjoy seafood dishes, also try our Tom Yum Goong for a different style of spiced seafood cooking.
Instant Pot Biryani:
For a faster version, use an Instant Pot or electric pressure cooker. Saute the marinated chicken first using the saute function. Then layer the soaked (but not parboiled) rice on top. Add water in a 1:1 ratio with the rice. Pressure cook on low for 6 minutes and let the pressure release naturally for 10 minutes. While not identical to dum-cooked biryani, this method produces good results in under an hour.
The Cultural Significance of Biryani
Biryani is far more than a rice dish in South Asia. It is a symbol of celebration, hospitality, and cultural identity. In India and Pakistan, no wedding feast, religious festival, or family gathering is complete without biryani. The dish carries so much cultural weight that entire cities define themselves by their biryani style. Hyderabad and Lucknow in India, along with Karachi in Pakistan, each claim to make the finest biryani in the world.
The history of biryani reflects the blending of Persian and Indian cultures during the Mughal period. Persian traders and rulers brought their rice-cooking techniques to the subcontinent. Over centuries, Indian cooks adapted these methods using local spices, meats, and cooking vessels. As a result, biryani became a uniquely South Asian creation that honors both traditions. Today, biryani has spread far beyond its origins. You can find it in Middle Eastern, Southeast Asian, and African kitchens, each adding local touches to the classic recipe.
In many South Asian households, the ability to cook great biryani is a point of family pride. Recipes pass down through generations, often with closely guarded secret spice blends. The process of making biryani, from slow-frying onions to the final dum stage, is treated as a ritual. Families gather around the pot when the lid comes off, and the first cloud of saffron-scented steam rising from the rice is a moment of shared joy. If you appreciate the role food plays in cultural traditions, you might also enjoy learning about Tandoori Chicken, another Mughal-era dish with deep historical roots.
Conclusion
Making an authentic biryani recipe at home is well within your reach once you master three key techniques. First, marinate the meat long enough for the spices to work their way in. Second, parboil the rice to exactly 70 percent doneness. Third, seal the pot tightly and trust the dum process. These three steps are what separate true biryani from ordinary rice with meat on top.
This recipe gives you a solid foundation to explore the many regional styles of biryani. Start with this Hyderabadi-style chicken version, then experiment with lamb, prawns, or vegetables. Each variation brings its own character while following the same core layering and dum-cooking method. Above all, take your time and enjoy the process. Biryani rewards patience like few other dishes in the world.
If you loved this biryani recipe, explore more of our Asian recipes collection. For other beloved Indian dishes, try our Butter Chicken recipe or discover the smoky flavors of Tandoori Chicken.