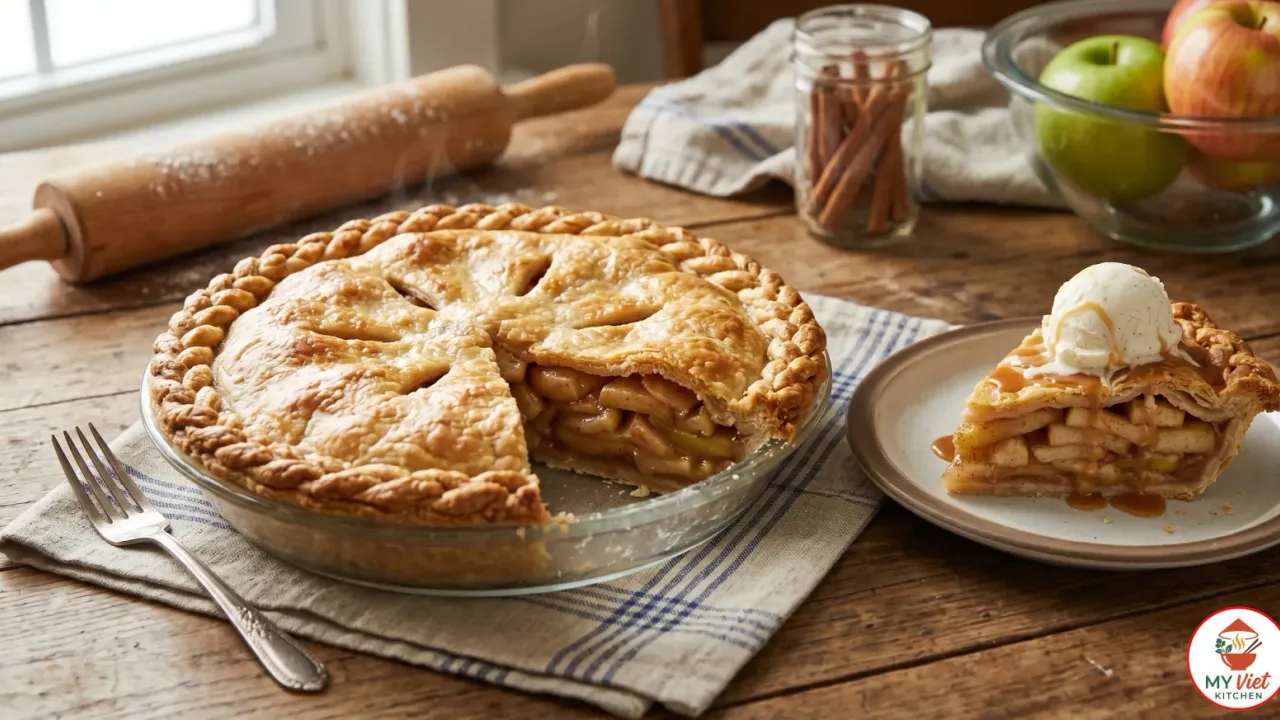
Nothing says comfort quite like a slice of warm, homemade apple pie. This classic American dessert features a flaky, buttery crust wrapped around tender cinnamon-spiced apples. Whether you bake it for a holiday gathering or a simple weeknight treat, this apple pie recipe delivers incredible flavor with straightforward steps. In addition, you can master the technique in just one afternoon.
Prep Time: 30 minutes | Cook Time: 55 minutes | Servings: 8
Difficulty: Medium | Calories: ~350 per serving
What Makes This Apple Pie Special?
Apple pie holds a treasured place in American food culture. For centuries, families have passed down their own versions of this beloved dessert. However, the best versions share a few common traits: a crisp golden crust, a perfectly spiced filling, and apples that hold their shape without turning to mush.
This recipe stands out because it uses a simple all-butter crust instead of one made with shortening. As a result, you get a richer flavor and a tender, flaky texture that shatters beautifully with each bite. Furthermore, the filling balances sweetness with a bright hit of lemon juice and warm spices like cinnamon, nutmeg, and allspice.
Unlike store-bought versions, a homemade apple pie lets you control the sugar level and spice blend. Therefore, you can adjust the recipe to match your personal taste. Above all, baking a pie from scratch fills your kitchen with an aroma that no candle can replicate.

Choosing the Right Apples
The apple variety you choose will shape the flavor and texture of your pie. Not all apples perform well in the oven, so selecting the right type matters. Here are the best options for a perfect apple pie.
- Granny Smith (best choice): These tart, firm apples hold their shape during baking and provide a nice contrast to the sweet filling.
- Honeycrisp: These apples offer a balanced sweet-tart flavor and a crisp texture that stays intact in the oven.
- Braeburn: With a rich, spicy flavor, Braeburn apples add complexity and maintain a firm bite after baking.
- Mix of varieties: For the most interesting flavor, combine two or three types. A blend of tart and sweet creates depth that a single variety cannot match.
Ingredients for Apple Pie
For the Pie Crust:
- 2 1/2 cups all-purpose flour
- 1 cup cold unsalted butter, cubed
- 1 teaspoon salt
- 1 tablespoon granulated sugar
- 6 to 8 tablespoons ice water
For the Apple Filling:
- 6 large Granny Smith apples, peeled and sliced
- 3/4 cup granulated sugar
- 2 tablespoons all-purpose flour
- 1 tablespoon lemon juice
- 1 1/2 teaspoons ground cinnamon
- 1/4 teaspoon ground nutmeg
- 1/4 teaspoon ground allspice
- 2 tablespoons unsalted butter, cut into small pieces
For the Egg Wash:
- 1 large egg, beaten
- 1 tablespoon coarse sugar for topping
Pro tip: Keep your butter and water as cold as possible. Cold fat creates steam pockets during baking, and those pockets give you the flaky layers that define a great pie crust.
Step-by-Step Instructions
Step 1: Make the Pie Crust
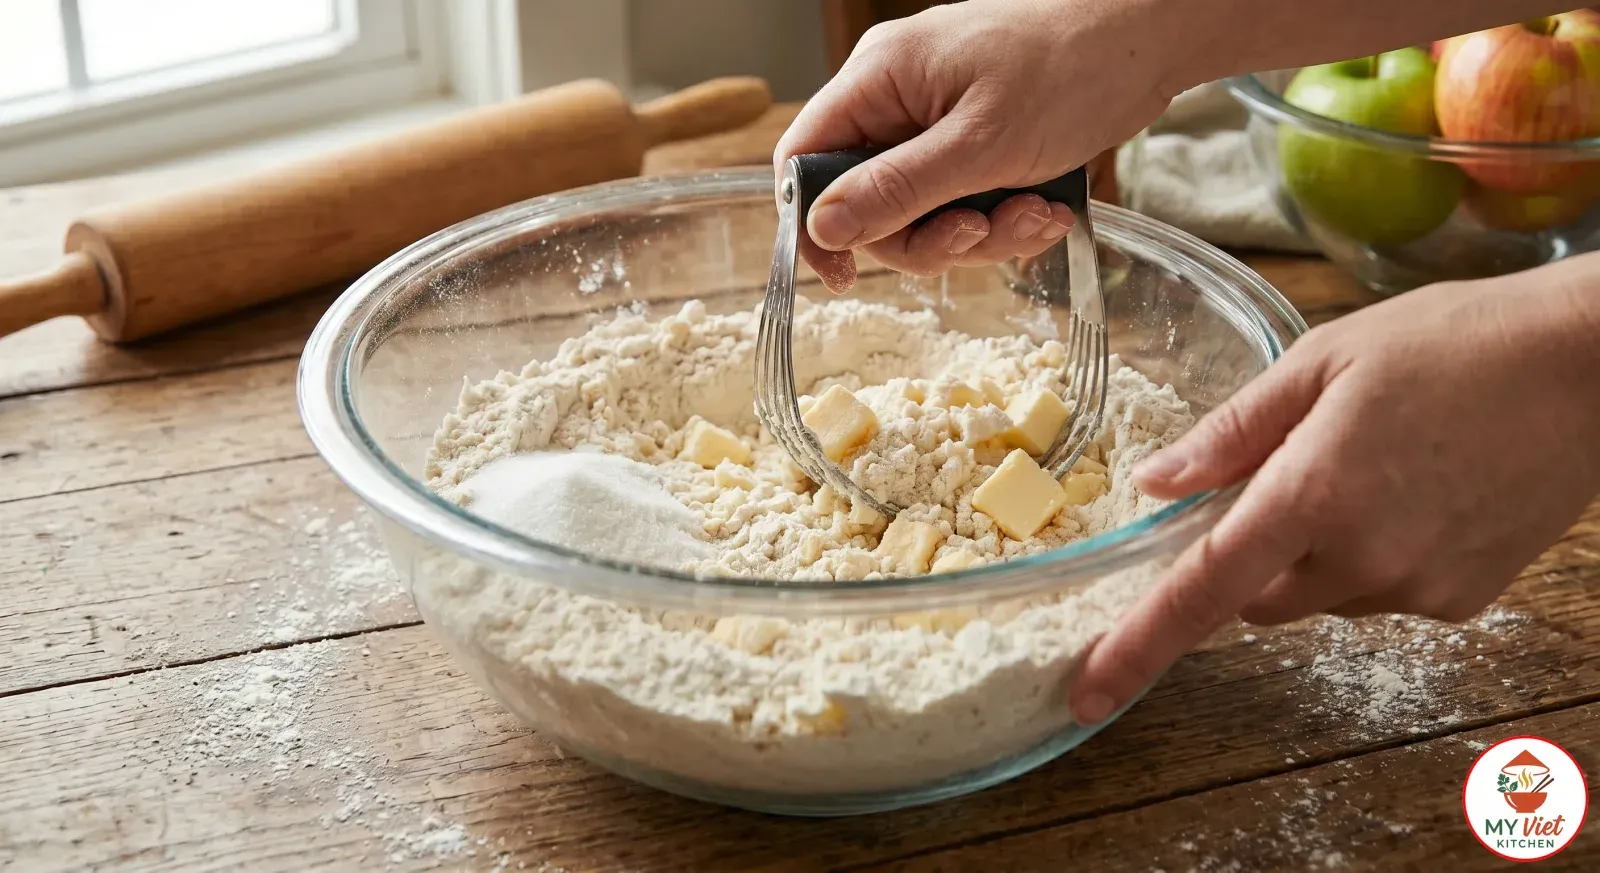
1First, combine the flour, salt, and sugar in a large mixing bowl. Then, add the cold cubed butter and work it into the flour using a pastry cutter or your fingertips. Stop when the mixture looks like coarse crumbs with pea-sized butter pieces remaining. Next, drizzle in ice water one tablespoon at a time while gently stirring with a fork. The dough should hold together when you press it without feeling sticky. Finally, divide it into two equal portions, shape each into a flat disc, wrap in plastic, and refrigerate for at least one hour.
Step 2: Prepare the Apple Filling
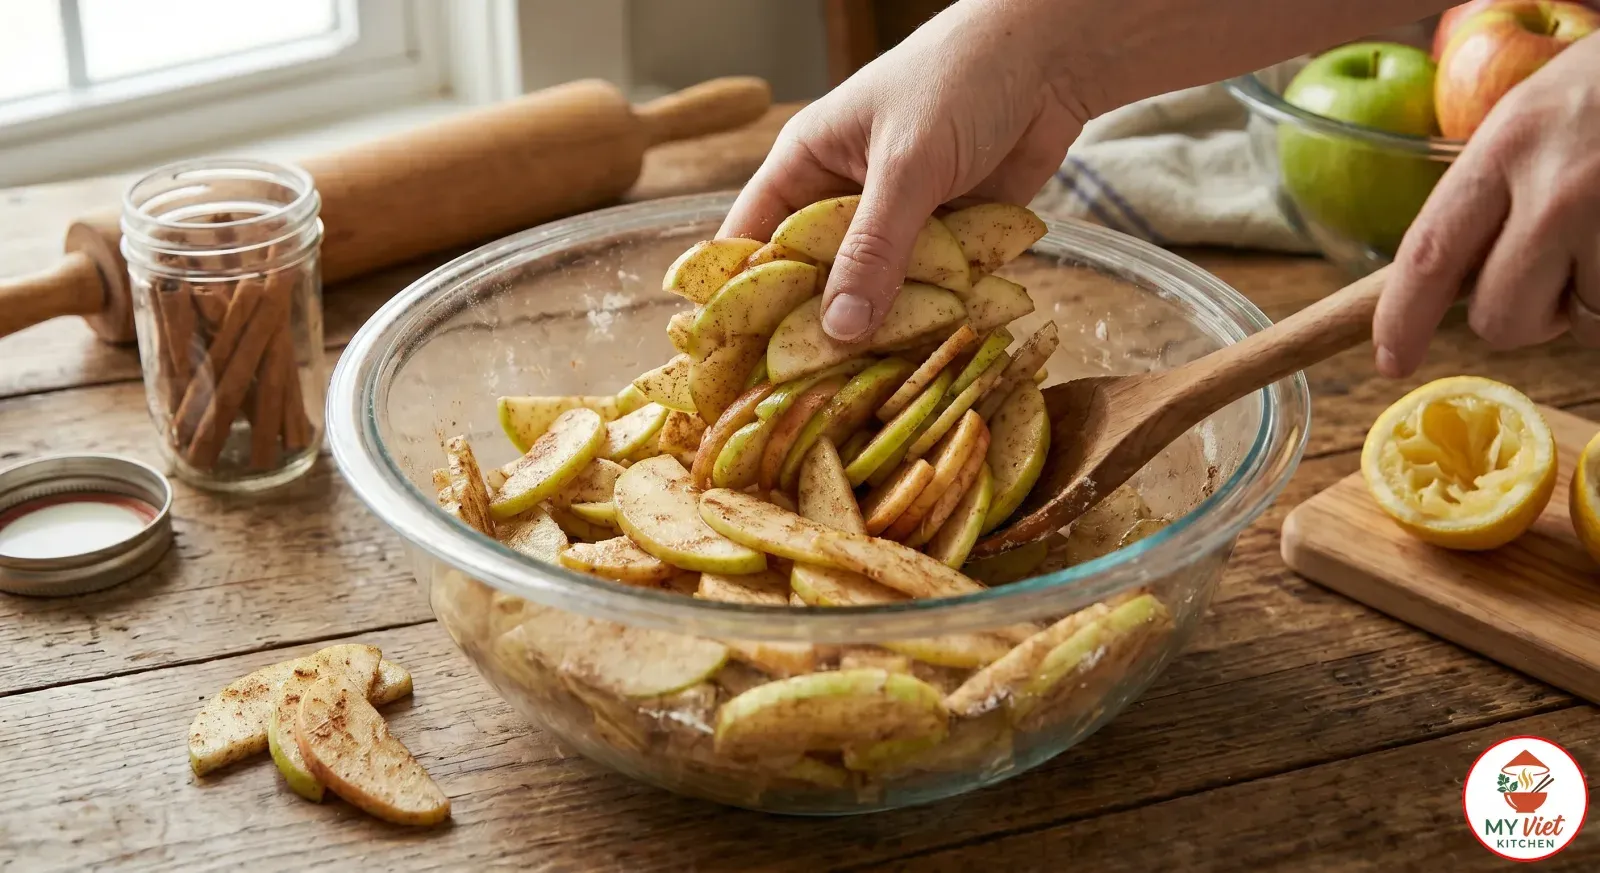
2While the dough chills, peel and core the apples. Cut them into thin, even slices about 1/4 inch thick. Even slices ensure that every piece cooks at the same rate. After that, place the apple slices in a large bowl. Add the sugar, flour, lemon juice, cinnamon, nutmeg, and allspice. Toss everything together until the apples are evenly coated. The flour acts as a thickener, so it prevents the filling from turning watery.
Step 3: Assemble the Pie
3Roll out one dough disc on a lightly floured surface until it forms a circle about 12 inches across. Carefully transfer it into a 9-inch pie dish and press it gently against the bottom and sides. Then, pour the spiced apple filling into the crust and mound it slightly in the center. Dot the top of the filling with small pieces of butter. These butter pieces melt during baking and add extra richness to the filling.
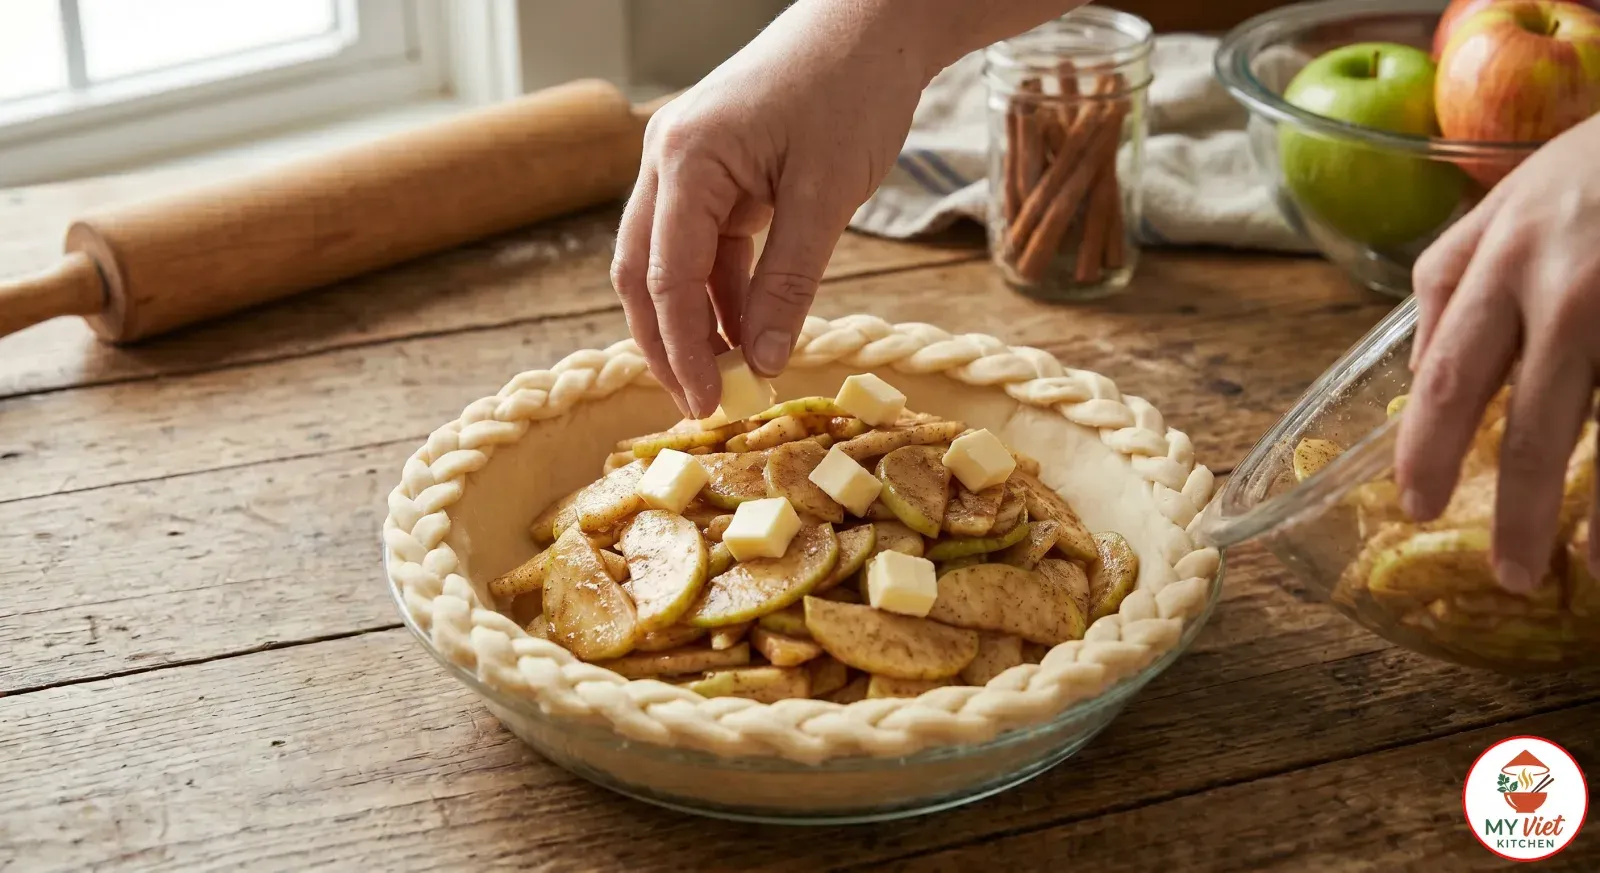
Step 4: Add the Top Crust
4Roll out the second dough disc and place it over the filled pie. Trim any excess dough hanging over the edge, leaving about a half-inch overhang. Fold the overhang under the bottom crust edge and crimp with a fork or your fingers to seal. After that, cut four to six slits in the top crust. These vents allow steam to escape and prevent the filling from bubbling over.
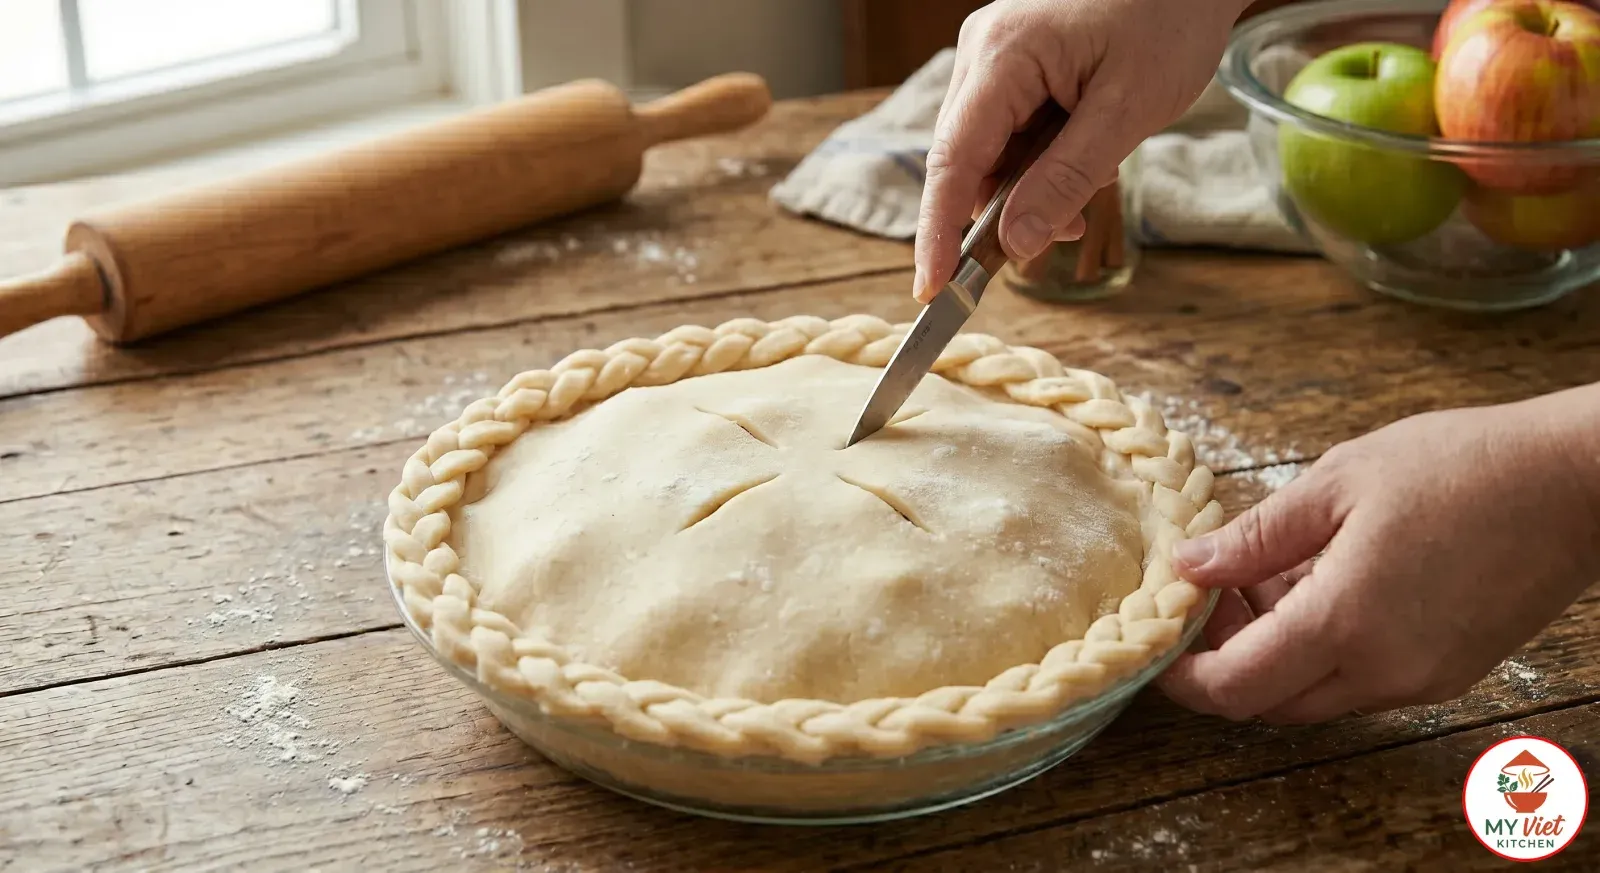
Step 5: Bake the Apple Pie
5Brush the entire top crust with the beaten egg wash. Then, sprinkle coarse sugar evenly over the surface for a sparkling golden finish. Place the pie on the center rack of an oven preheated to 425F. Bake for 15 minutes at this high temperature to set the crust quickly. After that, reduce the heat to 375F and continue baking for 40 to 45 minutes. The pie is ready when the crust turns deep golden brown and you can see the filling bubbling through the slits.
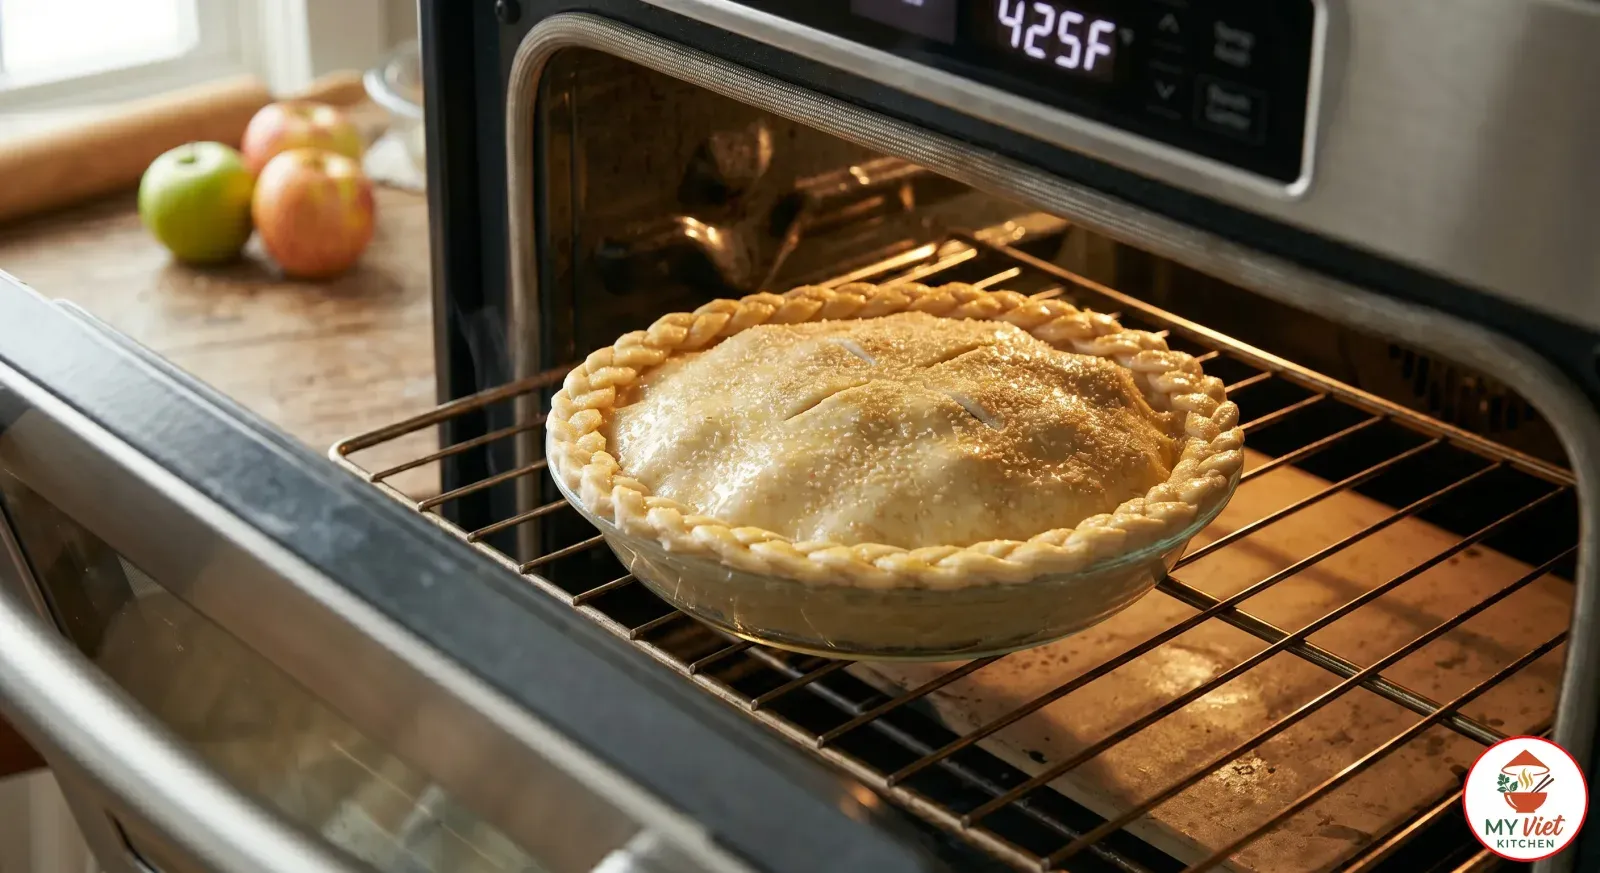
Step 6: Cool and Serve
6Remove the pie from the oven and place it on a wire rack. Let it cool for at least two hours before cutting. This cooling time is essential because it allows the filling to thicken and set. If you cut too early, the filling will run out and the slices will not hold their shape. Patience truly pays off with this step.
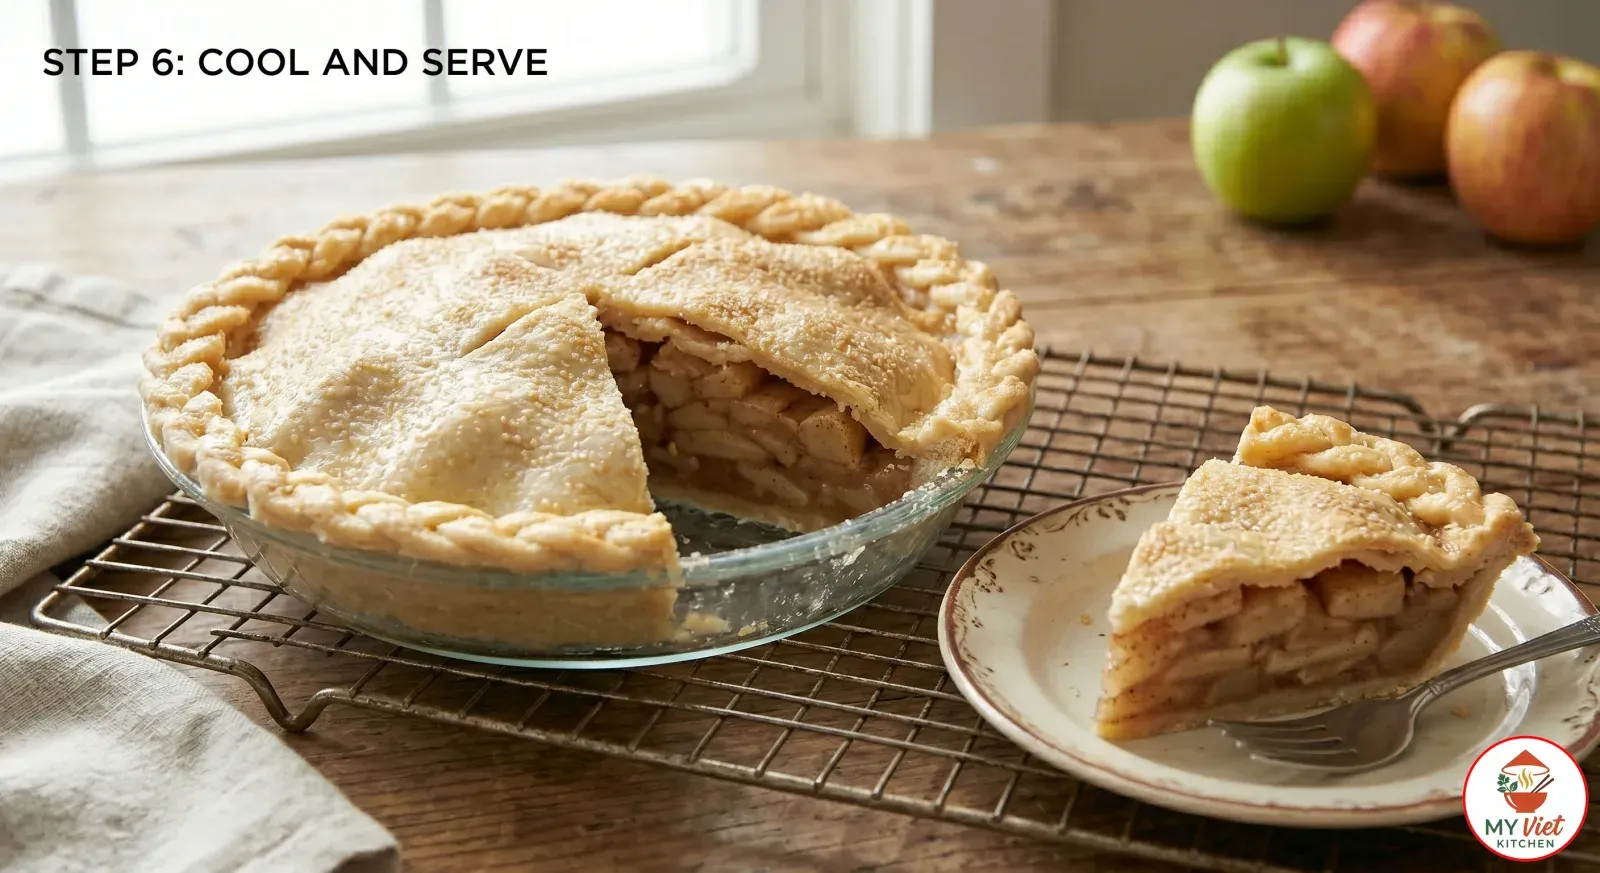
Expert Tips for Perfect Apple Pie
Keep Everything Cold
The secret to a flaky crust lies in cold butter. If your kitchen is warm, chill the flour and the mixing bowl before starting. Also, work quickly to prevent the butter from softening. When the butter melts slowly in the oven rather than in the bowl, it creates the steam that produces flaky layers.
Slice Apples Evenly
Uniform slices cook at the same rate. Thick slices may stay crunchy while thin ones turn mushy. Aim for slices about 1/4 inch thick. A mandoline makes this task quick and consistent, but a sharp knife works just as well.
Use a Glass Pie Dish
Glass conducts heat evenly and lets you check the bottom crust during baking. As a result, you can see exactly when the bottom turns golden. This simple trick helps you avoid the dreaded soggy bottom.
Classic Apple Pie vs. Dutch Apple Pie
Both versions share the same delicious apple filling. However, the topping sets them apart. Here is a quick comparison to help you decide which style to try.
| Feature | Classic Apple Pie | Dutch Apple Pie |
|---|---|---|
| Top Layer | Double pie crust | Butter crumb streusel |
| Texture | Flaky and crisp | Crunchy and crumbly |
| Difficulty | Medium | Easy |
| Best For | Traditional occasions | Casual gatherings |
Serving Suggestions
A great apple pie deserves equally great accompaniments. While many people enjoy it on its own, adding a topping or side takes the experience to the next level.
The Perfect Accompaniments:
- Vanilla ice cream: The cold, creamy sweetness pairs perfectly with the warm, spiced filling.
- Whipped cream: A light and airy topping that adds richness without overwhelming the pie.
- Sharp cheddar cheese: A thin slice on the side provides a savory contrast that many pie lovers swear by.
- Caramel sauce: Drizzle it over each slice for an extra layer of indulgent sweetness.
Beverage Pairings:
- Hot apple cider: This warm drink echoes the apple flavor and pairs naturally with the pie.
- Black coffee: The bitterness balances the sweetness of the dessert.
- Chai tea: Its warm spices complement the cinnamon and nutmeg in the filling.
Storage and Reheating
Room temperature: Cover loosely with foil or plastic wrap. The pie stays fresh for up to two days on the counter.
Refrigerator: Store in the fridge for four to five days. The flavors deepen slightly over time, so leftovers taste just as good.
Freezer: Wrap individual slices tightly in plastic and then foil. They keep well for up to three months. You can also freeze the entire unbaked pie for later use.
Reheating: Warm slices in a 350F oven for 10 to 15 minutes until the crust crisps up again. Avoid the microwave because it makes the crust soggy.
Common Mistakes to Avoid
1. Overworking the Dough
Handling the dough too much develops gluten, which makes the crust tough instead of flaky. Mix just until the dough comes together, and stop as soon as you see no dry flour remaining.
2. Skipping the Chill Time
Chilling relaxes the gluten and firms up the butter. If you skip this step, the crust shrinks during baking and loses its flaky texture. Always chill for at least one hour before rolling.
3. Cutting Too Soon
The filling needs time to set as the pie cools. Cutting into a hot pie results in a runny, soupy filling. Wait at least two hours for clean, beautiful slices.
Frequently Asked Questions
What are the best apples for apple pie?
Granny Smith apples work best because they hold their shape and offer a tart contrast to the sweet filling. You can also combine them with Honeycrisp or Braeburn for a more complex flavor. According to the University of Minnesota Extension, firm tart apples produce the best results in baked desserts.
Can I make apple pie ahead of time?
Yes, you can prepare the pie up to 24 hours before baking. Keep it covered in the refrigerator and bake just before serving. Alternatively, freeze the assembled pie for up to three months and bake it directly from frozen, adding about 15 extra minutes to the baking time.
How do I prevent a soggy bottom crust?
Start baking at 425F for the first 15 minutes to quickly set the bottom crust. You can also place a baking sheet on the rack below the pie for extra heat. In addition, make sure you do not add too much liquid to the filling.
Why does my apple pie filling turn out watery?
Watery filling usually happens when the pie does not cool long enough. The thickener in the filling needs time to set. Toss the apples with flour before assembling, and always let the pie rest for at least two hours after baking.
How long does homemade apple pie last?
At room temperature, apple pie stays fresh for about two days. In the refrigerator, it lasts four to five days. For longer storage, freeze slices for up to three months.
Variations and Adaptations
Salted Caramel Apple Pie:
Drizzle a layer of salted caramel sauce over the apples before adding the top crust. The salty-sweet combination elevates this classic to a whole new level. Consequently, it makes a stunning dessert for special occasions.
Lattice Top Apple Pie:
Instead of a solid top crust, weave strips of dough into a lattice pattern. This technique looks impressive and also allows more moisture to escape. As a result, the filling thickens perfectly.
Gluten-Free Apple Pie:
Swap the all-purpose flour for a gluten-free baking blend in both the crust and filling. Add an extra tablespoon of butter to the crust for better texture. Although the result differs slightly, it still delivers a satisfying flaky crust.
The Cultural Significance of Apple Pie
Few desserts carry as much cultural weight as apple pie does in America. The phrase “as American as apple pie” has described core values since the early 20th century. Interestingly, the dish actually traces its roots back to European settlers who brought their pie-making traditions to the New World.
Over time, American bakers adapted those recipes to use local apple varieties. By the 1800s, apple pie had become a staple at holiday tables across the country. Today, it remains a symbol of home, comfort, and tradition. Whether served at Thanksgiving dinner or a Fourth of July picnic, apple pie brings people together around the table.
Conclusion
Making a homemade apple pie from scratch may seem daunting at first, but the process is truly rewarding. With cold butter, the right apples, and a little patience, you can create a dessert that looks and tastes like it came from the best bakery in town. Most importantly, remember to keep your ingredients cold, slice your apples evenly, and let the pie cool completely before cutting.
Ready to explore more classic recipes? Check out our full collection of recipes for dishes from around the world. If you love American comfort food, you might also enjoy our Mac and Cheese or New York Cheesecake recipes.